Advertisement
Available languages
Available languages
Quick Links
Download this manual
See also:
Quick Reference Manual
Advertisement

Summary of Contents for Benning Sun 2
- Page 1 Bedienungsanleitung Operating manual SUN 2 HOLD HOLD ON/OFF ON/OFF...
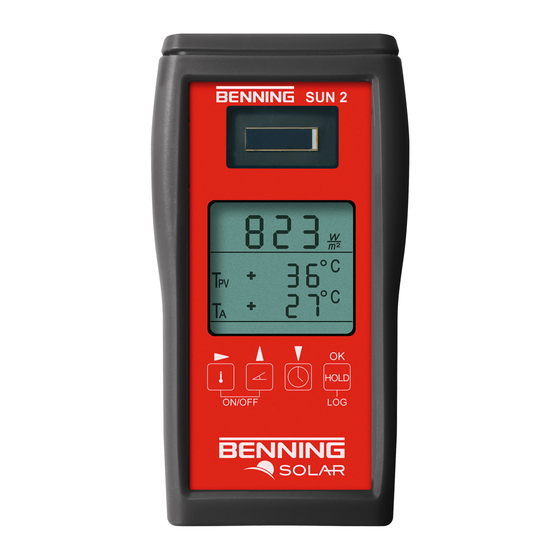
- Page 2 D SUN 2 HOLD HOLD ON/OFF ON/OFF Bild 1: Gerätefrontseite Fig. 1: Device front BENNING SUN 2 03/ 2012...
- Page 3 Diese Bedienungsanleitung richtet sich an ausgebildetes Fachpersonal und unterwiesene Personen. Das BENNING SUN 2 ist ausschließlich zur Messung in trockener Umgebung vorgesehen (Nä- heres hierzu im Abschnitt 6. “Umgebungsbedingungen”). In der Bedienungsanleitung und auf dem BENNING SUN 2 werden folgende Symbole verwen-...
- Page 4 3.8 ein Stück CD-ROM mit Download-Software, Bedienungsanleitung, Informationsmateri- al, etc. Hinweis auf Verschleißteile: Das BENNING SUN 2 wird durch zwei 1,5 V Mignon-Batterien gespeist (IEC LR6). Es dürfen Alkaline, wiederaufladbare NiCd oder NiMH Batterien verwendet werden. Gerätebeschreibung siehe Bild 1: Gerätefrontseite...
- Page 5 Bei Arbeitstemperatur von 0 °C bis 50 °C: relative Luftfeuchte kleiner 80 %, nicht kondensierend Lagerungstemperatur: Das BENNING SUN 2 kann bei Temperaturen von - 20 °C bis + 60 °C (Luftfeuchte 0 bis 80 %) gelagert werden. Dabei sind die Batterien aus dem Gerät herauszu- nehmen.
- Page 6 BENNING SUN 2 eingeschaltet. Ein Signalton bestätigt dies. Erneutes Drücken der Tasten für > 2 Sekunden schaltet das Gerät aus. Das BENNING SUN 2 schaltet sich nach ca. 2 Minuten selbstständig ab (APO, Auto-Power- Off). Es schaltet sich wieder ein, wenn die Tasten 3 und 4 betätigt werden.
- Page 7 Zeit-/ Datumstempel versehen. Die Auslesung der Messdaten erfolgt über die integrierte USB-Schnittstelle und mit Hilfe eines Downloadprogramms. Das Messintervall (Zeit- raum zwischen zwei Messungen) des BENNING SUN 2 ist in Minutenschritten von 1 Min. bis 60 Min. einstellbar.
- Page 8 Datenlogger über USB-Schnittstelle auslesen Installieren Sie einmalig den Treiber und das Downloadprogramm von der CD-ROM. Schließen Sie das BENNING SUN 2 über das USB-Verbindungskabel an den PC an und schalten Sie das Gerät ein. Starten Sie das Downloadprogramm und klicken Sie unter Optionen auf „COM-Ports aktua- lisieren“.
- Page 9 9.2 Batteriewechsel Das BENNING SUN 2 wird durch zwei 1,5 V Mignon-Batterien/ Typ AA (IEC LR6) gespeist. Ein Batteriewechsel ist erforderlich sobald die Batteriespannung unter 1,8 V sinkt (siehe Ab- schnitt 8.1.2). So wechseln Sie die Batterien: Schalten Sie das BENNING SUN 2 aus.
-
Page 10: Table Of Contents
The BENNING SUN 2 is intended for measurements under dry ambient conditions only (for details, refer to section 6 "Ambient conditions"). The following symbols are used in this operating manual and on the BENNING SUN 2: Warning of electrical danger! ... -
Page 11: Safety Instructions
3.8 one CD-ROM with download software, operating manual, information material etc. Parts subject to wear: The BENNING SUN 2 is supplied by means of two 1.5 V batteries of type AA (IEC LR6). It is allowed to use alkaline rechargeable NiCd or NiMH batteries. -
Page 12: Ambient Conditions
For operating temperatures from 0 °C to 50 °C: relative air humidity lower than 80 %, non- condensing Storage temperature: The BENNING SUN 2 can be stored at temperatures between - 20 °C and + 60 °C (air humidity 0 to 80 %). During storage, the batteries must be removed. - Page 13 Press the keys 3 and 4 at the same time for approx. 2 seconds to switch the BENNING SUN 2 on. This will be confirmed by an acoustic signal. Press the keys again for > 2 seconds to switch the device off.
- Page 14 8.2 Data logger (measured value memory) with real-time clock The BENNING SUN 2 can store up to 5000 data records consisting of the values for insola- tion (solar irradiance), module temperature and ambient temperature. Each data record will be provided with a time / date stamp.
- Page 15 If the measured values are not downloaded, verify the COM port used by means of the Device Manager of your system. As soon as the BENNING SUN 2 has been connected to your PC by means of the USB connecting cable, the hardware driver and thus the COM port used can be viewed in the Device Manager under "Ports (COM &...
- Page 16 To maintain accuracy of the measuring results, the device must be recalibrated in regular in- tervals by our factory service. We recommend recalibrating the device once a year. For this purpose, send the device to the following address: Benning Elektrotechnik & Elektronik GmbH & Co. KG Service Center Robert-Bosch-Str. 20 D –...
- Page 17 Benning Elektrotechnik & Elektronik GmbH & Co. KG Münsterstraße 135 - 137 D - 46397 Bocholt Phone: +49 (0) 2871 - 93 - 0 • Fax: +49 (0) 2871 - 93 - 429 www.benning.de • E-Mail: duspol@benning.de...


