Sanyo SCP2700 Operating Manual
Hide thumbs
Also See for SCP2700:
- User manual (160 pages) ,
- Instruction manual (37 pages) ,
- User manual (139 pages)
Table of Contents
Advertisement
Quick Links
Advertisement
Table of Contents

Related Manuals for Sanyo SCP2700


Summary of Contents for Sanyo SCP2700
- Page 1 SCP2700 Operating Guide (Draft)
-
Page 2: Table Of Contents
Phone Basics......................7 Your Phone ..........................7 Key Functions .........................8 Viewing the Display Screen.....................9 Turning Your Phone On and Off ....................10 Turning Your Phone On....................10 Turning Your Phone Off....................10 Using the Battery........................10 Installing the Battery.......................10 Removing the Battery.....................10 Charging the Battery ......................10 Using the Phone Charger.................... - Page 3 Selecting a Ringer Type for Alarms, Power On/Off Tone, or Scheduled Events ..20 Selecting Vibrate Types ....................20 Alert Notification......................20 Selecting a Key Tone .....................20 Setting Up Voice Guide ....................21 Display Settings ........................21 Changing the Phone’s Main Menu Style ................21 Changing the Screen Saver ...................21 Changing the Display Screen Animation ................21 Changing the Backlight Time Length ................21 Changing the Font Size....................22...
- Page 4 Using Special Numbers ......................29 Deleting Phone Content ......................30 Resetting Phone Content ......................30 Roaming ....................... 31 Understanding Roaming......................31 Setting Your Phone’s Roam Mode ..................31 Using Call Guard........................32 Using Data Roam Guard .......................32 History........................33 Viewing History ........................33 Displaying Your Recent History..................33 History Icon Indication ....................33 Displaying a History Thread ...................33 Displaying History Details ....................33...
- Page 5 Onscreen menus: .......................40 Calendar and Tools ..................... 41 Using Your Phone’s Calendar ....................41 Displaying Your Calendar....................41 Setting the Time/Date ....................41 Holidays........................41 Schedule ........................42 Adding a Schedule to the Calendar ................42 Storing a Schedule as a To Do Item ................42 Call Alarm........................42 Adding a Call Alarm to the Calendar................42 To Do..........................43 Storing To Do Items to Your Phone................43...
- Page 6 Adjusting White Balance.....................51 Adjusting Brightness....................51 Camera Settings ......................51 User Settings .........................52 Saving a User Settings ....................52 Selecting a User Settings When Taking Pictures............52 User Settings Options....................52 Storing Pictures ........................52 Reviewing Pictures in My Albums ..................52 Reviewing Pictures in Assigned Media Folder ...............52 My Albums Options .......................53 Setting Your Picture as Picture ID or Screensaver ............53 Deleting Pictures ......................53...
- Page 7 Setting Up Group Distribution Lists................61 PCS Callback ......................61 Voicemail-to-Voicemail Message ................61 Voicemail-to-Voicemail Receipt Request ..............61 Voicemail-to-Voicemail Message Reply..............62 Voicemail-to-Voicemail Message Forwarding .............62 Extended Absence Greeting..................62 Using Text Messaging ......................62 Accessing Text Messages....................62 Composing Text Messages ....................63 Using Preset Messages ....................63 Using SMS Voice Messaging ....................63 Accessing SMS Voice Messages...................63 Composing SMS Voice Messages .................64...
-
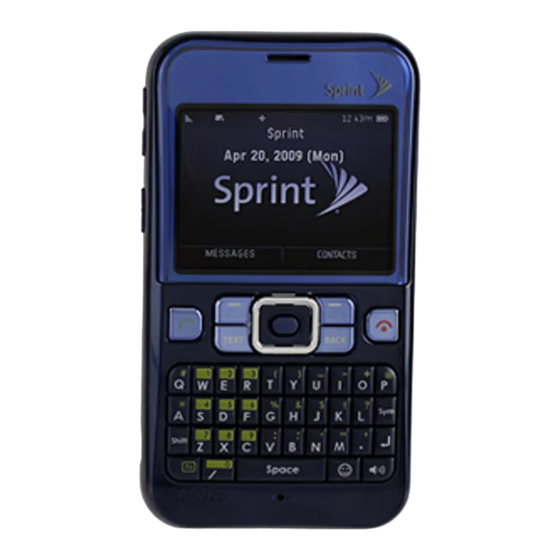
Page 8: Phone Basics
Phone Basics Your Phone... -
Page 9: Key Functions
Key Functions Earpiece lets you hear the caller and automated prompts. Screen displays all the information needed to operate your phone, such as the call status, the Contacts list, the date and time, and the signal and battery strength. MENU/OK Key lets you access the phone’s menus and select the highlighted choice when navigating through a menu. -
Page 10: Viewing The Display Screen
Viewing the Display Screen This list identifies some of the more common symbols you will see on your display screen. • indicates your current signal strength. The more lines you have, the stronger your signal. • indicates your phone cannot find a signal. •... -
Page 11: Turning Your Phone On And Off
Turning Your Phone On and Off Turning Your Phone On ► Press END/. Once your phone is on, it displays “Looking for service.” When your phone finds a signal, it automatically enters standby mode. At this point, you are ready to begin making and receiving calls. -
Page 12: Using The Phone Charger
Using the Phone Charger Install the battery to the phone. Plug the phone charger into a wall outlet. Plug the other end of the phone charger into the charger jack on the side of your phone. A red indicator light means the battery is charging. A green indicator light means charging is completed. -
Page 13: Making And Answering Calls
Making and Answering Calls Making Calls Placing a call from your wireless phone is as easy as making a call from any landline phone. Enter the number, press TALK, and you are on your way to clear calls. Make sure your phone is on. Enter a phone number. -
Page 14: Using Abbreviated Dialing
Using Abbreviated Dialing Abbreviated Dialing is similar to speed dialing. You can use either of the following abbreviated dialing features. • Contacts Match to retrieve any number saved in your Contacts by entering any three to thirty-two digits of the number. (See “To activate the Contacts Match feature” on page 26.) •... -
Page 15: Answering Calls
Answering Calls Note: Incoming calls go directly to voicemail when your phone is off. Depending on your settings, your phone notifies you of incoming calls in the following ways: • The phone rings or vibrates. • The indicator light flashes. •... -
Page 16: Phone Numbers
Phone Numbers Saving a Phone Number Your phone can store a total of 4200 phone numbers in 600 Contacts entries. Each entry’s name can contain up to 64 characters, which will be sorted alphabetically. To save a number from the main menu: Enter a phone number and press OPTIONS (right softkey) >... -
Page 17: Missed Call Notification
Missed Call Notification When an incoming call is not answered, the Missed Call log is displayed on your screen. To call the Missed Call entry from the notification screen: ► Highlight the entry and press CALL (left softkey). To display the Missed Alerts list from standby mode: ►... -
Page 18: Entering Text
Entering Text Selecting a Character Input Mode Your phone provides convenient ways to enter words, letters, punctuation, and numbers whenever you are prompted to enter text (for example, when adding an Contacts entry). From a screen where you can enter text, press TEXT MODE (right softkey). Select an option. -
Page 19: Customizing The Xt9 Settings
Customizing the XT9 Settings Press MENU/OK > Settings > Text Entry > Word Settings. Select an option and press MENU/OK. Next Word Prediction to automatically display the word that may follow the current text input. Word Completion to show the completed words that match the keys you have entered without entering the whole word. -
Page 20: Settings
Settings Sound Settings Volume Settings Adjusting the Phone’s Volume You can adjust your phone’s volume settings to suit your needs and your environment. ► Press the volume key on the side of your phone up and down in standby mode. - or - Press MENU/OK >... -
Page 21: Selecting Ringer Types For Messages
Selecting Ringer Types for Messages Press MENU/OK > Settings/Tools > Settings > Sounds > Ringer Type > Messages. Select Message, Voicemail, Voice SMS or Email. Select Default Message, Contact Entries, or Unknown #s when Message or Voice SMS is selected. Select All Contacts or One Contact when Contact Entries is selected. -
Page 22: Setting Up Voice Guide
Setting Up Voice Guide Voice Guide activates both voice prompt and keypress echo functions. This feature allows you to hear voice prompts such as “Start Snooze Mode” and “Snooze Canceled” as well as spoken numbers as you press the keypad. (The default setting is Off). Press MENU/OK >... -
Page 23: Changing The Font Size
Changing the Font Size You can adjust the font size to appear on the main screen. To change the font size for messages: Press MENU/OK > Settings/Tools > Settings > Display > Font Size > Main Screen > Messages. Select a font size and press MENU/OK. To change the font size for entering text: Press MENU/OK >... -
Page 24: Setting Return To Idle Mode
Setting Return to Idle Mode Idle mode refers to standby mode, when signal is available, or signal search mode, when signal is sought for. You can select how to return to idle mode. Press MENU/OK > Settings/Tools > Settings > Display > Return to Idle. A message appears. -
Page 25: Text Messages
Text Messages Setting a Callback Number You can notify your recipients of your callback number with a text message. Press MENU/OK > Settings/Tools > Settings > Messages > Callback Number. Select My Phone Number or None. - or - Select Other, enter a number and press DONE (left softkey). Setting a Signature You can create your own signature and add it to your messages. -
Page 26: Sms Voice Messages
SMS Voice Messages Setting the Speakerphone You can set the speakerphone on or off for SMS Voice messages. Press MENU/OK > Settings/Tools > Settings > Messages > Voice SMS Options > Speakerphone. Select On or Off and press MENU/OK. Setting the Sender’s Name You can identify yourself to people who receive your SMS Voice messages. -
Page 27: Hearing Aid Compatibility (Hac) Function
Hearing Aid Compatibility (HAC) Function Your phone has been tested for hearing aid device compatibility and rated. (See “Using Your Phone With a Hearing Aid Device” on page 67.) To use this function effectively, set the hearing aid setting to on. Press MENU/OK >... -
Page 28: Headset Mode
Headset Mode Set up your phone for hands-free use when an optional headset is connected to it. To activate the turbo button on or off: Press MENU/OK > Settings/Tools > Settings > More… > Headset Mode > Turbo Button. Select On or Off. Tip: Press the turbo button twice to redial the last outgoing call. -
Page 29: Security
Security Accessing the Security Menu You must enter your lock code to view the Security menu. Press MENU/OK > Settings/Tools > Settings > More… > Security. Enter lock code. Tip: If you cannot recall your lock code, try using the last four digits of your phone number. Using Your Phone’s Lock Feature The lock can be unlocked by entering your lock code. -
Page 30: Locking Data Services
Locking Data Services This feature disconnects the data services connection and locks the function. Press MENU/OK > Settings/Tools > Settings > More… > Restrict and Lock > Data. Select Off and Lock and enter your lock code. Select Locked. Tip: You can disable the data services function by selecting an option Disable Data after step 1 above and press DISABLE (right softkey). -
Page 31: Deleting Phone Content
Deleting Phone Content You can quickly and easily delete all the content that you have created or stored in your phone. From the Security menu display (See “Accessing the Security Menu” on page 28.), select Delete/Reset. Select an option and press MENU/OK. Delete Web Cookies to delete all Web cookies saved in the phone. -
Page 32: Roaming
Roaming Understanding Roaming Recognizing Icons on the Display Screen Your phone’s display screen always lets you know when you are off the Nationwide PCS Network. Any time you are roaming, the phone displays the roaming icon. Tip: Remember, when you are using your phone off the Nationwide PCS Network, always dial numbers using 11 digits (1 + area code + number). -
Page 33: Using Call Guard
Using Call Guard Your phone has two ways of alerting you when you are roaming off the PCS Network: the onscreen roaming icon and Call Guard. Call Guard makes it easy to manage your roaming charges by requiring an extra step before you can place or answer a roaming call. To turn the Call Guard on or off: Press MENU/OK >... -
Page 34: History
History Viewing History Displaying Your Recent History Recent History shows up to the 60 most recent phone calls you have placed, received, or missed. Each history entry contains the phone number (if available) and Contacts entry name (if the phone number is in your Contacts). Duplicate calls (same number and type of call) may only appear once on the list. -
Page 35: History Menu Options
History Menu Options You may see several menu items on the onscreen menu or pressing OPTIONS (right softkey). • Call to dial the phone number. • Call:Speaker On to dial the phone number in speakerphone mode. • Save Contact to save the phone number to your Contacts. (See “Saving a Phone Number From History below.) •... -
Page 36: Making A New Group Entry From History
Making a New Group Entry From History You can form a group from History and send a message or save it to your Contacts. From the Recent History display, press OPTIONS (right softkey) > New Group. Read the message and press START (left softkey). Scroll through the list and press MENU/OK for each selection. -
Page 37: Contacts
Contacts Your phone can store up to 600 Contacts entries with 7 phone numbers, 3 email addresses and a web address for each entry. You can also store up to 40 groups with 25 members from your Contacts. Viewing Contacts Displaying the Contacts List You can see stored Contacts and groups on the Contacts list. -
Page 38: Editing A Contacts Entry
Editing a Contacts Entry From the Contacts list display, highlight an entry to edit and press OPTIONS (right softkey) > Edit Contact. Highlight a field to edit and press MENU/OK. Edit the information and press MENU/OK. Press DONE (left softkey). Deleting a Contacts Entry From the Contacts list display, highlight an entry to delete and press OPTIONS (right softkey) >... -
Page 39: Adding Members To A Group
Adding Members to a Group From the Contacts list display, scroll to a group to add members to and press OPTIONS (right softkey) > Edit Group > Add More. Read the message and press START (left softkey). Highlight each member to add and press MENU/OK for each selection. Each member’s default phone number is assigned and a check mark will appear in the box next to the selected member. -
Page 40: Assigning Speed Dial Numbers
Assigning Speed Dial Numbers Your phone can store up to 98 phone numbers in speed dial locations. (See “Using Speed Dialing” on page 13 for details on how to make calls using speed dial numbers.) From the Contacts list display, press OPTIONS (right softkey) > Settings > Speed Numbers. -
Page 41: Dialing Pcs Services
Dialing PCS Services You must be in digital mode to access PCS Services. From the Contacts list display, select OPTIONS (right softkey) > Settings > Services. - or - Press MENU/OK > Settings/Tools > Settings > More… > Contacts > Services. Select Customer Service, Dir Assistance, Account Info, or PCS Operator. -
Page 42: Calendar And Tools
Calendar and Tools Using Your Phone’s Calendar Your Calendar can be shown in monthly or weekly display and store three different types of events – up to 100 Schedule events, 15 Call Alarm events and 40 To Do events. Note: Days with events are indicated by a small [triangle] just to the left of the date. Displaying Your Calendar Press MENU/Ok >... -
Page 43: Schedule
Schedule Adding a Schedule to the Calendar From the Calendar display, highlight the day to add a schedule to and press OPTIONS (right softkey) > Add Schedule. Enter a description to the Description field and press MENU/OK. - or - Press TEXT MODE (right softkey) >... -
Page 44: To Do
To Do Storing To Do Items to Your Phone From the Calendar display, press OPTIONS (right softkey) > Add To Do. Enter a description to the Description field and press MENU/OK. - or - Press TEXT MODE (right softkey) > From Schedule to retrieve a description from your Schedule List. -
Page 45: Viewing Events As A List
Viewing Events as a List You can view stored events as a list. Daily List You can view events listed for a day. ► From the Calendar display, highlight a day and press MENU/Ok. - or - From the Calendar display, press OPTIONS (right softkey) > Go to Date. Enter a date and press MENU/OK. -
Page 46: Events Memory
Events Memory Your phone provides Memory use status for Schedule, Call Alarm and To Do. Each display shows the number of events categorized as Free, Used, and Old or Completed. Viewing Events Memory From the Calendar display, press OPTIONS (right softkey) > View Memory. Select Schedule, Call Alarm or To Do. -
Page 47: Using Your Phone's Tools
Using Your Phone’s Tools In addition to helping you be more efficient and organized, your phone offers useful and entertaining tools. Using the Alarm Clock You can set up to five alarms. This feature is not available while your phone is turned off. Press MENU/OK >... -
Page 48: Using The Countdown Timer
Using the Countdown Timer You can use Countdown Timer to alert when a specified period of time has elapsed. Up to five timers can be set. This feature is not available while your phone is turned off. Press MENU/OK > Settings/Tools > Tools > Countdown. Select a countdown number and press MENU/OK. -
Page 49: Voice Services
Voice Services Voice and Call Recording You can store up to 2000 voice memos on your phone. Each memo could be up to three minutes. Voice Memo To record a voice memo: Press MENU/OK > Settings/Tools > Tools > Voice Memo > Record. Start recording after the beep. -
Page 50: Camera
Camera Taking pictures with your phone’s built-in camera is as simple as choosing a subject, pointing the lens, and pressing a button. Activating Camera Mode ► Press and hold the side camera key > Camera. - or - Press MENU/OK > Photos > Camera. Taking Pictures From Camera mode, use the phone’s main screen as a viewfinder and aim the camera lens at your subject. -
Page 51: Using The Zoom
Using the Zoom You can zoom in on a subject in the range of 1x to 12x. ► From Camera mode, press or press and hold the Navigation key right or left or the Side key up and down. Using the Self-Timer You can set a timer to delay the shutter point. -
Page 52: Image Controls
Image Controls Adjusting Sharpness From Camera mode, press 7. - or - From Camera mode, press OPTIONS (right softkey) > Image Controls > Sharpness. Select Auto, or Manual. Press the navigation key right or left or the side key up and down to adjust the sharpness when Manual is selected. -
Page 53: User Settings
User Settings The camera mode is launched with its default camera settings each time it is activated. You can save up to three user settings and call one up easily to take a picture with the specific settings. Saving a User Settings Set your favorite camera settings following the steps in “Camera Settings”... -
Page 54: My Albums Options
My Albums Options Press OPTIONS (right softkey) in My Albums mode to display additional options: • Send Media to send pictures. • Set as to assign a picture to Picture ID or Screensaver. (See “Setting Your Picture as Picture ID or Screensaver” below.) •... -
Page 55: Resize
Color Tone Press MENU/OK > Photos > My Albums. Select a picture and press OPTIONS (right softkey) > Details/Edit > Special Effects > Color Tone. Press NEXT (right softkey) or the Navigation key right or left to scroll through the colors and press OK (left softkey) to select. -
Page 56: Picture Information
Picture Information You can see the detailed information on each picture. Press MENU/OK > Photos > My Albums. Select a picture and press OPTIONS (right softkey) > Details/Edit > Picture Info. Press DONE (left softkey) to go back to the picture. Full Screen The picture is displayed in Full Screen mode. -
Page 57: Using Bluetooth
Using Bluetooth The Bluetooth menu allows you to use many functions of your phone’s Bluetooth service. Activating Bluetooth Mode The first step to use a Bluetooth function is to turn the Bluetooth on and then make it visible. Turning Bluetooth On and Off Press MENU/OK >... -
Page 58: Viewing The Trusted List
Viewing the Trusted List ► From the Bluetooth menu, select Trusted List. Trusted List Options Once you have created paired devices, several options are available from the Trusted List. From the Trusted List, highlight a device. Press OPTIONS (right softkey) to display the following options: Connect or Disconnect to connect to or disconnect from the Bluetooth device (if applicable). -
Page 59: Find Me
Find Me This feature allows your phone to be temporarily visible to other Bluetooth devices for three minutes, even when the visibility is set to Hidden, so that the other device can initiate a paring process with your phone. From the Bluetooth menu, press FIND ME (left softkey) Follow the onscreen prompts to enter your PIN and press MENU/OK. -
Page 60: Setting Your Bluetooth Voice Priority
• HFP: Hands-Free Profile - This profile functions as a wireless car kit. Incoming calls ring to the hands-free headset or device. Calls can be received by pressing a button on the headset or device. For dialing, four functions are supported; recent call dial, voice dial, speed dial and number dial. -
Page 61: Pcs Service
PCS Service Using Voicemail All unanswered calls to your phone are automatically transferred to your voicemail, even if your phone is in use or turned off. Setting Up Your Voicemail From standby mode, press and hold 1. Follow the system prompts to: Create your passcode. -
Page 62: Voicemail Options
Voicemail Options Your phone offers several options for organizing and accessing your voicemail. Using Expert Mode Using the Expert mode setting for your personal voicemail box helps you navigate through the voicemail system more quickly by shortening the voice prompts you hear at each level. Press and hold 1 to access your voicemail. -
Page 63: Voicemail-To-Voicemail Message Reply
Voicemail-to-Voicemail Message Reply Reply to a voice message received from any other PCS voicemail user. After listening to a voice message, press 2. Follow the voice prompts to record and send your reply. Voicemail-to-Voicemail Message Forwarding Forward a voice message, except those marked “Private,” to other PCS voicemail users. After listening to a message, press 6. -
Page 64: Composing Text Messages
Composing Text Messages Press MENU/OK > Messages > Messages > Send Message > Text Message. Select a recipient from the Recent List and press MENU/OK, or select one of the following options: Go to Contacts to select a recipient from your Contacts. Qualifying Contacts entries must contain a phone number or an email address. -
Page 65: Composing Sms Voice Messages
To reply to an SMS Voice message: Press REPLY (left softkey) while the message is being played. - or - Press MENU/OK > Messages > Voice SMS, highlight a message and press REPLY (left softkey). Record your reply and press DONE (left softkey) > Send (left softkey). Composing SMS Voice Messages Press MENU/OK >... -
Page 66: Using Caller Id
Using Caller ID Caller ID allows people to identify a caller before answering the phone by displaying the number of the incoming call. You can follow these steps when you do not want your number displayed in making a call. Call PCS Customer center to permanently block your number. Press * 6 7. -
Page 67: Safety
Safety General Precautions There are several simple guidelines to operating your phone properly and maintaining safe, satisfactory service. • To maximize performance, do not touch the bottom portion of your phone where the internal antenna is located while using the phone. •... -
Page 68: Turning Off Your Phone Before Flying
Consult the manufacturer of any personal medical devices, such as pacemakers and hearing aids, to determine if they are adequately shielded from external RF signals. Note: Always turn off the phone in healthcare facilities and request permission before using the phone near medical equipment. -
Page 69: Getting The Best Hearing Device Experience With Your Phone
Phones that have been rated have a label located on the box. Your SCP-2700 by Sanyo has [M4 T4] ratings. These ratings are not guarantees. Results will vary depending on the user’s hearing device and individual type and degree of hearing loss. If a hearing device is particularly vulnerable to interference noise;... -
Page 70: Caring For The Battery
Caring for the Battery Protecting Your Battery The guidelines listed below help you get the most out of your battery’s performance. • In order to avoid damage, charge the battery only in temperatures that range from 32º F to 113º F (0º C to 45º C). •... -
Page 71: Specific Absorption Rate (Sar) For Wireless Phones
do not use a body-worn accessory, ensure the antenna is at least 0.866 inch ([2.2] centimeters) from your body when transmitting. Use of non-PSC approved accessories may violate FCC RF exposure guidelines. For more information about RF exposure, visit the FCC Web site at www.fcc.gov. Specific Absorption Rate (SAR) for Wireless Phones The SAR is a value that corresponds to the relative amount of RF energy absorbed in the head... -
Page 72: Fcc Notice
FCC Notice This device complies with Part 15 of the FCC Rules. Operation is subject to the following two conditions: (1) this device may not cause harmful interference, and (2) this device must accept any interference received, including interference that may cause undesired operation. Changes or modifications not expressly approved by the party responsible for compliance could void the user’s authority to operate the equipment.