
Related Manuals for Schwinn 438


Summary of Contents for Schwinn 438
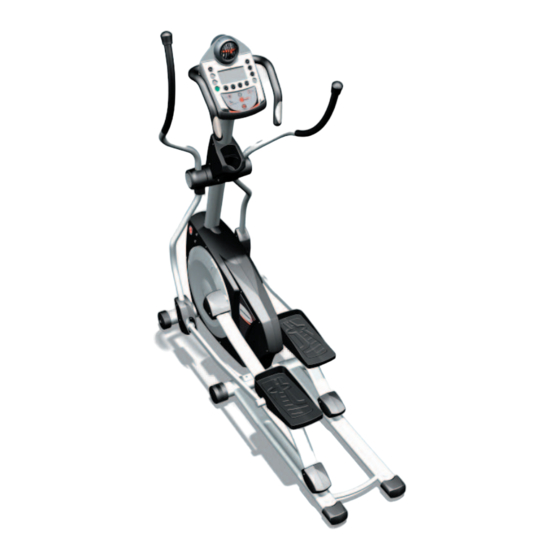
- Page 1 Elliptical Trainer Elliptical Trainer Model 438 Model 438 ASSEMBLY GUIDE and OWNER’S MANUAL odel 438...
- Page 2 fi nd the information valuable in assisting you in your pursuit of a healthy lifestyle. ® The Schwinn 438 elliptical trainer will enable you to customize and monitor your workouts to: ▲ Increase your energy level ▲ Increase cardiovascular and aerobic fi tness ▲...
-
Page 3: Table Of Contents
Parts List ...4 Hardware List ...5 Assembly Instructions ...6 FOR DETAILED INSTRUCTIONS AND INFORMATION ON HOW TO USE AND CARE FOR YOUR SCHWINN TRAINER MODEL 438, REFER TO THE OWNER’S MANUAL SECTION STARTING ON PAGE 17. Owner’s Manual Safeguards ...17 Features ...19 Operation ...20... -
Page 5: Parts Diagram
Tools Required The tools below are required during the assembly of your Schwinn trainer. They are included with the product. 4mm Allen Wrench 6mm Allen Wrench Complete Parts Diagram ® 438 ellipitcal 5mm Allen Wrench Open End Wrench Philips Screwdriver... - Page 6 Console #2 Fan Assy #3 Handlebar Jct Cover Set #5 Lower Left Handlebar Assy #6 Left Upper Handlebar #8 Lower Handlebar Cover Set #9 Left Mast Cover #12 Right Mast Cover #13 Right Pedal Arm Assy #15 Right Upper Handlebar #16 Console Mast Assy #18 Complete Static Handlebar #19 Left Crank Cover #21...
- Page 7 Step #1 8.2x18x1.5T Curve Washer 8x25 Button Head Bolt #36 #35 (Qty 6) (Qty. 6) Step #3 8x15 Socket Cap Head Bolt 8.2x15x1.2T Arc Washer #43 #26 (Qty 4) (Qty 4) Step #6 12.5x25x1.0T Arc Washer 10.2x25x1.5T Flat Washer #32 (Qty 4) #33 (Qty 2) 10x1.5 Nylon Hex Nut #34 4x16 Self-Tap Round Head...
- Page 8 Introduction Read and follow each step carefully and in proper order to avoid missing any steps. Be sure to have all parts and tools on hand for a particular step before beginning assembly for that step. If you discover parts are missing, contact Customer Service at 800-864-1270.
- Page 9 Step 2—Assemble the Console Parts Console (Qty 1) Fan Assembly (Qty 1) Static Handlebar (Qty 1) 2–1 Remove the six (6) Round Head Machine Screws (#1) from the Console (#2). Attach the Console (#2) to the 2–2 Static Handlebar (#19) with the six (6) Round Head Machine Screws (#1) you removed in the previous step.
- Page 10 Step 3—Attach the Console Mast to the Main Frame Parts N/A Main Frame (Qty 1) Console Mast (Qty 1) Shroud Plug (Qty 4) Hardware 8x15 Socket Cap Head Bolt (Qty 4) 8.2x15x1.2T Arc Washer (Qty 4) Figure A–3 3–1 Securely attach the “zip tie” at the bottom of the Console Mast (#18) to the computer cable from the Main Frame, and pull the...
- Page 11 Step 4—Attach the Console to the Console Mast Parts Console (Qty 1) Fan Assembly (Qty 1) Console Mast (Qty 1) Static Handlebar (Qty 1) Hardware 5x8 Pan Head Screw (Qty 4) Figure A–4 4–1 Attach the Console/Fan/Static Handlebar Assembly (#2, #3, and #19) to the Console Mast (#18) with four (4) Pan Head Screws (#11).
- Page 12 Step 5—Attach Mast Covers Parts Left Mast Cover (Qty 1) Right Mast Cover (Qty 1) Console Mast (Qty 1) Hardware 5x8 Pan Head Screw (Qty 5) Console Mast Pivots Figure A–5 5–1 Slide the Left Mast Cover (#12) over the Console Mast Pivot, and attach with two (2) Pan Head Screws (#11).
- Page 13 Step 6—Attach the Sub Pedal Arm Assemblies and Crank Covers Parts Sub Pedal Arm Assy (Qty 2) Right Crank Cover (Qty 1) Left Crank Cover (Qty 1) Hardware 12.5x25x1.0T Arc Washer (Qty 4) 10.2x25x1.5T Flat Washer (Qty 2) 10x1.5 Nylon Hex Nut (Qty 2) 4x16 Self-Tapping Round Head Screw (Qty 2) Place the Sub Pedal Arm...
- Page 14 Step 7—Attach the Pedal Arm Assemblies Parts Left Pedal Arm Assembly (Qty 1) Right Pedal Arm Assembly (Qty 1) Sub Pedal Arm Assy (Qty 2) Hardware 20.5x29x1.5T Wave Washer (Qty 2) Figure A–7 7–1 Remove the two (2) 8x1.25x10 Button Head Bolts (#39), a 8x1.25x20 Button Head Bolt (#40), and a Pedal Arm Bracket (#42) from the Right Pedal Arm...
- Page 15 Step 8—Attach the Upper Handlebar Assemblies Parts Left Upper Handlebar (Qty 1) Right Upper Handlebar (Qty 1) Console Mast (Qty 1) Hardware 20.5x29x1.5T Wave Washer (Qty 2) 10.3x35x2T Washer Flat (Qty 2) Nylon Hex Nut (Qty 2) Figure A–8 8–1 Attach the Right Upper Handlebar (#16) to the Console Mast (#18) with a Flat Washer...
- Page 16 Step 9—Attach the Lower Handlebar Assemblies Parts Lower Left Handlebar Assembly (Qty 1) Left Pedal Arm Assembly (Qty 1) Left Upper Handlebar (Qty 1) Lower Handlebar Cover Set (Qty 2) Lower Right Handlebar Assembly (Qty 1) Right Pedal Arm Assembly (Qty 1) Right Upper Handlebar (Qty 1)
- Page 17 Figure A–9...
- Page 18 Step 10—Attach the Handlebar Junction Cover Set Parts Handlebar Junction Cover Set (Qty 2) Left Upper Handlebar (Qty 1) Right Upper Handlebar (Qty 1) Hardware 5x8 Pan Head Screw (Qty 4) Figure A–10 10–1 Attach the Handlebar Junction Cover Set (#5) to the Right Upper Handlebar (#16) with two (2) Pan Head Screws (#11) and the Cap.
-
Page 19: Safeguards
Important Safety Information Do not discard this Owner’s Manual. It contains important information on the ® proper and safe operation of your Schwinn Elliptical Trainer Model 438. The following is a list of warning labels used throughout this manual: Warning: Indicates a potentially hazardous situation which, if not avoided, could result in death or serious injury. - Page 20 • Service the equipment only in accordance with the maintenance section in the Schwinn ® Elliptical Trainer Model 438 Assembly Guide and Owner’s Manual. Always disconnect the power supply before servicing the machine. • This elliptical is for home use only. Do not use in a commercial, institutional, or rental setting.
-
Page 21: Features
® Schwinn Model 438 Features ■ Synchronized Arms For a total body workout. ■ Heavy Duty Construction Sturdy construction stands up to the most intense workout environment. ■ Foot Platform Two-piece, padded, open-ended foot plates for all sizes that move along with your natural foot motion. - Page 22 Using Your Schwinn Elliptical Trainer Model 438 ® Before operating your Schwinn 438 elliptical trainer, read the warnings listed on pages 17 and 18 of this manual. CONSULT YOUR PHYSICIAN BEFORE STARTING ANY EXERCISE PROGRAM. He or she can help establish...
- Page 23 To change directions, simply slow the pedals down until they stop, and switch directions. ■ Resistance Control You can change the resistance level in your Schwinn elliptical trainer at any time during your workout. Adjusting your level will allow you to increase or decrease your intensity level.
- Page 24 Schwinn ® elliptical trainer. Computer Console Design Before we discuss using the specifi c functions of the computer, let’s get familiar with the display, the different features, and various buttons located on the console.
- Page 25 ■ Alphanumeric Display Within the LCD display the computer features a “message center” that prompts you to input specifi c data and values to make the elliptical trainer easy to operate and gets you to your workout quickly.
- Page 26 ® Using the Schwinn 438 Computer ■ LCD Display Descriptions TIME Displays the workout time. The time will count down from the time you entered when beginning the program and shows the time remaining for your workout. The time starts to count up once it reaches zero.
- Page 27 Used to change resistance level or UP/DOWN to adjust values such as program time. Confi rms or enters your selection. ENTER These three buttons enable the user SCAN to alternately view INTERVAL TIME or TIME, RPM or WATTS, and SPEED or CALORIES. Pressing RESET in the Program RESET mode will bring you back to the...
- Page 28 “ENTER PROGRAM” mode. ■ Grip Heart Rate ® This Schwinn elliptical trainer is equipped with grip heart rate sensors located on the handlebars. You must contact these sensors with both hands so that the computer can detect your pulse.
- Page 29 Control and Fitness Test programs. The computer must receive a steady, consistent signal for the duration of these programs to operate correctly. If there is no display, please see “IMPORTANT Things You Should Know Before Exercising” on page 32 for more information. Software Features ■...
- Page 30 60%–70% of maximum heart rate—General Fitness Zone— Fat Burning Exercise within this zone improves general fi tness, begins to develop endurance, and contributes greatly to weight control and management by utilizing mostly fat calories for energy. 70%–80% of maximum heart rate—Aerobic Workout Zone—Endurance Training Exercise within this zone increases overall fi...
- Page 31 minutes, the computer measures your heart rate, and the power (watts). These numbers, along with information about your age and weight, are put into a formula and produce a “Fitness Score.” Note: The Fitness Test is an excellent way to measure changes in your own fi...
- Page 32 When choosing the BMI program you will be prompted to enter your height and weight, and the computer will calculate and display your Body Mass Index. The console will display “IDEAL BMI RANGE.” The ideal or normal range is 18.5–24.9. The console will also display your ideal weight range for your height.
- Page 33 HR,” and the HEART RATE icon on the display will blink. This message will show for fi ve seconds, then the program will resume. You must see your heart rate on the display, and then you must push the RECOVERY button again to perform the test.
- Page 34 By moving the product away from such items, you may be able to avoid many heart rate display problems. ■ Resistance control—You can control the resistance of your elliptical trainer by using the UP or DOWN buttons. You increase the resistance by pressing the UP button or...
-
Page 35: Operation
decrease the resistance by pressing the DOWN button. You will notice a slight lag in time while the electronic brake adjusts to your input, so make sure to allow for this and don’t over-compensate. ■ Sleep mode—The console will enter Sleep mode, and the system will turn off automatically if there is no input for approximately two minutes. - Page 36 Confi rm your selection by pressing ENTER. The default resistance level will be the last level you entered (previous workout). ■ Enter Time When the “ENTER TIME” screen appears, select the desired time by pressing the UP or DOWN buttons. The default time will be the last time you entered (previous workout).
- Page 37 To access the profi le programs, scroll through the display by using the UP or DOWN buttons until you reach “PROGRAMS.” Press ENTER; the program profi le and name will appear in the display. Press the UP or DOWN buttons to select your desired program.
- Page 38 Based on your age, the elliptical trainer will calculate a maximum heart rate and the heart rate zones described below. These rates are based on average fi tness for persons your age.
- Page 39 greatly to weight control and management by utilizing mostly fat calories for energy. • HRC 70–80 (Select this zone for an aerobic workout.) Exercise within this zone increases overall fi tness, improves cardiovascular effi ciency, and endurance. • HRC 80–90 (Select this zone for an anaerobic workout.) Exercise within this zone maximizes fi...
- Page 40 ■ Changing Levels You can only increase or decrease the resistance level by pressing the UP or DOWN buttons when in the fi rst interval column, which is the warm-up column. This enables you to set your starting warm-up level. A longer warm-up at lower resistance can burn more calories than a shorter warm-up at higher resistance.
- Page 41 To access the Custom 01 and Custom 02 programs, scroll through the display by pressing the UP or DOWN buttons until you reach “CUSTOM PROGS.” Press ENTER; “CUSTOM 01” will fl ash. Press the UP or DOWN buttons to alternate between the two programs.
- Page 42 ■ Change an Existing Program Press the UP or DOWN buttons as you exercise in each interval to override your old custom program. The console will automatically store this new profi le in memory and will then be the new default Custom program. ■...
- Page 43 ■ Enter Weight At the “ENTRWEIGHT...” screen, select the appropriate weight in pounds or kilograms by pressing the UP or DOWN buttons. Press ENTER to confi rm your selection. ■ Start Press START when the “PRESS START” screen appears. “T.T.PROGRAM” will display, confi rming your selection. You can now begin exercising.
- Page 44 To access the Fitness Test, scroll through the display by pressing the UP or DOWN buttons until you reach “FITNESS TEST,” and then press ENTER. ■ Enter Age When the “ENTER AGE” screen appears, select your age by pressing the UP or DOWN buttons. Press ENTER to confi...
- Page 45 Console Operation—Calorie Goal The Calorie Goal program enables you to select an amount of calories you would like to burn and lets you choose a profi le program to achieve that goal. Your exercise is complete when the calories count down to zero. ■...
- Page 46 Time will begin counting up and calories will begin counting down from your preset calorie goal value until the display reaches zero. When you have reached your calorie goal, the computer displays “GREAT JOB,” followed by “YOUR RESULTS.” The display will show a summary of your workout: ■...
- Page 47 Using the Chest Strap Transmitter The Schwinn ® 438 elliptical trainer has built-in wireless heart rate monitoring capability. When you wear the chest strap transmitter during your workout, the elliptical trainer’s computer heart rate display will continuously read out your heart rate in beats per minute.
- Page 48 Leveling your Schwinn Elliptical Trainer Level the elliptical trainer to compensate for uneven surfaces. To level the Schwinn elliptical trainer, raise or lower the two leveling bolts located on the underside of the rear stabilizer by screwing them in or out as needed.
-
Page 49: Maintenance
Keep all the tools supplied with the elliptical trainer to perform future maintenance. Call your authorized Schwinn ® Fitness products distributor if you have any ® questions on the proper use or maintenance of this equipment, or contact Schwinn Fitness products Customer Service at 1-800-864-1270. -
Page 50: Fitness Guide
Fitness Guidelines by Jay Blahnik ■ Exercise and Health It is not a secret that lack of exercise is increasingly becoming a major health issue. Obesity is on the rise, and being overweight can contribute to an increased risk in heart attack, diabetes, high blood pressure and other life threatening illnesses. - Page 51 embarrassed about carrying around a few extra pounds). No more sharing sweaty equipment, or wondering if you will catch athlete’s foot in the health club shower. The biggest advantage, however, may simply be the time factor. With work schedules ever-changing and busy family obligations, a home gym offers the benefi...
- Page 52 For example, you might try using your Schwinn ® stepper or swimming in the pool or ®...
- Page 53 scheduled, moderate level workout for 20–30 minutes on Monday, Wednesday, Friday and Sunday (see the intensity monitoring section for further details on how hard to workout). On the other days, you might try going for a leisurely stroll 10 minutes in the morning and in the evening (or whenever you can fi t it in).
- Page 54 but certainly the easiest one to incorporate into our daily lives because it can be done anywhere and almost at any time. To maintain your fl exibility, you simply need to stretch. This could be as simple as reaching for your toes, or reaching overhead when you wake up in the morning.
- Page 55 levels. Any diet that focuses on just one food group source or processed foods can be unhealthy in the long run, and should be avoided. Don’t focus too much on any particular meal or snack, but rather on your overall intake of a variety of different foods during any given day.
- Page 56 When you are fi rst starting out, you should exclusively work in the Zone 1 and Zone 2 intensities. After a few weeks, you can occasionally incorporate Zone 3 and Zone 4 intensities for short periods of time. Remember, when you begin to incorporate Zone 3 and Zone 4 intensities, you will fi...
- Page 57 you may fi nd that your numbers don’t change, but you are able to stay in Zone 3 and Zone 4 longer than you used to. Don’t get too attached to any specifi c number or target heart rate. If you train properly, you will notice numbers that used to be diffi...
- Page 58 workout early, or skip a day. It just might be the thing you need to get you excited about your next workout. Possibly the most important thing is to keep progressing your exercise program slowly. Big increases in time or intensity can set you up for injury, and cause you to drop out.
-
Page 59: Workout Log
achievement... -
Page 60: Warranty
® • See your authorized Schwinn Fitness Dealer for service or write to: Schwinn Fitness Technical Services, Nautilus Inc., World Headquarters, 16400 SE Nautilus Drive, Vancouver, WA 98683; or call 1-800-864-1270 for assistance or questions. ® Fitness warranty policies ®... - Page 62 Nautilus Inc., World Headquarters, 16400 SE Nautilus Drive, Vancouver WA 98683 © 2005 Nautilus Inc. All Rights Reserved. Nautilus and the Nautilus logo are either registered trademarks or trademarks of Nautilus Inc. Schwinn and the Schwinn Quality Seal are registered trademarks. 1.800.864.1270 Model 438...