
Related Manuals for Jackson TEMPSTAR HH-E


Summary of Contents for Jackson TEMPSTAR HH-E
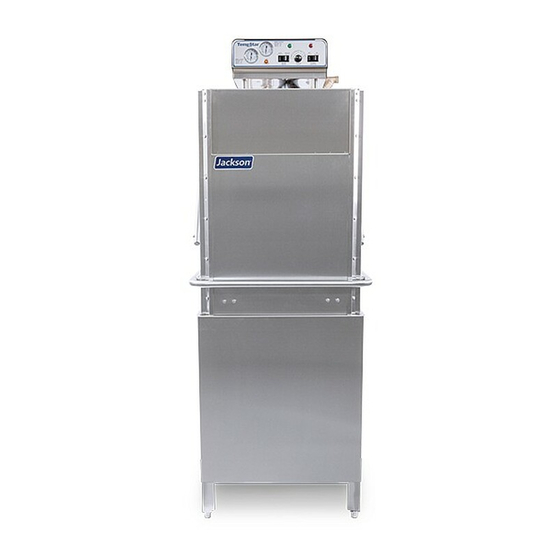
- Page 1 INSTALLATION, OPERATION, AND SERVICE MANUAL TEMPSTAR SERIES DOOR-TYPE DISHMACHINES ® TempStar HH-E Manual • 07610-002-23-32-AD ®...
- Page 2 ONE YEAR LIMITED PARTS AND LABOR WARRANTY For a period of one (1) year from date of original installation of a new Jackson Dishmachine (but in no event to exceed eighteen (18) months from date of shipment from Jackson’s factory), Jackson WWS, Inc. (Jackson) will repair or replace, at its discretion, any original part that proves defective in materials or workmanship at the time the Dishmachine was purchased;...
- Page 3 MANUFACTURER'S LIMITED WARRANTY (CONT.) (APPLICABLE ONLY IN THE UNITED STATES AND CANADA) PRODUCT CHANGES: Jackson reserves the right to make changes in design and specification of any component of the Dishmachine as engineering or necessity requires. DISCLAIMER OF WARRANTIES: THERE ARE NO WARRANTIES, EXPRESSED OR IMPLIED, INCLUDING, WITHOUT LIMITATION, ANY IMPLIED WARRANTY OF FITNESS FOR A PARTICULAR PURPOSE OR MERCHANTABILITY, THAT ARE NOT SET FORTH HEREIN, OR THAT EXTEND BEYOND THE DURATION HEREOF.
- Page 4 Added hi-limit thermostat setpoint instructions. 1-10-13 8252 Updated schematic and control box to reflect rotary switch. QOF NDB- 3-7-13 Updated Jackson logo and company name. Updated warranty page. 3-24-14 Removed "Stop" page. Converted manual from Quark to InDesign. 4-16-14 8291 Changed pgs.
- Page 5 Added instructions for programming new exhaust fan timer. Updated schematics. Updated to new manual format. Audited and corrected all P/Ns in the manual. Added the TempStar HH-E and associated parts and assemblies. Moved door switch from the Tub Assembly page to the Hood 8541 Assembly page.
- Page 6 NOMENCLATURE TempStar HH-E ® Door-type dishmachine; ENERGY STAR qualified, electrically-heated, ® high-temp, hot-water sanitizing, with booster heater. TempStar HH-E-VER ® Door-type dishmachine; ENERGY STAR qualified, electrically-heated, ® high-temp, hot-water sanitizing, with booster heater and ventless energy recovery system. TempStar HH-E NB ®...
-
Page 7: Table Of Contents
TABLE OF CONTENTS GUIDES Symbols ............................1 Abbreviations & Acronyms ......................1 SPECIFICATIONS Dimensions ............................ 2 Dimensions - HH-E-VER ....................... 3 Table Dimensions .......................... 4 Operating Parameters ........................5 Electrical Requirements ........................ 6 INSTALLATION Installation Instructions ........................8 Inspection......................... 8 Unpacking ........................ - Page 8 TABLE OF CONTENTS OPERATION Operating Instructions ......................... 13 Preparation ........................13 Power Up ........................13 Filling the Wash Tub ....................... 13 Ware Preparation ......................13 Daily Machine Preparation ..................... 13 Warm-up Cycles ......................14 Washing a Rack of Ware ....................14 Operational Inspection....................
- Page 9 TABLE OF CONTENTS PARTS Solenoid Valve & Vacuum Breaker Parts ..................49 Wash & Rinse Assemblies ......................50 VER System ..........................52 VER System Door Interlock ......................54 VER System Door Interlock Override ..................55 460 V Machine Transformer Mounting Box ................. 56 Kits ..............................
-
Page 10: Symbols
GUIDES GUIDES SYMBOLS - risk of injury to personnel. WARNING - risk of damage to equipment. CAUTION - risk of electrical shock. - caustic chemicals. - reference data plate. - lockout electrical power. - important note. NOTICE - instructions hyperlink. ABBREVIATIONS &... -
Page 11: Specifications
DIMENSIONS SPECIFICATIONS [102 mm] LEGEND [124 mm] MINIMUM A - Drain 1 1/2" NPT B - Water Inlet 3/4" NPT C - Electrical Connection D - Optional Steam Connection 3/4” NPT increased 2" using the machine's 15 [387 mm] adjustable feet. [102 mm] MINIMUM [641 mm]... -
Page 12: Dimensions - Hh-E-Ver
DIMENSIONS - HH-E-VER SPECIFICATIONS LEGEND A - Drain 1 1/2" NPT B - Water Inlet 3/4" NPT C - Electrical Connection (134mm) 4 ( 2 10 mm MINIMUM increased 2" using the machine's adjustable feet. 7mm) 17 (432mm) ( 3 mm) (79mm) CLEARANCE 93 (2362mm) -
Page 13: Table Dimensions
TABLE DIMENSIONS SPECIFICATIONS CORNER INSTALLATION 4 (102 mm) MIN ALIGN WITH TABLE - For corner DISTANCE CAN VARY install instructions: 8 1/4 4 (102 mm) MIN (210 mm) 20 1/2” ALIGN WITH TABLE - (521 mm) DISTANCE CAN VARY (762 mm) OPENING Distance from wall... -
Page 14: Operating Parameters
OPERATING CAPACITY: Water Line Size (NPT) 3/4" Drain Line Size (NPT) 1 1/2" Normal Cycle Racks per Hour TempStar HH-E NB/Tempstar HH S: Dishes per Hour 1325 Wash Temperature (minimum) (°F/°C) 150/66 Glasses per Hour 1908 Rinse Temperature (minimum) (°F/°C) 180/83 Inlet Water Temperature (°F/°C) -
Page 15: Electrical Requirements
Numbers in this manual are for reference and may change without notice. NOTICE On three-phase machines, imbalanced wild leg goes to L3. Also see the Motor Rotation section. TEMPSTAR HH-E 70° Rise (14 kW) & TEMPSTAR HH-E-VER Wash Wash Rinse Volts... - Page 16 Numbers in this manual are for reference and may change without notice. NOTICE On three-phase machines, imbalanced wild leg goes to L3. Also see the Motor Rotation section. TEMPSTAR HH-E NB Wash Wash Rinse Volts...
-
Page 17: Installation
INSTRUCTIONS INSTALLATION INSPECTION Before installing the unit, check the packaging and machine for damage. If the packaging is damaged, the machine might also be damaged. If there is damage to both packaging and machine, do not throw away the packaging. The machine has been inspected and packed at the factory and is expected to arrive to you in new, undamaged condition. -
Page 18: Steam Line Connection
INSTRUCTIONS INSTALLATION WATER SUPPLY If water hardness tests at less than 3 GPG, install the water supply line directly to the machine’s incoming water connection point. A water shut-off valve should be CONNECTION: installed to allow access for service. WATER HARDNESS OF 3 GPG OR LESS STEAM LINE The steam machines come with lines to connect the source steam. -
Page 19: Chemical Connections
INSTRUCTIONS INSTALLATION CHEMICAL Detergent Connect detergent by removing the bulkhead fitting on the back of the machine and CONNECTIONS replacing it with the appropriate dispensing equipment. Chemical connections should be made by the chemical supplier. Using deionized water or other aggressive fluids will result in corrosion and Detergent Probe Installs Here... -
Page 20: Electrical Power Connections
INSTRUCTIONS INSTALLATION ELECTRICAL POWER Electrical and grounding conductors must comply with the applicable portions of the National Electric Code ANSI/NFPA 70 (latest edition) and/or other electrical codes. CONNECTIONS The data plate is located on the right side of the machine. Refer to the data plate for machine operating requirements, machine voltage, total amperage, and serial number. -
Page 21: Voltage Check
INSTRUCTIONS INSTALLATION VOLTAGE CHECK Ensure that the power switch is in the "OFF" position and apply power to machine. Check the incoming power at the terminal block and ensure it corresponds with the voltage listed on the data plate. If not, contact a qualified service agency to examine the problem. -
Page 22: Operating Instructions
OPERATING INSTRUCTIONS OPERATION PREPARATION Before operating the unit, verify the following: 1. The tank is clean and free of debris. 2. The wash arms, rinse arms, sump strainer, and scrap screen are all installed correctly. 3. The standpipe is installed. Wash &... -
Page 23: Warm-Up Cycles
OPERATING INSTRUCTIONS OPERATION WARM-UP CYCLES For the first operation of each day, it might be necessary to run the machine through three cycles to ensure that all of the cold water is out of the system and to verify that the unit is operating correctly. -
Page 24: Shutdown & Cleaning
OPERATING INSTRUCTIONS OPERATION SHUTDOWN & 4. Remove the sump strainer and scrap screen. CLEANING 5. Use a hand-scraper to scrape foodsoil into a trash basket. 6. Rinse with pre-rinse hose and replace. 7. Remove all wash and rinse arms. 8. Remove the end-caps from the arms. 9. -
Page 25: Ver Coil Cleaning
OPERATING INSTRUCTIONS OPERATION SHUTDOWN & 10. Use a small wire or toothpick to remove remaining debris or lime deposits from the nozzles. CLEANING 11. Flush the arms with water. 12. Replace end-caps and ensure they have been tightened. 13. Spray or wipe out interior of the machine. 14. -
Page 26: Detergent Control
DETERGENT CONTROL OPERATION DETERGENT Detergent usage and water hardness are two factors that contribute greatly to how efficiently this machine will operate. Using detergent in the proper amount can CONTROL become a source of substantial savings. A qualified water treatment specialist can determine what is needed for maximum efficiency from the detergent. -
Page 27: Deliming
DELIMING OPERATION DELIMING To delime the machine, follow the steps below. The tank capacities of the machine can be found on the Operating Parameters section of this manual. 1. Remove rinse arms and place in sink with deliming solution. 2. Disconnect or turn off chemical feeder pumps. 3. -
Page 28: Maintenance
PREVENTATIVE MAINTENANCE MAINTENANCE PREVENTATIVE The manufacturer highly recommends that any maintenance and repairs not specifically discussed in this manual be performed only by qualified service personnel. MAINTENANCE WARNING! Unqualified personnel performing maintenance on the machine may void the warranty, lead to larger problems, or cause harm to the operator. WARNING Following the operating and cleaning instructions in this manual will result in the most efficient results from the machine. -
Page 29: Troubleshooting
COMMON PROBLEMS TROUBLESHOOTING WARNING! Inspection, testing, and repair of electrical equipment should only be performed by a qualified service technician. Many of the tests require that the unit have power to it and live electrical components be exposed. USE EXTREME CAUTION WHEN TESTING THE MACHINE. WARNING PROBLEM POSSIBLE CAUSE... - Page 30 COMMON PROBLEMS TROUBLESHOOTING WARNING! Inspection, testing, and repair of electrical equipment should only be performed by a qualified service technician. Many of the tests require that the unit have power to it and live electrical components be exposed. USE EXTREME CAUTION WHEN TESTING THE MACHINE. WARNING PROBLEM POSSIBLE CAUSE...
-
Page 31: Parts Control Box
CONTROL BOX PARTS Fuses 208/230 V 460 V WARNING: DISCONNECT POWER TO MACHINE BEFORE SERVICING WARNING: DISCONNECT POWER TO MACHINE BEFORE SERVICING DETERGENT EXHAUST FAN CONSTANT VOLTAGE RINSE-AID DISPENSER DETERGENT EXHAUST FAN CONSTANT VOLTAGE RINSE-AID DISPENSER DISPENSER CONTROL CONNECTION CONNECTION DISPENSER CONTROL CONNECTION... - Page 32 CONTROL BOX PARTS 07610-002-23-32-AD...
- Page 33 CONTROL BOX PARTS ITEM DESCRIPTION PART NUMBER Control Box Weldment 05700-003-30-14 Timer Bracket 05700-003-02-08 Locknut, 6-32 (Not Shown) 05310-373-03-00 Contactor, 4-Pole 05945-004-43-74 Terminal Block 05940-011-48-27 Locknut, 10-24 05310-373-01-00 Contactor, Wash Motor 05945-002-74-20 Relay 05945-111-47-74 Relay (460 V, 3-Phase, 5-Wire Only) 05945-111-89-75 Light, Green 05945-111-44-43...
- Page 34 CONTROL BOX PARTS ITEM DESCRIPTION PART NUMBER Fuse Holder, 6-Pole (Not Shown) 05920-002-42-13 Screw, 6-32 x 3/8" with Tooth Washer (Not Shown) 05305-002-25-91 Decal, Dispenser Connection 09905-003-34-09 Decal, Dispenser Connection (460 V Unit Only) 09905-004-43-81 Timer, Universal 05945-003-75-23 Locknut, 10-32 (Not Shown) 05310-373-02-00 Screw 10-32 x 1"...
-
Page 35: Hood
HOOD PARTS 07610-002-23-32-AD... - Page 36 HOOD PARTS ITEM DESCRIPTION PART NUMBER Hood 05700-004-49-92 Hood Support Assembly 05700-004-13-45 Left Back Inner Door Guide 05700-031-76-34 Right Back Outer Door Guide 05700-031-76-80 Right Back Inner Door Guide 05700-031-76-35 Left Back Outer Door Guide 05700-031-76-33 Locknut, 1/4-20 Hex with Nylon Insert 05310-374-01-00 Washer, 1/4-20 05311-174-01-00...
-
Page 37: Door & Arm
DOOR & ARM PARTS Before ordering door or arm parts, NOTICE see the note on the next page. See previous page. 07610-002-23-32-AD... - Page 38 DOOR & ARM PARTS ITEM DESCRIPTION PART NUMBER Door Stop Kit 06401-003-08-69 Upper Door, Complete Assembly 05700-002-01-30 Plug, Cantilever 05340-011-35-00 Connecting Link 05700-021-92-45 Cantilever Arm, Complete Assembly (items 3, 5, 8, 9) 05700-004-51-87 Cantilever Arm, Arm Only 05700-004-51-40 Wear Button 05700-011-88-01 Bracket, Cantilever Arm Support 05700-031-88-00...
-
Page 39: Tub
PARTS 07610-002-23-32-AD... - Page 40 PARTS ITEM DESCRIPTION PART NUMBER 05700-004-53-36 Track Assembly 05700-002-01-00 Bulk Head Plug 04730-609-05-00 Wash Motor See "Motors" page. Gasket 05700-111-35-03 O-ring 05330-111-35-15 Bolt, Hex 3/8-16 x 1 1/4" Long 05305-276-10-00 Lower Wash Manifold Weldment 05700-031-46-00 Sump Strainer 05700-001-22-23 Bracket, Sump Strainer 05700-001-22-24 Locknut, 1/4-20 with Nylon Insert 05310-374-02-00...
- Page 41 PARTS ITEM DESCRIPTION PART NUMBER Lockwasher, 5/16", Split 05311-275-01-00 Nut, Hex, 5/16-18 05310-275-01-00 Locknut, 10-24 with Nylon Insert 05310-373-01-00 Cover, Wash Heater 05700-031-47-57 Decal, Warning-Disconnect Power 09905-004-08-16 Harness, 5-Connector 05700-004-23-78 Thermostat Mounting Bracket 05700-004-22-17 Wash Heater Gasket 05330-011-47-79 Probe, Thermistor 4” 06685-004-17-26 Thermostat, High Limit 05930-004-33-12...
-
Page 42: Steam Tub
STEAM TUB PARTS ITEM DESCRIPTION PART NUMBER Tub Weldment, HH Steam 05700-002-63-13 Track Assembly 05700-002-01-00 Bulk Head Plug 04730-609-05-00 Wash Motor See "Motors" page. 07610-002-23-32-AD... - Page 43 STEAM TUB PARTS ITEM DESCRIPTION PART NUMBER Gasket 05700-111-35-03 O-ring 05330-111-35-15 Bolt, Hex 3/8-16 x 1 1/4" 05305-276-10-00 Lower Wash Manifold Weldment 05700-031-46-00 Sump Strainer 05700-002-16-13 Bracket, Sump Strainer 05700-002-18-28 Locknut, 1/4-20 with Nylon Insert 05310-374-02-00 Strainer Weldment 05700-003-07-76 Wash Overflow Weldment 05700-001-25-69 Support, Ball Stop Lift (Not Shown) 05700-002-91-55...
-
Page 44: Frame
FRAME PARTS ITEM DESCRIPTION PART NUMBER Frame 05700-002-03-49 05700-002-62-41 Frame, 460 V Adjustable Foot, 1 1/2" 05340-108-02-06 Adjustable Foot, 3" 05340-002-14-55 05340-002-01-15 Adjustable Foot, Flanged Front Dress Panel 05700-002-01-42 07610-002-23-32-AD... -
Page 45: Rinse Tank
RINSE TANK PARTS Complete Assemblies 208-230 V, 14 kW 70 ◦ Rise - 05700-004-43-33 208-230 V, 12 kW 40 ◦ Rise - 05700-004-52-19 460 V, 14 kW 70 ◦ Rise - 05700-004-53-22 460 V, 12 kW 40 ◦ Rise - 05700-004-53-21 CAUTION! HH-E &... - Page 46 RINSE TANK PARTS Complete Assemblies 208-230 V, 14 kW 70 ◦ Rise - 06401-004-55-19 208-230 V, 12 kW 40 ◦ Rise - 06401-004-55-20 460 V, 14 kW 70 ◦ Rise - 06401-004-55-21 460 V, 12 kW 40 ◦ Rise - 06401-004-55-22 CAUTION! HH-E &...
-
Page 47: Steam Coil
STEAM COIL PARTS ITEM DESCRIPTION PART NUMBER Steam Coil, Complete Assembly 05700-002-08-62 Steam Coil 05700-021-41-38 Stand C, Steam Coil Support 05700-002-08-52 Stand D, Steam Coil Support 05700-002-08-53 Gasket, Steam Coil 05700-001-17-86 Washer, Steam Coil 05700-001-17-87 Adapter, Steam Coil Nut 05310-011-17-85 Stand A, Steam Coil Support 05700-002-08-50 Stand B, Steam Coil Support... -
Page 48: Motors
MOTORS PARTS Complete Assemblies (See next page for parts.) See Motor Rotation section. The models covered in this manual come supplied with various wash motor assemblies (a wash motor assembly includes the wash motor and the pump end), depending on the characteristics of the machine. To ensure you order the correct wash motor assembly for the model you are servicing, please refer to the following table: WASH MOTOR MODEL... - Page 49 MOTORS PARTS Parts (See previous page for complete assemblies.) ITEM DESCRIPTION PART NUMBER Pump Casing 208/230 V 05700-002-82-57 Pump Casing 460 V 05700-002-06-20 Impeller Assembly, 208/230 V 05700-002-82-50 Impeller Assembly, 460 V 05700-002-06-19 Mechanical Seal, 208/230 V 05330-002-34-22 Mechanical Seal, 460 V 05330-002-87-16 Motor Bolt 05700-002-82-55...
-
Page 50: Heaters
04540-121-47-39 04540-121-63-38 04540-121-47-39 04540-121-63-38 04540-121-47-39 04540-121-63-38 04540-121-47-39 04540-121-63-38 04540-121-47-39 04540-121-63-38 04540-002-44-31 04540-121-63-38 04540-002-43-09 04540-121-65-99 04540-121-63-39 04540-121-65-99 04540-121-63-39 TempStar HH-E NB Volts Phase Wash Heater 04540-121-47-39 04540-121-47-39 04540-121-47-39 Heater Phase Conversion Kit 04540-121-47-39 06401-004-00-22 04540-121-47-39 04540-121-47-39 04540-121-47-39 04540-121-47-39 04540-002-44-31 04540-002-43-09 04540-121-65-99... -
Page 51: Plumbing - Hh-E
PLUMBING - HH-E PARTS Top View Before ordering plumbing parts, see NOTICE the note on the next page. Back View 07610-002-23-32-AD... - Page 52 PLUMBING - HH-E PARTS ITEM DESCRIPTION PART NUMBER Plumbing, HH-E, Complete Assembly 05700-004-52-85 Plumbing, Inlet HH-E 05700-004-47-98 Vacuum Breaker, 1/2" Brass 04820-003-06-13 Plug, 1/8” Brass 04730-209-07-37 Casting, 1/2" Flanged Coupling 05700-004-47-97 Rinse Injector 05700-002-56-75 Gasket, Rinse Injector (Not Shown) 05330-111-42-81 Hose, 1/2"...
-
Page 53: Plumbing - Hh-E-Ver
PLUMBING - HH-E-VER PARTS Before ordering plumbing parts, see NOTICE the note on the next page. BACK OF MACHINE APPROX. 45° 07610-002-23-32-AD... - Page 54 PLUMBING - HH-E-VER PARTS ITEM DESCRIPTION PART NUMBER Plumbing, HH-E-VER, Complete Assembly 05700-004-52-07 Tee, 1/2" x 1/2" x 1/4" 04730-002-22-56 Fitting, 1/4" Barb, 1/4" Swivel 04730-011-95-41 Elbow, 90-degree, 1/2" Street Brass 04730-206-08-00 Nipple, 1/2" Close Brass 04730-207-15-00 Solenoid Valve, 1/2", 208 V 04810-003-71-56 Y-strainer, 1/2"...
-
Page 55: Inlet Plumbing - Hh S
Nipple, Close, 3/4’’ NPT, Black Iron 04730-907-01-00 INLET PLUMBING - HH S PARTS To order this complete assembly, use part number: 05700-002-01-60 Bushing, Reducing, 3/4’’ to 1/2’’ 04730-911-02-34 Union, 3/4’’ NPT, Black Iron Elbow, 3/4” 90° Street 2 per assembly 04730-011-87-37 04730-912-01-01 3/4”... -
Page 56: Outlet Plumbing - Hh S
OUTLET PLUMBING - HH S PARTS Union, 3/4’’ NPT, Black Iron To order this complete assembly, use part nu 04730-912-01-01 05700-002-01-55 Bushing, Reducing, 3/4’’ to 1/2’’ 04730-911-02-34 Steam Trap, 3/4” NPT F&T 06680-500-02-77 Elbow, 3/4” 90° Street 04730-011-87-37 Nipple, Close, 3/4’’ NPT, Black Iron 04730-907-01-00 To order this complete assembly, use part number: 05700-002-01-60... -
Page 57: Plumbing Options
PLUMBING OPTIONS PARTS SHOCK ABSORBER (WATER ARRESTOR) OPTION Water Arrestor, 1/2” 06685-100-05-00 Tee, 1/2” x 1/2” x 1/2” 04730-211-27-00 Nipple, 1/2”, Close, Brass 04730-207-15-00 WATER TREATMENT OPTION Scaltrol System Replacement Cartridge 04730-003-05-76 (inspect at least every 6 months) RSC-100 PRESSURE REGULATING VALVE OPTION* Pressure Gauge, 0-100 PSI 06685-111-88-34 Ball Valve, 1/4"... -
Page 58: Solenoid Valve & Vacuum Breaker Parts
SOLENOID VALVE & VACUUM BREAKER PARTS PARTS Screw Cap Screw Data Plate Coil & Housing Data Plate Valve Bonnet Spring 06401-003-07-40 Spring & Plunger 06401-003-07-40 Plunger Cap Retainer 06401-003-07-40 O-Ring O-Ring Diaphragm 06401-003-07-42 Retainer O-ring & Diaphragm Plunger 06401-003-07-42 Diaphragm 06401-003-07-42 Components of Repair Kit 06401-003-06-24... -
Page 59: Wash & Rinse Assemblies
WASH & RINSE ASSEMBLIES PARTS RINSE ARMS & MANIFOLD WASH ARMS & MANIFOLD 2, 3, 4 9, 18 6, 18 17, 8 17 18 2, 3, 19 07610-002-23-32-AD... - Page 60 WASH & RINSE ASSEMBLIES PARTS ITEM DESCRIPTION PART NUMBER Upper Manifold 05700-031-34-82 Nut, 3/8-16 Hex 05310-276-01-00 Lockwasher, 3/8" 05311-276-01-00 Bolt, Hex 3/8-16 x 7/8" 05306-011-36-95 O-ring 05330-111-35-15 Positioning Bracket, Manifold Tube 05700-011-34-63 Tube, Wash Manifold 05700-031-92-58 Gasket, Manifold 05700-111-35-03 Wash Arm Assembly 05700-004-13-13 Bearing Assembly 05700-021-35-97...
-
Page 61: Ver System
VER SYSTEM PARTS 07610-002-23-32-AD... - Page 62 VER SYSTEM PARTS ITEM DESCRIPTION PART NUMBER VER System, Complete Assembly 05700-004-53-27 Plate, Fan Mounting 05700-004-18-07 Upper Shroud 05700-004-18-06 Screw, 6-32 x 1 3/4" 05305-004-19-80 Locknut, 1/4-20 Hex with Nylon Insert 05310-374-01-00 Exhaust Box 05700-004-18-04 Gasket, Heat Exchanger 05330-004-18-22 Gauge 06680-011-86-42 Coil Box Back 05700-004-18-03...
-
Page 63: Ver System Door Interlock
VER SYSTEM DOOR INTERLOCK PARTS ITEM DESCRIPTION PART NUMBER Guide Block, Door Lock 09330-004-22-72 Cover, Door Lock Mounting 05700-004-22-80 Rod, Interlock Weldment 05700-004-23-15 Solenoid, Horizontal, 1" Push 04820-004-24-11 Spring, Compression 05935-004-24-10 Base, Door Interlock Box 05700-004-24-25 Screw, 3/8" Pan Head 05305-171-02-00 Washer, Flat #10 05311-173-02-00... -
Page 64: Ver System Door Interlock Override
VER SYSTEM DOOR INTERLOCK OVERRIDE PARTS The following instructions are for models equipped with the Door Interlock option. These instructions should only be used if the door interlock fails to unlatch and the doors won't open. 1. Turn machine off by flipping the power switch to "OFF." 2. -
Page 65: 460 V Machine Transformer Mounting Box
460 V MACHINE TRANSFORMER MOUNTING BOX PARTS 460 V Transformer 2 A Circuit Breaker 05950-111-65-93 05925-111-64-18 Transformer Mounting Bracket 05700-031-62-82 Transformer Mounting Box 05700-002-10-01 Transformer Mounting Box Top (Not Shown) 05700-000-78-53 07610-002-23-32-AD... -
Page 66: Kits
KITS PARTS Call 1-880-800-5672 to order kits for TempStar HH-E models and use the part numbers below: DESCRIPTION PART NUMBER Door Interlock Kit 06401-004-03-23 Door Magnet Cover Kit 06401-004-07-73 Drain Water Tempering Kit 06401-004-07-86 Exhaust Fan Contactor Kit 05700-004-35-35 False Panel Kit... -
Page 67: Schematics
HH-E/VER 208-230 V, NEW RINSE TANK SCHEMATICS 07610-002-23-32-AD... -
Page 68: Hh-E & Hh-E-Ver 460 V, New Rinse Tank
HH-E/VER 460 V, NEW RINSE TANK SCHEMATICS 07610-002-23-32-AD... -
Page 69: Hh-E & Hh-E-Ver 208/230 V, Old Rinse Tank
HH-E/VER 208-230 V, OLD RINSE TANK SCHEMATICS 07610-002-23-32-AD... -
Page 70: Hh-E & Hh-E-Ver 460 V, Old Rinse Tank
HH-E/VER 460 V, OLD RINSE TANK SCHEMATICS 07610-002-23-32-AD... -
Page 71: Nb 208/230 V
NB 208/230 V SCHEMATICS 07610-002-23-32-AD... - Page 72 NB 460 V SCHEMATICS 07610-002-23-32-AD...
-
Page 73: Hh S 208/230 V
HH S 208/230 V SCHEMATICS 07610-002-23-32-AD... -
Page 74: Sdi Options
SDI OPTIONS SCHEMATICS 07610-002-23-32-AD... - Page 76 Jackson WWS, Inc. • 6209 N. US Hwy 25E • Gray, KY 40734 USA 1.888.800.5672 • www.jacksonwws.com TempStar HH-E Manual • 07610-002-23-32-AD ®...