
Related Manuals for Runco Quantum Color Q-750d Series


Summary of Contents for Runco Quantum Color Q-750d Series
- Page 1 N S T A L L A T I O N P E R A T I O N A N U A L Q-750d Series LED Home Theater Projector and Digital High Definition (DHD™) Controller/Scaler/Processor Q-750d Q-750d/CineWide™ Q-750d/CineWide with AutoScope™...
-
Page 3: Runcocare™ Standard Two Year Limited Warranty
1. Runco may update this list of products excluded from this warranty from time to time at Runco’s sole discretion, but updates to the list of covered products will not apply on a retroactive basis. - Page 4 3. Runco Technical Support staff will attempt to correct any minor issues that may be causing the problem. If Runco is unable to fix the problem to the customer’s satisfaction, Runco will issue a Return Material Authorization (RMA) if it is determined that the claim was made within the coverage period of the Standard Limited Warranty.
- Page 5 6. Runco’s warranty does not cover black uniformity issues or other LCD issues associated with usage outside the Runco recommended guidelines and specifications for the product 7. Second day shipment delivery time and availability may vary based on origin and destination and Runco is unable to deliver to PO Box and FPO Box addresses Extended Service Options Runco offers extended and expanded service plans.
- Page 6 Runco. The trademarks reporduced in this Runco Owner’s Manual and used on the Runco Products are either owned by Runco or are licensed by Runco. You may not reproduce or use the trademarks without the prior written consent of Runco.
-
Page 7: Important Safety Instructions
Important Safety Instructions Thank you for your purchase of this quality Runco video product! For best performance, please read this manual carefully as it is your guide through the menus and operation. CAUTION RISK OF ELECTRIC SHOCK DO NOT OPEN... -
Page 8: Compliance Information
Council Directive 2006/95/EC and amended by M1 and C1 on Low Voltage Equipment Safety; EN 60950 “Safety of information technology equipment, including electrical business equipment” The Technical Construction file required by this Directive is maintained at the corporate headquarters of Runco International, LLC, located at 1195 NW Compton Drive, Beaverton, OR 97006-1992. - Page 9 FCC PART 15: NOTE: This equipment has been tested and found to comply with the limits for a Class B digital device, pursuant to Part 15 of the FCC Rules. These limits are designed to provide reasonable protection against harmful interference in a residential installation.
- Page 10 Notes: Q-750d Series Installation/Operation Manual...
-
Page 11: Table Of Contents
RuncoCare™ Standard Two Year Limited Warranty ... iii Important Safety Instructions ... vii Compliance Information ... viii 1. Introduction ...1 2. Controls and Functions ...5 3. Installation ...13 Q-750d Series Installation/Operation Manual About This Manual ...1 Target Audience ...1 If You Have Comments About This Manual..1 Textual and Graphic Conventions ...1 Using This Manual ...2 Description, Features and Benefits ...3... - Page 12 Table of Contents 4. Operation ...47 5. Maintenance and Troubleshooting ...71 Other Considerations ...21 Installing the Optional CineWide/AutoScope Lens Mount ...21 Installing the AutoScope Lens Motor (Q-750d/CineWide with AutoScope) ...22 Installing the Fixed CineWide Base Plate (Q-750d/CineWide) ...26 Mounting the Q-750d ...28 Floor Mounting (Upright) ...28 Ceiling Mounting (Inverted)...28 Adjusting the Projection Angle ...28...
- Page 13 6. External Control ...73 7. Specifications ...81 Q-750d Series Installation/Operation Manual Serial Communications ...73 RS-232 Connection and Port Configuration ...73 Serial Command Syntax ...73 Using Discrete IR Codes ...78 IR Command Protocol ...78 IR Command List...79 Q-750d Specifications ...81 DHD Controller Specifications ...83 Overall Dimensions –...
- Page 14 Table of Contents Notes: Q-750d Series Installation/Operation Manual...
- Page 15 List of Figures 2-1. Q-750d Front/Bottom/Side/Top Views ...5 2-2. Q-750d Rear Panel ...6 2-3. DHD Controller Front Panel ...7 2-4. DHD Controller Rear Panel ...8 2-5. DHD Controller/Q-750d Remote Control ...10 3-1. Estimating Throw Distance ...16 3-2. Projector Placement ...18 3-3.
- Page 16 List of Figures 4-8. CIE 1931 Color Coordinate Diagram and Effect of PCE Hue and Saturation Controls .64 6-1. RC5 Message Format ...79 7-1. Overall Dimensions – Q-750d ...84 7-2. Overall Dimensions – Q-750d/CineWide with AutoScope ...85 Q-750d Series Installation/Operation Manual...
-
Page 17: Introduction
Runco has prepared this manual to help home theater installers and end users get the most out of the Q-750d. Runco has made every effort to ensure that this manual is accurate as of the date it was printed. However, because of ongoing product improvements and customer feedback, it may require updating from time to time. -
Page 18: Using This Manual
Introduction Using This Manual Graphic Conventions: These symbols appear in numerous places throughout the manual, to emphasize points that you must keep in mind to avoid problems with your equipment or injury: TIPS highlight time-saving short cuts and helpful guidelines for using certain features. -
Page 19: Description, Features And Benefits
Integrating Runco's award-winning controller/processor technology for flawless images from any source, the Q-750d sets new standards in projection with Runco's game-changing InfiniLight™ LED lampless technology, Personal Color Equalizer and Runco SmartColor. Runco's revolutionary QuantumColor™ projectors pair energy-saving LED technology with proprietary Runco engineering to create unsurpassed performance and unrivaled customization. -
Page 20: Key Features And Benefits
Your Q-750d is shipped with the following items. If any items are missing or damaged, please contact your Runco dealer or Runco Customer Service at (800) 23-RUNCO. • Q-750d Series LED Home Theater Projector and DHD Controller •... -
Page 21: Controls And Functions
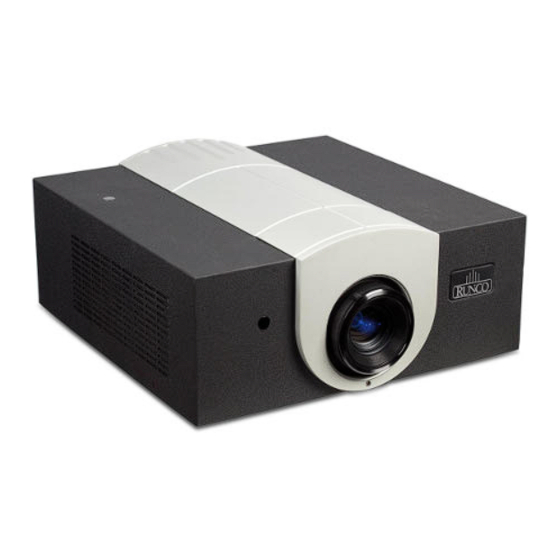
• INTAKE VENT Internal fans draw cool air into the projector through this vent. • RUNCO LOGO The logo can be rotated to match the projector orientation: inverted (ceiling-mounted) or upright. To rotate the logo, grip it at the sides, pull it away from the projector and rotate it 180 degrees. -
Page 22: Q-750D Rear Panel
Controls and Functions Q-750d Rear Panel Figure 2-2. Q-750d Rear Panel • FRONT IR SENSOR Receives infrared signals from the remote control unit. • EXHAUST VENT Warm air exits the projector through this vent. Ensure that it is not blocked. •... -
Page 23: Dhd Controller Front Panel
Q-750d 16:9 Figure 2-3. DHD Controller Front Panel 1. RUNCO ICON Lights blue to indicate that the controller is on or powering up. 2. IR SENSOR Receives IR commands from the remote control. 3. VACUUM FLUORESCENT DISPLAY Can be used instead of the On-Screen Display (OSD). -
Page 24: Dhd Controller Rear Panel
Controls and Functions DHD Controller Rear Panel Figure 2-4. DHD Controller Rear Panel 7. RIGHT BUTTON Used to direct-select inputs or move the menu cursor right in the OSD. When no menus are present on-screen, the RIGHT button toggles through the different sources, in this order: Composite Video - S-Video 1 - S-Video 2 - Component - HD 1 - HD 2 - SCART - HDMI 1 - HDMI 2... -
Page 25: Outputs
1. HDMI Out Connect this to the DHD Input on the Q-750d (see Figure 2-2). 2. Display Control Connect this to the RS-232 input on the Q-750d, using the provided communication cable. 3. TRIGGERS Connection for up to three (3), 12-volt trigger-controlled devices such as retractable screens, screen masks or a CineWide with AutoScope system. -
Page 26: Q-750D Remote Control Unit
Controls and Functions Q-750d Remote Control Unit Figure 2-5 shows the Q-750d remote control, and the paragraphs that follow describe its functionality. (not available on RETURN some models) EXIT HDMI HDMI CUST CUST Figure 2-5. DHD Controller/Q-750d Remote Control 16 : 9 4 : 3 Q-750d Series Installation/Operation Manual... - Page 27 1. IR OUTPUT INDICATOR Lights when a button is pressed to indicate that an IR signal is being transmitted. 2. ON / OFF Press to turn the projector on or off. 3. ENTER Press to select a highlighted menu item or confirm a changed setting. 4.
- Page 28 Controls and Functions 10. Aspect Ratio Selection Buttons Use the red buttons to select an aspect ratio directly or to enter numeric characters, as follows: 16:9 (3) For viewing 16:9 DVDs or HDTV programs in their native aspect ratio. 4:3 (6) Scales the input signal to fit 4:3 display mode in the center of the screen.
-
Page 29: Installation
Installation must be performed by a qualified custom video Note installation specialist. To install batteries in the remote control, press up on the battery cover retainer clip and lift off the cover. Install the two AAA batteries with the correct polarity and then replace the cover. -
Page 30: Quick Setup
Installation Quick Setup Table 3-1 gives a quick overview of the Q-750d installation process. The sections following this one provide detailed instructions. Table 3-1. Installation Overview Step Procedure Choose a location for the projector Install CineWide lens mounting assembly (stationary base plate or AutoScope lens motor –... -
Page 31: Installation Considerations
Proper installation of your projector will ensure the quality of your display. Whether you are installing a projector temporarily or permanently, you should take the following into account to ensure your projector performs optimally. Choose the installation type that best suits your needs: front or rear screen, floor mount or inverted mount. -
Page 32: Ambient Light
Installation ➤ Ambient Light ➤ Throw Distance In general, minimize or eliminate light sources directed at the screen. Contrast ratio in your images will be noticeably reduced if light directly strikes the screen, such as when a shaft of light from a window or floodlight falls on the image. Images may then appear washed out and less vibrant. - Page 33 Table 3-3 lists the available lens options for the Q-750d and their associated throw ratios. Table 3-3. Throw Ratios for the Q-750d Series Throw Ratio with Projector Model Primary Lens Only Minimum Maximum Standard Q-750d 1.85 – 2.40 Standard Q-750d with Optik A 1.56 –...
-
Page 34: Vertical And Horizontal Position
Installation ➤ Vertical and Horizontal Position ➤ Vertical and Horizontal Lens Shift Proper placement of the projector relative to the screen will yield a rectangular, perfectly-centered image that completely fills the screen. Ideally, the projector should be positioned perpendicular to the screen and in such a way that the lens center is aligned with either the top or bottom edge of the screen area, and centered horizontally. -
Page 35: Horizontal Lens Shift (Example Only)
100% Width Lens Shift (1.0 x W) Note: This is a general example of lens shift. Lenses vary in their shift capabilities. No particular lens or projector is used in this example. Figure 3-4. Horizontal Lens Shift (EXAMPLE ONLY) Vertical Lens Shift (Standard Q-750d): The Q-750d provides up to 60% of vertical lens shift up or down. -
Page 36: Folded Optics
In order to easily solve this issue, Runco recommends using the DHD Controller with a high-quality audio receiver that has the ability to effectively synchronize audio and video signals. -
Page 37: Other Considerations
Other considerations and tips that can help improve your installation: • Keep the ambient temperature constant and below 35°C (95°F). Keep the projector away from heating and/or air conditioning vents. Changes in temperature may cause drifts in the projector circuitry, which may affect performance. •... -
Page 38: Installing The Autoscope Lens Motor (Q-750D/Cinewide With Autoscope)
Installation ➤ Installing the AutoScope Lens Motor (Q-750d/CineWide with AutoScope) Figure 3-6 shows the Q-750d/CineWide with AutoScope motor assembly. CineWide with AutoScope Ceiling Mt. Adapter/ Projector Stand, Right Screw, Phillips Pan-Head, M6-1.0 x 12mm (14x) AutoScope Lens Motor Figure 3-6. Q-750d/CineWide with AutoScope Motor Assembly – Exploded View CineWide with AutoScope Ceiling Mt. - Page 39 Installation Remove Projector Front Feet: Remove Place the projector upside down on a blanket or other soft surface. Loosen and remove the two front feet on the projector. Install Ceiling Mount Adapters/Projector Stands: For ceiling installations, these brackets bring the mounting points for the projector mounting plate (included with the projector ceiling mount kit) from the bottom of the projector up and around the AutoScope lens motor housing.
- Page 40 Installation Figure 3-7. Q-750d with Ceiling Mount Adapters/Projector Stands DO NOT OVER-TIGHTEN THE SCREWS. Caution Install Lens Motor: 1. Position the AutoScope Lens Motor as shown in Figure 3-8. 2. Line up the mounting holes on the lens motor housing with those on the underside of the projector.
-
Page 41: Autoscope Lens Motor Installation
Installation 3. Secure the motor to the projector with the eight (8) remaining M6 x 12mm Pan-Head Phillips screws. Figure 3-8. AutoScope Lens Motor Installation After you have installed the AutoScope lens motor, proceed with Mounting the Q-750d (page 28). Q-750d Series Installation/Operation Manual... -
Page 42: Installing The Fixed Cinewide Base Plate (Q-750D/Cinewide)
Installation ➤ Installing the Fixed CineWide Base Plate (Q-750d/CineWide) Figure 3-9 shows the anamorphic lens base plate assembly for a Q-750d/CineWide. Screw, Phillips Pan-Head, M6 x 1.0 x 12mm (6x) Anamorphic Lens Base Plate Figure 3-9. Q-750d/CineWide with Anamorphic Lens Base Plate and Ceiling Mounting Rails - Exploded View Ceiling Mount Rails (part of... - Page 43 To install the fixed CineWide base plate on a Q-750d/CineWide: 1. Place the projector upside down on a blanket or other soft surface. 2. Place the CineWide base plate on the bottom of the projector. 3. If you are mounting the projector on a ceiling: Line up the three holes on the left and right mounting rails (included with the projector ceiling mount kit) with those on the projector and base plate.
-
Page 44: Mounting The Q-750D
Q-750d and suspend it from the ceiling using a specially-designed ceiling mount fixture. Use only the Runco-approved ceiling mount kit designed for your Note projector. Install the mount kit according to the instructions provided with it. -
Page 45: Connections To The Q-750D And Dhd Controller
Proceed as follows to connect the DHD Controller to the Q-750d, your video sources, external controller(s) – if present – and AC power. When connecting your equipment: • Turn off all equipment before making any connections. • Use the correct signal cables for each source. •... - Page 46 Installation RS-232 Connection: Connect the Display Control output from the DHD Controller to the RS-232 input on the Q-750d. Use a standard, modular telephone cable with RJ11 plugs at both ends. On the Q-750d end, use the provided RJ11-to-DB9 adapter. This adapter is wired as shown in Figure 3-11.
-
Page 47: Connecting Source Components To The Dhd Controller
Connect your video sources to the DHD Controller as shown and described in the sections that follow. HDMI Source Connections: See Figure 3-12. Use the HDMI inputs whenever possible. This ensures the highest video quality because the signal is carried in the digital domain throughout the entire signal path, from source component output into the projector. -
Page 48: Component Video Source Connections
Installation Component Video Source Connections: Connect your component video sources to the HD1, HD2 and/or Component/SCART inputs as shown in Figure 3-13. RCA-to-BNC adapter COMPONEN T VIDEO OUT BD/DVD Figure 3-13. Component Video Source Connections DTV-Set-Top Box (DTV-STB) Q-750d Series Installation/Operation Manual... -
Page 49: Rgbhv Source Connections
RGBHV Source Connections: Connect personal computers and/or other RGB sources to the HD1, HD2 and/or Component/SCART inputs as shown in Figure 3-14. Computer Figure 3-14. RGBHV Source Connections Q-750d Series Installation/Operation Manual BNC-to-RCA adapter RGB Camcorder Installation... -
Page 50: Scart Rgbs Source Connections
Installation SCART RGBS Source Connections: Connect the green, blue and red outputs from your SCART source to the Component/SCART input on the DHD Controller. Connect the sync output from your SCART source to the Video input on the DHD Controller. See Figure 3-15. - Page 51 Composite and S-Video Source Connections: See Figure 3-16. Camcorder Gaming Console Figure 3-16. S-Video and Composite Video Source Connections Q-750d Series Installation/Operation Manual Composite S-Video S-Video Installation...
-
Page 52: Controller Connection
Installation ➤ RS-232 Controller Connection Use a straight-through, 9-pin RS-232 cable to connect a PC or control/automation system (if present) to the RS-232 port on the DHD Controller; see Figure 3-17. For more information about using this connection, refer to External Control on page 73. to Automation/ Control System or PC... -
Page 53: Connecting 12-Volt Trigger Outputs To External Equipment
If your Q-750d is equipped with a CineWide with AutoScope system, connect the AutoScope lens motor to a 12-volt trigger output on the DHD Controller; see Figure 3-18. Similarly connect other 12-volt trigger-activated equipment (such as retractable screens or screen masks) to the other trigger outputs. AutoScope Lens Motor Power AC Input... -
Page 54: Connecting An External Ir Receiver To The Dhd Controller
Installation ➤ Connecting an External IR If infrared signals from the remote control cannot reach the DHD Controller due to Receiver to the DHD excessive distance or obstructions such as walls or cabinet doors, you can connect an Controller external IR receiver to the DHD Controller to extend the range of the remote control. See Figure 3-19. -
Page 55: Connecting To Ac Power
Projector/DHD Controller: Plug the female end of one power cord into the AC receptacle on the rear of the Q-750d (AC 100V ~ 240V). Then, connect the other end to your AC power source. Similarly connect the DHD Controller to a nearby AC outlet. AutoScope Lens Motor: With AutoScope-equipped projectors, an additional power cord is provided for the lens motor. -
Page 56: Primary Lens Adjustments
Installation Primary Lens Adjustments ➤ Focus and Zoom ➤ Lens Shift Adjusting the Picture Orientation The Q-750d gives you a great deal of control over the picture size, position and focus. To focus the projected image, grasp the lens by the outer ring and rotate it. -
Page 57: Installing And Adjusting The Cinewide Anamorphic Lens
The Q-750d Anamorphic lens mount kit consists of everything shown in Figure 3-20. Some components shipped with your projector may differ slightly from what is shown in these instructions. If any items are missing or damaged, please contact your Runco dealer or Runco Customer Service at (800) 23-RUNCO. - Page 58 Installation Attach Lens Mounting Assembly to Lens Motor Carriage Plate or Fixed CineWide Base Plate: 1. Remove the two Yaw/X Adjustment Levers (item #8) from the bottom of the Anamorphic Lens Holder (item #5). 2. Place the Anamorphic Lens Holder on top of the AutoScope Carriage Plate or Fixed CineWide Base Plate (item #7).
- Page 59 Configure Lens Motor Trigger (Q-750d/CineWide with AutoScope only): CineWide with AutoScope maintains constant image height independent of the aspect ratio, while using the full display resolution of the projector. It accomplishes this by moving the anamorphic lens in front of the primary lens when widescreen material is being viewed. When the viewer transitions back to 16:9 or 4:3 source material, the anamorphic lens moves out of the light path.
- Page 60 There may be some pincushion distortion even after the lens is Note properly adjusted, especially at shorter throw distances. If this is the case, Runco recommends that you slightly over-scan the image into the screen frame area to mask the distortion. Correct position...
- Page 61 Installation Adjusting the Yaw: Loosen the Yaw/X-Adjustment Levers to allow the lens to pivot freely from side to side. Then, angle the lens to even out any left-right pincushion distortion: Anamorphic Lens (Top View) Correct Position Wrong Position Once the proper lens angle has been set, firmly tighten the Yaw/X-Adjustment Levers to secure the lens in place.
- Page 62 Installation Geometry: 1. Input an anamorphic cross-hatch test pattern to the projector. 2. Unscrew the Anamorphic Lens just enough to allow it to rotate freely. 3. Grasp the lens by the center ring and rotate the lens until the image is properly anamorphic: Wrong Position 4.
-
Page 63: Operation
Saturation (Red / Yellow / Green / Cyan / Blue / Magenta) Level (Red / Yellow / Green / Cyan / Blue / Magenta) Runco Smart Color (RSC) (On or Off) White Balance (Red / Green / Blue Gain) Brightness... -
Page 64: Main Menu
Sync Threshold HDMI EDID Extension Front Panel Brightness Auto Power Off System Reset Figure 4-1. DHD Controller OSD Menu Structure for Q-750d (continued) ➤ Main Menu Runco Video Input Source Aspect Ratio Picture Input Position Memory Presets Information Calibration Service... -
Page 65: Input Source
From the Main Menu, select Input Source to choose a video signal source. The active source is indicated by an arrow ( active source. To change the aspect ratio (size and shape) of the projected image, select Aspect Ratio from the Main Menu and press ENTER. Select the appropriate aspect ratio for your screen size and the type of program material being viewed;... - Page 66 Operation Table 4-1. Aspect Ratio Settings Remote Aspect Ratio Control 16:9 16:9 4:3 Image, stretched to fill 16:9 Screen (Display) Letterbox LBOX (Letterbox aspect ratio) VirtualWide VWIDE Description Select 16:9 to view 16:9 DVDs and HDTV programs in their native aspect ratio. 16:9 Image on 16:9 Screen (Display) 4:3 images are stretched...
- Page 67 Table 4-1. Aspect Ratio Settings (continued) Remote Aspect Ratio Control Cinema CINEMA (Cinema aspect ratio / no CineWide) ( Cinema aspect ratio / CineWide) Virtual Cinema Native (none) Q-750d Series Installation/Operation Manual Description Select Cinema to view 2.35 source material in its native aspect ratio.
-
Page 68: Picture
Runco video display devices. Accordingly, Runco recommends that setup and calibration be performed by an ISF certified installation technician. - Page 69 PLUGE patterns vary but generally consist of some combination of black, white and gray areas against a black background. The example above includes two vertical bars and four shaded boxes. Select Brightness from the Picture menu and press ENTER. Adjust the brightness so that: •...
- Page 70 Operation Color Saturation: On your external test pattern source, select a color bar pattern like the one shown in Figure 4-4. Figure 4-4. Typical Color Bar Pattern for Adjusting Color Saturation and Tint 1. Press the MENU button on the remote control or DHD Controller front panel. 2.
- Page 71 11.Adjust the color saturation level until the outermost (gray and blue) color bars appear to be a single shade of blue: Tint: Tint or “hue” is essentially the ratio of red to green in the color portion of the image. When tint is decreased, the image appears redder;...
-
Page 72: Input Position
Operation ➤ Input Position Input Position Left/Right Up/Down Width Height Overscan Overscan Mode Phase Tracking Sharpness: “Sharpness” is the amount of high-frequency detail in the image. To adjust sharpness, select Sharpness from the Picture menu and press ENTER. On your external test pattern source, select a pattern like the one shown in Figure 4-5. -
Page 73: Overscan Modes
Overscan/Overscan Mode: Overscan pushes the outside edge of the active picture area of the video signal out beyond the edge of the display area. Some television programs are produced based on the assumption that older television sets may not display the outer edges of the broadcast picture area. Overscan effectively trims away these inactive, outer edges and enlarges the remaining portion of the image to fill the display area. -
Page 74: Memory Presets
Operation ➤ Memory Presets Memory Presets ISF Night ISF Day Custom 1 Save Reset Custom 2 Save Reset Phase (RGB, Component or SCART sources): This control adjusts the phase of the pixel sampling clock relative to the incoming signal. Adjust the phase when an RGB, Component or SCART image still shows shimmer or “noise”... -
Page 75: Sleep Timer
You should save changes to any of the following settings to a preset; otherwise they will be lost when a new input source or resolution is selected: • Brightness • Contrast • Color saturation • Tint • Sharpness • Gamma •... -
Page 76: Information
DHD Controller and display device. Should you ever need to contact Runco Technical Support, this information will help them answer your questions or resolve product performance issues. - Page 77 If excess ambient light washes out the image and it becomes difficult or impossible to see details in dark areas, lower the gamma setting to compensate. This improves contrast while maintaining good details for blacks. Conversely, if the image is washed out and unnatural, with excessive detail in black areas, increase the setting.
- Page 78 • Select SMPTE-C to use the color gamut defined in SMPTE 170M-1999. • Select EBU to use the color gamut defined in EBU Tech. 3213-E. • Select Native for Runco's recommended Personal Color Equalizer preset for typical video sources. It displays the fully saturated LED color gamut with appropriate color brightness, hue, and Runco Smart Color settings.
- Page 79 Table 4-3 lists the x- and y-coordinates for each primary and secondary color component. Table 4-3. x/y Color Gamut Values Color Gamut Settings and Associated x/y Values Primary REC709 Color 0.640 0.330 0.635 Yellow 0.419 0.505 0.421 Green 0.300 0.600 0.305 Cyan 0.225...
- Page 80 Figure 4-8. CIE 1931 Color Coordinate Diagram and Effect of PCE Hue and Saturation Controls • RSC™ (Runco Smart Color): Set RSC to On to to improve the accuracy of flesh tones and increase color saturation, without sacrificing the purity of other colors.
- Page 81 Input Image: The Input Image controls are functionally similar to those in the Picture menu (refer to page 52), but are accessible only by entering the Calibration menu passcode. The Input Image settings establish the “zero point” for the Picture Note menu settings, whose values represent offsets from the Input Image settings.
-
Page 82: Service
• Splash Timer: When you turn on the Q-750d, it projects a welcome screen with the Runco and ISF logos, along with the personalized information you enter as described above. Select Splash Timer from the Splash Configure menu to set the amount of time for which this screen appears. - Page 83 Input Names: You can give each DHD Controller input a descriptive name. For example, you may want to change the default input name to the type of source component connected to it: “VCR,” “DVD,” “Laptop” et cetera. Input names can be up to 12 characters long.
- Page 84 Operation Display Device - Configure: The options in the Display Device - Configure menu allow you to change the picture orientation, perform lens adjustments or access other, display-device specific functions. • Installation – Orientation: Select Installation from the Display Device - Configure menu, then select Orientation to change the picture orientation to suit the method of installation (Floor Front, Floor Rear, Ceiling Front or Ceiling Rear).
- Page 85 Miscellaneous: Select Miscellaneous from the Service menu to set the following options: • Language: Select Language from the Miscellaneous menu and press the up- or down-arrows to select the OSD Language (English, Français, Deutsch, Italiano, Español, Svenska, Traditional Chinese, Simplified Chinese, Português or Russian). •...
- Page 86 Operation Front Panel Brightness: Select Front Panel Brightness from the Service menu to adjust the brightness of the front-panel LED and LCD status indicators. Logo LED • Logo LED: Select Logo LED from the Front Panel Brightness menu to adjust the brightness of the large, illuminated logo on the left side of the display.
-
Page 87: Maintenance And Troubleshooting
Neither the DHD Controller • The batteries in the remote nor the projector turns on. On the DHD Controller, the Runco icon LED is off and the standby LED is on. The DHD Controller turns on, • The DHD Controller is but the projector does not. - Page 88 Maintenance and Troubleshooting Table 5-1. Troubleshooting Chart (continued) Symptom Colors in the image are • The Red/Pr, Green/Y or swapped; for example, reds appear blue or vice versa. Image geometry is incorrect. • Incorrect aspect ratio Possible Cause(s) • Ensure that the source Blue/Pb outputs from the outputs are connected to source are connected to...
-
Page 89: External Control
In addition to using the DHD Controller front-panel keypad or remote control unit, there are two methods of controlling the Q-750d and DHD Controller externally: • Using a serial (RS-232) link to send ASCII commands and receive responses to those commands. - Page 90 External Control Table 6-1 lists the RS-232 command set. The “Parameter (min/max)” column shows the valid parameter ranges, or “NA” for commands that take no parameters. When you enter a valid command, the DHD Controller executes it and acknowledges it with a plus sign on the command line (+ >).
- Page 91 Table 6-1. Serial Commands (continued) Parameter Command (min/max) Aspect Ratio Commands 16:9 ASPECT? CINEMA LETTERBOX NATIVE VIRTUALWIDE VIRTUALCINEMA Picture Adjust Commands BRIGHTNESS -50/50 BRIGHTNESS? CHROMADELAY -7/7 CHROMADELAY? COLOR -50/50 COLOR? CONTRAST -50/50 CONTRAST? FILMMODE FILMMODE? FILTER 0/10 FILTER? PHASE 0/31 PHASE? SHARPNESS -50/50...
- Page 92 External Control Table 6-1. Serial Commands (continued) Parameter Command (min/max) Image Preset Commands CUSTOM1 CUSTOM2 NIGHT PRESET? Input Position Commands IHEIGHT 0/20 IHEIGHT? IHPOS -50/50 IHPOS? IVPOS -50/50 IVPOS? IWIDTH 0/50 IWIDTH? OVERSCAN 0/20 OVERSCAN? OVERSCANMODE OVERSCANMODE? Output Shift Commands OHEIGHT -50/50 OHEIGHT?
- Page 93 Table 6-1. Serial Commands (continued) Parameter Command (min/max) Sleep Timer Commands SLEEPTMR? STOFF ST30MIN ST60MIN ST90MIN ST2HRS ST4HRS Miscellaneous Commands DISPLAY? INRES? MODEL? OUTRES? SERNUM? SWVER? SYSSTATE? TRIGGER The following serial commands are meant to emulate buttons on the remote control or DHD Con- troller front panel.
-
Page 94: Using Discrete Ir Codes
External Control Using Discrete IR Codes ➤ IR Command Protocol The DHD Controller accepts commands in the form of IR signals that conform to the Phillips RC5 protocol. Each DHD Controller remote control button has an RC5 control code associated with it. You can use these codes to program a third-party, “universal”... -
Page 95: Ir Command List
Figure 6-1 shows the pulse train for this command (with the toggle bit set to zero). Data Word Start Bits Toggle Bit Encoded Data Word 1.78 ms Modulated Carrier Zoom In of Carrier 27.8 µs First Packet RC5 Packet Transmission 14 cycles, 24.9 ms 64 cycles, 113.8 ms Figure 6-1. - Page 96 External Control Table 6-2. RC5 Control Codes for the DHD Controller (continued) RC5 Data from Remote Control Remote Button Name Control (Note) CUST 1 0x3472 CUST 2 0x3473 DOWN 0x3446 ENTER 0x3444 EXIT 0x3474 HD 1 0x3451 HD 2 0x3452 HDMI 1 0x3453 HDMI 2...
-
Page 97: Specifications
Table 7-1. Q-750d Specifications Projector Type: Digital Light Processing™ (DLP™),Single-Chip, 16:9 SuperOnyx™ DMD™ with InfiniLight Illumination: RGB InfiniLight Runco Smart Color Native Resolution: Full HD, 1920 x 1080 (16:9) Aspect Ratios: Refer to Table 7-2 Video Standards: Refer to Table 7-2... - Page 98 Colors have up to 50% higher contrast than Mercury or Xenon lamp systems. These are typical projector brightness and contrast specifications found in most companies’ sales literature. Runco includes these measurements in its literature to allow for direct comparison with other manufacturers’ projectors. These measurements are typically taken at 9,000K to 13,000K to get expected performance data when the projector is used in professional, commercial and industrial displays.
-
Page 99: Dhd Controller Specifications
Table 7-2 lists the DHD Controller specifications. Table 7-2. DHD Controller Specifications Aspect Ratios: 4:3, Letterbox, 16:9, VirtualWide, Cinema, Virtual Cinema, Native Video Standards: NTSC, PAL Inputs: (1) Composite (2) S-Video (1) Component/RGBHV/SCART (5 x RCA) (2) Component/RGBHV (5 x BNC) (2) HDMI with HDCP Output: HDMI 1.3 with HDCP... -
Page 100: Overall Dimensions - Q-750D
Specifications Overall Dimensions – Q-750d Figure 7-1 shows the Q-750d dimensions (all dimensions are in millimeters and [inches]). Figure 7-1. Overall Dimensions – Q-750d Q-750d Series Installation/Operation Manual... -
Page 101: Overall Dimensions - Q-750D/Cinewide With Autoscope
Figure 7-2 shows the Q-750d/CineWide with AutoScope dimensions (all dimensions are in millimeters and [inches]). Figure 7-2. Overall Dimensions – Q-750d/CineWide with AutoScope Q-750d Series Installation/Operation Manual Overall Dimensions – Q-750d/CineWide with AutoScope Specifications... -
Page 102: Supported Timings
Specifications Supported Timings Table 7-3. Supported Signal Timings by Input Refresh Format Resolution Rate (Hz) 60.00 66.59 640x480 640x480 72.00 75.00 85.00 60.00 72.00 800x600 800x600 75.00 85.00 832x624 832x624 74.54 47.95 848x480 848x480 60.00 60.00 70.00 1024x768 1024x768 75.00 85.00 1152x864 1152x864... - Page 103 Table 7-3. Supported Signal Timings by Input (continued) Refresh Format Resolution Rate (Hz) 60.00 1280x1024 1280x1024 75.00 85.00 1360x768 1360x768 60.00 60.00 1400x1050 1400x1050 60.00 75.00 1600x1200 1600x1200 60.00 1680x1050 1680x1050 60.00 1920x1080 1920x1080 47.95 1920x1200 1920x1200 60.00 SCART – 50.00 RGBS 480/60i...
- Page 104 Specifications Table 7-3. Supported Signal Timings by Input (continued) Refresh Format Resolution Rate (Hz) PAL-M – 59.94/60.00 15.734/15.750 PAL-N – 50.00 SECAM – 50.00 Horizontal Pixel Frequency Frequency (MHz) (kHz) 3.580 – 15.625 3.580 – 15.625 13.500 – Supported? (√ = Yes, – = No) √...
- Page 106 020-0997-00 Rev. A November 2009 Runco International • (800) 23RUNCO • Fax (503) 748-8161 • www.runco.com...