Accu-Chek Aviva User Manual
Hide thumbs
Also See for Aviva:
- Quick start manual ,
- Owner's booklet (316 pages) ,
- Standard owner’s booklet (306 pages)
Table of Contents
Advertisement
Advertisement
Table of Contents
Troubleshooting

Related Manuals for Accu-Chek Aviva


Summary of Contents for Accu-Chek Aviva
- Page 1 User’s Manual Blood Glucose Meter...
-
Page 2: Table Of Contents
Chapter 3: Meter Memory, Setup, and Data Transfer ............15 Chapter 4: Control Tests ....................25 Chapter 5: Maintenance and Troubleshooting ..............29 Chapter 6: Technical Information ..................35 Chapter 7: The Accu-Chek FastClix Finger Pricker ............41 Index ..........................48... -
Page 3: Introduction
The Accu-Chek Aviva meter with the Accu-Chek Aviva test strips provide a complete test system that is meant for in vitro diagnostic use by people with diabetes at home. The system is not for use in diagnosis or screening of diabetes mellitus. - Page 4 Introduction WARNING The Accu-Chek FastClix finger pricker is intended for patient self-monitoring by an individual person only. It must not be used to collect blood from more than one person as it does not incorporate any features to guard against cross-infection.
-
Page 5: Chapter 1: Your New System
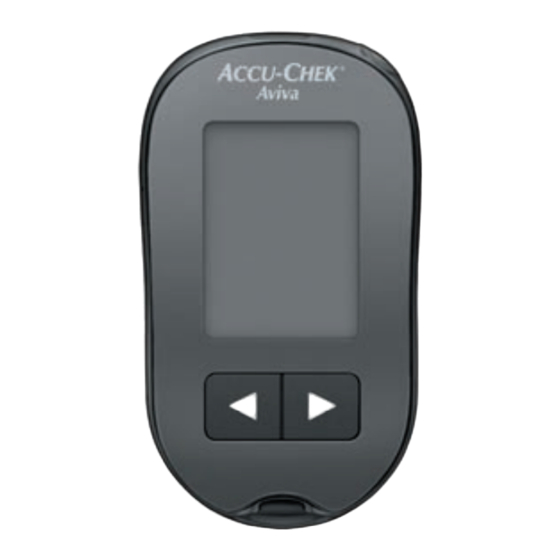
Your New System The Accu-Chek Aviva Meter 5. Battery Door 1. Power/Set Button Turns meter on or o and sets options. 6. Infrared (IR) Window Transfers data from meter to computer. 2. Display Shows results, messages, and test results stored in memory. - Page 6 Your New System (for example) 7. Test Strip Container* 11. Battery 8. Insert this end into meter. 9. Yellow Window Touch blood drop or control solution here. 10. Control Solution Bottle* *Some items may not be included in the kit. They are a separate purchase.
- Page 7 Your New System Using the Accu-Chek Aviva System • Use only Accu-Chek Aviva test strips. • Use the test strip immediately after removing it from the test strip container. • Do not apply blood or control solution to the test strip before inserting it into the meter.
- Page 8 If one of the segments is missing or looks di erent from the picture, do not use the meter. Contact the Accu-Chek Customer Careline on 0800 701 000 (UK) or 1 800 709 600 (ROI). Adjust settings for time and date,...
-
Page 9: Chapter 2: Blood Glucose Tests
Blood samples taken from the palm are equivalent to blood samples taken from the fingertip. To receive Alternative Site Testing (AST) instructions and an AST cap for obtaining blood from the palm, contact the Accu-Chek Customer Careline on 0800 701 000 (UK) or 1 800 709 600 (ROI). WARNING Blood glucose results can be displayed in either mg/dL or mmol/L. - Page 10 Before you perform your first blood glucose test, set up the meter correctly. You need the meter, a test strip, a finger pricker, and a lancet. Prepare the finger pricker. See Chapter 7, The Accu-Chek FastClix Finger Pricker. Wash and dry your hands. Check the use by date on Insert the test strip into the test strip container.
- Page 11 Blood Glucose Tests The test result appears on the display. To assign a marker to the test result, leave the test strip in the meter. See Chapter 2, Marking Blood Glucose Results and Setting the Post-Meal Test Reminder. Otherwise, remove and discard the used test strip. After a successful test, the meter turns itself o 5 seconds after the test strip is removed.
- Page 12 Blood Glucose Tests Performing a Blood Glucose Test with Blood from Your Palm, Forearm, or Upper Arm (Alternative Site Testing) You have the option of obtaining a blood sample from other sites on your body besides the fingertip. Alternative sites include the palm, forearm, and upper arm. Blood obtained from the fingertip can be used at any time to perform a blood glucose test.
- Page 13 If you are interested in AST, talk to your healthcare professional first. *For samples from the palm you will need an AST converter cap, which can be obtained by contacting the Accu-Chek Customer Careline on 0800 701 000 (UK) or 1 800 709 600 (ROI).
- Page 14 Blood Glucose Tests Marking Blood Glucose Results and Setting the Post-Meal Test Reminder You can mark a blood glucose result to indicate a special event. If you select a test result marker, it is automatically stored in memory. When you review the test results in memory, these markers can help you remember what was di erent about the test result.
-
Page 15: Unusual Blood Glucose Results
5. Did you follow the directions? See Chapter 2, Blood Glucose Tests, and repeat the blood glucose test. Contact the Accu-Chek Customer Careline on 0800 701 000 (UK) or 1 800 709 600 (ROI) if you still have problems. -
Page 16: Symptoms Of Low Or High Blood Glucose
Blood Glucose Tests Symptoms of Low or High Blood Glucose Being aware of the symptoms of low or high blood glucose can help you understand your test results and decide what to do if they seem unusual. Low blood glucose (hypoglycaemia): Symptoms of hypoglycaemia may include, but are not limited to: anxiety, shakiness, sweating, headache, increased hunger, dizziness, pale skin colour, sudden change in mood or irritability, fatigue, di culty concentrating, clumsiness, palpitations, and/or confusion. -
Page 17: Chapter 3: Meter Memory, Setup, And Data Transfer
• Control results are stored in memory, but cannot be reviewed on the meter. To view stored control results, first transfer them to a compatible software application. Contact the Accu-Chek Customer Careline on 0800 701 000 (UK) or 1 800 709 600 (ROI) for product availability. - Page 18 Meter Memory, Setup, and Data Transfer Memory Viewing Test Results in Memory With the meter on or o , press and release to enter memory. The most recent test result appears on the display. Button Function Action Previous test results Press to view previous test results from newest to oldest.
- Page 19 Meter Memory, Setup, and Data Transfer Setup Using the Set-Up Mode The following features can be customised as required. Symbol Function Action Factory Pre-set Time and date Set the time and date. Beeper Select On or OFF. Setting the beeper to OFF does not a ect test results.
- Page 20 Meter Memory, Setup, and Data Transfer Setup Setting the Time and Date Press and release Press and hold until Repeat step 3 to set Press and release set-up appears on the minutes, day, month, and (power/set button) to turn to decrease or the meter on.
- Page 21 Meter Memory, Setup, and Data Transfer Setup Setting the Beeper On or OFF NOTE The beeper prompts you: • to apply blood or control solution to the test strip. • when enough blood or control solution is drawn into the test strip. •...
- Page 22 Meter Memory, Setup, and Data Transfer Setup Setting the Post-Meal Test Reminder NOTE The post-meal test reminder: • If a test was performed within 15 minutes • beeps 1 or 2 hours after the blood glucose of a test reminder, the test reminder does test to remind you to do a post-meal test.
- Page 23 Meter Memory, Setup, and Data Transfer Setup Setting the Test Reminders NOTE Test reminders: • If a test was performed within 15 minutes • beep at the same time each day. of a test reminder, the test reminder does • beep every 2 minutes up to 3 times. not beep.
- Page 24 Meter Memory, Setup, and Data Transfer Either set the A-2 test reminder or press and release to set up more options. To exit, press and hold until the flashing test strip symbol appears on the Press and release display. to select 00, 15, 30, or 45.
- Page 25 Meter Memory, Setup, and Data Transfer Setup Setting the Hypoglycaemic Alert WARNING • This function is no substitute for hypoglycaemia training by your healthcare professional. • Before you set the hypoglycaemic alert, talk to your healthcare professional to help you decide what blood glucose level is your hypoglycaemic level.
-
Page 26: Data Transfer
Data Transfer Transferring Results to a Computer We o er software to help you transfer your results. For information on Accu-Chek software, contact the Accu-Chek Customer Careline on 0800 701 000 (UK) or 1 800 709 600 (ROI). You can transfer your stored results to a computer to track, identify patterns, and print. -
Page 27: Chapter 4: Control Tests
• you want to check if you are performing the test correctly. About the Control Solution • Use only Accu-Chek Aviva control solution. • Close the control solution bottle tightly after use. • Write the date you open the control solution bottle on the bottle label. The control solution must be discarded 3 months from the date the control solution bottle was opened (discard date) or on the use by date on the bottle label, whichever comes first. -
Page 28: Performing A Control Test
Control Tests Performing a Control Test You need the meter, a test strip, and control solution Level 1 or Level 2. Check the use by date on Insert the test strip into Select the control solution Remove the cap from the the test strip container. - Page 29 Control Tests (for example) (for example) The control result, the Press and release to set the control level in the bottle symbol, and a meter. flashing L appear on the OK and the control result alternate on the display if display.
- Page 30 6. Did you follow the directions? Read Chapter 4, Control Tests, and repeat the control test. If you still have problems, contact the Accu-Chek Customer Careline on 0800 701 000 (UK) or 1 800 709 600 (ROI). 7. Did you choose the correct control...
-
Page 31: Chapter 5: Maintenance And Troubleshooting
The meter automatically tests its own systems every time you turn it on and lets you know if something is wrong. See Chapter 5, Display and Error Messages. If you drop the meter or think the results are not accurate, contact the Accu-Chek Customer Careline on 0800 701 000 (UK) or 1 800 709 600 (ROI). -
Page 32: Maintenance And Troubleshooting
Maintenance and Troubleshooting Cleaning the Meter Keep the meter free of dust. If you need to clean or disinfect it, follow these guidelines carefully to help you get the best performance possible. WARNING • Do not allow liquid to enter any openings in the meter. •... -
Page 33: Display And Error Messages
WARNING • Never make therapy decisions based on an error message. • If you have any concerns or see any other error display, contact the Accu-Chek Customer Careline on 0800 701 000 (UK) or 1 800 709 600 (ROI). Display... - Page 34 Maintenance and Troubleshooting Display Action Blood glucose is below the defined hypoglycaemic (low blood glucose) level. See Chapter 2, Unusual Blood Glucose Results. A general marker was assigned to this test result. A pre-meal marker was assigned to this test result. A post-meal marker was assigned to this test result.
- Page 35 Maintenance and Troubleshooting Display Action Not enough blood or control solution was drawn into the test strip for measurement or was applied after the test had started. Discard the test strip and repeat the blood glucose or control test. Blood or control solution was applied to the test strip before the flashing drop symbol appeared on the display.
- Page 36 Maintenance and Troubleshooting...
-
Page 37: Chapter 6: Technical Information
Dimensions 94 × 52 × 21 mm (LWH) Weight Approx. 59 g (with battery) Construction Hand-held Protection class Meter type The Accu-Chek Aviva meter is suitable for continuous operation. Control solution storage conditions Refer to the control solution package insert. -
Page 38: Technical Information
Technical Information Electromagnetic Compatibility – This meter meets the electromagnetic immunity requirements as per EN ISO 15197 Annex A. The chosen basis for electrostatic discharge immunity testing was basic standard IEC 61000-4-2. In addition, the meter meets the electromagnetic emissions requirements as per EN 61326. The meter’s electromagnetic emission is thus low. -
Page 39: Explanation Of Symbols
Technical Information Explanation of Symbols These symbols may appear on the packaging, on the type plate, and in the instructions for the Accu-Chek Aviva meter. Consult instructions for use Caution, refer to safety-related notes in the instructions for use accompanying this product. - Page 40 Technical Information On the finger pricker itself and on the packaging of the Accu-Chek FastClix finger pricker, you will encounter the following symbols, shown here with their meaning. Use only once Use by Batch code Sterilized using irradiation This product fulfils the requirements of the European Directive 93/42/EEC on medical...
-
Page 41: Warranty And Service Instructions
The statutory provisions on rights in consumer goods sales in the country of purchase shall apply. Additional Supplies Test Strips Accu-Chek Aviva test strips Control Solutions Accu-Chek Aviva control solutions Lancet Drums... - Page 42 Technical Information...
-
Page 43: Chapter 7: The Accu-Chek Fastclix Finger Pricker
• A new lancet drum is dark grey with a white end. *To obtain an AST converter cap, please contact the Accu-Chek Customer Careline on 0800 701 000 (UK) or 1 800 709 600 (ROI). -
Page 44: Inserting A Lancet Drum
The Accu-Chek FastClix Finger Pricker • A used lancet drum has a visible red stripe on the white end. • You cannot reuse a used lancet drum. • Do not remove the lancet drum until you have used all 6 lancets. -
Page 45: Taking A Fingertip Blood Sample
The Accu-Chek FastClix Finger Pricker WARNING The Accu-Chek FastClix finger pricker is intended for patient self-monitoring by an individual person only. It must not be used to collect blood from more than one person as it does not incorporate any features to guard against cross-infection. -
Page 46: Taking An Alternative Site Blood Sample
The Accu-Chek FastClix Finger Pricker Taking an Alternative Site Blood Sample Make sure you select the Dial the depth setting to Press the finger pricker firmly against the selected AST converter cap. 5½ for forearm or upper puncture site and press the release button. -
Page 47: Changing The Lancet Drum
The Accu-Chek FastClix Finger Pricker NOTE • Always use a new, sterile lancet each time you test to avoid infection. • For safety reasons, once you advance to a new lancet, you cannot go back to a used lancet. • NEVER reuse a lancet. - Page 48 The Accu-Chek FastClix Finger Pricker Caring for the Finger Pricker Clean and disinfect the finger pricker regularly to prevent the transmission of infection. Follow these guidelines carefully to clean and disinfect without damaging the finger pricker. When to clean and disinfect the Finger Pricker •...
-
Page 49: Any Questions
Review your test procedure and make sure that you are performing the steps correctly. If you still have questions, please contact the Accu-Chek Customer Careline on 0800 701 000 (UK) or 1 800 709 600 (ROI). Please have your Accu-Chek Aviva meter, Accu-Chek Aviva test strips, and Accu-Chek Aviva control solutions available when you call. -
Page 50: Index
Index alternative site testing 10 low blood glucose 14 battery, changing 29 maintenance, meter 29 battery, installing 29 marking test results 12 battery door 3 memory, meter 15 battery type 29, 35 meter, cleaning 30 beeper, setting 19 meter, discarding 36 blood glucose results, unusual 13 blood glucose test 7 post-meal marker 12... - Page 51 Roche Diabetes Care Limited Charles Avenue, Burgess Hill West Sussex, RH15 9RY, United Kingdom Accu-Chek Customer Careline UK Freephone number: 0800 701 000 ROI Freephone number: 1 800 709 600 calls may be recorded for training purposes www.accu-chek.co.uk www.accu-chek.ie LAST UPDATE: 2015-01...
- Page 52 Roche Diagnostics GmbH Sandhofer Strasse 116 68305 Mannheim, Germany www.accu-chek.com ACCU-CHEK, ACCU-CHEK AVIVA, and FASTCLIX are trademarks of Roche. © 2015 Roche Diagnostics 07019505001(02)-0115...