Accu-Chek Aviva Connect - Blood Glucose Monitoring System Quick Start
Also See for Aviva Connect:
- Owner's booklet (316 pages) ,
- Standard owner’s booklet (306 pages) ,
- User manual (180 pages)
Advertisement
Table of Contents
Contents
Accu-Chek Aviva Connect - Blood Glucose Monitoring System Quick Start
SAFETY

- This Quick Start Guide does not replace the User's Manual for your Accu-Chek Aviva
Connect blood glucose meter. The User's Manual contains important cleaning and disinfecting procedures and additional information. - The meter and lancing device are for single patient use. Do not share them with anyone, including other family members! Do not use on multiple patients!
- All parts of the kit are considered biohazardous and can potentially transmit infectious diseases from bloodborne pathogens, even after you have performed cleaning and disinfecting.
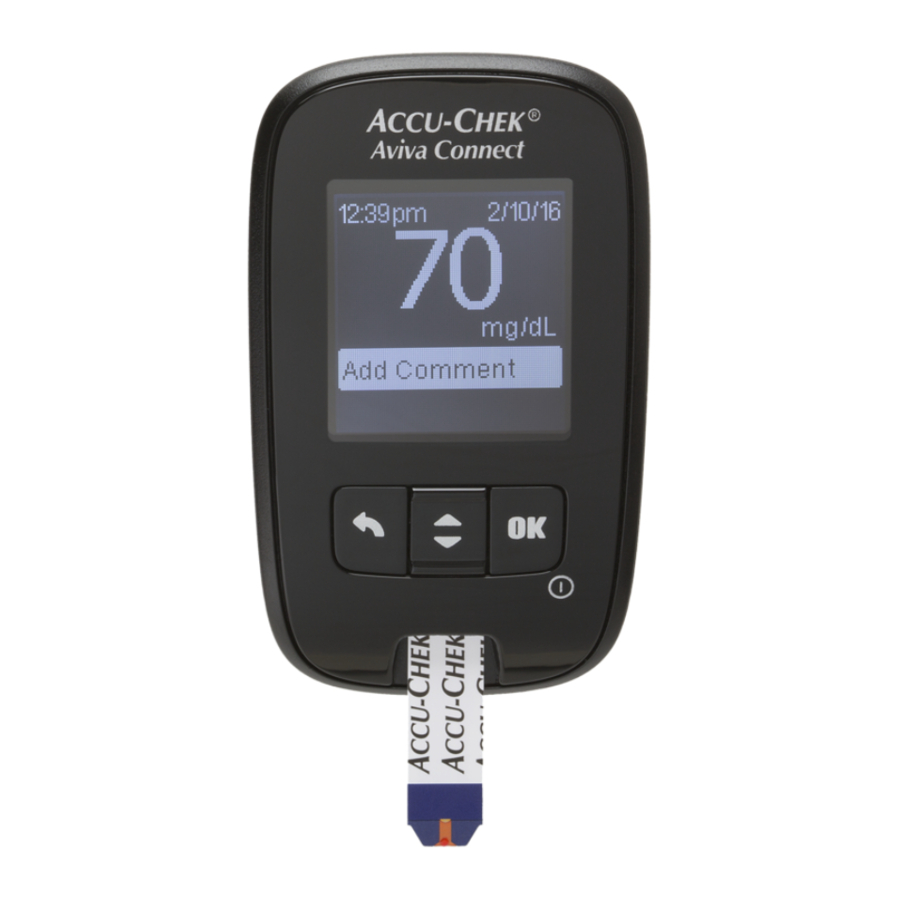
Overview

- Back Button
![]()
- Up Arrow and Down Arrow Button
![]()
- Display
- Power/Set/OK Button
![]()
- Test Strip Slot
- Battery Drawer
- Micro USB Port


Setting up the Lancing Device
- Familiarize yourself with the Accu-Chek FastClix lancing device.
![]()
- Get the lancet drum from the pocket in the carry case.
![]()
NOTE
Each lancet drum contains 6 sterile lancets. You can perform 6 tests before replacing it.
![]()
- Remove the cap by pulling it straight off. Do not twist the cap.
![]()
You must not insert the lancet drum into the lancing device and simultaneously press the release button or hold the lancing device with the release button resting on a surface such as a table top. This could release a lancet and inadvertently cause injury.
![]()
- Insert the lancet drum, white end first, into the lancing device. Push the lancet drum all the way in until it clicks firmly into place.
![]()
NOTE
Do not remove the lancet drum until all 6 lancets are used since the drum cannot be reused once it has been removed from the lancing device.
![]()
- Replace the cap on the lancing device. Make sure the notch on the cap lines up with the notch on the lancing device.
![]()
- Adjust the lancet depth to a comfortable penetration level. Start at 2. For tougher skin, dial to a higher number.
![]()
Using the lancing device: By pressing the release button, the lancing device primes and pricks with 1 click.
![]()


Performing a Blood Glucose Test
- Wash and dry your hands before and after you perform a blood glucose test.
![]()
- Check the Use By date on the test strip container. Do not use test strips past the Use By date.
![]()
- Remove a test strip from the test strip container. Close the cap tightly.
![]()
- Insert the test strip into the meter in the direction of the arrows.
![]()
The meter turns on. Preparing to test appears.
![]()
- Press the lancing device firmly against the side of your fingertip and press the release button to prick your finger.
![]()
- Touch the end of the test strip to the blood drop. Do not put blood on top of the test strip.
![]()
Analyzing appears when there is enough blood in the test strip.
![]()
The test result appears on the display after 5 seconds.
![]()
Prepare the lancing device for the next test. Slide the lever over and back once to advance to the next lancet. The window shows the number of lancets remaining.
![]()


Documents / ResourcesDownload manual
Here you can download full pdf version of manual, it may contain additional safety instructions, warranty information, FCC rules, etc.
Download Accu-Chek Aviva Connect - Blood Glucose Monitoring System Quick Start
Advertisement
Thank you! Your question has been received!


Need Assistance?
Do you have a question about the Aviva Connect that isn't answered in the manual? Leave your question here.