Panasonic AW-HR140PJ Operating Instructions Manual
Hd integrated camera
Hide thumbs
Also See for AW-HR140PJ:
- Operating instructions manual (124 pages) ,
- Operating instruction (124 pages)
Table of Contents
Advertisement
Before using this product, be sure to read "Read this first!" (pages 4, 18, 19).
ENGLISH
This manual contains information excerpted from the Operating Instructions and the Installation Instructions.
Excerpted Version
For more information, please visit the Panasonic website (http://pro-av.panasonic.net/en/manual/index.html), and
refer to the Operating Instruction (PDF).
Avant d'utiliser cet appareil, assurez-vous de lire la section « Lire ces informations en premier ! » (pages 4, 20, 21).
FRANÇAIS
Pour de plus amples informations, visiter le site Web de Panasonic (http://pro-av.panasonic.net/en/manual/index.
html) et consulter le mode d'emploi (PDF).
Antes de usar este producto, asegúrese de leer "Lea este documento en primer lugar!" (páginas 4, 22, 23).
ESPAÑOL
Si desea obtener más información, visite el sitio web de Panasonic (http://pro-av.panasonic.net/en/manual/index.
html) y consulte las instrucciones de funcionamiento (PDF).
Bitte lesen Sie sorgfältig die „Bitte lesen Sie zuerst diesen Hinweis!" vor der Nutzung dieses Produkts. (Seiten 5, 24).
DEUTSCH
Weitere Informationen finden Sie auf der Panasonic-Webseite (http://pro-av.panasonic.net/en/manual/index.html)
und in der Bedienungsanleitung (PDF).
Prima di utilizzare il prodotto, assicurarsi di leggere "Leggere prima quanto segue!" (pagine 5, 25).
ITALIANO
Per maggiori informazioni, per favore visitare il sito web Panasonic (http://pro-av.panasonic.net/en/manual/index.
html), e fare riferimento alle istruzioni per l'uso (PDF).
Перед использованием данного прибора ознакомьтесь с информацией в разделе «Прочитайте
нижеследующее до начала эксплуатации!» (стр. 5, 26).
PУССКИЙ
Для получения дополнительной информации посетите веб-сайт Panasonic (http://pro-av.panasonic.net/en/
manual/index.html), а также обратитесь кинструкции по эксплуатации (PDF).
Before operating this product, please read the instructions carefully and save this manual for future use.
SS0417TY0 -FJ
Printed in Japan
Operating Instructions
Installation Instructions provided
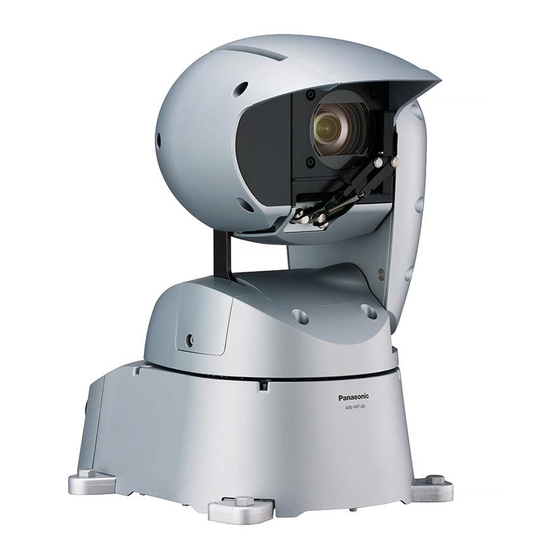
HD Integrated Camera
AW-HR140PJ
Model No.
AW-HR140EJ
Model No.
Excerpted Version
ENGLISH
DVQX1270ZA
Advertisement
Table of Contents

Related Manuals for Panasonic AW-HR140PJ


Summary of Contents for Panasonic AW-HR140PJ
- Page 1 Avant d’utiliser cet appareil, assurez-vous de lire la section « Lire ces informations en premier ! » (pages 4, 20, 21). FRANÇAIS Pour de plus amples informations, visiter le site Web de Panasonic (http://pro-av.panasonic.net/en/manual/index. html) et consulter le mode d’emploi (PDF).
- Page 2 Model number given in Model number of unit manual About copyright and licence „ „ AW-HR140PJ Distributing, copying, disassembling, reverse compiling, reverse AW-HR140 AW-HR140EJ engineering, and also exporting in violation of export laws of the AW-HS50N software provided with this unit are expressly prohibited.
-
Page 3: Table Of Contents
Features....................30 Read this first! (For AW-HR140EJ) ............ 19 Controller supported ................31 Lire ces informations en premier ! (Pour AW-HR140PJ) ....20 Accessories ..................32 Lire ces informations en premier ! (Pour AW-HR140EJ) ....21 Operating precautions ................ 33 Lea esto primero! (Para AW-HR140PJ) .......... -
Page 4: Installation Instructions
Installation Instructions Read this first! ENGLISH WARNING: WARNING: To prevent injury, this apparatus must be securely attached to Installation should only be performed by qualified installation the floor/wall in accordance with the installation instructions. personnel. Improper installation may result in the entire apparatus falling down and causing injury. -
Page 5: Bitte Lesen Sie Zuerst Diesen Hinweis
Installation Instructions Bitte lesen Sie zuerst diesen Hinweis! DEUTSCH WARNUNG: WARNUNG: Um Verletzungen zu verhüten, muss dieser Apparat gemäß Die Installation darf nur durch qualifiziertes Personal ausgeführt der Installationsanleitung sicher am Boden bzw. an der Wand werden. befestigt werden. Fehlerhafte Installation kann zum Herunterfallen des Gerätes und zu Verletzungen führen. -
Page 6: Installation Precautions
Installation Instructions Installation precautions Panasonic does not accept any responsibility for accident or damage during installation if procedure in this manual is not followed. To installation personnel Read the “Installation Instructions” thoroughly and then perform the operation correctly and safely. -
Page 7: Install The Camera
The unit is equipped with an internal heater and defroster to enable (The metal conduits must be grounded.) use in cold environments. For AW-HR140PJ The heater and defroster automatically activate when the For AW-HR140EJ approximate internal temperature of the unit reaches 0 °C (32 °F) or below. -
Page 8: Before Installation
Installation Instructions Before installation Be sure to configure the switches on the connector panel and bottom of the unit before installing it. Configuring the switches after the unit is installed may prove difficult. MODE switch settings Switch Function positions The MODE switches are located on the connector panel of the unit. AW series protocol setting (Factory settings) POWER/ SDI OUT... -
Page 9: Example Of Attaching The Washer Nozzle
Installation Instructions How to install and connect the unit (continued) Example of attaching the washer nozzle Fixing the drop-prevention wire Fix the drop-prevention wire to a part of the main structure of the Diameter of nozzle that can be attached: ø 16 mm (ø 5/8 inches) building or a part that is sufficiently strong (minimum withdrawal strength of 1764 N {180 kgf} or more). -
Page 10: Attaching The Cable Cover
Loosen screw A and remove the reinforcement arm Manufacturer: cover from the body. Eco Solutions Company, Panasonic Corporation Part no.: Panasonic PV flexible conduit, nominal diameter DMW128N (Panasonic PV flexible conduit) <NOTE> Reinforcement arm cover • Use weatherproof cables for outdoor wiring. - Page 11 Installation Instructions How to install and connect the unit (continued) Remove the two pin fixing screws and remove the pins Install the unit suspended. at the mechanism endpoint. For the installation procedure, refer to the preceding “Performing Positions of pins for stand-alone installation the installation surface work”...
-
Page 12: Connections
Installation Instructions Connections Connections with an HD monitor HD Integrated Camera AW-HR140 External DC POWER/ SDI OUT 10BASE-T/ STANDBY RS-422 100BASE-TX G/L IN 1/PM MODE LINK power supply SIGNAL GND AUDIO IN(1/2) HD-SDI signal HD monitor Connections with a controller (AW-RP50/AW-RP120/AK-HRP200) HD Integrated Camera AW-HR140 LAN cable (crossover cable) -
Page 13: System Example 1 (Serial Control)
Installation Instructions Connections (continued) System example 1 (Serial control) HD Integrated Camera AW-HR140 HD Integrated Camera AW-HR140 POWER/ 10BASE-T/ STANDBY SDI OUT RS-422 100BASE-TX G/L IN 1/PM External DC MODE LINK power supply SIGNAL GND AUDIO IN(1/2) RS-422 connector Genlock signal generator Pan-tilt head and camera control signal... -
Page 14: System Example 2 (Ip Control)
Installation Instructions Connections (continued) System example 2 (IP control) HD Integrated Camera AW-HR140 HD Integrated Camera AW-HR140 POWER/ External DC 10BASE-T/ STANDBY SDI OUT RS-422 100BASE-TX G/L IN 1/PM MODE LINK power supply SIGNAL GND AUDIO IN(1/2) LAN connector Genlock signal generator LAN cable SDI video signal... -
Page 15: System Example 3 (Ip Image Transmission, Poe++)
Installation Instructions Connections (continued) System example 3 (IP image transmission, PoE++) HD Integrated Camera AW-HR140 HD Integrated Camera AW-HR140 POWER/ 10BASE-T/ SDI OUT STANDBY RS-422 100BASE-TX G/L IN 1/PM MODE LINK SIGNAL GND AUDIO IN(1/2) connector Network Recorder WJ-NV300/4 LAN cable (straight cable) PoE++ compatible switching hub or injector... -
Page 16: (Connection With Commercially Available Controller)
Installation Instructions Connections (continued) System example 4 (connection with commercially available controller) HD Integrated Camera AW-HR140 Serial connector Communication connector POWER/ 10BASE-T/ SDI OUT STANDBY RS-422 100BASE-TX G/L IN 1/PM MODE LINK SIGNAL GND AUDIO IN(1/2) External DC power supply Commercially available controller •... -
Page 17: Appearance
Installation Instructions Appearance Unit: mm (inch) 356.6 (14-1/32) 396.9 (15-19/32) 179.7 (7-1/16) -
Page 18: Operating Instructions
Operating Instructions Read this first! (For AW-HR140PJ) ENGLISH WARNING: CAUTION: • To reduce the risk of fire or electric shock, do not expose this In order to maintain adequate ventilation, do not install or place equipment to rain or moisture. -
Page 19: Read This First! (For Aw-Hr140Ej)
For more information about collection and recycling, please contact your local municipality, dealer or supplier. Penalties may be applicable for incorrect disposal of this waste, in accordance with national legislation. Manufactured by: Panasonic Corporation, Osaka, Japan Importer’s name and address of pursuant to EU rules:... -
Page 20: Lire Ces Informations En Premier ! (Pour Aw-Hr140Pj)
Operating Instructions Lire ces informations en premier ! (Pour AW-HR140PJ) FRANÇAIS AVERTISSEMENT: ATTENTION: • Pour réduire les risques d’incendie ou de choc électrique, Pour maintenir une bonne ventilation, ne pas installer ni placer évitez d’exposer cet appareil à la pluie ou à l’humidité. -
Page 21: Lire Ces Informations En Premier ! (Pour Aw-Hr140Ej)
Le non-respect de la réglementation relative à l’élimination des déchets est passible d’une peine d’amende. Fabriqué par : Panasonic Corporation, Osaka, Japon Nom et adresse de l’importateur en accord avec les règlements de l’Union Européenne : Panasonic Marketing Europe GmbH... -
Page 22: Lea Esto Primero! (Para Aw-Hr140Pj)
Operating Instructions Lea esto primero! (Para AW-HR140PJ) ESPAÑOL ADVERTENCIA: PRECAUCIÓN: • Para reducir el riesgo de producir un incendio o recibir una Para mantener unas buenas condiciones de ventilación, no descarga eléctrica, no exponga este equipo a la lluvia ni a la instale ni ponga este aparato en una librería, mueble empotrado... -
Page 23: Lea Esto Primero! (Para Aw-Hr140Ej)
Para más información sobre la recogida o reciclaje, por favor contacte con su ayuntamiento, su distribuidor o su proveedor. Puede haber sanciones por una incorrecta eliminación de este residuo, de acuerdo con la legislación nacional. Fabricado por: Panasonic Corporation, Osaka, Japón Nombre y dirección del importador conforme a las normas de la UE:... -
Page 24: Bitte Lesen Sie Zuerst Diesen Hinweis! (Für Aw-Hr140Ej)
Für mehr Informationen zu Sammlung und Recycling, wenden Sie sich bitte an Ihren örtlichen Abfallentsorgungsdienstleister, Händler oder Zulieferer. Gemäß Landesvorschriften können wegen nicht ordnungsgemäßer Entsorgung dieses Abfalls Strafgelder verhängt werden. Hergestellt von: Panasonic Corporation, Osaka, Japan Name und Adresse des Importeurs gemäß EU-Bestimmungen: Panasonic Marketing Europe GmbH... -
Page 25: Leggere Prima Quanto Segue! (Per Aw-Hr140Ej)
Per ulteriori informazioni su raccolta e riciclaggio, vi invitiamo a contattare il vostro comune, rivenditore o fornitore. Lo smaltimento non corretto di questi rifiuti potrebbe comportare sanzioni in accordo con la legislazione nazionale. Fabbricato da: Panasonic Corporation, Osaka, Giappone Nome e indirizzo dell'importatore in conformità con le normative UE:... -
Page 26: Прочитайте Нижеследующее До Начала Эксплуатации! (Для Aw-Hr140Ej)
Operating Instructions Прочитайте нижеследующее до начала эксплуатации! (Для AW-HR140EJ) РУССКИЙ ОСТОРОЖНО: ВНИМАНИЕ: • Для снижения риска возникновения пожара или Для обеспечения надлежащей вентиляции не удара электрическим током не подвергайте данное устанавливайте и не размещайте данное устройство на оборудование воздействию дождя или влаги. книжном... -
Page 27: Note On Grounding
Operating Instructions Read this first! (continued) Note on grounding • Ground the unit via the <SIGNAL GND> ground connector. POWER/ 10BASE-T/ STANDBY SDI OUT G/L IN 1/PM RS-422 100BASE-TX MODE LINK SIGNAL GND AUDIO IN(1/2) POWER/ SDI OUT 10BASE-T/ STANDBY 100BASE-TX G/L IN 1/PM... -
Page 28: Before Use
10.0 ® ® Microsoft Windows 7 Professional SP1 ® ® • Connection with a Panasonic camera controller is also possible via 64-bit / 32-bit Panasonic’s proprietary serial communication format. Windows ® Internet Explorer ® 11.0 / 10.0 / 9.0 / •... -
Page 29: Disclaimer Of Warranty
Disclaimer of warranty • Protect your network against unauthorized access by restricting users IN NO EVENT SHALL Panasonic Corporation BE LIABLE TO ANY to those who log in with an authorized user name and password. PARTY OR ANY PERSON, EXCEPT FOR REPLACEMENT OR •... -
Page 30: Features
For details on PoE++ devices for which operation has been one of Panasonic’s currently available controllers (AW-RP50, verified, consult your local dealer or Panasonic representative. AW-RP120 and AK-HRP200). The unit can also be used together with the cameras and pan-tilt... -
Page 31: Controller Supported
• It may be necessary to upgrade the version of the controller in order to support the unit. For details on upgrading, visit the support page on the following website. http://pro-av.panasonic.net/ <NOTE> • The following operations can not be performed via the following controllers. -
Page 32: Accessories
Operating Instructions Accessories Check that the following accessories are present and accounted for. • After removing the product from its container, dispose of the packing materials in an appropriate manner. Hexagonal bolt Cable cover (1) Washer nozzle mount bracket Drop-prevention wire (1) M8 ×... -
Page 33: Operating Precautions
Operating Instructions Operating precautions Shoot under the proper lighting conditions. The unit comes with the safe mode. „ „ „ „ To produce pictures with eye-pleasing colors, shoot under the The safe mode is function designed to protect the unit from damage. proper lighting conditions. - Page 34 This product includes MIT Licensed software. This product includes BSD Licensed software. For details on obtaining the source codes, visit the following website. http://pro-av.panasonic.net/ However, do not contact Panasonic for questions regarding obtained source codes.
-
Page 35: Parts And Their Functions
Operating Instructions Parts and their functions RS-422 connector <RS-422> This RS-422 connector (RJ45) is connected when exercising serial control over the unit from an external device. Use a cable with the following specifications for the connection to this connector. LAN cable (category 5 or above, straight cable), max. - Page 36 Operating Instructions Parts and their functions (continued) Status display lamp <POWER/STANDBY> DC IN connector <12V IN> (XLR connector) This lights in the following way depending on the status of the unit. Input 10.8 V (12 V–10%) to 24 V (21.8 V+10%) DC. Orange: When the standby status is established <NOTE>...
-
Page 37: Aw-Rp50 (Not Supplied)
Operating Instructions AW-RP50 (not supplied) For detailed operations, refer to the Operating Instructions of the AW-RP50 — <Operations and Settings>. Control panel „ „ POWER ALARM CAMERA MENU PAGE GAIN/PED R/B GAIN R/B PED AWB/ABB SHUTTER... - Page 38 Operating Instructions AW-RP50 (not supplied) (continued) DELETE button [DELETE] FOCUS/PUSH OTAF dial [FOCUS/PUSH OTAF] Press this to delete the preset memory data for the currently selected Use this to control the focus manually. remote camera. When it is turned clockwise: When it is pressed again while its indicator is lighted, the menu is The focusing moves to the far end.
-
Page 39: Rear Panel
Operating Instructions AW-RP50 (not supplied) (continued) Rear panel „ „ SIGNAL GND POWER TO PAN/TILT HEAD 12V IN TALLY/GPI BOOT POWER switch [POWER] When the POWER switch is set to the ON position, the POWER indicator (1) lights, and the unit can be operated. - Page 40 Operating Instructions AW-RP50 (not supplied) (continued) Basic operations of the AW-RP50 „ „ For detailed operations, refer to the Operating Instructions of the AW-RP50 — <Operations and Settings>. 1, 7 POWER ALARM CAMERA MENU PAGE GAIN/PED R/B GAIN R/B PED AWB/ABB SHUTTER EXIT...
- Page 41 Operating Instructions AW-RP50 (not supplied) (continued) Basic operations for the menus „ „ For detailed operations, refer to the Operating Instructions of the AW-RP50 — <Operations and Settings>. POWER ALARM CAMERA MENU PAGE GAIN/PED R/B GAIN R/B PED AWB/ABB SHUTTER EXIT STORE DELETE...
-
Page 42: Network Settings
Easy IP Setup Software. You can obtain Easy IP Setup Software (EasyIPSetup.exe) by downloading it from the following website. http://pro-av.panasonic.net/ To establish the settings for a multiple number of units, the settings must be selected for each camera involved. If the settings cannot be established using the Easy IP Setup Software, select the settings separately for the unit and personal computer on the Network setup screen [Network] of the setting menu. -
Page 43: Installing The Plug-In Viewer Software
Operating Instructions Network settings (continued) To prevent unauthorized access to cameras Installing the plug-in viewer software Enable the user authentication function To view IP images from the unit on a web browser, the “Network (Not available when the AW-RP50 is connected) Camera View 4S”... -
Page 44: Troubleshooting
– – – → For details on upgrading, visit the support page on the following website. http://pro-av.panasonic.net/ • When using an HTTPS connection, network connection with the AW-RP50, PDF page 91 AW-RP120, and AK-HRP200 will be disabled. - Page 45 Operating Instructions Troubleshooting (continued) Symptom Cause and solution Reference pages • Has a LAN cable of category 5 or above been connected to the LAN connector pages 13 to 15 for IP control <LINK/ACT>? • Is the <LINK> LED of the LAN connector for IP control <LINK/ACT> lit? →...
- Page 46 Operating Instructions Troubleshooting (continued) Symptom Cause and solution Reference pages For Windows: • Press the [F5] key on the keyboard of the personal computer to request that the settings be acquired. – – – For Mac: • Press the [Command] + [R] key on the personal computer’s keyboard to request that the settings be acquired.
- Page 47 Operating Instructions Troubleshooting (continued) Symptom Cause and solution Reference pages • Is access being performed in HTTPS mode? Screen displays may take a while to appear in HTTPS mode due to signal – – – processing. Screens displays take a while to •...
- Page 48 Operating Instructions Troubleshooting (continued) Video „ „ Symptom Cause and solution Reference pages • Has the unit been connected properly to the other connected devices? pages 12 to 16 • If the system is configured in such a way that the picture is also switched when PDF page 23 the unit to be operated is selected, has the correct unit been selected? No pictures are displayed or the...
- Page 49 Operating Instructions Troubleshooting (continued) Symptom Cause and solution Reference pages • Activate the ATW (Auto tracking white adjustment) function. PDF page 28 Something is wrong with the • In some situations, the proper colors may not be reproduced using the ATW coloring of the pictures function.
- Page 50 Operating Instructions Troubleshooting (continued) IP images „ „ Symptom Cause and solution Reference pages For Windows: • Is the plug-in viewer software installed? page 43 → Install the plug-in viewer software. For Windows: • If [Check for newer versions of stored pages] is not set to [Every time I visit the webpage] in the temporary Internet file settings, IP images may not appear in the Images are not displayed live screen [Live].
- Page 51 Operating Instructions Troubleshooting (continued) Symptom Cause and solution Reference pages • The images may be distorted if the transmission path is congested and proper transmission is not possible. – – – → Consult your network administrator. The images are distorted •...
- Page 52 “This website wants to run the • Select [Allow]. – – – following add-on: ‘WebVideo Module’ from ‘Panasonic System Networks Co., Ltd.’.” For Internet Explorer 9.0, 10.0, and 11.0: • Click the information bar, and select [Always Allow Pop-ups from This Site].
-
Page 53: Specifications
37 dB to 42 dB is Super Gain Mode website. http://pro-av.panasonic.net/ Frame mix: 0 dB, 6 dB, 12 dB, 18 dB, 24 dB • This cannot be configured when the format is INPUT „... - Page 54 Operating Instructions Specifications (continued) Synchro scan: • 59.94 Hz: [Pan-tilt head unit] 60.15 Hz to 642.21 Hz (255 steps) Installation method: • 50 Hz: 50.15 Hz to 535.71 Hz (255 steps) Stand-alone (Desktop) or suspended (Hanging) • To ensure safety, the unit must be secured using Gamma: HD, FILMLIKE1, FILMLIKE2, FILMLIKE3 the mount bracket supplied.
- Page 55 Operating Instructions Specifications (continued) Connector signal details „ „ — COLD — DC 12V OUT +12V HR10A-7R-4SC (73) Hirose Electric Co. HA16RA-4P (77) Hirose Electric Co. • Keep outputs for pin number 4 [12V-OUT] within 12 V/0.5 A DC. • The maximum cable length for connections to pin number 4 [12V-OUT] •...
-
Page 56: Index
SDI OUT connector ................G/L IN connector ................. Status display lamp ................Ground connector ................Grounding .................... Wiper ....................Hole for securing the camera pedestal ..........Hole used to secure cable cover ............Web Site: http://www.panasonic.com © Panasonic Corporation 2017...