Table of Contents
Advertisement
Quick Links
READ AND SAVE THESE INSTRUCTIONS
Address: 46101 Fremont Boulevard, Fremont, CA 94538
US Toll Free Number: 1-888-979-9889
www.deltabreez.com
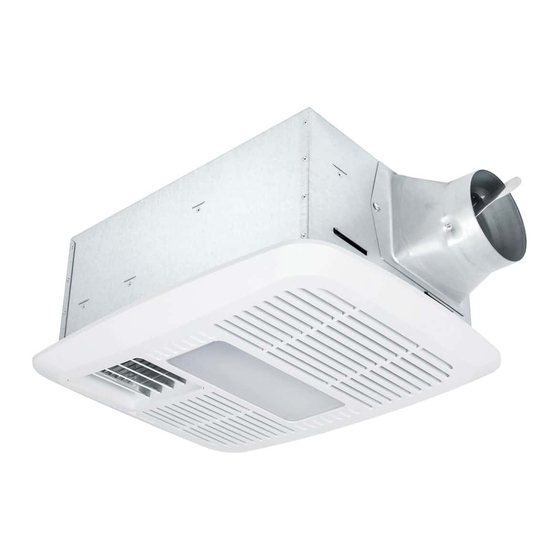
VENTILATION FAN WITH
LED LIGHT AND HEATER
TABLE OF CONTENTS
MODEL RAD110LED
2
3
4
5
9
9
10
11
11
12
12
Advertisement
Table of Contents

Related Manuals for Delta BreezRadiance RAD110LED


Summary of Contents for Delta BreezRadiance RAD110LED
-
Page 1: Table Of Contents
VENTILATION FAN WITH LED LIGHT AND HEATER MODEL RAD110LED TABLE OF CONTENTS Package Contents Important Instructions Preparation Assembly Instructions Wiring Instructions Operating Instructions Care and Maintenance Dimensions Product Specification Troubleshooting Warranty READ AND SAVE THESE INSTRUCTIONS Address: 46101 Fremont Boulevard, Fremont, CA 94538 US Toll Free Number: 1-888-979-9889 www.deltabreez.com... -
Page 2: Package Contents
PACKAGE CONTENTS PART DESCRIPTION Fan Body Duct Connector Grille HARDWARE CONTENTS (Images are not shown in actual scale) × 4 Suspension Bracket × 8 Wood Screw (Ø 4 x 25 ) × 1 Short Machine Screw ( M4 x 5 ) -
Page 3: Important Instructions
IMPORTANT INSTRUCTIONS When using electrical appliances, basic precautions should • Installation work must be carried out by a qualified always be followed to reduce the risk of fire, electric shock, person(s) in accordance with all local and safety codes and injury to persons, including the following: including the rules for fire-rated construction. -
Page 4: Preparation
• Use a roof cap or wall cap that has a built-in damper to reduce backdrafts. • External timer/dimmer switch can be used please contact Delta Breez customer service and consult with a licensed electrician for compatibility. WARNING: Remove ceiling section using dimensions provided below. Be careful to cut hole exactly. If hole is too big, the fan grille will not hide it. -
Page 5: Assembly Instructions
ASSEMBLY INSTRUCTIONS Unpacking Carefully remove unit from carton. Remove the foam in the housing. Refer to the Package Contents list on page 2 to verify that all parts are present. Installing the unit Installing the fan body in an existing building requires an accessible area (attic or crawl space) above the planned installation location and existing duct and wiring. - Page 6 ASSEMBLY INSTRUCTIONS INSTALLATION 1. Mounting the fan body between the joists a. Insert suspension brackets to the duct side and back of the fan body , depending on the distance between the joists. b. Insert the fan body between joists. Make sure the fan body is level and perpendicular with the joist, and flush with ceiling surface.
- Page 7 ASSEMBLY INSTRUCTIONS 2. Connecting the duct CAUTION: All ducting must comply with local and national building codes. a. Insert the duct into the duct connector and tape all duct work connections to make them secure and air tight. b. Do not install the unit where ducts are configured as shown in Figure 2-2.
- Page 8 ASSEMBLY INSTRUCTIONS 4. Completing the Installation a. Check the plug from the fan into the receptacle marked “Vent”. Check the plug from the heating unit into the VENT LIGHT receptacle marked “Heat”. HEAT b. Plug the Light Connector into the receptacle marked “Light”.
-
Page 9: Wiring Instructions
WIRING INSTRUCTIONS CAUTION: • Make sure power is switched off at service panel before starting installation. • All electrical connections must be made in accordance with local codes, ordinances, or national electrical code. If you are unfamiliar with methods of installing electrical wiring, secure the services of a qualified electrician. -
Page 10: Care And Maintenance
CARE AND MAINTENANCE See safety information before proceeding. Routine maintenance should be done at least once a year. • Never use solvents, thinner or harsh chemicals when cleaning the fan. • Do not allow water to enter the motor, heater and LED module. •... -
Page 11: Dimensions
DIMENSIONS " " " " " 4" Unit: Inches PRODUCT SPECIFICATIONS SPECIFICATIONS Model No. RAD110LED Air flow @ 0.1 in. WG 110 CFM Noise 0.7 Sones Voltage 120V Hertz 60Hz Power Consumption 1650W Duct Diameter 4 in. Weight 14.8 lbs. Main Light Output 850 Lumens TYPE IC INHERENTLY PROTECTED. -
Page 12: Troubleshooting
2. All returns of defective parts or products must include the product model number, and must be made through an authorized Delta Electronics distributor. Authorized returns must be shipped prepaid. Repaired or replacement products will be shipped by Delta Electronics F.O.B.