Table of Contents
Advertisement
Advertisement
Table of Contents

Related Manuals for Comelit Planux


Summary of Contents for Comelit Planux
- Page 2 WARNINGS ......................4 MONITOR DESCRIPTION ................... 5 LOADS KEY FUNCTIONS ....................5 LOADS MENU DESCRIPTION ................24 PLANUX MANAGER MENU ................6 CONSUMPTION LIGHTS CONSUMPTION MENU DESCRIPTION ............. 25 LIGHTS MENU DESCRIPTION ................7 KEY TO THRESHOLD COLOURS ............... 25 LIGHT CONTROL....................
- Page 3 CLEAR........................37 TRANSMISSION TIME ..................52 SETTINGS......................38 NUMBER OF TRANSMISSIONS ................. 52 UNIT OF MEASUREMENT .................. 38 PLANUX MANAGER SETTINGS FOR VEDO SERIES CONTROL UNITS ..53 PULSES ....................... 38 STEP ........................39 ALARM SCALE FACTOR ....................39 ALARMS MENU DESCRIPTION................54 AREA STATUS LEGEND ..................
-
Page 4: Warnings
INTRODUCTION WARNINGS Comelit Group S.p.A. declines any responsibility for improper use of the apparatus, for any alterations made by others for any reason, and for the use of non-original accessories or materials. Caution! In order to reduce the risk of faults and electric shocks: •... -
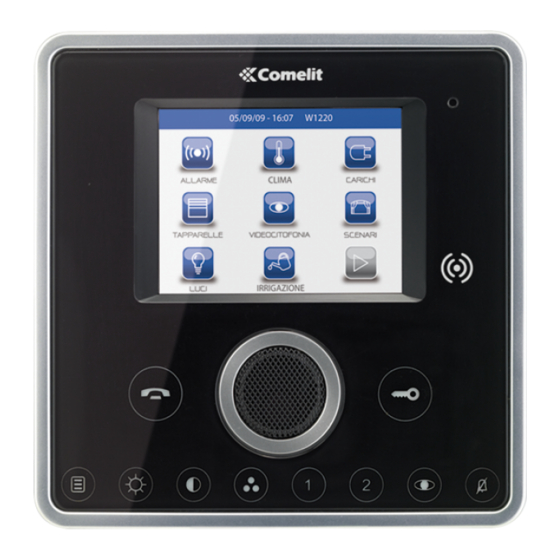
Page 5: Monitor Description
Door lock key: opens the corresponding door lock. Wed 08/09/13 - 08:31 Menu key: switches the Planux Manager monitor on and off. Door entry monitors Door e ntry m m onitors Climate Alarm... -
Page 6: Planux Manager Menu
INTRODUCTION PLANUX MANAGER MENU The Planux Manager icons change depending on the type of system installed and the functions available. To navigate the menu, simply use your fi nger to touch the icon corresponding to the desired function. To access the main menu, press the key. -
Page 7: Lights Lights Menu Description
LIGHTS LIGHTS MENU DESCRIPTION LIGHT CONTROL To access the lights menu, press the icon on the The lights within various areas may be controlled main menu screen. individually. Press the relevant icon in the lights menu (e.g. Thu 21/06/12 - 16:07 0W Upstairs area). -
Page 8: Light Scheduling For An Area
LIGHTS LIGHT SCHEDULING FOR AN AREA Select the days of the week for which you wish to program the activity (selected days will be highlighted Press the icon followed by the icon representing in red) and press the icon to add a programming one of the available areas (e.g. -
Page 9: Dimmer Light Scheduling
LIGHTS DIMMER LIGHT SCHEDULING Select the days of the week for which you wish to program the activity (selected days will be highlighted Once you have entered the relevant area, press the in red) and press the icon to add a programming icon and then the icon corresponding to one of the schedule to the list. -
Page 10: Light Scheduling
LIGHTS LIGHT SCHEDULING Select the days of the week for which you wish to program the activity (selected days will be highlighted Once you have entered the relevant area, press the in red) and press the icon to add a programming icon and then the icon corresponding to one of the lights schedule to the list. -
Page 11: Other Other Menu Description
OTHER LOAD CONTROL OTHER MENU DESCRIPTION The Other menu manages the programming and The loads within various areas may be controlled individually. control of loads or generic electrical commands (connected to SimpleHome module outputs) not Press the relevant icon in the Other menu (e.g. included in the other menus. -
Page 12: Load Scheduling
OTHER LOAD SCHEDULING Select the days of the week for which you wish to program the activity (selected days will be highlighted Once you have entered the relevant area, press the in red) and press the icon to add a programming icon and then the icon corresponding to one of the schedule to the list. -
Page 13: Load Scheduling For An Area
OTHER LOAD SCHEDULING FOR AN AREA Select the days of the week for which you wish to program the activity (selected days will be highlighted Press the icon followed by the icon representing in red) and press the icon to add a programming one of the available areas (e.g. -
Page 14: Shutter Control
SHUTTERS SHUTTERS MENU DESCRIPTION 2 All shutters in the area are moving. 3 All shutters in the area are stationary. To access the Shutters menu, press the icon on the main menu screen. SHUTTER CONTROL The shutters within various areas may be controlled Thu 05/09/09 - 16:07 0W individually. -
Page 15: Shutter Scheduling
SHUTTERS SHUTTER SCHEDULING Select the days of the week for which you wish to program the activity (selected days will be highlighted Once you have entered the relevant area, press the in red) and press the icon to add a programming icon and then the icon corresponding to one of schedule to the list. -
Page 16: Shutter Scheduling For An Area
SHUTTERS SHUTTER SCHEDULING FOR AN AREA Select the days of the week for which you wish to program the activity (selected days will be highlighted Press the icon followed by the icon representing in red) and press the icon to add a programming one of the available areas (e.g. -
Page 17: Automation Automation Menu Description
AUTOMATION AUTOMATION MENU DESCRIPTION Thu 21/06/12 - 16:07 0W To access the automation menu, press the icon on the main menu screen. Entry gate Entry gate Thu 05/09/09 - 16:07 0W Garage door 1 Entry gate Entry gate Garage door 2 Garage door 2 Garage door 1 Rear gate... -
Page 18: Automation Scheduling
AUTOMATION AUTOMATION SCHEDULING Select the days of the week for which you wish to program the activity (selected days will be highlighted Press the icon followed by the icon representing in red) and press the icon to add a programming one of the available areas (e.g. -
Page 19: Irrigation Irrigation Menu Description
IRRIGATION IRRIGATION MENU DESCRIPTION Thu 21/06/12 - 16:07 0W To access the Irrigation menu, press the icon on the main menu screen. North Garden North Garden Thu 05/09/09 - 16:07 0W South Garden North Garden North Garden East Garden East Garden South Garden West Garden West Garden... -
Page 20: Irrigation Scheduling
IRRIGATION IRRIGATION SCHEDULING Select the days of the week for which you wish to program the activity (selected days will be highlighted Press the icon followed by the icon representing in red) and press the icon to add a programming one of the available areas (e.g. -
Page 21: Climate Climate Menu Description
CLIMATE CLIMATE MENU DESCRIPTION CLIMATE CONTROL Press the relevant icon in the climate menu (e.g. To access the Climate menu, press the icon on the Bedroom 1). main menu screen. Thu 21/06/12 - 16:07 0W Thu 21/06/12 - 16:07 0W Bedroom 1 20°... -
Page 22: Climate Scheduling
CLIMATE CLIMATE SCHEDULING NOTE: daily climate control programming must refer to the whole 24-hour cycle; any hours not Press the icon to access the scheduling menu programmed by the user will be set by the system for the climate control system in the relevant area. automatically. -
Page 23: Manual Climate Mode
CLIMATE MANUAL CLIMATE MODE CLIMATE FORCING If necessary, it is possible to force both automatic and Press the icon to set the climate to manual manual programming for a set period of time (hours mode and use the + and – selectors to adjust the or days). - Page 24 LOADS LOADS MENU DESCRIPTION In the event of an overload, the system automatically decides which of the active programmed loads to disable. The user, via the loads menu, will be able to: 1 Select the loads to be disabled in the event of an overload.
-
Page 25: Consumption Consumption Menu Description
CONSUMPTION CONSUMPTION MENU DESCRIPTION KEY TO THRESHOLD COLOURS This menu can be used for monitoring consumption If the maximum consumption thresholds are set (see though graphs and tables. Thresholds menu on page 37) in table mode, the check boxes are coloured to indicate the consumption To access the Consumption menu, press the icon level. -
Page 26: Door Entry Monitors Menu Description
Recordings are saved in .avi format on the SD card, Cameras in the "Video" folder, and may also be viewed on a PC using Windows Media Player. If there is no SD card, the recordings will be saved in the Planux Manager Intercoms Intercoms device memory (MAX. 2 recordings). -
Page 27: Viewing A Recording
SETTING MELODIES To manage the Planux Manager melodies, access the Door entry monitors > Set melody menu. Select the type of call for which you wish to modify the melody by pressing the relevant icon. -
Page 28: Adjusting The Volume
DOOR ENTRY MONITORS ADJUSTING THE VOLUME ACTUATORS To adjust the ringtone, audio, key tone or alarm tone To view the list of actuators present, access the menu volume, access the Door entry monitors > Volume Door entry monitors > Actuators. adjustment menu. -
Page 29: Renaming Actuators
DOOR ENTRY MONITORS CAMERAS Thu 05/09/09 - 16:07 0W To view the list of cameras present, access the menu Door entry monitors > Cameras. Generic Actuator Generic Actuator Thu 05/09/09 - 16:07 0W Device not present Camera 1 Camera 1 Camera 2 Camera 3 RENAMING ACTUATORS... -
Page 30: Renaming Cameras
DOOR ENTRY MONITORS When a video image is displayed, to return to the RENAMING CAMERAS menu simply touch the screen; to view other camera Press the icon followed by the icon corresponding images press an icon again. to the group of cameras you wish to rename. If no camera is connected, the message “DEVICE NOT PRESENT”... -
Page 31: Intercoms
DOOR ENTRY MONITORS INTERCOMS RENAMING INTERCOMS To view the list of intercom calls present, access the Press the icon followed by the icon corresponding Door entry monitors > Intercoms menu. to the intercom call you wish to rename. Thu 05/09/09 - 16:07 0W Thu 05/09/09 - 16:07 0W Name Intercom 1... -
Page 32: Language
60 seconds? 2 Scroll through the screen. Language LANGUAGE Set date and time The Planux Manager menu display language can be changed by selecting one of the options on the list. Access the menu Setup > Language. Information... -
Page 33: Setting The Date & Time
SETUP Confi rm by pressing the icon. INFORMATION To view the software version installed, access the Thu 05/09/09 - 16:07 0W Information menu. Thu 21/06/12 - 16:07 0W Adjust volumes Keypad locked Language VERS. SW: 1.5 VERS. EE: 1.3.2 6214C Set melodies SB CODE: 5P RANGE: 0 - 0 Set date and time... -
Page 34: Toolbar
SETUP - CONSUMPTION CONSUMPTION SETUP MENU DESCRIPTION TOOLBAR The Toolbar menu can be used to select which meter Thu 08/09/13 - 08:07 0W to monitor on the main bar. Thu 08/09/13 - 08:07 0W Toolbar Elect. consumption Currency Production Display Rates Water Thu 08/09/13 - 08:07 0W... -
Page 35: Currency
SETUP - CONSUMPTION CURRENCY DISPLAY The Currency menu can be used to select the currency The Display menu can be used to select the meters to be associated with consumption monitoring. connected to the system that you wish to view in the consumption menu area. -
Page 36: Rates
SETUP - CONSUMPTION RATES Press the icon to access the programming screen. PROG The Rates menu can be used to set the meter rates according to time bands. The information will then NOTE: daily rate programming must refer to the be used to construct the consumption graphs in the whole 24-hour cycle;... -
Page 37: Thresholds
SETUP - CONSUMPTION THRESHOLDS This menu can be used to set maximum thresholds 2. Enter the value using the number keys. for hours, days, months and years, so that the 3. Press the icon to confi rm. check boxes for the energy consumption table are coloured to indicate the consumption level (see Key CLEAR to threshold colours on page 25), providing a report in... -
Page 38: Settings
SETUP - CONSUMPTION SETTINGS UNIT OF MEASUREMENT This menu can be used to customise the settings of In this menu you can select the unit of measurement the meters connected to the system. to be associated with the meter, in accordance with its function (e.g. -
Page 39: Step
SETUP - CONSUMPTION STEP The value entered via this menu determines by how much the count is increased following the number of pulses set previously. Thu 21/06/12 - 16:07 0W SCALE FACTOR This menu an be used to change the scale value for the meter readings. -
Page 40: Advanced Menus Description
ADVANCED ACCESSING ADVANCED MENUS ADVANCED MENUS DESCRIPTION Access the menu Setup > Advanced. Thu 21/06/12 - 16:07 0W Enter the installer password (set by default to 1961). Prog. Keys Prog Keys Thu 05/09/09 - 16:07 0W Conf. video memory Actuators ENTER PASSWORD Cameras Thu 21/06/12 - 16:07 0W... -
Page 41: Key Programming
KEY PROGRAMMING Select the desired function by pressing the icon to the right of it. To program the Planux Manager keys, access the menu Setup > Advanced > Prog. keys menu. Thu 05/09/09 - 16:07 0W Select the key you want to program (e.g. Key 1). -
Page 42: Video Memory Setup
ADVANCED VIDEO MEMORY SETUP ADDING ACTUATORS The video memory function can be set up so that all To add an actuator, press the icon. video entry phone calls are recorded. Enter the desired name and press the icon to Access the menu Setup > Advanced > Video memory confi... -
Page 43: Modifying An Actuator Code
ADVANCED MODIFYING AN ACTUATOR CODE DELETING ACTUATORS To modify the code of an actuator, press the icon To delete an actuator, press the icon followed by followed by the actuator icon. the actuator icon. Thu 05/09/09 - 16:07 0W Thu 05/09/09 - 16:07 0W Generic act. -
Page 44: Cameras
ADVANCED CAMERAS ADDING CAMERAS To manage the cameras, access the menu Setup > To add a camera, press the icon. Advanced > Cameras. Enter the desired name and press the icon to Thu 05/09/09 - 16:07 0W confi rm. Thu 05/09/09 - 16:07 0W Camera 1 Camera 1 Name... -
Page 45: Modifying A Camera Code
ADVANCED MODIFYING A CAMERA CODE DELETING CAMERAS Press the icon followed by the camera icon. Press the icon followed by the camera icon. Thu 05/09/09 - 16:07 0W Thu 05/09/09 - 16:07 0W Camera 1 Camera 1 Camera 2 Camera 3 Camera 4 Enter the desired code using the numerical keypad Confi... -
Page 46: Intercoms
ADVANCED INTERCOMS ADDING AN INTERCOM To manage the intercoms, access the Setup > To add an intercom call, press the icon. Advanced > Intercoms menu. Enter the desired name and press the icon to Thu 05/09/09 - 16:07 0W confi rm. Thu 05/09/09 - 16:07 0W Intercom 1 Intercom 1... -
Page 47: Modifying An Intercom Address
ADVANCED MODIFYING AN INTERCOM ADDRESS DELETING AN INTERCOM Press the icon followed by the intercom call icon. Press the icon followed by the intercom call icon. Thu 05/09/09 - 16:07 0W Thu 05/09/09 - 16:07 0W Intercom 1 Intercom 1 Intercom 2 Enter the desired address using the numerical Confi... -
Page 48: Selective Intercom
ADVANCED SELECTIVE INTERCOM ADDING A SELECTIVE INTERCOM Once created, selective intercom calls can be found To add a selective intercom call, press the icon. under the "Intercoms" menu (see page 31). Enter the desired name and press the icon to To manage selective intercom calls, access the menu confi... -
Page 49: Deleting / Modifying A Selective Intercom
ADVANCED DELETING / MODIFYING SETTING THE BRACKET CODE A SELECTIVE INTERCOM Each bracket in the system is identifi ed by its own code; this code should be a number between 1 and To delete or modify a selective intercom call, follow 240. -
Page 50: Setting A Monitor As Main / Secondary
ADVANCED SETTING A MONITOR AS SETTING A MULTIPLE ADDRESS When the "Multiple address" function is activated, MAIN / SECONDARY the monitor will ring every time a Simplebus address Access the menu Setup > Advanced > Addresses > within the set range is called. Monitor. -
Page 51: Calibrating The Touch-Screen
ADVANCED SET INPUT CALIBRATING THE TOUCH-SCREEN 2 different functions can be assigned to the CFP-CFP If the touch-screen does not respond correctly to input on the bracket terminal board: touch commands, it can be calibrated. • Floor door call (CFP) Access the menu Setup >... -
Page 52: Reset Configurations
RESET CONFIGURATIONS PRODUCT UPDATE The function deletes all door entry monitor, home Please contact your installer or the Comelit Group automation and alarm system settings. S.p.A. service centre for product software updates. Access the menu Setup > Advanced > Reset confi... -
Page 53: Planux Manager Settings For Vedo Series Control Units
3. Set the device password VEDO SERIES CONTROL UNITS Access the menu Setup > Advanced > Device password. The settings required in order to use the Planux Manager device with Vedo series control units are Thu 08/09/13 - 16:07 0W illustrated below. -
Page 54: Area Status Legend
ALARM ALARMS MENU DESCRIPTION AREA STATUS LEGEND To access the Alarms menu, press the icon on the Downstairs area Downstairs area Downstairs area main menu screen. Downstairs area Downstairs area Downstairs area Thu 05/09/09 - 16:07 0W Downstairs area Downstairs area Downstairs area Downstairs area Downstairs area... -
Page 55: Fully Arming The Anti-Intrusion System
ALARM FULLY ARMING THE ANTI-INTRUSION All alarms will be activated. SYSTEM Thu 05/09/09 - 16:07 0W Access the Alarms menu. Press the icon. Downstairs area Thu 05/09/09 - 16:07 0W Upstairs area Downstairs area Downstairs area External Upstairs area Garage External If a zone is not ready (see legend page 54), the area to which it belongs will not be armed. -
Page 56: Fully Disarming The Anti-Intrusion System
ALARM FULLY DISARMING THE ANTI- All areas in the control panel will be disarmed. INTRUSION SYSTEM Thu 05/09/09 - 16:07 0W Access the Alarms menu. Press the icon Downstairs area Downstairs area Thu 05/09/09 - 16:07 0W Upstairs area Downstairs area External Upstairs area Garage... -
Page 57: Activating The Alarm For An Area
ALARM ACTIVATING THE ALARM FOR AN AREA Thu 05/09/09 - 16:07 0W Access the Alarms menu. Press the icon corresponding to one of the available areas. Partial 1 Instant Delayed Thu 05/09/09 - 16:07 0W Delayed Partial 2 Instant Downstairs area Downstairs area Total Delayed... -
Page 58: Deactivating The Alarm For An Area
ALARM DEACTIVATING THE ALARM FOR AN Press the icon. AREA Thu 05/09/09 - 16:07 0W Access the Alarms menu. Press the icon corresponding to the area for which you wish to deactivate the alarms. Partial 1 Delayed Instant Thu 05/09/09 - 16:07 0W Partial 2 Delayed Instant... -
Page 59: Displaying The Alarm Zone
ALARM DISPLAYING THE ALARM ZONE Press the Zone icon. Access the Alarms menu. Thu 05/09/09 - 16:07 0W Press the icon for the relevant area. Partial 1 Instant Delayed Thu 05/09/09 - 16:07 0W Delayed Partial 2 Instant Downstairs area Delayed Total Instant... -
Page 60: Resetting The Alarm Status
ALARM RESETTING THE ALARM STATUS Press the icon. Access the Alarms menu. Thu 05/09/09 - 16:07 0W Press the icon for the relevant area. Thu 05/09/09 - 16:07 0W Partial 1 Instant Delayed Downstairs area Partial 2 Delayed Instant Upstairs area Delayed Total Instant... -
Page 61: Resetting The Alarm Memory
ALARM RESETTING THE ALARM MEMORY Press the icon. Access the Alarms menu. Thu 05/09/09 - 16:07 0W Press the icon for the relevant area. Thu 05/09/09 - 16:07 0W Partial 1 Instant Delayed Downstairs area Partial 2 Delayed Instant Upstairs area Delayed Total Instant... -
Page 62: Managing Users
ALARM MANAGING USERS Press the icon. Access the Alarms menu. Thu 05/09/09 - 16:07 0W Press the icon. Thu 05/09/09 - 16:07 0W User management Downstairs area Downstairs area System test Upstairs area Alarm log External Garage Thu 05/09/09 - 16:07 0W Enter the supervisor password and press the icon Supervisor... -
Page 63: Adding Users
ALARM ADDING USERS MODIFYING THE USER PASSWORD Press the icon followed by the user icon. To add a user, press the icon. Enter the old user password and press the icon Enter the desired name and press the icon to to confi... -
Page 64: Deleting Users
ALARM DELETING USERS SYSTEM TEST The system test can be carried out to check whether Press the icon followed by the user icon. The the sensors for the various zones are working "supervisor" user cannot be deleted. correctly. The test can only be carried out while the system is in standby. -
Page 65: Alarm Log
ALARM Select one of the available areas. ALARM LOG Access the Alarms menu. Thu 05/09/09 - 16:07 0W Press the icon. Downstairs area Downstairs area Thu 05/09/09 - 16:07 0W Upstairs area Downstairs area Downstairs area External Upstairs area Garage External Garage Downstairs area... -
Page 66: Alarm Log Legend
ALARM Thu 05/09/09 - 16:07 0W 05/09/09 08:05 CLS GARAGE DOOR 05/09/09 08:03 OPN GARAGE DOOR 05/09/09 07:23 CLS ENTRANCE DOOR 05/09/09 07:23 OPN ENTRANCE DOOR 05/09/09 06:45 CLS ENTR VOLUMETRIC 05/09/09 06:45 OPN ENTR VOLUMETRIC 1 Save alarm log to SD card. 2 Delete event log. -
Page 67: Scenarios Scenarios Menu Description
SCENARIOS SCENARIOS MENU DESCRIPTION CREATING NEW SCENARIOS The Planux Manager system controls three types of Access the Scenario settings menu by pressing scenario. · One shot: these must be activated manually and Thu 05/09/09 - 16:07 0W perform the function for which they were programmed every time they are activated. - Page 68 SCENARIOS If you wish to control all the lights in an area, press Thu 05/09/09 - 16:07 0W the corresponding fl ag icon. Climate Climate Thu 05/09/09 - 16:07 0W Loads Kitchen Shutters Shutters Lounge Lights Bedroom Bedroom Bathroom Bathroom Select the function to be associated with the scenario (e.g.
-
Page 69: Scheduling Scenarios
SCENARIOS Once all the desired functions have been set, exit the SCHEDULING SCENARIOS scenario creation menu by pressing the icon. To schedule a new scenario, press the icon. Thu 05/09/09 - 16:07 0W Thu 05/09/09 - 16:07 0W Climate YOU CAN NOW SAVE OR SCHEDULE THE SCENARIO Loads TIME... -
Page 70: Activating Scenarios
SCENARIOS Select the days of the week for which you wish to ACTIVATING SCENARIOS program the activity (selected days will be highlighted To access the Scenarios menu, press the icon on in red) and press the icon to add a programming the main menu screen. -
Page 71: Deleting Scenarios
SCENARIOS Enter the password and press the icon to confi rm. Access the Scenario settings menu by pressing Thu 05/09/09 - 16:07 0W Thu 05/09/09 - 16:07 0W Switch on all the lights Switch on all the lights Exit ENTER PASSWORD Press the icon followed by the icon corresponding DELETING SCENARIOS... -
Page 72: Modifying Scenarios
SCENARIOS Enter the password and press the icon to confi rm. Access the Scenario settings menu by pressing Thu 05/09/09 - 16:07 0W Thu 05/09/09 - 16:07 0W Switch on all the lights Switch on all the lights Exit ENTER PASSWORD Press the icon followed by the icon corresponding MODIFYING SCENARIOS... -
Page 73: Key Menu Description
SCENARIOS Once all desired functions have been set, exit the KEY MENU DESCRIPTION Modify scenario menu. To access the Keys menu, press the icon on the main menu screen. Thu 05/09/09 - 16:07 0W Thu 05/09/09 - 16:07 0W Climate YOU CAN NOW SAVE OR SCHEDULE THE SCENARIO Loads... -
Page 74: Registering New Keys
SCENARIOS REGISTERING NEW KEYS Thu 05/09/09 - 16:07 0W To access the Keys menu, press the icon on the main menu screen. Thu 05/09/09 - 16:07 0W Pass new key Pass the key over the sensor. Press the icon. Enter the password and press the icon to confi... -
Page 75: Deleting Keys
SCENARIOS Thu 05/09/09 - 16:07 0W Thu 05/09/09 - 16:07 0W Key saved Confirm removal of key? DELETING KEYS Press the icon. To access the Keys menu, press the icon on the Enter the password and press the icon to confi rm. main menu screen. -
Page 76: Renaming Keys
SCENARIOS RENAMING KEYS MODIFYING KEY FUNCTIONS To access the Keys menu, press the icon on the To access the Keys menu, press the icon on the main menu screen. main menu screen. Thu 05/09/09 - 16:07 0W Thu 05/09/09 - 16:07 0W Press the icon followed by the icon corresponding Press the... - Page 77 SCENARIOS Thu 05/09/09 - 16:07 0W Thu 05/09/09 - 16:07 0W Switch on all the lights Press the relevant icons to associate an entry or exit scenario with the key. Only One shot scenarios can be associated with it. Thu 05/09/09 - 16:07 0W Switch on all the lights Exit Exit to confi...
-
Page 78: Activating Scenarios Using A Key
SCENARIOS ACTIVATING SCENARIOS USING A KEY If no scenario is associated with the key, the following message will appear: Pass the key over the sensor. Thu 05/09/09 - 16:07 0W No scenario Door entry monitors Climate Alarm Other Other Shutters Lights Loads Loads... - Page 79 NOTES...
- Page 80 www.comelitgroup.com...