Table of Contents
Advertisement
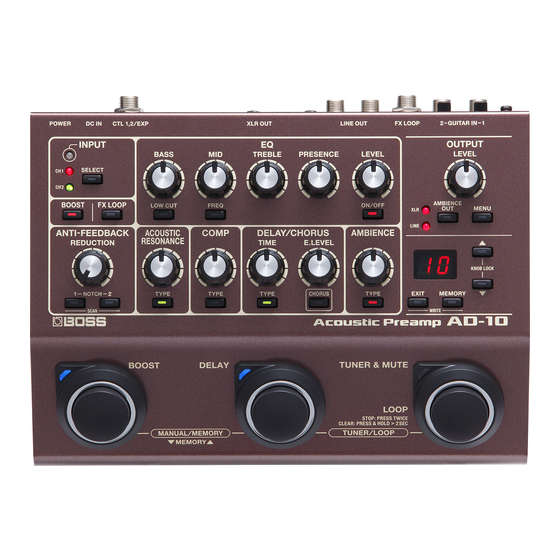
The AD-10 is designed for the acoustic guitarist who performs live; in a single unit, it combines a preamp, effects, looper, and
direct box.
Contents
Before using this unit, carefully read "USING THE UNIT SAFELY" and "IMPORTANT NOTES" (the leaflet "USING THE UNIT SAFELY" and the Owner's
Manual p. 14)). After reading, keep the document(s) where it will be available for immediate reference.
2
2
3
3
4
4
4
IN 1 and 2
4
5
5
5
5
5
6
6
6
6
7
7
7
7
7
8
Owner's Manual
Copyright © 2017 ROLAND CORPORATION
9
10
10
10
11
11
11
12
12
13
14
14
14
14
Advertisement
Table of Contents

Related Manuals for Boss AD-10


Summary of Contents for Boss AD-10
-
Page 1: Table Of Contents
Owner’s Manual Copyright © 2017 ROLAND CORPORATION The AD-10 is designed for the acoustic guitarist who performs live; in a single unit, it combines a preamp, effects, looper, and direct box. Contents Getting Ready Looper Connecting the Equipment Advanced Settings... -
Page 2: Getting Ready
Use a commercially available USB 2.0 cable to connect this port to your computer so that audio can be sent and received between the AD-10 and the computer. You can record the AD-10’s sound into your computer, or output sound from your computer via the AD-10’s output jacks. -
Page 3: Connecting A Footswitch Or An Expression Pedal
Getting Ready Connecting a Footswitch or an Expression Pedal If you connect a footswitch (FS-5U, FS-6, FS-7: sold separately) or expression pedal (FV-500H, FV-500L, EV-30, Roland EV-5: sold separately) to the CTL1,2/EXP jack, you'll be able to assign a variety of functions to it. “Assigning the Functions of the Pedals” (p. 12) * Use only the specified expression pedal. -
Page 4: Input Settings
Getting Ready Input Settings Tuning the Guitar (Tuner) The AD-10 is equipped with two channels of 1 Press the [TUNER & MUTE] pedal. input jack (GUITAR IN 1, 2). You can use these to Guitar is muted, the tuner is switched on. -
Page 5: Manual/Memory Mode
Manual Mode Here’s how to save settings that you want to keep. When you start up the AD-10, it is in Manual mode. In this mode the sound and effects are applied according to the position of 1 Hold down the [EXIT] button and press the the panel knobs. -
Page 6: Editing The Effects
Editing the Effects EQ (Equalizer) [ON/OFF] button Switches the equalizer on/off. Adjusts the tone. MEMO You can specify EQ independently for GUITAR IN 1 and 2. For details, refer to “Making Independent EQ Settings for GUITAR IN 1 and 2” (p. 11). BOOST Turning this on raises the level. -
Page 7: Anti-Feedback
Set this to the point (notch frequency) at which you want to In CHORUS effect, a slightly detuned reduce feedback. The AD-10 lets you specify two different sound is added to the original sound points: [NOTCH1] and [NOTCH2]. You can also set the notch to add depth and breadth. -
Page 8: Sub-Parameter Settings
Editing the Effects Sub-Parameter Settings Button Parameter Value Explanation By long-pressing one of the effect buttons, you can access Adjusts the noise additional settings. ON/OFF 0 – gg NOISE suppressor. SUPPRESSOR 1 Long-press a button. Adjusts the width The display indicates the of the area affected parameter/value. -
Page 9: Looper
Looper When you press the [DELAY] pedal and the [TUNER & MUTE] pedal simultaneously, the looper starts. When the looper starts, you can use the [TUNER & MUTE] pedal to record your guitar and create a loop performance. Recording Loop Playback Overdub Recording will start immediately Play back the loop. -
Page 10: Advanced Settings
MEMO When you press the [AMBIENCE OUT] button, the display shows the ambience level of the entire AD-10. Use the [ ? ] [ = ] buttons to specify the level. This is convenient when you want to make a fine adjustment to the amount of ambience, for example to compensate for the acoustics of the venue in which you’re performing. -
Page 11: Stomp Pedal Setting
Stomp Pedal Setting System Settings For each memory, you can specify which effect turns on/off Settings that are shared by the entire AD-10 are called "system when you press a pedal in Manual mode or Stomp mode (p. 5). settings."... -
Page 12: Assigning The Functions Of The Pedals
Value Explanation USB monitor setting You can specify the function of each of the AD-10’s pedals, and Switches the output of the AD-10 sound to the of a footswitch or expression pedal connected to the CTL1, 2/ XLR and LINE jacks. -
Page 13: Restoring The Factory Settings (Factory Reset)
Always use the knob positions. Restoring the Factory Settings (Factory Reset) Here’s how to return the AD-10 to its factory-set state. 1 While holding down the NOTCH [1] and [2] buttons, turn the power on. “ Fr ” appears in the display, and the [MEMORY] button blinks. -
Page 14: Appendices
• This product contains eParts integrated software platform of eSOL Co.,Ltd. eParts is a trademark of eSOL Co., Ltd. in Japan. • Roland and BOSS are either registered trademarks or trademarks of Roland Corporation in the United States and/ or other countries.