Table of Contents
Advertisement
Advertisement
Table of Contents

Related Manuals for AEG L82470BI


Summary of Contents for AEG L82470BI
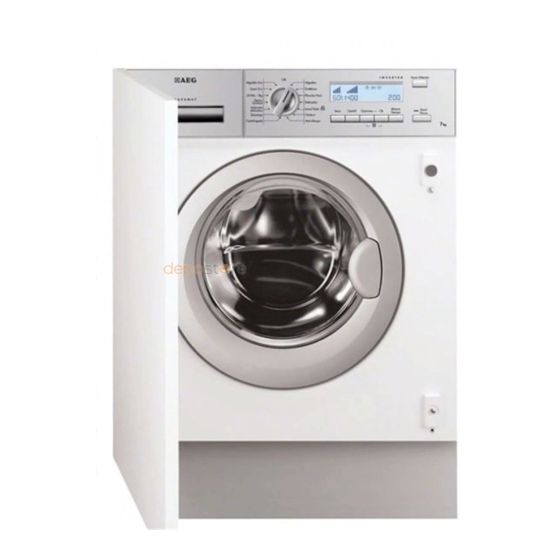
- Page 1 User Manual L82470BI Washing Machine...
-
Page 2: Table Of Contents
15. TECHNICAL DATA..................... 32 FOR PERFECT RESULTS Thank you for choosing this AEG product. We have created it to give you impeccable performance for many years, with innovative technologies that help make life simpler features you might not find on ordinary appliances. Please spend a few minutes reading to get the very best from it. -
Page 3: Safety Information
ENGLISH SAFETY INFORMATION Before the installation and use of the appliance, carefully read the supplied instructions. The manufacturer is not responsible if an incorrect installation and use causes injuries and damages. Always keep the instructions with the appliance for future reference. -
Page 4: Safety Instructions
The appliance is to be connected to the water mains • using the new supplied hose-sets. Old hose sets must not be reused. If the supply cord is damaged, it must be replaced by • the manufacturer, its Authorised Service Centre or similarly qualified persons in order to avoid a hazard. -
Page 5: Product Description
ENGLISH 2.3 Water connection • Do not put a container to collect possible water leakage under the • Make sure not to cause damage to appliance. Contact the Authorised the water hoses. Service Centre to ensure which • Before you connect the appliance to accessories can be used. - Page 6 Water inlet hose Feet for the appliance level 3.2 Accessories Spanner To remove the transit bolts. Plastic caps To close the holes on the rear side of the cabinet after the removal of the transit bolts. Inlet Hose To connect the appliance to the water tap.
-
Page 7: Control Panel
ENGLISH 4. CONTROL PANEL 4.1 Control Panel description Delay start Cottons Cottons Mix 20° Synthetics 20 Min. - 3kg Easy Iron Jeans Delicates Delicate Rinses Wool/Silk Time Save Temp. Spin Options Start/Pause Drain Outdoor Spin Anti-Allergy Programme dial Options button (Options) Display Spin selection button (Spin) Delay start button (Delay Start) - Page 8 Programme progress display: PREWASH , MAIN WASH , RINSE SPIN , DRAIN , OVERDOSAGE • The programme progress display shows the different phases of the selected programme. • During washing, a black line blinks under the running phase indicator. At the...
-
Page 9: Programmes
ENGLISH 5. PROGRAMMES 5.1 Programme Chart Programme Maximum load Programme description Temperature range Maximum spin (Type of load and soil level) speed Washing programmes 7 kg White cotton and coloured cotton. 1400 rpm Normal soil and light soil. Cottons 95°C - Cold 3 kg Synthetic items or mixed fabric 1200 rpm... - Page 10 Programme Maximum load Programme description Temperature range Maximum spin (Type of load and soil level) speed Items in denim and jersey. Also for 3 kg 1200 rpm dark coloured items. Jeans 60°C - Cold 3 kg Cotton and synthetic items with light soil level or worn only once.
-
Page 11: Consumption Values
ENGLISH Programme Cottons Eco ■ ■ ■ ■ ■ ■ ■ ■ Easy Iron ■ ■ ■ ■ Delicates ■ ■ ■ ■ ■ ■ ■ ■ ■ ■ Wool/Silk Outdoor ■ ■ ■ ■ Anti-Allergy ■ ■ ■ ■ Spin ■... -
Page 12: Options
Programmes Load (kg) Energy con- Water con- Approxi- Remaining sumption sumption mate pro- moisture (kWh) (litre) gramme du- ration (mi- nutes) Synthetics 40°C 0.50 Delicates 40°C 0.55 0.25 Wool/Silk 30°C Standard cotton programmes Standard 60°C cot- 0.84 Standard 60°C cot- 0.77... -
Page 13: Extra Rinse
ENGLISH Sensitive • NIGHT CYCLE If you select this option, the appliance Set this option to reduce the washing does not drain the water and all intensity. spinning phases are suppressed. In this way the laundry is not wrinkled. The appliance add some rinses in few As the programme is very noiseless, it programmes. -
Page 14: Settings
8. SETTINGS 8.1 Acoustic signals until the indicator comes on/goes off. The acoustic signals operate when: You can activate this option: • The programme is completed. • After you press Start/Pause : the • The appliance has a malfunction. -
Page 15: Setting A Programme
ENGLISH 10.2 Setting a programme 10.4 Starting the programme Turn the programme selector dial to the Press button Start/Pause to start the required programme. programme. The corresponding red indicator stops blinking. The programme dial determines the type of washing cycle (e.g. water level, drum The indicator is on to indicate the movement, number of rinses) and the... -
Page 16: Opening The Door
• Press button Delay Start repeatedly to press button Start/Pause to pause the set the desired delay. appliance. Changing a running programme is The symbol appears on the display. possible only by resetting it. The wash programme can be delayed from 30 min. -
Page 17: Hints And Tips
ENGLISH attention to the water level and • Turn the programme selector dial to temperature !) . Off. • Set the DRAIN or SPIN programme. After closing the door, it is necessary to • Reduce the spin speed, if needed. set the programme and the options •... -
Page 18: Care And Cleaning
11.4 Ecological hints Special stain removers are available. Use the special stain remover that is • Set a programme without the applicable to the type of stain and fabric. prewash phase to wash laundry with normal soil. 11.3 Detergents and additives •... -
Page 19: Door Seal
ENGLISH • Select the cotton programme with the Regularly examine the seal and remove highest temperature with a small all objects from the inner part. quantity of detergent. 12.4 Door seal 12.5 Cleaning the detergent dispenser... -
Page 20: Cleaning The Drain Filter
12.6 Cleaning the drain filter The pump should be inspected regularly and particularly if: • The appliance does not empty and/or spin. • The appliance makes an unusual noise during draining due to objects such as safety pins, coins etc. blocking the pump. - Page 21 ENGLISH 6. Remove foreign bodies and fluff from the filter seat and from the filter impeller. 7. Check carefully whether the pump impeller rotates (it rotates jerkily). If it doesn’t rotate, please contact your Service Centre. 8. Put the cap back on the emergency emptying hose and place the latter back in its seat.
-
Page 22: Troubleshooting
45° 20° 12.8 Frost precautions 6. Screw the water inlet hose back on and re-fit the emergency emptying If the appliance is installed in an area hose after having put the cap on where the temperature can be less than again. - Page 23 ENGLISH 13.2 Possible failures Problem Possible solution The programme does • Make sure that the mains plug is connected to the mains not start. socket. • Make sure that the appliance door is closed. • Make sure that there is not a damaged fuse in the fuse box. •...
-
Page 24: Installation
Problem Possible solution You cannot open the ap- • Make sure that the washing programme is finished. pliance door. • Set the drain or the spin programme if there is water in the drum. The appliance makes an • Make sure the levelling of the appliance is correct. Refer to unusual noise. - Page 25 ENGLISH Remove the cardboard top. Remove the polystyrene packaging materials. Remove the internal film. Open the door. Remove the polystyrene piece from the door seal and all the items from the drum. Put one of the polystyrene packaging elements on the floor behind the appliance. Carefully put down the appliance with the rear side on it.
- Page 26 Remove the polystyrene protection from the bottom. Pull up the appliance in vertical position. Remove the polystyrene block fitted on the door seal (if present). Pull out all items from the drum. Remove the power supply cable and the drain hose from the hose holders.
-
Page 27: Positioning And Levelling
ENGLISH Put the plastic caps in the holes. You can find these caps in the user manual bag. We recommend that you keep the packaging and the transit bolts for any movements of the appliance. 14.2 Positioning and levelling • Install the appliance on a flat hard floor. •... -
Page 28: Water Drainage
14.3 The inlet hose • Connect the hose to the back appliance. Turn the inlet hose only left or right. • Loose the ring nut to set it in the correct position. • Connect the water inlet hose to the cold water tap with 3/4 thread. - Page 29 ENGLISH On the edge of a sink • Make sure that the plastic guide cannot move when the appliance drains. Attach the guide to the water tap or the wall. To a stand pipe with vent-hole • Directly into a drain pipe at a height of not less than 60 cm (23.6”) and not more than 100 cm (39.3”).
-
Page 30: Preparation And Assembly Of The Door
To a wall-pipe • Directly to a built-in drain pipe in the room wall and tighten it with a clip. You can extend the drain hose to maximum 400 cm. Contact the service centre for the other drain hose and the extension. - Page 31 ENGLISH Door 16-22 mm The dimensions of the door should be: • width 595 - 598 mm • thickness 16-22 mm • the height X depends on the height of the Ø 35 mm adjacent furniture's base. 22±1,5 mm 14 mm 595-598 mm Hinges To mount the hinges it is necessary to drill...
-
Page 32: Technical Data
WARNING! Do not remove the screw B. If the door has to be opened from left to right, invert the position of the plates E, the magnet D and the plate C. Mount the counter-magnet D and the hinges A as previously described. - Page 33 ENGLISH...
- Page 34 www.aeg.com...
- Page 35 ENGLISH...
- Page 36 www.aeg.com/shop...