
Related Manuals for Huawei UAP2105


Summary of Contents for Huawei UAP2105
-
Page 1: User Guide
UAP2105 V300R011C90 User Guide Issue Date 2009-08-20 Huawei Proprietary and Confidential Copyright © Huawei Technologies Co., Ltd. - Page 2 Huawei Technologies Co., Ltd. provides customers with comprehensive technical support and service. For any assistance, please contact our local office or company headquarters. Huawei Technologies Co., Ltd. Address: Huawei Industrial Base Bantian, Longgang Shenzhen 518129 People's Republic of China Website: http://www.huawei.com...
-
Page 3: Table Of Contents
3.4 Specifications of the UAP2105........................3-5 3.4.1 Performance Specifications of the UAP2105..................3-5 3.4.2 Technical Specifications of the UAP2105.....................3-6 4 Installing the UAP2105......................4-1 4.1 Selecting a Position for Installing the UAP2105....................4-2 4.2 Installing the SIM or USIM Card........................4-2 4.3 Connecting UAP2105 Cables..........................4-3 5 Configuring the UAP2105......................5-1 5.1 Initial Configuration............................5-2... - Page 4 UAP2105 Contents User Guide 7 Communication Ports Used by the UAP2105...............7-1 Huawei Proprietary and Confidential Issue 03 (2009-08-20) Copyright © Huawei Technologies Co., Ltd.
- Page 5 Figure 3-3 Ports and buttons on the UAP2105.....................3-4 Figure 4-1 Installing the SIM or USIM card......................4-3 Figure 4-2 Connecting the power adapter of the UAP2105.................4-4 Figure 4-3 Cable connections (with the modem having only one LAN port)............4-5 Figure 4-4 Cable connections (with the modem having multiple LAN ports).............4-5 Figure 4-5 Cable connections (in FE direct connection mode)................4-6...
-
Page 7: Communication Ports Used By The Uap2105
User Guide Tables Tables Table 3-1 LED on the UAP2105..........................3-3 Table 3-2 Ports and buttons on the UAP2105......................3-4 Table 3-3 Performance specifications of the UAP2105..................3-5 Table 3-4 Technical specifications of the UAP2105....................3-6 Table 5-1 Meanings of parameters........................5-7 Table 6-1 Commissioning AP Services........................6-2 Table 6-2 Alarm management options.........................6-5... -
Page 9: About This Document
This describes the safety precautions that are taken when installing, operating and maintaining the equipment manufactured by Huawei. 3 Introduction to the UAP2105 Developed in compliance with the protocols of R99/R4/R5/R6 FDD, the UAP2105 provides UMTS radio network access for home and Small Office and Home Office (SOHO) users. Issue 03 (2009-08-20) Huawei Proprietary and Confidential Copyright ©... - Page 10 This describes how to install the UAP2105, accessories, and related cables. 5 Configuring the UAP2105 This describes how to configure the UAP2105 through the WebUI or the AP Manager. 6 Routine Operation and Maintenance of the UAP2105 This describes how to perform commissioning, routine maintenance, and software management of the AP after installation and configuration.
- Page 11 +A means the three keys should be pressed concurrently. Key 1, Key 2 Press the keys in turn. For example, pressing Alt, A means the two keys should be pressed in turn. Issue 03 (2009-08-20) Huawei Proprietary and Confidential Copyright © Huawei Technologies Co., Ltd.
- Page 12 Press the primary mouse button twice continuously and quickly without moving the pointer. Drag Press and hold the primary mouse button and move the pointer to a certain position. Huawei Proprietary and Confidential Issue 03 (2009-08-20) Copyright © Huawei Technologies Co., Ltd.
-
Page 13: Changes In The Uap2105 User Guide
User Guide 1 Changes in the UAP2105 User Guide Changes in the UAP2105 User Guide This describes the changes in the UAP2105 User Guide. 03(2009-09-20) This is the second commercial release.. Compared with issue 02(2009-07-10) of V300R011C90, this issue does not add contents. - Page 14 UAP2105 1 Changes in the UAP2105 User Guide User Guide Topic Change Description 3.4.1 Performance Specifications of the UAP2105 The description of the capacity and service capabilities of the UAP2105 is modified. Compared with issue 01 (2009-05-30) of V300R011C90, this issue does not delete contents.
-
Page 15: Safety Precautions
Only qualified specialists are allowed to check and repair the device and remove the safety facilities. Only personnel that are certificated or authorized by Huawei are allowed to replace or change the device or accessories (including software). Any fault or error that might cause safety problems must be reported to the personnel in charge immediately. - Page 16 Place the device in a dry, ventilated, and dustfree place that is neither exposed to direct sunlight nor close to heat or fire. Keep the device far away from strong magnetic or electric fields. Huawei Proprietary and Confidential Issue 03 (2009-08-20) Copyright © Huawei Technologies Co., Ltd.
-
Page 17: Introduction To The Uap2105
3.3 Ports and Buttons on the UAP2105 This describes the ports and buttons on the UAP2105. The ports are used for the power supply, Ethernet cable, and SIM or USIM card. The RESTORE button is used to restore the login password of the WebUI to the default password. -
Page 18: Appearance Of The Uap2105
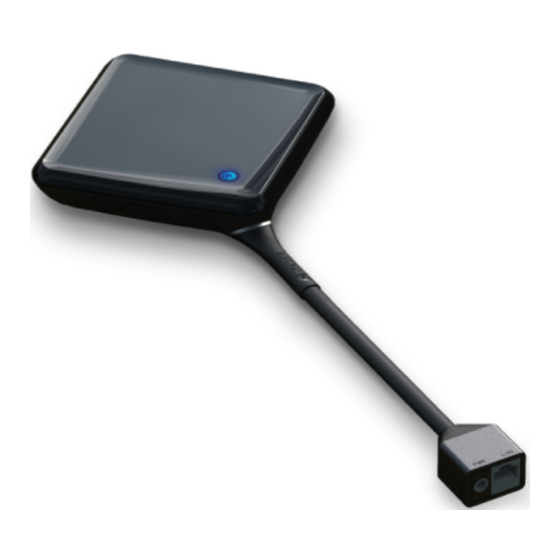
Figure 3-1 shows a black UAP2105. Figure 3-1 UAP2105 3.2 LED on the UAP2105 The UAP2105 has only one LED, which indicates the working status of the UAP2105. Figure 3-2 shows the LED on the UAP2105. Huawei Proprietary and Confidential Issue 03 (2009-08-20) Copyright ©... -
Page 19: Figure 3-2 Led On The Uap2105
Blinking in red (ON for Slight interference exists in the signals of an AP cell. The 1s and OFF for 1s) UAP2105 works properly, but the quality of service (QoS) deteriorates. Blinking in red (ON for Strong interference exists in the signals of an AP cell. The 0.25s and OFF for 0.25s) -
Page 20: Ports And Buttons On The Uap2105
3.3 Ports and Buttons on the UAP2105 This describes the ports and buttons on the UAP2105. The ports are used for the power supply, Ethernet cable, and SIM or USIM card. The RESTORE button is used to restore the login password of the WebUI to the default password. -
Page 21: Specifications Of The Uap2105
This describes the performance specifications and technical specifications of the UAP2105. 3.4.1 Performance Specifications of the UAP2105 This describes the performance specifications of the UAP2105 in terms of the frequency bands, maximum transmit power, number of TRXs, transmit and receive diversity, receiver sensitivity, and clock precision. -
Page 22: Technical Specifications Of The Uap2105
Receiver -110 dBm sensitivity Clock precision ±0.1 ppm 3.4.2 Technical Specifications of the UAP2105 This describes the technical specifications of the UAP2105. Technical Specifications Table 3-4 Technical specifications of the UAP2105 Item Specification Dimensions (Height x Width x Depth) 33 mm x 125 mm x 125 mm Weight 0.4 kg... - Page 23 UAP2105 User Guide 3 Introduction to the UAP2105 Item Specification Power consumption < 8 W Ambient temperature Working temperature: -5 C to +40 Storage temperature: -40 C to +70 Relative humidity 5% RH to 95% RH Specifications of the power adapter...
-
Page 25: Installing The Uap2105
4.2 Installing the SIM or USIM Card This describes how to install the SIM or USIM card. The data in the card enables the UAP2105 to perform user authentication and then to connect the core network after the authentication is successful. -
Page 26: Selecting A Position For Installing The Uap2105
4.2 Installing the SIM or USIM Card This describes how to install the SIM or USIM card. The data in the card enables the UAP2105 to perform user authentication and then to connect the core network after the authentication is successful. -
Page 27: Connecting Uap2105 Cables
USIM card faces the silkscreen. Do not remove the SIM or USIM card while the UAP2105 is running. Otherwise, the AP cell cannot be set up. After the SIM or USIM card is re-inserted, the UAP2105 cell is reestablished. -
Page 28: Figure 4-2 Connecting The Power Adapter Of The Uap2105
4-2. Figure 4-2 Connecting the power adapter of the UAP2105 CAUTION To ensure that the UAP2105 runs properly, use the power adapter delivered with the UAP2105. Step 2 Connect the Ethernet cable. In PPPoE mode The UAP2105 is connected to the Ethernet through an xDSL device, such as a modem, BAS, or DSLAM. -
Page 29: Figure 4-3 Cable Connections (With The Modem Having Only One Lan Port)
4 Installing the UAP2105 If the Modem Then … has ... Multiple LAN ports Connect the UAP2105 to an idle LAN port on the modem through an Ethernet cable, as shown in Figure 4-4. The UAP2105 and the computer for local maintenance should be connected to the same modem. -
Page 30: Figure 4-5 Cable Connections (In Fe Direct Connection Mode)
4 Installing the UAP2105 User Guide The UAP2105 is directly connected to the Ethernet through a device, such as a router. The number of devices used in FE direct connection mode is smaller than the number of devices used in PPPoE mode. As a result, the UAP2105 provides higher uplink and downlink rates. -
Page 31: Configuring The Uap2105
Configuring the UAP2105 About This Chapter This describes how to configure the UAP2105 through the WebUI or the AP Manager. 5.1 Initial Configuration This describes how to configure the IP address of the AP and the connection mode through an ADSL modem or router according to the network topology of the AP. -
Page 32: Initial Configuration
ADSL modem to Bridge Only and the connection of the ADSL modem to RFC 2684 Bridge. The setting method varies according to the type of the ADSL modem. For details, see the document delivered with the ADSL modem. Huawei Proprietary and Confidential Issue 03 (2009-08-20) Copyright © Huawei Technologies Co., Ltd. -
Page 33: Figure 5-1 Configuring An Ap
Check the configuration of the AP. On the WebUI, choose Transfer Basic > NETMODE to check the configuration of the AP, as shown in Figure 5-2. Figure 5-2 Checking the configuration of the AP Issue 03 (2009-08-20) Huawei Proprietary and Confidential Copyright © Huawei Technologies Co., Ltd. -
Page 34: Fe Direct Connection Mode
The IP address of the computer is set on the 192.168.1.x network segment. Context Figure 5-3 shows the FE direct connection mode. Figure 5-3 FE direct connection mode Huawei Proprietary and Confidential Issue 03 (2009-08-20) Copyright © Huawei Technologies Co., Ltd. -
Page 35: Defining A Subscriber In The Ahr
Step 1 Start the AHR client, and then type the user name, password, and IP address of the AHR server, as shown in Figure 5-4. Figure 5-4 Logging in to the AHR Issue 03 (2009-08-20) Huawei Proprietary and Confidential Copyright © Huawei Technologies Co., Ltd. -
Page 36: Figure 5-5 Adding An Ap Zone
AP cell in sequence. Step 6 Confirm the settings, and then click Finish, as shown in Figure 5-6. Figure 5-6 Completing settings Huawei Proprietary and Confidential Issue 03 (2009-08-20) Copyright © Huawei Technologies Co., Ltd. -
Page 37: Adding A User
AP AP Zone Name Name of the zone configured Name of the zone where the in the 5.2.1 Adding a Zone AP is located Issue 03 (2009-08-20) Huawei Proprietary and Confidential Copyright © Huawei Technologies Co., Ltd. - Page 38 UE. Step 3 Type parameters (the parameters with red asterisks are mandatory), and then click OK. The AP user is added successfully. ----End Huawei Proprietary and Confidential Issue 03 (2009-08-20) Copyright © Huawei Technologies Co., Ltd.
-
Page 39: Setting Parameters On The Ap Manager
Step 1 Open the Internet Explorer (IE), and then type the IP address and login port number (such as, http://185.22.61.79:8080/apm) of the AP Manager. The login dialog box is displayed, as shown Figure 5-8. Figure 5-8 Logging in to the AP Manager Issue 03 (2009-08-20) Huawei Proprietary and Confidential Copyright © Huawei Technologies Co., Ltd. -
Page 40: Figure 5-9 Configuring A Zone
Figure 5-9 Configuring a zone Step 5 Set the parameters based on network planning, and then click Activate to activate the zone, as shown in Figure 5-10. 5-10 Huawei Proprietary and Confidential Issue 03 (2009-08-20) Copyright © Huawei Technologies Co., Ltd. -
Page 41: Setting Parameters In A Zone
Step 1 Choose Configuration > > Zone Configuration . The Zone Configuration page is displayed. Step 2 Select the zone in which parameters need to be set, as shown in Figure 5-11. Then, click Configure. Issue 03 (2009-08-20) Huawei Proprietary and Confidential 5-11 Copyright © Huawei Technologies Co., Ltd. -
Page 42: Figure 5-11 Configuring A Zone
Step 4 Choose APCELLFREQ from the left pane and set the list of AP frequencies, as shown in Figure 5-12. Figure 5-12 Setting the list of AP frequencies 5-12 Huawei Proprietary and Confidential Issue 03 (2009-08-20) Copyright © Huawei Technologies Co., Ltd. -
Page 43: Figure 5-13 Setting The List Of Ap Scrambling Codes
Step 10 Click Submit after the APCELLAC, list of AP frequencies, and list of AP scrambling codes are set. The configuration confirmation page is displayed, as shown in Figure 5-14. Figure 5-14 Configuration confirmation Issue 03 (2009-08-20) Huawei Proprietary and Confidential 5-13 Copyright © Huawei Technologies Co., Ltd. - Page 44 UAP2105 5 Configuring the UAP2105 User Guide Step 11 After confirming the settings, click Apply. ----End 5-14 Huawei Proprietary and Confidential Issue 03 (2009-08-20) Copyright © Huawei Technologies Co., Ltd.
-
Page 45: Routine Operation And Maintenance Of The Uap2105
UAP2105 User Guide 6 Routine Operation and Maintenance of the UAP2105 Routine Operation and Maintenance of the UAP2105 About This Chapter This describes how to perform commissioning, routine maintenance, and software management of the AP after installation and configuration. 6.1 Commissioning Services This describes how to trace the Uu interface, Iu interface, and CDT messages to test the services offered by the AP through the Trace Viewer tool of the Local Maintenance Terminal (LMT). -
Page 46: Commissioning Services
UAP2105 6 Routine Operation and Maintenance of the UAP2105 User Guide 6.1 Commissioning Services This describes how to trace the Uu interface, Iu interface, and CDT messages to test the services offered by the AP through the Trace Viewer tool of the Local Maintenance Terminal (LMT). -
Page 47: Figure 6-1 Tracing Management
UAP2105 User Guide 6 Routine Operation and Maintenance of the UAP2105 Figure 6-1 Tracing management Step 2 Power on the UE under the coverage of the AP cell. Check whether the UE can automatically search for the AP cell during startup. -
Page 48: Diagnosing Faults
UAP2105 6 Routine Operation and Maintenance of the UAP2105 User Guide 6.2 Diagnosing Faults This describes how to diagnose the faults in the AP, faults at the radio network layer, and faults at the transport network layer on the WebUI and how to view diagnosis results. -
Page 49: Handling Alarms
UAP2105 User Guide 6 Routine Operation and Maintenance of the UAP2105 Step 4 Click Start to diagnose the faults. After the fault diagnosis is complete, diagnosis results are displayed in the Trouble Diagnose Log pane. ----End 6.3 Handling Alarms This describes how to manage AP alarms on the AP Manager. You can subscribe to alarms, query alarm logs, and query and monitor active alarms. - Page 50 UAP2105 6 Routine Operation and Maintenance of the UAP2105 User Guide Prerequisite The FTP server is available. Log in to the AP Manager, and then choose Software > File Server. On the File Servers tab page, check Status of the corresponding FTP server.
- Page 51 UAP2105 User Guide 6 Routine Operation and Maintenance of the UAP2105 If You Set Immediately Reboot to ... Then … The AP is rebooted immediately for upgrade after the software is downloaded successfully. NOTE Rebooting the AP disrupts the services provided by the AP.
-
Page 52: Uploading Ap Terminal Files
UAP2105 6 Routine Operation and Maintenance of the UAP2105 User Guide Option Description Time Setting It is used to specify the time for starting the upgrade. If the upgrade mode is set to Timer, this option is enabled. Click Next. On the displayed page, select the target APs. - Page 53 UAP2105 User Guide 6 Routine Operation and Maintenance of the UAP2105 If Status of the FTP Server is ... Then … Unavailable The AP Manager cannot communicate with the FTP server normally. Select the option button before the FTP server, and then click Modify. Configure the FTP server on the displayed File Server Information page.
- Page 54 To view terminal files, click View Files, and store the terminal files on the local disk of the computer according to the displayed system message. The methods of viewing terminal files are the same. Choose Start > All Programs > Huawei Local Maintenance Terminal, and then select the corresponding alarm browser tool. The following description takes the method of viewing alarm logs for example: 1.
-
Page 55: Table 7-1 Communication Ports Used By The Uap2105
UAP2105 User Guide 7 Communication Ports Used by the UAP2105 Communication Ports Used by the UAP2105 Table 7-1 lists the communication ports used by the UAP2105. Table 7-1 Communication ports used by the UAP2105 Prot Side Port Side B Port...