Table of Contents
Advertisement
Quick Links
Advertisement
Table of Contents

Related Manuals for Philips FAXJET IPF520


Summary of Contents for Philips FAXJET IPF520
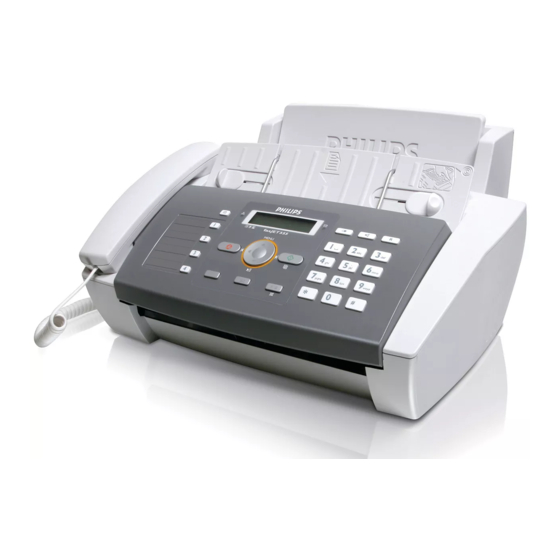
- Page 1 IPF520 IPF525 IPF555 User Manual...
-
Page 2: Dear Customer
Dear Customer Introduction Brand Variable With the purchase of this device, you have chosen a quality PHILIPS product brand. Their device fulfils the most var- ied requirements for private use or in your office and busi- ness everyday. Your device is delivered with a starter cartridge for a few test pages. -
Page 3: Table Of Contents
Table of Contents Dear Customer ... 2 About this User Manual ... 2 1 General Safety Information ... 4 Setting Up the Machine ... 4 Power Supply ... 4 Repairs ... 4 Consumable Materials ... 4 2 Overview... 5 Overview of the Menu Functions ... 5 Machine Overview ... -
Page 4: General Safety Information
(see back side of this user manual). Other consumable materials could damage the device or shorten its service life. Environment Dispose of old consumable materials according to the waste regulations of your country. Philips · IPF 520 · 525 · 555... -
Page 5: Overview
2 Overview Overview of the Menu Func- tions Calling Ijet 3 Menu Functions Press MENU to open the function menu. Page through [ menu entries. Confirm the selected function with o. Select further functions using [ or o. Press C to return to the previous menu level. -
Page 6: Machine Overview
… Panel with display Vorderansicht ‚ EXT socket—Connection socket for additional devices ƒ LINE socket—Connection socket for telephone cable „ ) Telephone handset socket—Connection socket for the telephone handset (IPF¦525, IPF¦555) Bodenansicht Philips · IPF 520 · 525 · 555... -
Page 7: Panel
Panel Telephone Book Entries ljet 3 m—Calling up the telephone book entries. Select the entries with [ or with the numeric keys Speed Dial Keys Ijet 2 q—Recalling speed dial entries. Green Lamp (SMS) Green Lamp _—It flashes whenever an SMS message has arrived or when a document is waiting to be retrieved from the fax memory. -
Page 8: Initial Operation
1 Fold open the paper feed flap towards front until stop. 2 Insert paper in the paper feeder. You can insert maxi- mum 100 sheets (A4 · 80 g/m 3 Close the paper feed flap. Philips · IPF 520 · 525 · 555... -
Page 9: Connecting Handset
Connecting the Telephone Cable Connecting the Telephone Cable Notice Analogue Fax Machine Your device is an analogue fax device (Group 3). It is not an ISDN device (Group 4), and there- fore it cannot be operated directly on an ISDN connection. -
Page 10: Initial Installation
Consult your retailer. Setting the Country 1 Use [ to select the country in which you are operat- ing the device. 2 Confirm with o. Philips · IPF 520 · 525 · 555... - Page 11 Activating the Printing Head 1 Confirm NEW PRINT CART.? using 1 to set the ink level memory to "full“. 2 A test page is printed. 3 Check the print sample for interruptions. 4 If necessary, repeat the printing using 0. 5 You can finish using 1 and j.
-
Page 12: Telephone Functions
(q) with the numeric keys. The position must always be a two digit number. Notice Speed Dial Entry Assigned If you select a position that is already assigned, a message appears on the display. 6 Confirm with o. Philips · IPF 520 · 525 · 555... -
Page 13: Telephone Book Of The Device
7 Enter the telephone numbers. 8 Confirm with o. 9 Enter the name. 10 Confirm with o. 11 Select a ring tone using [. 12 Confirm with o. 13 Using [ select if would like to save further entries or exit the function. -
Page 14: Calling Line Identification (Clip)
4 Using [, you can page through the list of missed calls. Notice Newly missed calls are indicated by means of a flashing indicator light. 5 Confirm with o. 6 To call back, pick up the handset. Philips · IPF 520 · 525 · 555... -
Page 15: Answering Machine
5 Answering Machine Type 2 (großer Core) (IPF¦555) Switching on and off Switching on the answering machine only with announcement and AM/FAX ljet 3 Notice Switching on the Answering Machine only with Outgoing Message The answering machine can be switched on only if an outgoing message has been recorded. -
Page 16: Listening To Messages
6 Using [ select TYPE CODE . 7 Confirm with o. If an access code was entered, this appears on the display. 8 Enter the new access code using the numeric keys. Philips · IPF 520 · 525 · 555... -
Page 17: Using Remote Access
Notice Deleting Access Code You can delete the access code by pressing C. Note that when the access code is deleted, everyone has an access to the stored messages. 9 Confirm with o. 10 You can exit with j. Protecting Answering Machine against Access by Strangers By entering an access code you can prevent other persons from hearing the personal messages, or from changing the... -
Page 18: Modifying The Settings
3 Confirm with o. ICM ON SPEAKER appears on the display. 4 Using [ select PRINT SET-UP . 5 Confirm with o. 6 Using [ select whether you would like to have a printout. 7 Confirm with o. Philips · IPF 520 · 525 · 555... -
Page 19: Fax
6 Fax Unsuitable Documents! CAUTION! Unsuitable Documents! Do not insert any documents into the device that ..are wet, have been edited with correction fluid, are soiled or have a coated surface. … that are written on with a soft pencil, with paint, chalk or charcoal. -
Page 20: Sending To Multiple Recipients (= Broadcasting)
6 Using [ select YES . 7 Confirm with o. 8 Using [ select whether the current settings should be printed or not. 9 Confirm with o. 10 Confirm YES if the settings are correct using o. Philips · IPF 520 · 525 · 555... -
Page 21: Fax Reception
Fax Reception Fax Reception Received faxes are printed out immediately. If no paper or no ink cartridge is inserted, the device saves incoming fax messages. The _-display flashes. If you insert paper or a new ink cartridge, the saved messages are printed. Message Memory Full If the message memory is full, no additional messages can be received. -
Page 22: Copier
6 Using [ select from the displayed contrast settings. 7 Confirm with o. 8 Using the numeric keys, enter how many copies of the document (max. nine copies) you would like to make. 9 Press o. The copy is created. Philips · IPF 520 · 525 · 555... -
Page 23: Sms
8 SMS Function is not supported in all countries and networks (Function is not supported in all countries and networks) SMS Requirements CLIP for SMS Your device is preset for using the SMS (Short Messaging Service) services. Caller Line Identification (CLIP) must be activated for the SMS to work. -
Page 24: Sending Saved Sms
2 Using [ select TELEPHONE CALL . 3 Confirm with o. The connection is established. 4 Pick up the handset, when LIFT HANDSET appears on the display. 5 Hang up to end the call. Philips · IPF 520 · 525 · 555... -
Page 25: Composing Sms
Replying an SMS You can add text to a received SMS and reply to the sender. 1 For the relevant SMS, press o. 2 Select using [ ANSWER . 3 Confirm with o. 4 You can modify the message, or add text to it. 5 Confirm with o. - Page 26 7 Confirm with o. Printing SMS Settings 1 Press _. 2 Using [ select CONFIGURATION . 3 Confirm with o. 4 Select using [ PRINT CONFIG. . 5 Confirm with o. The settings are printed. Philips · IPF 520 · 525 · 555...
-
Page 27: Settings
9 Settings Calling Ijet 3 Menu Functions Press MENU to open the function menu. Page through [ menu entries. Confirm the selected function with o. Select further functions using [ or o. Press C to return to the previous menu level. Press j to close the menu and return to the starting mode. -
Page 28: Entering Print Position
6 Using [ select BUZZER VOLUME . 7 Confirm with o. 8 Select the desired volume using [ or switch the buzzer off using DISABLED . 9 Confirm with o. 10 You can exit with j. Philips · IPF 520 · 525 · 555... -
Page 29: Setting The Fax Switch
Setting the fax switch Type Basic (IPF¦520) The built-in fax switch of your device distinguishes between fax messages and telephone calls. Faxes are received automatically. You can set whether faxes will be received automatically or manually. 1 Press MENU. RECEPT. SET-UP appears on the display. -
Page 30: Changing The Number Of Rings
1 Press MENU. RECEPT. SET-UP appears on the display. 2 Select using [ INSTALLATION . 3 Confirm with o. STATION NAME appears on the display. Philips · IPF 520 · 525 · 555... -
Page 31: Printing Lists
4 Select using [ TEL.LINE SETUP . 5 Confirm with o. LINE TYPE appears on the display. 6 Using [ select SILENCE LAPSE . 7 Confirm with o. 8 Using o select from the displayed values. 9 Confirm with o. 10 You can exit with j. -
Page 32: Starting Initial Installation
NO - the text which exceeds the page length is not printed. YES - the text which exceeds the page length is always printed onto a new page. 9 Confirm with o. Philips · IPF 520 · 525 · 555... -
Page 33: Telephone Lines And Additional Devices
10 Telephone Lines and Additional Devices Configuring Telephone Lines and Services DSL Connection DSL Connection In the event that you use a DSL modem: Connect the device to the slot intended for analogue telephones/fax machines! For additional information, please consult the operating manual of your DSL system. -
Page 34: Connecting Additional Devices
11 Confirm with o. 12 You can exit with j. Notice Switching Off Function You can switch this function off, if in step 8 you select NO , confirm using oand exit using j. Philips · IPF 520 · 525 · 555... -
Page 35: Detecting Call Signal Clock Pulse Automatically
Using an External Answering Machine For the best operation, the answering machine must be connected to the EXT socket of the device. Notice Number of Rings set on External An- swering Machine Make sure that a lower ring tone is set on the external answering machine than on the device (setting RINGS NUMBER ). -
Page 36: Service
5 Remove the cartridge from the packing and remove the protective strips. 6 Insert the cartridge into the holder with the coloured end facing front and the contacts facing down. 7 Press the cartridge down until it snaps into place. Philips · IPF 520 · 525 · 555... -
Page 37: Fixing A Paper Jam
8 Close the device by folding the document holder down and swivelling the metal bracket upward. 9 Then close the control panel. 10 NEW PRINT CART.? appears on the display. 11 Press the 1 key if a new cartridge was inserted. A test page is printed. -
Page 38: Cleaning The Scanner
3 Clean the contacts (A) with a slightly moistened cloth. DANGER! Do not touch the print jets (B)! Do not touch the print jets (B)! 4 Clean the contacts on the holder before reinserting the cartridge. Philips · IPF 520 · 525 · 555... -
Page 39: Power Cycling
5 Insert the cartridge and close the device. 6 Reconnect the device to the power supply. 7 Enter the date and time. Power Cycling If a problem occurs that cannot be corrected with the instructions in this user manual (see also the help below), follow the steps given here. -
Page 40: Troubleshooting
It is possible that the telephone service provider has activat- ed the answering machine function (= voice mail-box) for your telephone connection. Disabling the Mailbox. En- quire with your telephone service provider. Philips · IPF 520 · 525 · 555... -
Page 41: Appendix
12 Appendix Technical Data Dimensions (L¦×¦H¦×¦W) ...372¦×¦293¦×¦198¦mm Dimensions Weight ...3,5¦kg Weight Mains Connection... 220¦–¦240¦V¦~ / 50¦–¦60¦Hz Mains Connection Power Consumption Power Consumption Stand-by Mode Stand-by Mode...<¦5¦W Transmission ...<¦25¦W Transmission Recommended Ambient ...5¦–¦35¦ºC Recommended Ambient Relative Humidity ... 20¦–¦80¦% (non-condensing) Relative Humidity Connection Type... -
Page 42: Declaration Of Conformity (Doc)
The paper and cardboard packaging used can be disposed of as recyclable paper. Have the plastic wrapping and Sty- rofoam packaging recycled or dispose of it in the non-recy- clable waste, depending on the requirements in your coun- try. Philips · IPF 520 · 525 · 555... - Page 43 Trademarks: The references mentioned in this manual are trademarks of the respective companies. The lack of the trademarks É and Ë does not justify the assumption that these dedicated terminologies are free trademarks. Other product names used herein are for identification purposes only and may be trademarks of their respective owners.
-
Page 44: Customer Information
Telephone: 08 45 - 090 03 15 Fax: 08 70 - 124 02 02 Spaltenumbruch PHILIPS and the PHILIPS’ Shield Emblem are registered trademarks of Koninklijke Philips Electronics N.V. and are used by SAGEM COMMUNICATIONS under license from Koninklijke Philips Electronics N.V. SAGEM COMMUNICATIONS...