Table of Contents
Advertisement
Quick Links
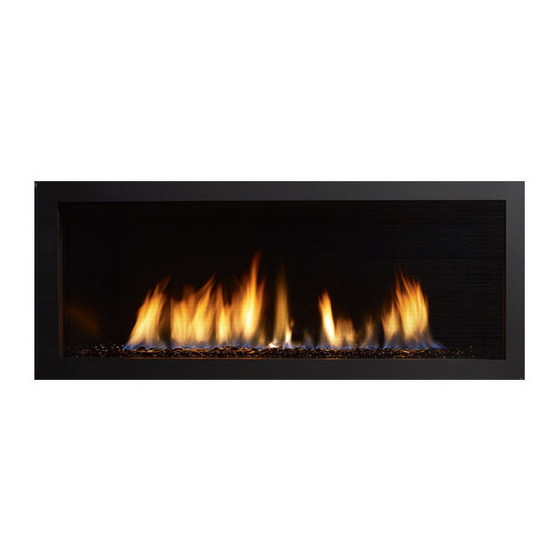
Regency Horizon
Gas Fireplace
Horizon HZ40E Product Video
WARNING
FIRE OR EXPLOSION HAZARD
Failure to follow safety warnings exactly could result in serious
injury, death, or property damage.
- Do not store or use gasoline or other lammable vapors and liquids in the vicinity of this or any other
appliance.
- WHAT TO DO IF YOU SMELL GAS
•
Do not try to light any appliance.
• Do not touch any electrical switch: do not use any phone in your building.
Leave the building immediately.
• Immediately call your gas supplier from a neighbour's phone. Follow the gas supplier's
instructions.
• If you cannot reach you gas supplier, call the ire department.
- Installation and service must be performed by a qualiied installer, service agency or the gas supplier.
Tested by:
919-360b
FPI FIREPLACE PRODUCTS INTERNATIONAL LTD. 6988 Venture St., Delta, BC Canada, V4G 1H4
®
Installer : Please complete the details on the back cover
and leave this manual with the homeowner.
Homeowner: Please keep these instructions for future reference.
HZ40E
Owners &
Installation Manual
40E
MODELS:
HZ
-NG10 Natural Gas
40E
HZ
-LP10 Propane
www.regency-ire.com
08.30.16
Advertisement
Table of Contents

Related Manuals for Regency Horizon HZ40E

Summary of Contents for Regency Horizon HZ40E
- Page 1 Gas Fireplace MODELS: -NG10 Natural Gas -LP10 Propane www.regency-ire.com Horizon HZ40E Product Video WARNING FIRE OR EXPLOSION HAZARD Failure to follow safety warnings exactly could result in serious injury, death, or property damage. - Do not store or use gasoline or other lammable vapors and liquids in the vicinity of this or any other appliance.
-
Page 2: Manufactured Mobile Home Requirements
Manufactured Home Construction and Safety Standard, Title 24 CFR, Part 3280, in the Untied States, or the Standard for Installation in Mobile Homes, CAN/CSA Z240 MH, in Canada. Regency Horizon Gas Inserts Video Regency Horizon ® HZ40E-10 Gas Fireplace... - Page 3 To the New Owner: Congratulations! You are the owner of a state-of-the-art Gas Fireplace by REGENCY ® . The HZ40E has been designed to provide you with all the warmth and charm of a ireplace at the lick of a switch. The model HZ40E has been approved by Warnock Hersey/Intertek for both safety and eiciency.
-
Page 4: Table Of Contents
Unit Installation with Horizontal Termination ....35 Main Assembly ............63 4" x 6-5/8" venting ............35 Accessories ..............64 Unit Installation with Horizontal Termination ....36 Dura-Vent Horizontal terminations .......37 Warranty Unit installation with Vertical Termination .....38 Warranty ..............66 Regency Horizon ® HZ40E-10 Gas Fireplace... -
Page 5: Copy Of Safety Decal
The State of Massachusetts requires the installation of a carbon monoxide alarm in accordance with NFPA 720 and a CO alarm with battery back up in the same room where the gas appliance is installed. Regency Horizon ® HZ40E-10 Gas Fireplace... -
Page 6: Ma Code - Co Detector
(e) A copy of all installation instructions for all Product Approved side wall horizontally vented gas fueled equipm ent, all venting instructions, all parts lists for venting instructions, and/or all venting design instructions shall remain with the appliance or equipment at the completion of the installation. Regency Horizon ® HZ40E-10 Gas Fireplace... - Page 7 (1092mm) (972mm) (902mm) Inner/Outer Faceplate 4 Piece Faceplate/Verona Surround Regency Horizon ® HZ40E-10 Gas Fireplace...
-
Page 8: Important Message
National Electrical Code, ANSI/NFPA 70 or CSA C22.1 Canadian Electrical Code. 3. See general construction and assembly instructions. The appliance and vent should be enclosed. Regency Horizon ® HZ40E-10 Gas Fireplace... -
Page 9: Installation Checklist
Before leaving this unit with the customer, the Flat on Wall installer must ensure that the appliance is iring Flat on Wall Corner Recessed into Wall/Alcove correctly and operation fully explained to Corner customer. Regency Horizon ® HZ40E-10 Gas Fireplace... -
Page 10: Clearances
(air space) to combustible materials are not adhered to. It is of greatest importance that this ireplace and vent system be installed only in accordance with these instructions. Alcove Regency Horizon ® HZ40E-10 Gas Fireplace 10 |... -
Page 11: Mantel Clearances
To Unit Base Top of Fireplace Opening MANTEL LEG CLEARANCES Combustible mantel leg clearances as per diagram: 5-11/16 (144mm) MANTEL LEG Non-Combustible 1.5" (38mm) 7-1/8 (181mm) Allowable mantel leg projection 10 (203mm) 13 (279mm) Regency Horizon ® HZ40E-10 Gas Fireplace... -
Page 12: Unit Assembly Prior To Installation
3. Install any optional components with access panel removed. 4. Reinstall access panel with 8 screws - prior to installing any facing material Note: Access panel is no longer accessible once facing material installed. Installation Access Panel Regency Horizon ® HZ40E-10 Gas Fireplace 12 |... -
Page 13: Framing Dimensions
Metal Studs after the unit is in position on edge and the venting, gas, and electrical is installed. The horizontal studs allow the non-combustible wall board to be attached and supported. Finished Floor Regency Horizon ® HZ40E-10 Gas Fireplace... -
Page 14: Optional Framing Kit
NOTE: Ensure the lat side of the steel stud is facing the wood framing. 9. Secure 2 vertical studs on either side of the appliance with 4 screws per side stud as shown. Vertical studs (258-027) (258-025)Flat side out Regency Horizon ® HZ40E-10 Gas Fireplace 14 |... -
Page 15: Wall Mount On / Off Switch And Remote Receiver Installation
11. Using the two (2) screws provided secure the cover plate to the Receiver. Low Voltage Junction Box Profl ame Receiver J-Box Receiver Slider Switch Wall Plate 10 ft. wire harness with 12 pin connector Diagram 1 Regency Horizon ® HZ40E-10 Gas Fireplace... -
Page 16: Non-Combustible Requirements
6. Prime wall for a second time for proper adhesion of paint 7. Paint walls using a high quality paint which will withstand the high temperatures being emitted from this appliance. Non-combustible board-faces and edges MUST BE PRIMED. Regency Horizon ® HZ40E-10 Gas Fireplace 16 |... -
Page 17: Framing & Finishing
IMPORTANT: 1/2" gap is required between the faceplate and the inished wall when using 4 piece Faceplate (Part # 258-954, 258-957) Unit shown with inner door frame only or Verona Glass Surround (Part # 256-951, 256-957) Regency Horizon ® HZ40E-10 Gas Fireplace... - Page 18 While every precaution is taken in providing the recommendations on preparation and inish, given the variations in paint quality, with temperature limits and workmanship in application, Regency is unable to guarantee the life of the joint compounds, paint or any other inish materials or workmanship applied to or used in any application surrounding the ireplace.
-
Page 19: Exterior Vent Termination Requirements
* Clearance in accordance with local installation codes and the requirements of the gas supplier 3 feet (91cm) within a height of 15 feet (4.5m) above the meter / regulator assembly 3 feet (91cm) above - if within 10 feet (3m) horizontally Regency Horizon ® HZ40E-10 Gas Fireplace... -
Page 20: 4" X 6-5/8" Rigid Pipe
DVA-ES - N/A from FPI Wall Thimble-Black 46DVA-WT 4DT-WT 4DWT 4DWT SV4RSM Wall Thimble Support/Ceiling Support 46DVA-DC SV4PF Firestop Spacer 46DVA-FS 4DT-FS 4DFSP 4DFS SV4BF TM-4CS Trim Plate-Black 4DT-TP 4DFPB 4DcP SV4LA TM-4TP Regency Horizon ® HZ40E-10 Gas Fireplace 20 |... - Page 21 Note: Horizontal runs of vent must be level, or have a 1/4” rise for every 1 foot of run towards the termination. Never allow the vent to run downward - this could cause high temperatures and may present a possible fi re hazard. Regency Horizon ® HZ40E-10 Gas Fireplace...
-
Page 22: Vent Restrictor Position
4. Once the vent restrictor plate is in the required position, secure with screws. Set 0 Set 1 Set 2 Set 3 (Factory set) VENT RESTRICTOR VENT RESTRICTOR VENT RESTRICTOR VENT RESTRICTOR AT 2" AT 1-1/2" AT 1" AT 3" Regency Horizon ® HZ40E-10 Gas Fireplace 22 |... -
Page 23: Venting Introduction
Refer to the "Vent Restrictor Position" section for details on how to change the vent restrictor from the factory setting of Set 0 to Set 1 if required. Note: For horizontal terminations the Regency Direct Vent Flex System may be used for installations with a maximum continuous vent length of up to 10 feet. -
Page 24: Horizontal Terminations
S.S. screws #8 x 1-1/2” drill point Notes: 1. Liner sections should be continuous without any joints or seams. ® 2. Only Flex pipe purchased from Regency may be used for Flex installations 3. Horizontal vent must be supported every 3 feet. ®... -
Page 25: Horizontal Terminations
American Metal Products Ameri Vent Direct Vent, Security Secure Vent , ICC Excel, Selkirk Direct-Temp. AstroCap is a proprietary trademark of FPI ® Fireplace Products International Ltd. Dura-Vent® and Direct Vent are registered and/or proprietary trademarks of Simpson Dura-Vent Co. Inc. Regency Horizon ® HZ40E-10 Gas Fireplace... -
Page 26: Horizontal Terminations
Flex system can only be used up to 10 feet - otherwise rigid venting must be used. Straight Out Horizontal Venting Diagram 1 center of hole Please note the minimum centerline for basic install shown above. Regency Horizon ® HZ40E-10 Gas Fireplace 26 |... - Page 27 3' Max. 6' Max. 4' Min. 4' Max. 7' Max. Please note minimum 6' Min. 1 foot between 90 5' Max. 8' Max. elbows is required. 8' Min. Restrictor Position - Set 0 (factory setting) Regency Horizon ® HZ40E-10 Gas Fireplace...
- Page 28 1 f o o t 6' Min. 10' Min. between 90 elbows 7' Min. 6' Max. 12' Min. 9' Max. is required. Restrictor Position - Set 0 (factory setting) Regency Horizon ® HZ40E-10 Gas Fireplace 28 |...
-
Page 29: Vertical Terminations
American Metal Products Ameri Vent Direct Vent, Security Secure Vent , ICC Excel, Selkirk Direct-Temp. AstroCap is a proprietary trademark of FPI ® Fireplace Products International Ltd. Dura-Vent® and Direct Vent are registered and/or proprietary trademarks of Simpson Dura-Vent Co. Inc. Regency Horizon ® HZ40E-10 Gas Fireplace... -
Page 30: Venting Arrangement For Vertical Terminations
Set 0 to Set 1 or Set 2 if required. Vent Restrictor on Set 2 Vent Restrictor on Set 1 Max. 10 (3m)(centerline to centerline) Minimum length of pipe between elbows 12 (305mm) Regency Horizon ® HZ40E-10 Gas Fireplace 30 |... -
Page 31: Vertical Termination With Co-Linear Flex System
46DVA-GK 3" Co-linear Adapter with lashing Outer Pipe with Kit# 946-563 Air Intake Pipe Length Co-Linear Flex Rigid Pipe Adapter Adapter # 510-994 with Kit# 946-563 45 Elbow Inner Pipe Adapter with Kit# 946-563 Regency Horizon ® HZ40E-10 Gas Fireplace... -
Page 32: Vertical Terminations
6' Min. Restrictor Position - Set 0 (factory setting) Restrictor Position - Set 0 (factory setting) For additional vertical venting with 2 x 90 elbows, refer to "Rigid Pipe Venting Arrangements" Section. Regency Horizon ® HZ40E-10 Gas Fireplace 32 |... - Page 33 Please note min. 1 foot 5' Min. 6' Max. 8' Min. between 90 elbows is 6' Min. 7' Max. 9' Min. required. 7' Min. 8' Max. 10' Min. Restrictor Position - Set 0 (factory setting) Regency Horizon ® HZ40E-10 Gas Fireplace...
-
Page 34: Venting Arrangements - Vertical Terminations
Horizontal Distance (Feet) Horizontal Distance (Feet) Horizontal Distance (Feet) The shaded area in the diagrams show the allowable vertical terminations when using two- 3" co-linear aluminium lex and 4 x 6-5/8" rigid pipe. Regency Horizon ® HZ40E-10 Gas Fireplace 34 |... -
Page 35: Unit Installation With Horizontal Termination
(drilling pilot holes will make this easier). 4. Level the ireplace and fasten it to the framing using nails or screws through the top and side nailing strips. Diagram 2 Diagram 4 Diagram 1 Regency Horizon ® HZ40E-10 Gas Fireplace... -
Page 36: Unit Installation With Horizontal Termination
Apply Outer Diameter) Mill-Pac to the outer lex pipe and slip it over the outer lue collar of the vent terminal at least 1-3/8"(35mm) and fasten with the 3 screws. Regency Horizon ® HZ40E-10 Gas Fireplace 36 |... -
Page 37: Dura-Vent Horizontal Terminations
Failure to do so may result in drafting or per- Termination. NEVER install the snorkel brick, concrete, or other types of sidings. formance issues not covered under warranty. upside down. Regency Horizon ® HZ40E-10 Gas Fireplace... -
Page 38: Unit Installation With Vertical Termination
A poor draft, or down drafting can result from high wind conditions near big trees or adjoining roof lines, in these cases, increasing the vent height may solve the problem. Regency Horizon ® HZ40E-10 Gas Fireplace 38 |... -
Page 39: Vertical Termination
10. Attach the rigid pipe section to the adaptor by using Mill-Pac on the inner/ Note: Any closets or storage spaces which the vent passes through must outer pipe. Use 3 screws to secure outer pipe. be enclosed. Regency Horizon ® HZ40E-10 Gas Fireplace 919-695... -
Page 40: Flex Vent Components
-1/4 Termination Cap Storm Collar Flashing Ceiling firestop Firestop spacer to prevent debris from falling into the ceiling Diagram 1 Roof support irestop Ceiling firestop Enclosure Ceiling firestop Diagram 1a Regency Horizon ® HZ40E-10 Gas Fireplace 40 |... -
Page 41: High Elevation
(clockwise) with a 1/8" lat screwdriver. Note: Any damage due to carboning resulting from improperly setting the aeration Note: Screw should be snug, but do not over controls is NOT covered under warranty. tighten. Regency Horizon ® HZ40E-10 Gas Fireplace... -
Page 42: Wiring Diagram
CAUTION: Label all wires prior to disconnection Caution: Ensure that the wires do not touch any when servicing controls. Wiring errors can cause hot surfaces and are away from sharp edges. improper and dangerous operation. Regency Horizon ® HZ40E-10 Gas Fireplace 42 |... -
Page 43: Optional Fan Installation - Initial Install
Remove 2 top screws and loosen 2 bottom screws to remove the side access pane Tabs 3) Secure the fan to the loor of the unit with 2 screws, in locations show below. Regency Horizon ® HZ40E-10 Gas Fireplace... - Page 44 Fan Control Module marked “COM”. Turn the switch on the Fan Control Module to the ON position. ON is to the left. The “O” is the off position FCM-COM connector Regency Horizon ® HZ40E-10 Gas Fireplace 44 |...
-
Page 45: Optional Fan Installation - Existing Install
9. Manoeuvre fan through left access panel opening. 6. Remove the burner by sliding it to the right - then lift out. * Prior to removing burner - remove crystals, pebbles, spa stones and inner panels - if installed. Regency Horizon ® HZ40E-10 Gas Fireplace... - Page 46 The “O” is the off position. 15. Secure the ground wire from the fan assembly and the power cord to the ground lug located on the back left near the fan. Regency Horizon ® HZ40E-10 Gas Fireplace 46 |...
- Page 47 IMPORTANT: These fans collect a lot of dust from within your home. Ensure you maintain these fan motors on a regular basis by vacuuming the fan blades and housing using a soft brush nozzle. Regency Horizon ® HZ40E-10 Gas Fireplace...
-
Page 48: Wiring Diagram With Optional Fan
Caution: Ensure that the wires do not touch any CAUTION: Label all wires prior to disconnection hot surfaces and are away from sharp edges. when servicing controls. Wiring errors can cause improper and dangerous operation. Regency Horizon ® HZ40E-10 Gas Fireplace 48 |... -
Page 49: Optional Wall Thermostat Installation
- see picture below. NOTE: When the remote receiver is set to ON position, the remote control transmitter and all of its features are now disabled. CAUTION Do not wire Thermostat wires to 120V wire. Regency Horizon ® HZ40E-10 Gas Fireplace... -
Page 50: Inner Panel Installation
6) Install the back enamel panel fi rst. Tilt the panel forward - position the bottom of the panel fi rst. Use care not to scratch or mark the panel on the pilot shield. Final Install Regency Horizon ® HZ40E-10 Gas Fireplace 50 |... -
Page 51: Glass Crystals Or Optional Stones
5 lbs 5 lbs 2 packages (6 x bags pebbles) HZ40E Natural River Pebbles shown surrounding the Horizon Burner Glass Crystals shown surrounding the Burner Optional Volcanic Stones + Glass Crystals shown on burner. Regency Horizon ® HZ40E-10 Gas Fireplace... -
Page 52: Optional Driftwood Log Set Installation
Secure template in place with magnets (supplied) on each side. These cut lines for HZ40E only HZ54E - existing Pilot HZ54E - new Pilot Hood Top View - showing both HZ54E/HZ40E cut Hood template out along dotted line Regency Horizon ® HZ40E-10 Gas Fireplace 52 |... - Page 53 Log 3, match bottom of Log 5 and template profi le. HZ54E shown - Completed Install 14. Carefully remove magnets and log placement template, slightly lifting logs as required. Match pin and pin landing Logs 1 and 3. HZ40E shown - Completed Install Regency Horizon ® HZ40E-10 Gas Fireplace...
-
Page 54: Glass Door Installation
See Diagram 2. Diagram 3 Diagram 1 Hook top of door onto top flange Flush Door Diagram 2 Regency Horizon ® HZ40E-10 Gas Fireplace 54 |... -
Page 55: Safety Screen/Inner Door Frame Removal/ Installation
3. Install screen into inner door frame - secure safety screen by bending in 6 tabs in locations shown below. Tabs 8. HZ42STE only - repeat Steps 1-7 to install screen and door frame on other side. Regency Horizon ® HZ40E-10 Gas Fireplace... -
Page 56: Verona / 4 Piece Faceplate Installation
If thicker inishing materials are used - the faceplate may be adjusted out - up to 1/2". HZ40E Important: 1/2" gap required between faceplate and inished wall. +1/2" +1/4" Use irst notch in bracket for standard installation Final Install Regency Horizon ® HZ40E-10 Gas Fireplace 56 |... -
Page 57: Outer Door Frame Installation
Inner door frame may be installed by itself, or with the outer door frame. The outer door frame cannot be installed by itself - if installing the outer door frame - the inner door frame must also be installed. Regency Horizon ® HZ40E-10 Gas Fireplace... -
Page 58: Operating Instructions
Use a non-abrasive cleaner and DO NOT ATTEMPT TO CLEAN THE GLASS WHILE IT IS HOT. Regency Horizon ® HZ40E-10 Gas Fireplace 58 |... -
Page 59: Lighting Procedure
2. Press and release the ON/OFF button on the remote handheld transmit- ter (see Diagram 2). An audible beep should be heard from the receiver. ON/OFF Button Diagram 2 Remote shown in Manual Mode on Hi Regency Horizon ® HZ40E-10 Gas Fireplace... -
Page 60: Copy Of Lighting Plate Instructions
Utiliser l'interrupteur mural ou la télécommande pour mettre le système sur ''OFF''. Lors de l'entretien de l'appareil –débrancher l'alimentation électrique et couper le gaz de l'appareil. DO NOT REMOVE THIS INSTRUCTION PLATE 919-401a Regency Horizon ® HZ40E-10 Gas Fireplace 60 |... -
Page 61: Maintenance
Replacement of the glass panels resealed & reinstalled in accordance with the should be done by a licensed or manufacturer's instructions. qualiied service person. 8. Verify operation after servicing. Regency Horizon ® HZ40E-10 Gas Fireplace... -
Page 62: Valve Assembly Replacement
10. Disconnect the inlet gas line and remove the valve assembly. panels - if installed. 11. Replace valve assembly and reverse steps. 7. Remove 3 screws on the burner to release it - locations shown below. Regency Horizon ® HZ40E-10 Gas Fireplace 62 |... -
Page 63: Main Assembly
Valve Assembly HZ40E NG SIT 911-012 Ignition board 258-576E/P Valve Assembly HZ40E LP SIT IPI/CPI Switch 911-013 910-157/P Replacement Fan (Dual Blower) 911-010 Stepper Motor/Modulator - NG 258-013 Safety screen 911-011 Stepper Motor/Modulator - LP Not Shown Regency Horizon ® HZ40E-10 Gas Fireplace... -
Page 64: Accessories
Verona Glass Surround 946-675 Black Relective Crystals 946-738 Caramel Luster Firebeads Chocolate Brown 946-676 Copper Crystals 946-677 Starire Crystals 258-917 Fan Kit 258-013 Mesh Guard 258-900 Steel Stud Framing Kit 256-930/P Log Set Regency Horizon ® HZ40E-10 Gas Fireplace 64 |... - Page 65 Regency Horizon ® HZ40E-10 Gas Fireplace...
-
Page 66: Warranty
FPI is not responsible for results or costs of workmanship of unauthorized FPI dealers or agents in the negligence of their service work. Regency Horizon ® HZ40E-10 Gas Fireplace 66 |... - Page 67 Freight damages for products or parts are not covered under the terms of the warranty. Products made or provided by other manufacturers and used in conjunction with the FPI appliance without prior authorization from FPI may void this warranty. Regency Horizon ® HZ40E-10 Gas Fireplace...
- Page 68 Product Registraion and Customer Support: Thank you for choosing a Regency Fireplace. Regency strives to be a world leader in the design, manufacture, and markeing of hearth products. To provide the best support for your product, we request that you complete a product registraion form at htp://www.regency-fire.com/Customer-Care/Warranty-Registraion.aspx...
- Page 69 Product Registration and Customer Support: Thank you for choosing a Regency Fireplace. Regency strives to be a world leader in the design, manufacture, and marketing of hearth products. To provide the best support for your product, we request that you complete a product registration form found on our Web Site under Customer Care within ninety (90) days of purchase.
- Page 72 Installer: ___________________________________________________________ Phone #: ___________________________________________________________ Date Installed: ______________________________________________________ Serial No.: __________________________________________________________ Horizon HZ40 Product Video Regency Horizon and SureFire are trademarks of FPI Fireplace Products International Ltd. © Copyright 2016 FPI Fireplace Products International Ltd. All rights reserved. Printed in Canada...