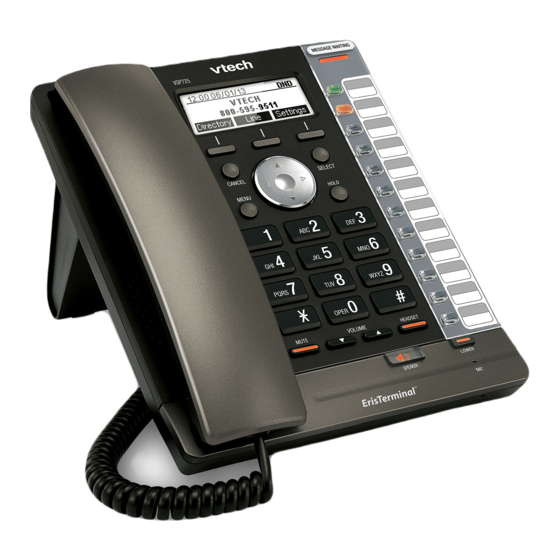
VTech VSP725 User Manual
Hide thumbs
Also See for VSP725:
- Administrator and provisioning manual (152 pages) ,
- User manual (74 pages) ,
- Quick start manual (16 pages)
Table of Contents
Advertisement
Quick Links
Advertisement
Table of Contents

Related Manuals for VTech VSP725


Summary of Contents for VTech VSP725
- Page 1 1 | P a g e VTech VSP725 User Guide nextiva.com/support...
-
Page 2: Table Of Contents
1 | P a g e Contents Installation ..............................2 Desk Setup ............................... 2 Wall Mounting ..............................3 Location of Controls ..........................5 Front Panel Features ............................5 Dial Pad and Audio Keys ..........................6 Provisioning Steps ............................. 7 NextOS 3.0 Portal ............................7 Network Configuration ............................ -
Page 3: Installation
2 | P a g e Installation Desk Setup NOTE: if you place the display face down when you attach the stand, be sure to place a soft cloth under the display to avoid any damage to the phone. 1. Attach the stand by lining up the tabs on the stand with the slots on the rear of the phone (Figure 1-1). -
Page 4: Wall Mounting
3 | P a g e 5. If there is a computer near the phone, but no extra Ethernet wall jacks, connect the computer to the PC port on the back of the phone using a second Ethernet cable. NOTE: The PC port is marked by on the back of the phone. - Page 5 4 | P a g e 1. Prepare the wall-mount screws. The phone will fit onto wall-mount screws with centers 3 ¼ inches (8.2 cm) or 4 inches (10.2 cm) apart. NOTE: Most standard wall plates have screw centers 3 ¼ inches (8.2 cm) apart. 2.
-
Page 6: Location Of Controls
5 | P a g e Location of Controls Front Panel Features Figure 2-1: Button Map © Nextiva, All Rights Reserved... -
Page 7: Dial Pad And Audio Keys
6 | P a g e Figure 2-2: Navigation Map Dial Pad and Audio Keys Figure 2-3: Keypad Map © Nextiva, All Rights Reserved... -
Page 8: Provisioning Steps
5. Click the Device section. 6. Select Own Device. 7. Select Nextiva VTech VSP725 from the Own Device drop-down list. 8. Enter the MAC address of the phone in the MAC Address text box. 9. Click Generate under the Authentication Name text box. -
Page 9: Network Configuration
8 | P a g e Network Configuration Configuring a Static IP Address Before you can configure a static IP Address, you must disable DHCP in the Admin settings. Disabling DHCP: 1. Press the MENU button. 2. Scroll down and select Admin settings. NOTE: To select a menu option, press the SELECT button. -
Page 10: Checking The Firmware
9 | P a g e 3. Press the 123 softkey to switch to letters, and then enter admin as the password. 4. Press the Enter softkey. 5. Select Network setting. 6. Select Others. 7. Enter the IP Address of the primary DNS server in the DNS 1 field; 8.8.4.4 is recommended. NOTE: To enter a period between the octets in the IP Address, press the Add dot softkey. - Page 11 2. Log in with admin for the username and admin for the password. The System Status screen displays (Figure 3-2). Figure 3-2: VTech Web Interface TROUBLESHOOTING: If the phone does not accept admin as the password, the password prompt appears again. At that point you will need to perform a factory reset (see the Factory Reset section for instructions).
-
Page 12: Enabling The Web Configuration Utility
11 | P a g e Rebooting the Phone 1. While still logged in to the phone on your web browser and on the Provisioning screen, click Reboot on the far-left side of the screen. 2. Click the blue Reboot button in the middle of the screen. The phone reboots, provisions, and registers to Nextiva’s network. -
Page 13: Additional Setup Options
Additional Setup Options Correcting the Time If the VTech VSP725 does not display the correct time, first check that the time zone in the NextOS 3.0 portal is correct for the user the phone is assigned to before proceeding. The VTech VSP725 cannot have its time changed on the local phone. Please call Nextiva Support to ensure your phone’s configuration file reflects the proper time zone. - Page 14 13 | P a g e Using Softkeys If you would like to turn a programmable key into a speed dial for a commonly called number, please contact Nextiva Support. From the NextOS 3.0 Portal 1. For Administrators, log in to the NextOS 3.0 portal by visiting www.nextiva.com and clicking on the customer Login found at the top right.
-
Page 15: Automatic Call Distribution (Acd) States
Automatic Call Distribution (ACD) States The VTech VSP725 supports phone integration with Nextiva Call Center Pro and Nextiva Call Center Enterprise’s ACD states, allowing agents to go available and sign out of a call center from their phone’s interface. -
Page 16: Basic Phone Usage
15 | P a g e Basic Phone Usage Making a Call 1. Go off-hook. 2. Dial the 10-digit phone number of the party you want to call, and then press the Dial softkey. 3. When finished speaking, go on-hook. Making a Second Call Without Line Mirroring 1. -
Page 17: Accepting A Second Call
16 | P a g e Using a Headset You can accept calls using the headset by pressing the HEADSET button. If you’d like the Answer softkey to default to your headset, please contact Nextiva Support. Accepting a Second Call Without Line Mirroring 1. -
Page 18: Conferencing
17 | P a g e 3. When the party is ready to accept the transfer, press the Transf softkey. The party that was on hold is transferred to the second party you dialed, and you are no longer connected to either party. -
Page 19: Do Not Disturb
18 | P a g e 1. Press the programmable key corresponding to the messages feature. 2. Press the SELECT button to check the messages for LINE 1, or scroll to select a different line. Then press the SELECT button. The phone dials out to the corresponding voice mailbox. NOTE: By default, the call is made using the speakerphone. - Page 20 19 | P a g e NOTE: If you are enabling Do Not Disturb for another line besides line 1, scroll down to find the line, and then press the right navigation button. 5. Press the Save softkey. Do Not Disturb is activated, and a busy symbol appears in the upper- right corner of the screen.
-
Page 21: Changing Acd States
20 | P a g e Changing ACD States In order for a call center agent to change their ACD state from the VTech VSP725, ACD functionality needs to be enabled on the phone by Nextiva Support. Signing In Changing your ACD state to Sign In does not result in calls from queue being routed to your phone. To achieve this, you must change your ACD state to Available. -
Page 22: Disposition Codes
21 | P a g e Disposition Codes This phone does not support the use of disposition codes. Wrap-Up Wrap-Up refers to the time after a call ends, but before another call is routed to your phone. This is an optional state that can be enabled or not enabled for your call center. -
Page 23: Factory Reset
22 | P a g e Factory Reset Through the Phone’s Menu 1. Press the MENU button. 2. Scroll down and select Admin settings. NOTE: To select a menu option, press the SELECT button. 3. Press the 123 softkey to switch to letters, and then enter admin as the password. 4.