Stihl FS 94 Instruction Manual
Hide thumbs
Also See for FS 94:
- Instruction manual (104 pages) ,
- Instruction manual (84 pages) ,
- Instruction manual (40 pages)
Table of Contents
Advertisement
Advertisement
Table of Contents

Related Manuals for Stihl FS 94


Summary of Contents for Stihl FS 94
- Page 1 STIHL FS 94 Instruction Manual...
-
Page 3: Table Of Contents
Minimize Wear and Avoid Damage Main Parts Specifications This instruction manual is protected by copyright. All rights reserved, especially the rights to reproduce, translate and process with electronic systems. FS 94, FS 94 R, FS 94 C, FS 94 RC... -
Page 4: Guide To Using This Manual
Do not lend or rent your power tool Handle heating without the instruction manual. Be sure that anyone using it understands the information contained in this manual. FS 94, FS 94 R, FS 94 C, FS 94 RC... - Page 5 (e.g. with a hair net, cap, hard hat, etc.). questions in this respect, consult a servicing dealer. Use only high quality tools and accessories in order to avoid the risk of accidents and damage to the machine. FS 94, FS 94 R, FS 94 C, FS 94 RC...
- Page 6 Check cutting tool or attachment for – spillage and damage. correct and secure assembly and good condition. FS 94, FS 94 R, FS 94 C, FS 94 RC...
- Page 7 0. balance and secure footing. securely. The cutting attachment must be clear of the ground and all other obstructions because it may begin to run when the engine starts. FS 94, FS 94 R, FS 94 C, FS 94 RC...
- Page 8 Special care must be taken when your ability to hear warnings (shouts, working in difficult, over-grown terrain. alarms, etc.) is restricted. FS 94, FS 94 R, FS 94 C, FS 94 RC...
- Page 9 (out of balance). high speed. The forces that occur act on adequate quality and its geometry must the machine, the attachment and the be correct (shape, thickness). material being cut. FS 94, FS 94 R, FS 94 C, FS 94 RC...
- Page 10 To reduce the risk of fire, do not service sensation in fingers), seek medical or store your machine near open flames. advice. Check the fuel filler cap for leaks at regular intervals. FS 94, FS 94 R, FS 94 C, FS 94 RC...
- Page 11 STIHL Polycut Mowing Head with Polymer Blades For mowing unobstructed edges of meadows (without posts, fences, trees or similar obstacles). FS 94, FS 94 R, FS 94 C, FS 94 RC...
- Page 12 Resharpen the grass cutting blade solid object. Never use wire in place of the nylon according to instructions when it has mowing line – risk of injury. dulled noticeably. FS 94, FS 94 R, FS 94 C, FS 94 RC...
-
Page 13: Approved Combinations Of Cutting Attachment, Deflector, Handle And Harness
English Approved Combinations of Cutting Attachment, Deflector, Handle and Harness Cutting Attachment Deflector Handle Shoulder Strap/Harness FS 94, FS 94 R, FS 94 C, FS 94 RC... -
Page 14: Mounting The Bike Handle
Grass cutting blade 260-2 (260 mm dia.) Grass cutting blade 230-4 (230 mm dia.) Grass cutting blade 230-8 (230 mm dia.) WARNING Non-metal grass cutting blades are not approved. FS 94, FS 94 R, FS 94 C, FS 94 RC... - Page 15 Fitting the Throttle Cable Tighten down the screws firmly. NOTICE Do not kink the throttle cable or lay it in tight radii – make sure the throttle trigger moves freely. FS 94, FS 94 R, FS 94 C, FS 94 RC...
-
Page 16: Mounting The Loop Handle
Adjusting the Throttle Cable bar (2); the holes must line up. accessory. Check adjustment of throttle cable – see "Inspection and Maintenance by User". FS 94, FS 94 R, FS 94 C, FS 94 RC... - Page 17 If no Go to "Securing the Loop Handle". barrier bar is fitted – lock the nuts if necessary. FS 94, FS 94 R, FS 94 C, FS 94 RC...
-
Page 18: Fitting The Carrying Ring
Line up the carrying ring. Tighten down the screw firmly. Metal Version The carrying ring comes standard with the machine or is available as a special accessory. FS 94, FS 94 R, FS 94 C, FS 94 RC... -
Page 19: Mounting The Cutting Attachment
Position deflector (1) or (2) on the NOTICE gearbox. The thrust plate on the gearbox is Insert the screws (3) and tighten necessary for mounting cutting tools. them down firmly. FS 94, FS 94 R, FS 94 C, FS 94 RC... - Page 20 The output shaft (2) must be blocked with the stop pin (6) to mount or remove cutting attachments. The stop pin is included with the machine and is available as a special accessory. FS 94, FS 94 R, FS 94 C, FS 94 RC...
- Page 21 Direction of rotation is indicated by an loose, fit a new one. arrow on the inside of the deflector. Keep the leaflet and packaging of the metal cutting tool in a safe place. FS 94, FS 94 R, FS 94 C, FS 94 RC...
-
Page 22: Fuel
1 part oil and the fuel tank. Gasoline Use only high-quality brand-name gasoline with a minimum octane rating of 90 – leaded or unleaded. FS 94, FS 94 R, FS 94 C, FS 94 RC... -
Page 23: Fueling
Thoroughly shake the mixture in the canister before fueling your machine. WARNING Pressure may build up in the canister – open it carefully. Clean the fuel tank and canister from time to time. FS 94, FS 94 R, FS 94 C, FS 94 RC... -
Page 24: Fitting The Harness
Balance the machine. Place the cap in the opening. Turn the cap clockwise as far as stop and tighten it down as firmly as possible by hand. FS 94, FS 94 R, FS 94 C, FS 94 RC... -
Page 25: Balancing The Machine
Press down the bar on the The correct floating position is obtained carabiner (1) and pull the carrying as follows: ring (2) out of the carabiner. FS 94, FS 94 R, FS 94 C, FS 94 RC... -
Page 26: Starting / Stopping The Engine
Function of stop switch and ignition system The ignition is switched off and the engine stopped when the stop switch is pressed. The stop switch returns automatically to the Run position when it FS 94, FS 94 R, FS 94 C, FS 94 RC... - Page 27 10 seconds in position g. release the stop switch – it springs At temperatures above +10°C back to the run position. Warm up the engine for at least 5 seconds in position g. FS 94, FS 94 R, FS 94 C, FS 94 RC...
-
Page 28: Transporting The Unit
– even if the bulb is filled with fuel. Swing wire rod outwards. Set the choke knob according to engine temperature. Now start the engine. FS 94, FS 94 R, FS 94 C, FS 94 RC... -
Page 29: Operating Instructions
Replace felt filter (5) – as a temporary measure you can knock it out on the palm of you hand or blow it out with compressed air – do not wash FS 94, FS 94 R, FS 94 C, FS 94 RC... -
Page 30: Adjusting The Carburetor
If the cutting attachment continues to keep rotating in idle even after adjustment, have the machine checked by a servicing dealer. Unplug spark plug boot (3) Unscrew spark plug FS 94, FS 94 R, FS 94 C, FS 94 RC... -
Page 31: Storing The Machine
Working in an easily combustible or explosive atmosphere may cause a fire or an explosion. This can result result in serious injuries or damage to property. FS 94, FS 94 R, FS 94 C, FS 94 RC... -
Page 32: Sharpening Metal Cutting Blades
STIHL balancer (special accessory) or have it If necessary, remove the mowing checked by a dealer and re- head. balanced as necessary – STIHL recommends a STIHL servicing dealer. FS 94, FS 94 R, FS 94 C, FS 94 RC... -
Page 33: Inspection And Maintenance By User
To reduce the risk of injury, always shut off the engine before installing the blades. Remove the mowing head. Replace blades as shown in the illustrated instructions. Mount the mowing head on the machine. FS 94, FS 94 R, FS 94 C, FS 94 RC... - Page 34 A vibration-absorbing rubber element is installed between the powerhead and the drive tube. Have it checked if there are signs of wear or a noticeable increase in vibration levels. FS 94, FS 94 R, FS 94 C, FS 94 RC...
-
Page 35: Maintenance And Care
Have decoked by servicing dealer after Exhaust port first 139 hours of operation, then every 150 hours of operation All accessible screws and nuts (not adjust- Retighten ing screws) FS 94, FS 94 R, FS 94 C, FS 94 RC... - Page 36 Safety labels Replace Only if there is a noticeable loss of engine power STIHL recommends an authorized STIHL servicing dealer. see chapter "Inspections and Maintenance by Dealer", section "Antivibration Elements" FS 94, FS 94 R, FS 94 C, FS 94 RC...
-
Page 37: Minimize Wear And Avoid Damage
Clutch – STIHL recommends that you have Filters (air, fuel) – servicing and repair work carried out Rewind starter – exclusively by an authorized STIHL FS 94, FS 94 R, FS 94 C, FS 94 RC... -
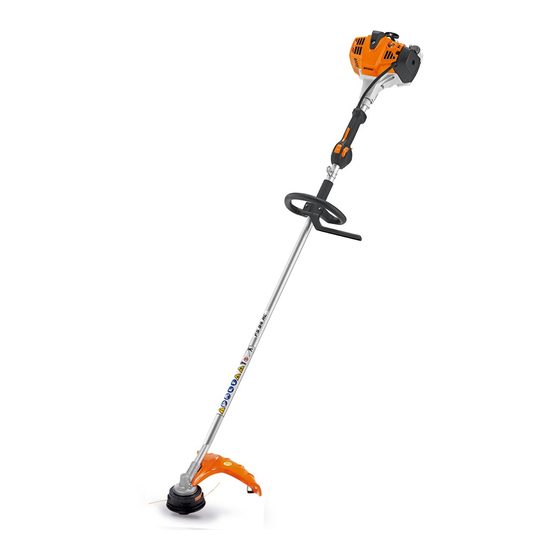
Page 38: Main Parts
14 Handle support 15 Carrying ring 16 Throttle cable retainer 17 Spark plug boot with cap 18 Air filter cover 19 Machine support 20 Loop handle 21 Barrier bar Serial number FS 94, FS 94 R, FS 94 C, FS 94 RC... -
Page 39: Specifications
93 dB(A) Fuel tank capacity: 540 cc (0.54 l) Sound power level L to ISO 22868 FS 94, 94 C-E with mowing head: 107 dB(A) with metal tool: 107 dB(A) FS 94, FS 94 R, FS 94 C, FS 94 RC... -
Page 40: Guide To Using This Manual 2 Maintenance And Repairs
REACH is an EC regulation and stands for the Registration, Evaluation, Authorisation and Restriction of Chemical substances. For information on compliance with the REACH regulation (EC) No. 1907/2006 see www.stihl.com/reach. FS 94, FS 94 R, FS 94 C, FS 94 RC... -
Page 41: Techniques 2 Ec Declaration Of Conformity
Directive 2000/14/EC, Annex V, using the ISO 10884 standard. Measured sound power level 107 dB(A) Guaranteed sound power level 109 dB(A) Technical documents deposited at: FS 94, FS 94 R, FS 94 C, FS 94 RC... - Page 42 English FS 94, FS 94 R, FS 94 C, FS 94 RC...
- Page 44 0458-593-0121-A englisch www.stihl.com *04585930121A* 0458-593-0121-A...