Table of Contents
Advertisement
Quick Links
Dear customer,
congratulations on the purchase of your new Neff oven.
We would like to thank you for your confidence in us and we
hope that you will have many years of enjoyment and cooking
pleasure with your new appliance.
To be able to take full advantage of all the technical features of
your cooker, please read these instructions for use.
The detailed table of contents will guide you quickly to all the
important information:
H
You will be informed of important safety information.
H
You will then be familiarised with the individual parts of your new oven.
H
Step by step guide on how to select particular settings.
H
The tables list the settings and shelf positions for a selection of typical
recipes, all of which are tested in our cookery centre.
H
In the unlikely event of a malfunction, this is where you will find
information on how to rectify minor faults yourself.
Have fun cooking.
Instructions for use
B46E74.0GB
en
NE241088
9000 266 549
Advertisement
Table of Contents

Related Manuals for NEFF b46e74n1

Summary of Contents for NEFF b46e74n1
-
Page 1: Instructions For Use
Dear customer, congratulations on the purchase of your new Neff oven. We would like to thank you for your confidence in us and we hope that you will have many years of enjoyment and cooking pleasure with your new appliance. -
Page 2: Table Of Contents
Table of contents Safety information ......Before installation ......Information for your safety . - Page 3 Table of contents End of operation ......Preselection mode ......Setting the clock .
- Page 4 Table of contents Dough proving ......Yeast dough ....... . Yoghurt .
-
Page 5: Safety Information
d Safety information Read this instruction manual carefully. Please keep the instruction and installation manuals in a safe place. Please pass on these manuals to the new owner if you sell the appliance. Before installation Transport damage Check the appliance for damage after unpacking it. Do not connect the appliance if it has been damaged in transport. - Page 6 There is a risk of fire. Never store combustible items in the cooking compartment. Never open the appliance door if there is smoke inside. Switch off the appliance. Pull out the mains plug or switch off the appliance by the fuse in the fuse box.
-
Page 7: Causes Of Damage
Causes of damage Accessories, foil, Do not place accessories on the cooking greaseproof paper or compartment floor. Do not cover the cooking ovenware on the cooking compartment floor with any sort of foil or greaseproof compartment floor paper. Do not place ovenware on the cooking compartment floor if a temperature of over 50 ºC is set. -
Page 8: Energy And Environment Tips
Energy and environment tips Here you can find tips on how to save energy when baking and roasting and how to dispose of your appliance properly. Saving energy Only preheat the oven if this is specified in the recipe or in the operating instruction tables. Use dark, black lacquered or enamelled baking tins. -
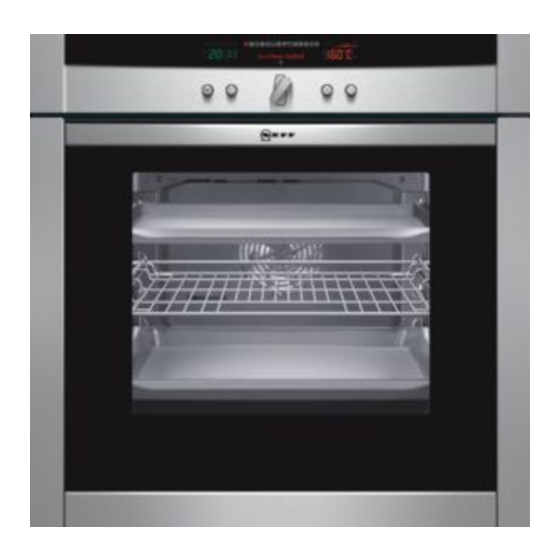
Page 9: Your New Appliance
Your new appliance In this section, you will find information on the control panel the operating modes the shelf positions the Neff light accessories Control panel EasyClock Text display Temperature display Clock function Rotary selector Operating mode Info button Temperature... -
Page 10: Operating Modes
Control Operating mode selector Selects the desired operating mode (see section: Switching on the appliance) Info button When the appliance is switched on: shows the current oven temperature while it is heating up (see section: Switching on the appliance) When the appliance is switched off: calls up the basic settings menu (see section: Changing the basic settings) Temperature selector When the appliance is switched on: sets the temperature... -
Page 11: Shelf Positions
Operating mode Application / Low temperature cooking For tender pieces of meat, that are to be cooked medium/rare or medium é Steam cooking For gentle preparation of vegetables, meat and fish ê Dough proving For preparing yeast dough and yoghurt z Oven cleaning For regeneration of the self cleaning surfaces in the cooking compartment... -
Page 12: The Nefflight
Note: When baking and roasting with Circotherm , do not use shelf position 2. Air circulation is adversely affected and the results of baking and roasting are impaired. The NeffLight Your appliance is equipped with a NeffLight . The NeffLight consists of two halogen bulbs and a system of mirrors which help to brightly illuminate the cooking compartment. -
Page 13: Accessories
Accessories Your appliance is equipped with the following accessories: Universal pan, enamelled for baking, roasting and grilling or for collecting drops of liquid Stepped wire rack, close meshed for baking, roasting and grilling, for placing in the universal pan 2 x wire rack, flat, with tilt protection for baking Insert the flat wire racks in such a way that the rear... -
Page 14: Before Using The Oven For The First Time
Accessories Order no. Aluminium baking tray Z1332X0 Enamelled baking tray Z1342X0 Non stick baking tray Z1343X0 Baking and roasting shelf, close meshed Z1453X0 Two piece enamelled roasting tray Z1512X0 Single telescopic extension rail retrofit kit Z1784X0 Tilt protection retrofit kit, pull out stop Z9110X0 Enamelled universal roasting dish Z9930X0... -
Page 15: Setting The Time
1. Turn the temperature selector until the language you require appears on the text display. 2. Press and hold the info button for 3 seconds. Your setting is saved. Your appliance must be switched off. Changing the language 1. Press and hold the info button for 3 seconds. This takes you directly to the language selection screen. -
Page 16: Cleaning The Appliance
1. Press the clock function button. The KJ and 3 symbols are lit. The clock display shows ‚ƒ:‹‹. 2. Set the current time using the rotary selector. Your setting is automatically adopted after 3 seconds. To subsequently change the time, press the clock Changing the time function button repeatedly until the KJ and 3 symbols are lit. -
Page 17: Switching On The Appliance
Switching on the appliance 1. Turn the operating mode selector until the desired operating mode appears on the text display. A default temperature is shown on the temperature display. 2. Turn the temperature selector to change the default temperature. Your appliance begins heating. Notes: The ê... - Page 18 Operating mode Default Temperature temperature range in C in C $ Bottom heating 50 225 4 Circo roasting 50 250 + Large grill 50 275 + Large grill (intensive)* Fixed setting ( Small grill 50 275 ( Small grill (intensive)* Fixed setting / Low temperature Fixed setting cooking...
-
Page 19: Switching Off The Appliance
Switching off the Turn the operating mode selector to the Û position. appliance The appliance is switched off. The appliance has a cooling fan. After the appliance is switched off, the cooling fan may continue to run. Residual heat indicator You can see in the temperature display whether there is a high or low residual heat in the cooking compartment. -
Page 20: Automatic Safety Switch Off
You can change the following basic settings: Basic settings menu Submenu Text display Setting symbol (basic setting) (temperature display) Language Select language English Lock Appliance controls unlocked ™‚‹ Appliance controls locked ™‚‚ Appliance controls permanent lock ™ƒ‚ Audible signal Audible signal off ™„‹... -
Page 21: Electronic Clock
Electronic clock This section contains information on how to set the minute minder how to switch your appliance off automatically (operating time and end of operation) how to switch your appliance on and off automatically (preselection operation) how to set the time how to activate rapid heating Clock display Clock function button... -
Page 22: Minute Minder
Clock function 3 Clock Setting the clock. f Rapid heating Shorten preheat time. Note: Between ƒƒ:‹‹ and †:†Š, the clock display is darkened if you do not alter any settings during this time or if no clock function is activated. For the Q timer, x cooking time, y end of operation and preselected operation clock functions, a signal sounds when the duration has... -
Page 23: Operating Duration
1. Press the clock function button until the symbols KJ and Q illuminate. 2. Set the duration using the rotary selector (e.g. †:‹‹ minutes). The setting is automatically applied. Then the clock is displayed again and the minute minder starts running. Operating duration Automatic switch off after a set duration. -
Page 24: End Of Operation
End of operation Automatic switch off at a set time. 1. Set the operating mode and temperature. The appliance heats up. 2. Press the clock function button until the symbols KJ and y illuminate. 3. Set the end of operation using the rotary selector (e.g. -
Page 25: Setting The Clock
3. Set the operating duration with the rotary selector (e.g. ‚:„‹ hours). The setting is automatically applied. 4. Press the clock function button until the symbols KJ and y illuminate. 5. Set the end of operation using the rotary selector (e.g. -
Page 26: Rapid Heating
Rapid heating With the 3 CircoTherm and ë Bread baking settings, you can shorten the preheat time. Note: During rapid heating, do not place any food in the cooking compartment for as along as the f symbol is illuminated. 1. Set the operating mode and temperature. The appliance heats up. -
Page 27: Childproof Lock
Childproof lock In this section you can learn how to lock your appliance how to lock your appliancepermanently Locking The locked appliance cannot be switched on accidentally or by unauthorised users (e.g. playing children). To switch the appliance on again, you must unlock it. After appliance operation, the appliance is not automatically locked. -
Page 28: Permanent Lock
Permanent lock The permanently locked appliance cannot be switched on accidentally or by unauthorised users (e.g. playing children). To switch the appliance on, you must interrupt the permanent lock briefly. After you have switched your appliance off, it locks again automatically. Locking the appliance 1. -
Page 29: Baking
Unlocking the appliance 1. Press and hold the info button until ™ƒ‚ appears permanently on the temperature display. 2. Turn the temperature selector until ™ƒ‹ appears on the temperature display. 3. Press and hold the info button until the ‚ symbol goes out. -
Page 30: Baking On One Level
If you wish to bake using tinplate dishes and % Top/bottom heat, you should use shelf height 1. Always slide the universal pan in carefully as far as it will go and make sure that the sloping edge is facing the appliance door. - Page 31 Bear in mind that your items may brown at different rates on each level. The items on the top level will brown most quickly and can be taken out earlier. Two baking tins on When baking with two round baking tins or two two levels trays, slide the stepped wire rack in at shelf position 1 and the straight wire rack in at shelf position 3.
-
Page 32: Baking Table
Baking table The values in the table are average values and apply to dark baking tins. The values may vary depending on the type and amount of dough/mixture and on the baking tin. We recommend that you set the lower of the specified temperatures the first time. - Page 33 Meal Setting Level Temperature Time in in ºC minutes Pies 1 level 170 180* 65 75 1 level 170 180* 65 75 2 levels 1 + 3 170 180* 65 75 Biscuits 1 level 160 170* 15 20 1 level 170 180* 15 20 2 levels...
-
Page 34: Baking Table For Pre Prepared Products
Baking table Please note the following points for pre prepared for pre prepared products: products Use the universal pan Only use greaseproof paper that is suitable for the selected temperature Spread chips out in a single layer Turn frozen potato products half way through the baking time Only season frozen potato products after they have finished baking... -
Page 35: Tips And Tricks
Meal Setting Level Temperature Time in mi in ºC nutes Chilled pizza 1 level 190 200* 10 15 1 level ë 200 210* 10 15 Part baked white bread 1 level 180 190* 10 20 1 level 180 190* 5 15 2 levels 1 + 3 170 180*... - Page 36 The cake is unevenly browned in Check the shelf height. the baking tin Check the temperature. Make sure that your baking tin is not placed directly in front of the air outlets in the rear wall of the cooking compartment. Check that the baking tin is correctly positioned on the wire rack.
-
Page 37: Roasting And Braising
Roasting and braising In this section, you will find information on Roasting Braising Tables for roasting and braising Tips and tricks There is a risk of injury if you use roasting dishes that are not heat resistant. Only use roasting dishes that are marked as being suitable for use in the oven. -
Page 38: Braising
Roasting in the universal Place the stepped wire rack on the universal pan and pan with stepped wire rack slide them in together at the same shelf height. For fatty meat and poultry, add X to ¼ litre of water to the universal pan, depending on the size and type of the joint. -
Page 39: Standing Time
In general, the larger the joint, the lower the temperature and the longer the roasting time. You should set the lower of the specified temperatures the first time. This will generally allow more even browning. The values for cooking time apply to 0.5 2 kg of food. - Page 40 Meal Setting Level Temperature Time in in ºC minutes (per 500 g) Pork Roast joint 35 + 35 35 + 35 Loin joint 30 + 30 30 + 30 Belly 30 + 25 30 + 25 Gammon Joint 30 + 30 30 + 30 Chicken Whole chicken...
-
Page 41: Tips And Tricks
Casseroles Setting Level Temperature Time in mi in ºC nutes (per 500 g) Diced meat 40 + 80 (beef, pork, lamb, chicken) 140* 40 + 80 Braising steak 45 + 80 140* 45 + 80 Chicken pieces (boned) 50 + 70 50 + 70 * Preheat oven Tips and tricks... -
Page 42: Grilling
Grilling In this section, you will find information on Grilling in general Circo roasting 4 Radiant grilling (+ large grill and ( small grill) The grilling table Caution There is a risk of damage to kitchen units if you grill with the appliance door open. -
Page 43: Radiant Grilling
Pierce duck and goose skin under the wings and legs to allow the fat to escape. Depending on the food you are cooking, the cooking compartment may become very dirty when you cook food on the wire rack using Circo roasting. You should therefore clean the cooking compartment after every use so that the dirt does not burn on. -
Page 44: Grilling Table
Wire rack position You can influence the grilling result by changing the position of the wire rack. Wire rack type/ position ¾ Place the stepped wire rack in the universal pan with the step pointing downwards: suitable for grilling items that should be well done ½... - Page 45 Meal Setting Level Temperature Time in in ºC minutes Steaks, high 2 3 cm ‚Ÿ£ 1st side: 5 7 2nd side: 3 5 Chops, high 2 3 cm ‚Ÿ£ 1st side: 6 8 2nd side: 4 7 Pork Roast joint 180 200 120 150*** Steaks, high 1 2 cm...
-
Page 46: Steaming
Steaming The é steam cooking setting can only be used in connection with the Mega System steamer (available as an optional accessory from exclusive dealers). Only switch the steam cooking setting on when the cooking compartment is completely cooled down (room temperature). -
Page 47: Dough Proving
Dough proving In this section, you will find information on ê Dough proving preparing yeast dough and yoghurt In order to be able use the dough proving mode, the cooking compartment must have cooled down (to room temperature). If Not possible" appears in the text display after switching on dough proving, the cooking compartment has not cooled down completely. -
Page 48: Yoghurt
4. Remove any remaining water from the cooking compartment after the proving process is complete. 5. Loosen any limescale with a little vinegar and wipe with clean water. The information in the table is only a guideline. Yeast dough Amount of Proving time flour in in minutes... -
Page 49: Low Temperature Cooking
6. Close the appliance door and switch on ê Dough proving. The proving process is controlled automatically. The temperature setting is fixed. 7. Switch off ê Dough proving after 6 7 hours and place the containers in the refrigerator for at least 18 hours. - Page 50 Do not turn pieces of meat during the cooking process The size, thickness and type of meat will have a significant influence on the searing and low temperature cooking times The properties of the pan and the heat output of the hotplate can influence the searing time Do not use the low temperature cooking setting together with the preselected operation clock...
-
Page 51: Low Temperature Cooking Table
Low temperature The information in the table is only a guideline. cooking table The searing time is for searing in a hot pan with fat. You can find information on how to proceed, further instructions and recipes in the accompanying cookbook. -
Page 52: Tips And Tricks
Note: Place the duck breast in a cold pan and fry the skin side first. Following low temperature cooking, insert at shelf height 3 and grill at 250 ºC for 3 5 minutes until crispy. Tips and tricks Low temperature cooked meat Serve on preheated plates with a hot sauce. -
Page 53: Defrost Setting
You can place large quantities of ready made frozen vegetables in aluminium dishes in the cooking compartment at the same time Use shelf position 1 when defrosting on one level, and shelf positions 1 + 3 when using two levels Observe the manufacturer's instructions when using frozen foods Defrost table... -
Page 54: Cleaning And Care
Cleaning and care In this section, you will find information on cleaning and care of your appliance cleaning agents and aids self cleaning surfaces in the cooking compartment oven cleaning z Risk of short circuit. Do not use high pressure cleaners or steam jet cleaners to clean your appliance. -
Page 55: Cleaning The Cooking Compartment
Appliance part/surface Cleaning agent/aid Glass surfaces Apply commercially available detergent with a soft, damp cloth or chamois leather; dry with a soft cloth. Door panels Use commercially available glass cleaner or apply commercially available detergent with a soft, damp cloth or chamois leather;... - Page 56 Appliance part Cleaning agent/aid Enamel surfaces To facilitate cleaning you can switch on the interior lighting (smooth surfaces) and detach the appliance door if necessary. Apply commercially available detergent or vinegar solution with a soft, damp cloth or chamois leather; dry with a soft cloth.
-
Page 57: Self Cleaning Surfaces
Self cleaning The back panel, side panels and ceiling of the cooking surfaces compartment are coated with a highly porous ceramic layer. This coating absorbs and disintegrates splashes from baking and roasting while the oven is in operation. The higher the set temperature and the longer the oven is in operation, the better the cleaning result. -
Page 58: Oven Cleaning
Oven cleaning The back wall, ceiling and side walls of the cooking compartment are coated with a highly porous ceramic layer. This coating absorbs and disintegrates splashes from baking and roasting while the oven is in operation. If these self cleaning surfaces (rough surfaces) in the oven no longer clean themselves adequately, they can be regenerated using the z Oven cleaning operating mode. -
Page 59: Removing And Fitting The Appliance Door
Removing and You can remove the appliance door to clean it more fitting the appliance thoroughly. door Risk of injury! The hinges on the appliance door can snap back with great force. Always turn both catches all the way to when fitting or removing the appliance door. - Page 60 4. Lift the door handle slightly with both thumbs and lift the appliance up and off (Fig. C). 1. Hold the appliance door and lift the door handle Fitting the appliance door slightly with both thumbs (Fig. A). 2. Hang the appliance door in the left and right hand guide rollers simultaneously (Fig.
-
Page 61: Cleaning The Door Panels
4. Use a coin to release both catches on the appliance door (Fig. D). Left hand catch: in an anti clockwise direction Right hand catch: in a clockwise direction 5. Open the appliance door a little wider and then close it. Cleaning the door panels To facilitate cleaning, you can remove the door panels... - Page 62 1. Press the left and right hand holders in the direction of the arrows (Fig. A) and unlatch the door panel. 2. Lift the door panel and pull it out (Fig. B). 3. Clean the inner door panel. Cleaning Clean the door panels with glass cleaner and a soft cloth.
-
Page 63: Cleaning The Hook In Racks
Fitting the door panel 1. Insert the door panel into the two supports (Fig. A). 2. Press on the door panel on the left and right next to the holders, until it engages into the holders (Fig. B). Cleaning the You can remove the hook in racks for easier cleaning. -
Page 64: Cleaning The Telescopic Shelves
Cleaning the You can unhook the telescopic shelves for easier telescopic shelves cleaning. Risk of burns from hot parts in the cooking compartment. Wait until the cooking compartment has cooled down. Removing the telescopic shelves 1. Pull and hold the flat spring (figure A). 2. -
Page 65: Faults And Repairs
Faults and repairs It is not always necessary to call the after sales service. In some cases, you can take remedial action yourself. You will find some tips for troubleshooting in the following table. Risk of electric shock. Work on the appliance electronics must only be carried out by an expert During work on the appliance electronics, the power supply to the appliance must be... - Page 66 Problem Possible cause Remedial action The appliance does not heat up, A key combination was Switch off the appliance, press the colon flashes on the activated and hold the info button for clock display, appears on the 3 seconds, then press and hold temperature display, for the clock function button for example ‚‡‹©...
-
Page 67: Changing The Cooking Compartment Bulb
Changing the Replace faulty cooking compartment bulbs. Spare cooking compart bulbs can be obtained from the after sales service or ment bulb specialist shops: E14, 220 240 V, 40 W, heat resistant to 300 ºC Use these bulbs only. Risk of electric shock. Disconnect the appliance from the power supply. - Page 68 Caution Clouding in halogen bulbs. Do not touch halogen bulbs with bare fingers. This causes oils to get onto the glass which are then burnt on and cloud the glass. Use a clean cloth to change the bulb. 1. Remove the appliance door (see section: Removing and fitting the appliance door).
-
Page 69: Replacing The Door Seal
Replacing the If the door seal is faulty, it must be replaced. door seal Replacement seals for your appliance can be obtained from the after sales service. The door seal is fixed in seven places. Unhooking the door seal 1. Unhook the door seal (figure B) at four places (figure A). -
Page 70: After Sales Service
After sales service In the event of faults and repairs that you cannot solve yourself, please contact our after sales service. You can find the addresses in the after sales service directory. Note: You will be charged for calling the after sales service regarding an operating fault. -
Page 71: Test Dishes
Test dishes Dishes tested in accordance with standard EN 60350. Please note the information in the tables about preheating. The table values do not include rapid heating. Baking Cookware Setting Level Temperature Time in in ºC minutes Shortbread 1 level Baking tray*** 140 150** 20 25... - Page 72 When baking apple pies on two levels, place the lower baking tin to the left on the stepped wire rack (figure B) and the upper baking tin to the right on the straight wire rack (figure C). Grilling Wire rack Setting Level Temperature...