ResMed Stellar Series User Manual
Hide thumbs
Also See for Stellar Series:
- User manual (274 pages) ,
- Quick setup manual (8 pages) ,
- User manual (213 pages)
Table of Contents
Advertisement
Advertisement
Table of Contents
Troubleshooting

Related Manuals for ResMed Stellar Series


Summary of Contents for ResMed Stellar Series
- Page 1 Non-invasive/invasive ventilators User Guide English...
-
Page 2: Table Of Contents
Stellar at a glance ......... . . 2 Patient interface Humidification Internal battery ResMed USB stick Use on an aircraft Mobile use Remote Alarm Setting up for noninvasive use . - Page 3 Cleaning and maintenance ........21 Daily Weekly Monthly Replacing the air filter Disinfection...
-
Page 4: Introduction
The device is for noninvasive use, or invasive use (with the use of the ResMed Leak Valve). Operation of the device includes both stationary, such as in hospital or home, or mobile, such as wheelchair usage. -
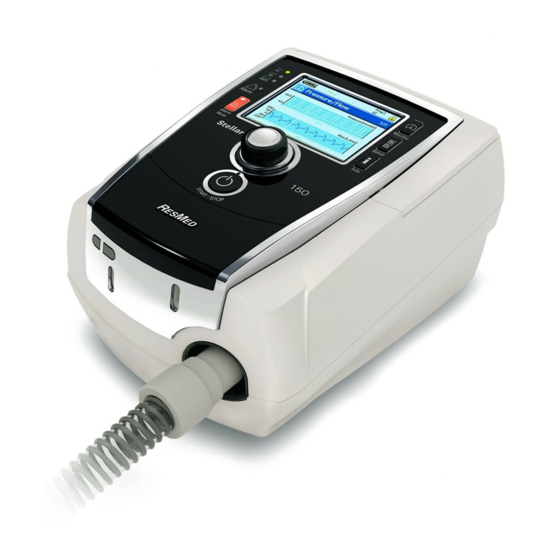
Page 5: Stellar At A Glance
The following optional components are compatible with Stellar: • 3 m air tubing • SlimLine™ air tubing • Clear air tubing (disposable) • H4i™ heated humidifier • Antibacterial filter • Heat moisture exchanger filter (HMEF) • ResMed XPOD oximeter • Nonin™ pulse oximetry sensors • FiO monitoring kit (external cable, T-piece adapter) •... -
Page 6: Patient Interface
50%. ResMed USB stick A ResMed USB stick may be used with the device either to help the clinician to monitor your treatment or to provide you with updated device settings. For more information, see “Data management”... -
Page 7: Use On An Aircraft
Use on an aircraft ResMed confirms that the Stellar can be used during all phases of air travel without further testing or approval by the airline operator. See “Technical specifications” on page 30. Mobile use The Stellar Mobility bag allows the Stellar to be used in mobile situations, eg, in a wheelchair. -
Page 8: Attaching The H4I Heated Humidifier For Noninvasive Use
• The heating feature of the H4i is disabled when the device is not mains powered. Setting up for invasive use The Stellar can be used invasively only with the ResMed Leak Valve, or using an uncuffed or deflated cuff tracheostomy tube with the ResMed Leak Port (24976). - Page 9 Notes: • When the Mask type is set to Trach, the Non-Vented Mask alarm will be automatically enabled to alert you when the ResMed Leak Valve has no vent holes or when the vent holes are blocked. • When the Mask Type is set to Trach AutoEPAP has to be turned off.
- Page 10 Connect the catheter mount. Catheter mount** HMEF ** The ResMed Leak Valve or the HMEF can be connected to standardised tracheostomy interfaces including connector pieces like catheter mounts. The catheter mount and the external humidifier are not part of the ResMed component.
-
Page 11: Using The Stellar Device For The First Time
Use only certified, clean oxygen sources. • ResMed strongly recommends adding oxygen into Stellar’s oxygen inlet at the rear of the device. Entraining oxygen elsewhere, ie into the breathing system via a side port or at the mask, has potential to impair triggering and accuracy of therapy/monitoring and alarms (eg, High Leak alarm, Non-vented mask alarm). - Page 12 To add supplemental oxygen Unlock the low flow oxygen inlet on the back of the device by pushing up on the locking clip. Insert one end of the oxygen supply tubing into the oxygen connector port. The tubing automatically locks into place. Attach the other end of the oxygen supply tubing to the oxygen supply.
-
Page 13: Using The Fio2 Monitoring Sensor
Regularly check the filter for entry of moisture or other contaminants. The filter must be replaced according to the manufacturer‘s specifications. Note: ResMed recommends using a filter with a low impedance (less than 2 cm H O at 60 L/min, eg, PALL BB 50 filter). -
Page 14: Stellar Basics
Fit the antibacterial filter to the air outlet of the device. Attach the air tubing to the other side of the filter. Attach the mask system to the free end of the air tubing. Perform the Learn Circuit function (see “Setup menu: Options” on page 18). From the Setup menu, select Options. -
Page 15: Lcd Screen
The LCD screen displays the menus, monitoring screens and alarm status. Values on this LCD screen and other screens throughout the User Guide are examples only. Warm-up feature H4i Ramp time ResMed USB stick Program Mains power Therapy mode External power supply... -
Page 16: Starting Therapy
Starting therapy Performing a functional test Make sure your device is functioning properly each time before starting therapy. If any problems occur, see “Troubleshooting” on page 24. Please also check other provided User Instructions for troubleshooting information. Turn off the device by pressing the power switch at the back of the device. -
Page 17: Starting Therapy
Check oxygen connection (if in use). Attach the accessories according to the setup descriptions (see “Adding supplemental oxygen” on page 8). Starting therapy CAUTION The Clinical mode is only for clinicians. If the device is operating in clinical mode press the power switch at the back to re-start the device in patient mode Fit your patient interface (mask or catheter mount) as described in the user instructions. -
Page 18: Working With Alarms
Working with alarms WARNING • This device is not intended to be used for vital signs monitoring. If vital signs monitoring is required, a dedicated device should be used for this purpose. • When adjusting alarm volume, ensure that the alarm can be heard above the ambient noise levels that the patient may experience in a variety of settings, including use in noisy environments or inside mobility bags. -
Page 19: Using Mask-Fit
Programs Programs can be configured by your clinician Program to provide you with multiple treatment options. For example, a clinician can set up programs for sleeping versus waking use or for use during exercise or physiotherapy. Programs save different patient circuit configurations (Learn Circuit result) and therapy and alarm settings. -
Page 20: Using The Menus
Notes: • Press for at least three seconds during mask-fit to start the treatment immediately. • The mask-fitting feature is disabled when the mask type Trach is selected. • Availability of this feature is country dependent. Using the menus The device has three menus (Monitoring, Setup, Info) accessed by the equivalent buttons on the right of the LCD screen. -
Page 21: Setup Menu
For a full list of compatible masks for this device, see the Mask/Device Compatibility List on www.resmed.com on the Products page under Service & Support. If you do not have internet access, please contact your ResMed representative. -
Page 22: Setup Menu: Configuration Menu
Parameter Description Learn Circuit The device is calibrated according to your air tubing system. 1. Ensure that the therapy is turned off before performing a Learn Circuit. 2. If in use, turn off the oxygen flow. 3. Select the mask type. 4. -
Page 23: Info Menu
Event Summary Event summary displays the summary of three types of events: changes in settings, alarms and system events (eg, connection of ResMed USB stick). There are up to 200 events of each type, displayed in chronological order, with the most recent event displayed at the top by default. -
Page 24: Data Management
• Do not store files on the USB stick other than those created by the device or application. Unknown files may be lost during data transfer. Plug the ResMed USB stick to one of the two USB connections on the rear side of the device. -
Page 25: Weekly
CAUTION • Do not hang the air tubing in direct sunlight as the tubing may harden over time and eventually crack. • Do not use bleach, chlorine, alcohol or aromatic-based solutions (including all scented oils), moisturising or antibacterial soaps to clean the air tubing or the ®... -
Page 26: Disinfection
In a mulitpatient use environment, you must perform the following before the device is provided to a new patient: Mask Reprocess; Cleaning, disinfection and sterilisation instructions are available from the ResMed website, www.resmed.com/masks/sterilization. If you do not have Internet access, please contact your ResMed representative. Air tubing Replace the air tubing. -
Page 27: Servicing
Inspection and repair should only be performed by an authorised agent. Under no circumstances should you attempt to open, service or repair the device yourself. This product should be inspected by an authorised ResMed service centre five years from the date of manufacture, except for the internal battery which ResMed recommends be tested after two years to assess the battery life. - Page 28 Problem / possible cause Action The self test of the device fails and 1. Power-off the device. therapy cannot be started (system failure 2. Power-on the device again. 21). If the problem persists, return the device for servicing. Component failure (system failure 8, 25). 1.
- Page 29 • Connection of a non-vented mask. • Ensure the mask has vents. • Mask vents may be blocked. • Ensure the mask vents are not • ResMed Leak Valve is missing or vent blocked. • Ensure the ResMed Leak Valve is is blocked.
-
Page 30: Other Troubleshooting
Low or Empty battery alarms. ResMed recommends the battery be tested after two years to assess the remaining battery life (see “Internal battery” on page 3). - Page 31 Trach is selected as interface. Incompatible accessories (eg, humidifier Use only equipment as recommended or mask system) with high resistance and supplied by ResMed. being used. High Leak Alarm or Low Min Vent alarms Consult your clinician. are set to ON.
- Page 32 • Too many components have been “Setup menu” on page 18). included or the impedance of accessories in use is above ResMed’s recommendation, eg, type of filter, external humidifier, air tubing. The delivered airflow is not humid/heated although the H4i humidifier is in use The humidifier is not properly attached.
-
Page 33: Technical Specifications
Test condition: T mode, IPAP: 40 cm H O, EPAP: 2 cm O, Rise Time: MIN, Fall Time: MIN, Ti: 4.0 sec, Respiratory Rate: 10 bpm, with ResMed calibration cap. Therapy pressure IPAP: ± 0.5 cm H O ± 10% of set pressure (end of... - Page 34 RTCA/DO-160 can be used during all phases of air travel without further testing or approval by the airline operator. ResMed confirms that the Stellar meets RTCA/ DO-160 requirements. This device is not suitable for use in the presence of a flammable anesthetic mixture.
-
Page 35: Guidance And Manufacturer's Declaration - Electromagnetic Emissions And Immunity
Guidance and manufacturer’s declaration – electromagnetic emissions and immunity Medical Electrical Equipment needs special precautions regarding EMC and needs to be installed and put into service according to EMC information provided in this document. Guidance and manufacturer’s declaration – electromagnetic emissions The device is intended for use in the electromagnetic environment specified below. - Page 36 Portable and mobile RF communications equipment should be used no closer to any part of the device, including cables, than the recommended separation distance calculated from the equation applicable to the frequency of the transmitter. Recommended separation distance: d = 1.17 √P Conducted RF 3 Vrms 3 Vrms...
-
Page 37: Symbols
(Hg, Cd, Pb) of the metals for which the limit is exceeded. For further information regarding product disposal, please contact your local ResMed office or your specialist distributor, or visit our website at www.resmed.com. -
Page 38: General Warnings And Cautions
The device must only be used with masks (and connectors ) recommended by ResMed, or by a clinician or respiratory therapist. A mask should not be used unless the device is turned on and operating properly. The vent hole or holes associated with the mask should never be blocked. - Page 39 • Pay attention to leaks and other unusual sounds. If there is a problem, contact an authorised service agent. • Do not replace any parts in the breathing circuit while the device is in operation. Stop operation before changing parts. Notes: A note advises to special product features.
-
Page 40: Limited Warranty
• Portable diagnostic/screening devices This warranty is only available to the initial consumer. It is not transferable. If the product fails under conditions of normal use, ResMed will repair or replace, at its option, the defective product or any of its components. - Page 41 ResMed (UK) Ltd 96 Jubilee Ave Milton Park Abingdon Oxfordshire OX14 4RW UK See Resmed.com for other ResMed locations worldwide. ResMed, SlimLine, SmartStart, Stellar and TiCONTROL are trademarks of the ResMed family of companies. For patent and other intellectual property information, see ResMed.com/ip ©...