Table of Contents
Advertisement
Available languages
Available languages
User & Care Guide
Guía de uso y cuidado
0010568060
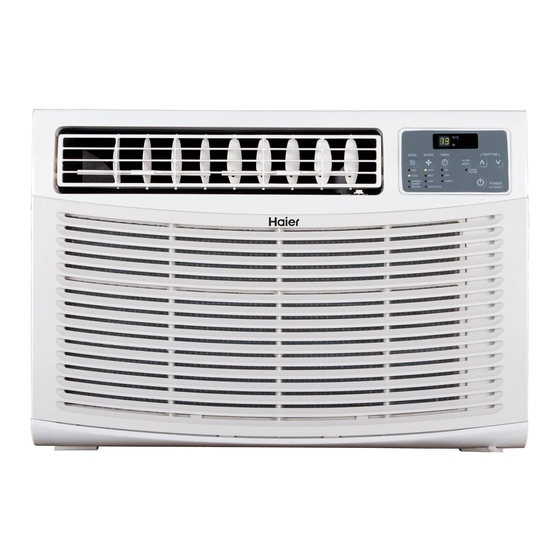
Design may vary by model number.
This user manual is to be only used for
electronic control 15,000 BTU, 18,000
BTU and 24,000 BTU.
Room Air Conditioner
Aire acondicionado
de uso doméstico
El diseño puede variar conforme al
número de modelo
Este manual del usuario sólo se debe
utilizar para el control electrónico
15,000 BTU, 18,000 BTU y 24,000 BTU.
HWE15XCR-L
HWE18VCR-L
HWE24VCR-L
Advertisement
Chapters
Table of Contents

Related Manuals for Haier HWE15XCR-L


Summary of Contents for Haier HWE15XCR-L
-
Page 1: Room Air Conditioner
Room Air Conditioner Aire acondicionado de uso doméstico HWE15XCR-L User & Care Guide HWE18VCR-L Guía de uso y cuidado HWE24VCR-L Design may vary by model number. El diseño puede variar conforme al número de modelo This user manual is to be only used for Este manual del usuario sólo se debe... -
Page 3: Table Of Contents
Normal Sounds of an Air Conditioner ..................25 TROUBLESHOOTING ......................26 LIMITED WARRANTY .......................27 PRODUCT REGISTRATION Thank you for purchasing our Haier product. This easy-to-use manual will guide Model number you in getting the best use of your product. Remember to record the model and serial Serial number numbers. -
Page 4: Safety Information
IMPORTANT SAFETY PRECAUTIONS WARNING THE INFORMATION IN THIS USE & CARE GUIDE MUST BE FOLLOWED TO MINIMIZE THE RISK OF PERSONAL INJURY, FIRE, ELECTRIC SHOCK OR OTHER UNSAFE CONDITIONS. THE INSTRUCTIONS IN THIS USE & CARE GUIDE ARE NOT MEANT TO INCLUDE EVERY POSSIBLE CONDITION OR SITUATION THAT MAY OCCUR. - Page 5 IMPORTANT SAFETY PRECAUTIONS 8. This air conditioner contains R410a refrigerant and requires technicians to use the proper equipment, tools and safety standards that are approved for this refrigerant. Use only equipment for R410a refrigerant. In addition, under federal law, all refrigerant must be properly removed from the air conditioner prior to its disposal.
-
Page 6: Operational Safety & Warnings
1. This air conditioner contains no consumer serviceable parts. If you have problems or questions regarding the operation of your air conditioner always call Haier Customer Service: 1-877-337-3639. 2. Be sure that the air conditioner is properly and securely installed in the window according to the installation instructions included in this Use &... -
Page 7: Installation Requirements
Scissors Drill and 1/8" bit Level Pencil PARTS SUPPLIED: Check that all parts for your air conditioner are included in the parts package. NOTE: If parts are missing, call Haier Customer Service: 1-877-337-3639. HWE15XCR-L HWE18VCR-L IMAGE PART HWE24VCR-L Top channel... -
Page 8: Location Requirements
NOTE: The outside cabinet louvers and air discharge must not be obstructed by bushes, trees, etc. Air must be able to pass freely through the cabinet louvers. WINDOW INSTALLATION Fig. 1 Window opening measurements: (See HWE15XCR-L, HWE18VCR-L, HWE24VCR-L A. Width 29-1/2" - 39" B. Height 19-1/8"... -
Page 9: Electrical Requirements
ELECTRICAL REQUIREMENTS WARNING ELECTRICAL SAFETY and WARNINGS 1. DO NOT cut or remove the grounding prong on the attached power supply cord. Doing so may cause sparks or fire, and voids all warranties. For safety purposes the air conditioner must be properly grounded. - Page 10 If this power supply cord is damaged, it cannot be repaired and must be replaced with a cord from the product manufacturer. If the power supply cord is damaged call Haier Customer Service: 1-877-337-3639. PAGE 8...
- Page 11 THE LOCATION SHOULD PROVIDE: rounded electrical outlet within 6 ft. (183 cm) of where the power supply cord exits the air conditioner, for models: HWE15XCR-L, HWE18VCR-L, HWE24VCR-L NOTE: Do not use an extension cord, plug adapter, surge protector or multi-outlet adapter.
-
Page 12: Electrical Requirements
It cannot be purchased at a retail store and must not be repaired by the user. If the power supply cord is damaged please call Haier Customer Service: 1-877-337-3639. The power supply cord contains no user-serviceable parts. -
Page 13: How To Install
UNPACKING THE AIR CONDITIONER WARNING EXCESSIVE WEIGHT HAZARD When moving or lifting the air conditioner, use two or more people. Wear gloves when handling the air conditioner to protect against possible sharp edges and metal fins. REMOVE PACKAGING MATERIALS Remove packaging materials. Save the carton and the foam packaging for storing the unit when not in use. - Page 14 PREPARING THE AIR CONDITIONER cont. Assemble and install side curtains and top channel (See Fig.7) Fig. 7 3/8" Self Tapping Screws 2. Slide left-hand curtain assembly into left side of top and bottom channels. Repeat for right-hand Top Channel Fig. 8 Side Curtains 3/8"...
- Page 15 PREPARING THE AIR CONDITIONER cont. 1. Measure the width of the window opening. (See Fig.9) 2. Mark the center line on the inside of the windowsill with a pencil. (See Fig.10) CENTER LINE OW OPENING Fig. 9 Fig. 10 WIDTH CENTER NOTES AND WARNINGS: re your air conditioner does not fall out of the opening during installation or removal.
-
Page 16: Preparing The Window
PREPARING THE WINDOW screw in each corner of the certain frame.(See Fig.12) 1" Wood Fig. 12 mounting channel. Screws case to window sill. Secure the left and right brackets to the 6. Adjust two 2-1/2" leveling bolts until contact with outside of the building and use nut lock to secure bolt. -
Page 17: Completing The Installation
COMPLETING THE INSTALLATION COMPLETE THE INSTALLATION Fig. 15 1. Uncoil the included foam seal. (See Fig.15) 2. Insert the foam seal behind the top of the lower window sash and against the glass of the upper window. (See Fig.16) Top of lower Foam seal 3. -
Page 18: Completing The Installation
COMPLETING THE INSTALLATION WARNING WALL INSTALLATION Construction and Installation NOTES: 1. Be certain that the location of the air conditioner in the wall conforms to all local building codes before installation. 2. Consult with a qualified carpenter concerning installation. 3. When installing the air conditioner in a through-the-wall application, work from inside the room. 5. -
Page 19: Using Your Air Conditioner
STARTING THE AIR CONDITIONER MODE FILTER RESET TEMPERATURE / TIME CLEAN FILTER INDICATOR SPEED POWER TIMER Operating your air conditioner properly helps you to obtain the best possible results. This section explains how to operate this air conditioner. IMPORTANT: you turn the air conditioner , either at the control panel or with the remote control, wait at least 3 minutes before turning it back on. - Page 20 STARTING THE AIR CONDITIONER cont. 1. Carefully remove the clear plastic from the control panel. 2. Press POWER once to turn on the air conditioner. NOTE: When the air conditioner is rst plugged in, the LED display will show “88” for 3 seconds. After the air conditioner is turned on for the rst time, the display will show the temperature and the fan is automatically set to Low speed and the Mode indicator will...
- Page 21 STARTING THE AIR CONDITIONER cont. SPEED 1. r P ess FAN SPEED until; you see the indicator light come on next to the desired setting. 2. Choose High, Med, Low or Auto Cool maximum cooling normal cooling minimum cooling and quiet operation AUTO COOL –...
- Page 22 STARTING THE AIR CONDITIONER cont. NOTE: Air conditioner can be either on or off. Press TIMER until Timer indicator light turns off. TO VIEW OR CHANGE THE REMAINING TIME (IN HOURS): TIMER OFF 1. Press the TEMP/TIME up or down arrow button to increase or decrease the time. 2.
- Page 23 STARTING THE AIR CONDITIONER cont. FILTER RESET ON/OFF This feature automatically no you that the air must be cleaned. The indicator light will come on after 240 hours of operation. Clean the air (refer MODE to Care and Cleaning), place it back in the front panel, and press the Filter Reset button.
-
Page 24: Using The Remote Control
USING THE REMOTE CONTROL TO CLEAR TIMER DELAY PROGRAM: NOTE: Air conditioner can be either on or off. Press TIMER until Timer indicator light turns off. TO SEE OR CHANGE THE REMAINING TIME (IN HOURS): TIMER OFF: 1. Press the TEMP/TIME up or down arrow button to increase or decrease the time. 2. -
Page 25: Caring For Your Air Conditioner
CLEANING THE AIR FILTER The air filter is removable for easy cleaning. A clean air filter helps remove dust, lint, and particles from the air for optimal cooling and operating efficiency. The Filter Reset light will turn on to notify you that the air filter must be cleaned. The light goes on after the air conditioner has been operating for 240 hours. -
Page 26: Cleaning The Front Panel
3. Air-dry the front panel completely. 4. Plug the power supply cord in the outlet and turn on the air conditioner. In the event that the is damaged and needs replacing, call Haier Customer Service: 1-877-337-3639 CUSTOMER SERVICE IMPORTANT... -
Page 27: Normal Sounds Of An Air Conditioner
NORMAL SOUNDS OF AN AIR CONDITIONER NORMAL SOUNDS Your new air conditioner is designed to give you many years of dependable service. This section tells you how to clean and care for your air conditioner properly. While your air conditioner is operating, it is normal to hear the following sounds: SOUNDS REASON Air movement... -
Page 28: Troubleshooting
TROUBLESHOOTING POSSIBLE POSSIBLE CAUSE REMEDY PROBLEM Air Conditioner Power supply cord is not plugged Plug unit into a mating grounded outlet. does not start or into an outlet. operate Power supply cord has tripped. Press and release RESET button on the power supply cord. -
Page 29: Limited Warranty
THIS LIMITED WARRANTY IS GIVEN IN LIEU WHAT WILL BE DONE OF ALL OTHER WARRANTIES, EXPRESS OR Haier America will repair or replace any mechanical, IMPLIED, INCLUDING THE WARRANTIES OF electrical part or the compressor, which proves MERCHANTABILITY AND FITNESS FOR A defective in normal household use for a period of PARTICULAR PURPOSE. - Page 30 Sonidos normales de un aire acondicionado ................25 SOLUCIÓN DE PROBLEMAS ....................26 GARANTÍA LIMITADA ......................27 REGISTRO DEL PRODUCTO Gracias por adquirir nuestro producto Haier. Este manual de fácil uso lo guiará para que Número de serie aproveche al máximo su producto.
- Page 31 PRECAUCIONES IMPORTANTES ADVERTENCIA LA INFORMACIÓN EN ESTA GUÍA DE USO Y CUIDADO DEBE SEGUIRSE DESCARGAS ELÉCTRICAS U OTRAS CONDICIONES INSEGURAS. LAS INSTRUCCIONES EN ESTA GUÍA DE USO Y CUIDADO NO TIENEN 1. Utilice este aire acondicionado solamente para lo que fue diseñado, 2.
- Page 32 PRECAUCIONES IMPORTANTES 8. Este aire acondicionado contiene el refrigerante R410a y se requiere que técnicos certificados usen el equipo, las herramientas y los estándares de seguridad adecuados que estén aprobados para este refrigerante. Utilice solamente el equipo certificado para el refrigerante R410a. Además, según la ley federal, todo el refrigerante debe retirarse de manera adecuada del aire acondicionado antes de desecharlo.
- Page 33 1. Este aire acondicionado no contiene partes que el consumidor pueda reparar. Si tiene problemas o preguntas respecto al funcionamiento de su aire acondicionado, llame a Servicio al cliente de Haier al: 1-877-337-3639. 2. Asegúrese de que al aire acondicionado esté instalado de manera 3.
-
Page 34: Información De Seguridad
Cinta métrica PARTES INCLUIDAS: Compruebe que todas las partes para su aire acondicionado co se incluyen en el empaque de las partes. NOTA: Si faltan partes, llame a Servicio al cliente de Haier al: 1-877-337-3639. HWE15XCR-L IMAGEN PARTE HWE18VCR-L HWE24VCR-L... -
Page 35: Requisitos De Instalación
árboles, etc. El aire tiene que poder pasar libremente a través de las rejillas del gabinete. INSTALACIÓN DE LA VENTANA (Vea la Fig. 1) HWE15XCR-L, HWE18VCR-L, HWE24VCR-L A. Ancho 749 - 991 mm B. Alto... -
Page 36: Requisitos Eléctricos
REQUISITOS ELÉCTRICOS ADVERTENCIA SEGURIDAD ELÉCTRICA Y ADVERTENCIAS Hacerlo puede provocar chispas o un incendio, y anula todas las garantías. Para fines 2. Para evitar el riesgo de incendio o una posible descarga eléctrica, NO use un adaptador tomacorriente múltiple con el aire acondicionado. 3. - Page 37 Si el cable de suministro eléctrico está dañado, no puede repararse y debe reemplazarse con un cable del fabricante del producto. Si el cable de suministro eléctrico está dañado, llame al Servicio al cliente de Haier al: 1-877-337-3639. REQUISITOS DE INSTALACIÓN...
- Page 38 Un tomacorriente eléctrico con conexión a tierra a una distancia de 6 pies (183 cm) a partir del lugar de donde sale el cable de suministro eléctrico del aire acondicionado, para los modelos: HWE15XCR-L, HWE18VCR-L, HWE24VCR-L NOTA: NO hay ningún material embalado dentro del acondicionador de aire para quitar - No abra el gabinete.
- Page 39 Si el cable de suministro eléctrico está dañado, llame al Servicio al cliente de Haier al: 1-877-337-3639. El cable de suministro eléctrico no contiene partes que el usuario pueda reparar. REQUISITOS DE INSTALACIÓN...
-
Page 40: Cómo Instalar
CÓMO DESEMPACAR EL AIRE ACONDICIONADO ADVERTENCIA RIESGO DE PESO EXCESIVO Es recomendable que dos o más personas muevan o levanten el aire acondicionado cuando sea necesario. Use guantes cuando manipule el aire acondicionado para protegerse de las posibles partes salientes de metal y bordes filosos. CÓMO QUITAR LOS MATERIALES DEL EMPAQUE Quite los materiales del empaque. - Page 41 PREPARACIÓN DEL AIRE ACONDICIONADO (Vea la Fig. 7). Fig. 7 3/8" Self Tapping Screws (Vea la Fig. 7). Haga lo mismo para la unidad de la cortina derecha. (Vea la Fig. 8). Fig. 8 Cortinas laterales CÓMO INSTALAR PÁGINA 12...
- Page 42 PREPARACIÓN DEL AIRE ACONDICIONADO 1. Mida el ancho de la abertura de la ventana. (Vea la Fig. 9). (Vea la Fig. 10). ANCHO DE LÍNEA CENTRAL Fig. 9 Fig. 10 WIDTH CENTER NOTAS Y ADVERTENCIAS: Asegúr INSTALACIÓN DEL GABINETE EN LA VENTANA (Vea la Fig.
-
Page 43: Preparación De La Ventana
PREPARACIÓN DE LA VENTANA madera de 1 pulg. para fijar el revestimiento al bastidor de Fig. 12 la ventana. Tornillos de madera de 1 pulg. 5. Instale tornillos niveladores gabinete a los soportes del autorroscantes de 3/8 de pulg., 3 en cada lado. 6. -
Page 44: Finalización De La Instalación
FINALIZACIÓN DE LA INSTALACIÓN FINALIZACIÓN DE LA INSTALACIÓN Fig. 15 1. Desenrolle la cinta de espuma incluida. (Vea la Fig. 15). de la ventana y contra el vidrio de la ventana superior. (Vea la Fig. 16). A. Parte superior del bastidor inferior Parte superior del de la ventana Cinta de espuma... - Page 45 FINALIZACIÓN DE LA INSTALACIÓN ADVERTENCIA De no seguir estas instrucciones, se pueden producir lesiones, un incendio o una descarga eléctrica. INSTALACIÓN DE LA PARED Construcción e instalación NOTAS: 1. Asegúrese de que la ubicación del aire acondicionado en la pared cumpla con todos los códigos locales de construcción antes de la instalación.
- Page 46 ENCENDIDO DEL AIRE ACONDICIONADO MODE FILTER RESET (modo) (restablecimiento TEMPERATURE / TIME (temporizador/hora) CLEAN FILTER INDICATOR SPEED POWER (suministro) (velocidad) TIMER (temporizador) Poner en funcionamiento de manera adecuada el aire acondicionado le permite obtener los mejores resultados posibles. Esta sección explica cómo hacer funcionar este aire acondicionado. IMPORTANTE: apague el aire acondicionado, ya sea desde el panel de control o con el control remoto, espere por lo menos 3 minutos antes de volver a encenderlo.
- Page 47 ENCENDIDO DEL AIRE ACONDICIONADO (continuación) 1. Quite con cuidado la película de plástico transparente del panel de control. 2. Oprima POWER (encendido) una vez para encender el aire acondicionado. NOTA: Cuando el aire acondicionado se conecte por primera vez, la pantalla LED mostrará “88” durante 3 segundos.
-
Page 48: Cómo Usar Su Aire Acondicionado
ENCENDIDO DEL AIRE ACONDICIONADO (continuación) SPEED (velocidad) FAN SPEED (velocidad del ventilador) hasta que vea que la luz indicadora pasa a la siguiente c ración deseada. 2. Elija el enfriamiento High, Med, Low o Auto. : para enfriar al máximo. : para un enfriamiento normal. - Page 49 ENCENDIDO DEL AIRE ACONDICIONADO (continuación) PARA BORRAR EL PROGRAMA DEL TEMPORIZADOR: NOTA: El aire acondicionado puede estar encendido o apagado. Oprima TIMER hasta que la luz indicadora del temporizador se apague. PARA VER O CAMBIAR EL TIEMPO RESTANTE (EN HORAS): TIMER OFF (temporizador apagado) 1.
-
Page 50: Uso Del Control Remoto
USO DEL CONTROL REMOTO FILTER RESET (restablecimiento del ltro) ON/OFF Esta característica le no de manera automática que el ro de aire MODE debe limpiarse. La luz indicadora se encenderá después de 240 horas de funcionamiento. Limpie el ro de aire (consulte Cuidado y limpieza), colóquelo SPEED de nuevo en el panel frontal y presione el botón Filter Reset. - Page 51 USO DEL CONTROL REMOTO (continuación) PARA BORRAR EL PROGRAMA DE DEMORA: NOTA: El aire acondicionado puede estar encendido o apagado. Oprima TIMER hasta que la luz indicadora del temporizador se apague. PARA VER O CAMBIAR EL TIEMPO RESTANTE (EN HORAS): TIMER OFF (temporizador apagado): 1.
-
Page 52: Cambio De La Dirección Del Aire
CAMBIO DE LA DIRECCIÓN DEL AIRE Flujo de Aire en 4 Direcciones: Las rejillas direccionales de aire le permiten controlar la dirección del flujo de aire. El flujo de aire se puede dirigir Fig. 20 LIMPIEZA DEL FILTRO DE AIRE durante 240 horas. -
Page 53: Limpieza Del Panel Frontal
3. Deje que el panel frontal se seque al aire completamente. 4. Conecte el cable de suministro eléctrico en el tomacorriente y encienda el aire acondicionado. En caso de que el ro esté dañado y necesite reemplazarse, llame al Servicio al cliente de Haier al: 1-877-337-3639 SERVICIO AL CLIENTE... -
Page 54: Sonidos Normales De Un Aire Acondicionado
SONIDOS NORMALES DE UN AIRE ACONDICIONADO SONIDOS NORMALES Su nuevo aire acondicionado está diseñado para ofrecerle muchos años de servicio confiable. En Cuando su aire acondicionado funciona, es normal escuchar los siguientes sonidos: SONIDOS MOTIVO Movimiento del aire Aire que gira alrededor del ventilador. Vibración de Instalación no correcta. -
Page 55: Solución De Problemas
SOLUCIÓN DE PROBLEMAS POSIBLE POSIBLE CAUSA SOLUCIÓN PROBLEMA El aire El cable de suministro eléctrico no Conecte la unidad a un tomacorriente acondicionado no entra en El cable de suministro eléctrico Oprima y suelte el botón RESET en el cable funcionamiento La unidad está... -
Page 56: Garantía Limitada
Haier America al 1-877-337-3639. que estas limitaciones no se apliquen en su caso. Algunos estados no permiten limitaciones sobre la duración de una garantía implícita, de modo que es... - Page 58 Model # HWE15XCR-L, HWE18VCR-L, Haier America HWE24VCR-L Wayne, NJ 07470 Issued Date: October 2015 ©2016 Haier America Trading, LLC.