Table of Contents
Advertisement
This service information is designed for experienced repair technicians only and is not designed for use by the general public.
It does not contain warnings or cautions to advise non-technical individuals of potential dangers in attempting to service a product.
Products powered by electricity should be serviced or repaired only by experienced professional technicians. Any attempt to service or
repair the product or products dealt with in this service information by anyone else could result in serious injury or death
SERVICE MANUAL
FACTORY MODEL NO.
ESA408M
ON/OFF
MODE
SPEED
TIMER
TEMP/TIME
TEMP/TIME
WARNING
All right reserved .Unauthorized copying and distribution is a violation of law
Group
CUSTOMER MODEL NO.
HWE08XCN
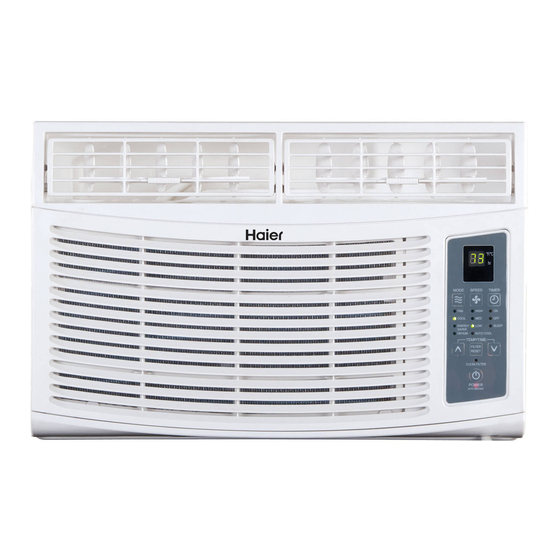
Feature
Top Discharge Airflow Pattern
Modern Family-look Design
3 Cool Settings, 3 Fan Settings
Easy-to-install Mounting Kit
Easy-Access Washable Filter
Digital Time & Temperature Display
24 Hour on/o
Filter Reset
Sheeping
©2013 (Qingdao Haier Air Conditioner General corp.,Ltd)
Order No.
ff Timer
Advertisement
Table of Contents

Related Manuals for Haier HWE08XCN


Summary of Contents for Haier HWE08XCN
-
Page 1: Service Manual
©2013 (Qingdao Haier Air Conditioner General corp.,Ltd) All right reserved .Unauthorized copying and distribution is a violation of law... -
Page 2: Table Of Contents
Table of Contents Table of Contents 1. Product Code Illumination and Series introduction .........1 2. Specifications....................2 3. Safety and Precaution..................3 4. Warning and Cautions..................4 5. Installation and Accessory Par ts..............6 6. Par ts and Functions..................1 7. Abnormity Diagnose..................1 8. -
Page 4: Specifications
Specification 2.Specification ESA408M Item Unit Cooling capacity BTU/h 8000 Heating capacity BTU/h Power supply 1PH/115V/60HZ Power input Cooling Running current BTU/(h·W) 10.8 Power input Heating Running current BTU/(h·W) Indoor side dB(A) Sound Level Outdoor side dB(A) Height inches 7/16 Net dimensions Width inches Depth... -
Page 5: Safety And Precaution
Safety and Precaution 3. Safety and Precaution WARNING: The information in this use & care guide must be followed to minimize the risk of personal injury, fire,electric shock or other unsafe conditions. The instructions in this use & care guide are not meant to include every possible conditionor situation that may occur. -
Page 6: Warning And Cautions
Warning and Cautions 4.Warning and Cautions WARNING • Electrical shock hazard • Plug into a mating, grounded 3 prong outlet. • Do not remove the ground prong from the power supply cord. • Do not use a plug adapter, extension cord, surge protector, or multi-outlet adapter •... -
Page 7: Energy Saving Guide
Warning and Cautions Energy Saving Guide When installing your air conditioner , make sure to seal all areas where there is a possibility of air leakage . The airflow should not be blocked , either inside by curtains , drapes or furniture , or outside by shrubs or bushes . -
Page 8: Installation And Accessory Parts
Installation and Accessory Parts 5. Installation and Accessory Parts operation of your air conditioner always call Haier Customer Service: 1-877-337-3639. e l l l l a instructions included in this Use & Care Guide. 3. DO NOT drill any holes in the base or sides of the air conditioner. - Page 9 Installation and Accessory Parts Window Installation Window opening measurements: A. Width B. Height B-HEIGHT A-WIDTH Prepare Air Conditioner for Installation Install Top Channel 1. Place the top channel on the top of the air conditioner, lining up the holes in the top channel with the holes in the top of the air conditioner.Make sure the channel is facing forward as indicated by the sticker.
- Page 10 Installation and Accessory Parts Install Side Curtains NOTE: Attach side curtains to the air conditioner before placing the unit in the window. 1. Place the tabbed side of the side curtain in the track on the right-hand side of the air conditioner cabinet. (See Fig.1) Fig.
-
Page 11: Prepare Window For Installation
Installation and Accessory Parts Prepare Window for Installation 1. Measure the width of the window opening.(See Fig.5) n i l l l i . l i WIDTH OF CENTER LINE WINDOW OPENING Fig. 5 Fig. 6 HEIGHT WIDTH WIDTH CENTER Notes and warnings: Be sure your air conditioner does not fall out of the window opening during installation or removal. - Page 12 Installation and Accessory Parts Completing the installation Attach side curtains to window 1. Pull the left-hand curtain and frame out until it fits flush to the side of the window frame. (See Fig.9) Fig. 9 2. Use a 1/8” drill bit to drill a starter hole through the top hole in the side curtain and into the window sash. 3.
- Page 13 Installation and Accessory Parts Final installation 1. Uncoil the included foam seal.(See Fig.12) Fig. 12 2. Insert the foam seal behind the top of the lower window sash and against the glass of the upper window. 3. Place the window lock bracket as shown in the diagram using a screwdriver. Use a 1/8" drill bit to drill a starter hole through the hole in the window lock bracket and into the upper window.
-
Page 14: Remote Control
Installation and Accessory Parts Parts Check that all parts for your specific air conditioner are included in parts package. Top channel Foam seal Side bracket(2) Window lock bracket 3/8" self tapping 1" wood screws(9) screws(3) ON/OFF MODE SPEED TIMER TEMP/TIME TEMP/TIME Side curtains(2) Side curtain frames(2) -
Page 15: Parts And Functions
Parts and Functions 6.Parts and Functions °F/°C MODE SPEED TIMER HIGH ENERGY SAVE COOL SLEEP DEHUM AUTO COOL TEMP/TIME FILTER RESET CLEAN FILTER POWER AUTO RESTART MODE 1. Press MODE until you see the indicator light come on next to the desired setting. 2. - Page 16 Parts and Functions TIMER To set the air conditioner to turn off between 1 hour and 24 hours (The air conditioner must be ON to set): 1. r P ess TIMER. Timer Off indicator light will flash. The display will show the remaining hours before the air conditioner will turn off.
-
Page 17: Using The Remote Control
Parts and Functions SLEEP 1. Press the TIMER button to choose Sleep mode. The indicator light will turn on. 2. The temperature will increase by 2˚F 1 hour after the mode is chosen. The temperature then increases another 2˚F increases another 2˚F after 1 hour. The unit will hold this temperature for hours then stops. - Page 18 Parts and Functions POWER Prbutton, the air conditioner will operate in Energy Save mode, low fan speed and temperature of 72°F. You can select any other mode to satisfy your needs.ess ON/OFF to turn on the air conditioner. When you first press the ON/OFF Mode Press MODE to choose Fan, Energy Save,...
-
Page 19: Abnormity Diagnose
y t i 7 . Abnormity Diagnose 1.Sensor Diagnose: 2 seconds after the sensors open circuit or short circuit , the unit will turn off automatically and the LED wil show E0 until the sensors resume . Firstly check whethe r Terminal CN on Pull out the terminals on the indoor the indoor mainbo ard contact well or mainboard and reinsert them. - Page 20 Abnormity Diagnose Check whether the keystroke can’t PCB is broken, replace a new PCB. get up with pressure. Repair the keystrok es on electrical box to keep them away from the keystrokes on PCB. c i t ditioner...
-
Page 21: System Flow Chart
System Flow Chart 8. System Flow Chart c i t ditioner... -
Page 22: Circuit Diagram
Circuit Diagram 9.Circuit Diagram c i t... - Page 23 Circuit Diagram c i t...
-
Page 24: Wiring Diagram
Wiring diagram 10. Wiring diagram WIRING DIAGRAM 0010519540B COMPRESSOR TRANSFORMER FAN MOTOR CAPACITOR B(or W) W(or GR) HERM BL(or R) R(or B) CN30 L M H BL(or R) FUSE1 T3.15A/250VAC COMP.RELAY CN31 CN18 B@(or BR) GR: GRAY BR: BROWN UV LIGHT G(Y/G) BL: BLUE W@(orBL) - Page 25 The End Sincere Forever Haier Group Haier Industrial Park, No.1, Haier Road Edited by: GuanLi LiuSUE 266101, Qingdao, China WangRuoFeng E-mail: hractech@haier.com Signed by: Tel: +86 532 88935350 Http://www.haier.com Approved by: ZhangPeng Factory Model NO. ESA408M Some models may have an additional letter after the model number.