Table of Contents
Advertisement
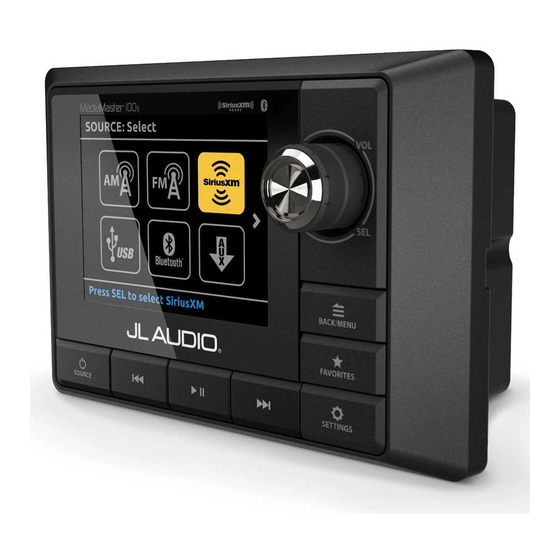
OWNER'S MANUAL
Thank you for purchasing a JL Audio MediaMaster®
Source Unit for your sound system.
This product has been designed and manufactured to exacting
standards in order to deliver years of musical enjoyment. For maximum
performance, we highly recommend that you have your MM100s
installed by an authorized JL Audio dealer. Your authorized dealer has
the training, expertise and installation equipment to ensure optimum
performance from this product. Due to the complexity of modern
vehicle systems, we do not recommend self-installation unless you have
extensive experience in automotive and marine electrical systems.
Should you decide to install this product yourself, please take the time to
read this manual thoroughly to familiarize yourself with its installation
requirements and setup procedures.
If you have any questions regarding the instructions in this manual or
any aspect of the product's operation, please contact your authorized
JL Audio dealer for assistance. If you need further assistance, please contact
the JL Audio Technical Support Department at technical@jlaudio.com
or call (954) 443–1100 during business hours.
Advertisement
Table of Contents

Related Manuals for JL Audio MediaMaster 100s

Summary of Contents for JL Audio MediaMaster 100s
- Page 1 If you have any questions regarding the instructions in this manual or any aspect of the product’s operation, please contact your authorized JL Audio dealer for assistance. If you need further assistance, please contact the JL Audio Technical Support Department at technical@jlaudio.com...
- Page 2 Protect Your Hearing! FCC Compliance Statement We value you as a long-term customer. This equipment has been tested and For that reason, we urge you to practice found to comply with the limits of restraint in the operation of this product Part 15 of the FCC Rules.
- Page 3 Safety Considerations Installation Applications • Install this product in a dry, well- This product is designed for operation ventilated location that does not with 12 volt, negative-ground electrical interfere systems. Using this product in systems with your factory-installed systems. If with positive ground and/or voltages a dry environment is not available, a other than 12 volts may result in...
- Page 4 The MM100s includes the following features: • Bluetooth® v2.1 with the aptX® codec • Water-resistant chassis and receives top-quality audio from display (IP66 rated) is built to compatible devices with playback withstand the elements control, up to 35 ft. (11 m) away •...
- Page 5 MOUNTING AND INSTALLATION Use a jigsaw or rotary tool to cut an The diagram below shows a typical opening in the mounting surface. mounting procedure into a fiberglass If necessary, use a file or sandpaper panel. Always follow proper safety to adjust the opening for proper procedures.
-
Page 6: General Connections
GENERAL CONNECTIONS ANT – Motorola® Style Antenna AUX-IN – To PreAmp Aux Source ZONE1 (MAIN) ZONE2 To Ampli er ZONE3 (SUB) ZONE4 (FIXED LEVEL) USB – USB Storage Media or iPhone® 5 or 6 REMOTE – MediaMaster® MMR-20 Remote Control (Sold Separately) CAN –... -
Page 7: General Controls
WIRING HARNESS CONNECTIONS Harnesses exiting the rear of the unit are used to connect to aftermarket amplifiers/ equipment and media devices. Depending on your specific equipment, you may or may not use all of the connections. Make sure to plan the layout of your system prior to routing wires and making connections. - Page 8 GENERAL CONTROL FUNCTIONS Below is a list of general commands, including many common operations. The functionality of each control will vary depending on the current source and menu selected. Use this button to turn ON or OFF and to access the source selection menu. Source/ •...
-
Page 9: Tuner Operation
Selecting a Source 1. Press to access the SOURCE: Select menu. 2. Rotate to highlight a desired source; press to select. Adjusting or Muting Volume 1. Rotate clockwise to increase volume 2. Rotate counter-clockwise to decrease volume 3. Press to mute/unmute audio (AM/FM/WB/SiriusXM®) or pause/resume the current selection (USB/Bluetooth®). - Page 10 Bluetooth® Audio You may wirelessly stream audio from a Bluetooth® compatible device from up to 35 ft. away (11 m). Up to 8 devices can be paired to the MM100s, but only one streaming device can connect at one time. Pairing a new device: 1.
- Page 11 Connecting USB Devices The USB port may be used to connect USB storage class devices (thumb drive, digital audio player, etc.). This USB connection also provides a 1A output for device charging. If this output is exceeded, an error message will display and the output will be disabled.
- Page 12 Connecting an iPhone® An iPhone® may be connected to the USB port using an appropriate Lightning to USB cable (not included). button and select USB from the SOURCE: Select Once connected, press the menu to access the connected device with the following controls: •...
- Page 13 SiriusXM® Satellite Radio Activate your SiriusXM® service online Only SiriusXM® brings you more of or by phone what you love to listen to, all in one For US Subscriptions: place. Get over 140 channels, including • Visit www.siriusxm.com/activatenow commercial-free music plus the •...
- Page 14 Listening to SiriusXM® SiriusXM® Main Menu 1. Press and turn The SiriusXM® Main Menu allows access select SiriusXM. to the following menu options: 2. Press to begin listening to Browse by Channel – Lists your available SiriusXM. channels. Browse by Category – Lists your Channel Selection available channels by categories.
- Page 15 Parental Controls Resetting SiriusXM® Radio Settings Some SiriusXM® channels contain mature A reset of the SiriusXM® tuner will content. When the Parental Controls erase all presets and settings, including feature is enabled, channels with mature parental controls, restoring all SiriusXM® content are restricted and will require a settings back to their factory defaults.
- Page 16 Audio Zone Setup The MM100s is equipped with four sets Access the Audio Zone Setup menu to of low-voltage, line-level RCA outputs to configure the functionality of each zone. send audio signals to your aftermarket 1. Press and hold to access amplifiers/equipment.
- Page 17 Optional Remote Controller volume level slider, accessible from the Audio Zone Levels menu. To access the Connecting an optional MMR-20 Wired Audio Zone Levels menu, press and Remote Controller (sold separately) will hold from any Now Playing add auxiliary control functionality from Screen.
-
Page 18: Troubleshooting
The Bluetooth® word mark and logos are registered trademarks owned by Bluetooth SIG, Inc. The aptX® word mark and logos are registered trademarks owned by CSR. iPhone® and Lightning are registered trademarks of Apple Inc. Use of all trademarks by JL Audio is under license. -
Page 19: Specifications
Specifications Electrical Specifications Operating Voltage 14.4V DC (10V – 15.9V allowable) Maximum Current Draw 1.5 A Standby Current Draw 120 mA Fuse Value Remote Turn-on Capacity 40 mA (max) Operating Temp Range -4 F to +158 F (-20 C to +70 C) Display Size / Type 3.5-inch / TFT LCD backlighted... - Page 20 Limited Warranty – Electronics (USA) JL Audio warrants this product to be free of defects in materials and workmanship for a period of two (2) years from the original date of purchase. This warranty is not transferable and applies only to the original purchaser from an authorized JL Audio dealer.