Jenn-Air 720-0720 Installation Instructions And Use & Care Manual
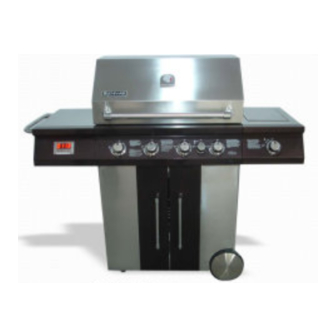
Freestanding outdoor grill
Hide thumbs
Also See for 720-0720:
- Use & care manual (104 pages) ,
- Installation instructions and user manual (104 pages)
Table of Contents
Advertisement
JENN-AIR
ASADORES AUTÓNOMOS PARA EXTERIORES
GRILS D'EXTÉRIEUR AUTOPORTANTS JENN-AIR
For questions about features, operation/performance, parts, accessories, or service, call:
Instrucciones de instalación y Manual de uso y cuidado
Para consultas respecto a características, funcionamiento, rendimiento, piezas, accesorios o servicio técnico, llame al:
Instructions d'installation et Guide d'utilisation et d'entretien
IMPORTANT:
Save for local electrical inspector's use.
Installer: Leave installation instructions with the homeowner.
Homeowner: Keep installation instructions for future reference.
IMPORTANTE:
Guarde para tenerlas a disposición del inspector de electricidad local.
Instalador: Deje las instrucciones de instalación con el propietario.
Propietario: Conserve las instrucciones de instalación para referencia futura.
IMPORTANT :
Conserver pour consultation par l'inspecteur local des installations électriques.
Installateur : Remettre les instructions d'installation au propriétaire.
Propriétaire : Conserver les instructions d'installation pour référence ultérieure.
720-0720 (LP) 730-0720 (NG)
®
FREESTANDING OUTDOOR GRILLS
JENN-AIR
Installation Instructions and Use & Care Guide
Au Canada, pour assistance, installation ou service, composez le
Table of Contents/Índice/Table des matières....................2
®
1-800-554-5799
1-800-554-5799
1-800-554-5799.
®
Advertisement
Table of Contents

Related Manuals for Jenn-Air 720-0720


Summary of Contents for Jenn-Air 720-0720
- Page 1 Propietario: Conserve las instrucciones de instalación para referencia futura. IMPORTANT : Conserver pour consultation par l'inspecteur local des installations électriques. Installateur : Remettre les instructions d'installation au propriétaire. Propriétaire : Conserver les instructions d'installation pour référence ultérieure. 720-0720 (LP) 730-0720 (NG)
-
Page 2: Table Of Contents
TABLE OF CONTENTS OUTDOOR GRILL SAFETY ............3 Hood Lights.................20 Using Your Searing Side Burner ..........21 INSTALLATION REQUIREMENTS ..........5 Using Your Rotisserie Burner.............22 Tools and Parts ................5 Rotisserie Cooking Tips .............22 Location Requirements ..............5 Using the Side Shelf Timer............23 Product Dimensions ..............6 TIPS FOR OUTDOOR GRILLING..........24 Electrical Requirements ...............6 Cooking Methods................24... -
Page 3: Outdoor Grill Safety
OUTDOOR GRILL SAFETY Your safety and the safety of others are very important. We have provided many important safety messages in this manual and on your appliance. Always read and obey all safety messages. This is the safety alert symbol. This symbol alerts you to potential hazards that can kill or hurt you and others. -
Page 4: Important Safety Instructions
IMPORTANT SAFETY INSTRUCTIONS WARNING: To reduce the risk of fire, electrical shock, ■ The LP gas supply cylinder to be used must be: injury to persons, or damage when using the outdoor cooking - constructed and marked in accordance with the gas appliance, follow basic precautions, including the Specification for LP Gas Cylinders of the U.S. -
Page 5: Installation Requirements
INSTALLATION REQUIREMENTS Tools and Parts Location Requirements Gather the required tools and parts before starting installation. Read and follow the instructions provided with any tools listed WARNING here. Tools Needed Phillips screwdriver Scissors or cutting pliers (to remove tiedowns) Wrench or pliers Noncorrosive leak- Pipe wrench detection solution... -
Page 6: Product Dimensions
It is recommended that a separate circuit servicing only this grill Product Dimensions be provided. To avoid electrical shock, do not immerse cord or plugs in water or other liquid. Unplug from the outlet when not in use and before cleaning. Allow to cool before putting on or taking off parts. -
Page 7: Gas Supply Requirements
IMPORTANT: Grill must be connected to a regulated gas supply. Recommended Ground Method Refer to the model/serial rating plate for information on the type of gas that can be used. If this information does not agree with The outdoor grill, when installed, must be electrically grounded in the type of gas available, check with your local gas supplier. -
Page 8: Gas Connection Requirements
Gas Connection Requirements 5. Slide the drawer with the 20 lb LP gas fuel tank back into the 20 lb LP Gas Fuel Tank cabinet. Turn the tank tray locking bracket counterclockwise 90° to tighten. This grill is equipped for use with a 20 lb LP gas fuel tank (fuel tank not supplied). -
Page 9: Installation Instructions
INSTALLATION INSTRUCTIONS Freestanding Outdoor Grill Installation WARNING Attach Right Side Shelf with Sear Burner 1. Unpack right side shelf with sear burner. Excessive Weight Hazard 2. Remove 3 screws from the side of the searing side burner. Use two or more people to move and install grill. 3. - Page 10 6. Attach the side shelf to the control panel (C) by tightening the 12. Replace the searing side burner, angling it so that the side screw from the side shelf control panel to the main control burner tube slides over the valve orifice (B). panel.
- Page 11 Attach Left Side Shelf 1. Unpack left side shelf and timer control panel. Remove two 6. Remove 3 screws from the side of the side shelf. “AA” batteries and set aside. 7. Attach the top of the side shelf to the grill (B) by inserting the 2.
-
Page 12: Make Gas Connection
Make Gas Connection NOTE: If grill is to be converted to Natural gas, follow instructions To Connect the 20 lb LP Gas Fuel Tank: in the “Gas Conversions” section. 1. Check that the 20 lb LP gas fuel tank is in the “Off” position. If not, turn the valve clockwise until it stops. - Page 13 To Disconnect the 20 lb LP Gas Fuel Tank: Plug in Grill 1. Check that the burner control knobs are in the “Off” position and the grill is cool. 2. Check that the 20 lb LP gas fuel tank is in the “Off” position. If WARNING not, turn the valve clockwise until it stops.
-
Page 14: Gas Conversions
GAS CONVERSIONS 6. Use an adjustable wrench to remove the LP regulator from the Tools and Parts for Gas Conversion manifold. Gather the required tools and parts before starting installation. Read and follow the instructions provided with any tools listed here. - Page 15 3. Connect the quick connector on the other end of the 3. Use a 6 mm socket and wrench or 6 mm nut driver to remove 10 ft (3.0 m) PVC flexible gas supply hose to the rigid Natural the brass orifice from the end of gas valve. The main burner gas supply pipe.
- Page 16 2. Using a Phillips screwdriver, remove the 4 screws at the back 5. Use 24 mm wrench to remove the orifice nut. of grill from inside the grill (2 screws on each side of the rotisserie infrared burner). A. Orifice nut 3.
- Page 17 2. Lift out the searing side burner. 8. Open the manual shutoff valve in the gas supply line. The valve is open when the handle is parallel to the gas pipe. A. Closed valve B. Open valve 9. Test all connections using an approved noncorrosive leak- detection solution.
-
Page 18: Check And Adjust The Burners
Check and Adjust the Burners The burners are tested and factory-set for most efficient 6. If flame is yellow (not enough air), turn air shutter adjustment operation. However, variations in gas supply and other conditions screw counterclockwise. may make minor adjustments to air shutter or low flame setting If flame is noisy or lifts away from burner (too much air), turn necessary. -
Page 19: Outdoor Grill Use
OUTDOOR GRILL USE This manual covers several different models. The grill you have purchased may have some or all of the features listed. The locations and appearances of the features shown here may not match those of your model. Control Panel IGNITE IGNITE IGNITE... -
Page 20: Hood Lights
Prepare the Grill for Lighting Manually Lighting the Grill and Searing Side Burner 1. Open the hood completely. Do not light burners with the hood 1. Open the hood completely. Do not light burners with the hood closed. closed. 2. Make sure control knobs are turned to OFF. The drip pan must 2. -
Page 21: Using Your Searing Side Burner
Using Your Searing Side Burner Infrared grilling produces intense heat which quickly sears the 3. Push in and turn the control knob to IGNITE/ON and hold in. meat. Searing locks in flavor and juices while allowing the outer You will hear the “snapping” sound of the spark. When burner surface to absorb smoke and food aroma that is produced as is lit, release the knob. -
Page 22: Using Your Rotisserie Burner
8. Remove match and replace manual lighting extension on the 5. Gently hold the lit match close to the rotisserie burner. right side panel. IMPORTANT: If burner does not light immediately, turn the burner knob to OFF and wait 5 minutes before relighting. If any burners do not light after attempting to light them manually, contact the Customer Service Center. -
Page 23: Using The Side Shelf Timer
Trussing Poultry for the Rotisserie Using the Side Shelf Timer 1. Load the spit rod by sliding one of the forks on the rod, with the prongs facing inward. Tighten the screw to keep it from slipping. 2. Push the rod through the center of the bird. 3. -
Page 24: Tips For Outdoor Grilling
TIPS FOR OUTDOOR GRILLING WARNING During Grilling Turn foods only once. Juices are lost when meat is turned Food Poisoning Hazard several times. Do not let food sit for more than one hour before or Turn meat just when juices begin to appear on the surface. after cooking. -
Page 25: Grilling Chart
Grilling Chart Knobs have High, Medium and Low settings for flame When 2 temperatures are listed, for example: Medium to adjustment. Medium-Low, start with the first and adjust based on cooking progress. Heat settings indicated are approximate. Cooking times may vary from chart times depending on the Grilling times are affected by weather conditions. - Page 26 FOOD COOKING METHOD/ INTERNAL TEMP. TIME SPECIAL INSTRUCTIONS BURNER SETTING (total minutes) Fish and Seafood Fillets, Steaks, Chunks DIRECT 4-6 per Grill, turning once. Brush grill Halibut, Salmon, Medium ½" (1.3 cm) with oil to keep fish from Swordfish, 8 oz (0.25 kg) thickness of fish sticking.
-
Page 27: Outdoor Grill Care
OUTDOOR GRILL CARE 4. Loosen the screw securing the light assembly to the grill hood Replacing the Igniter Battery and pull out the light with glass light cover. If igniters stop sparking, the battery should be replaced. 1. Open cabinet door. 2. -
Page 28: General Cleaning
8. Replace bulb with a new 12-volt, 10-watt maximum, halogen GRILL GRATES bulb, using a tissue or wearing cotton gloves to handle the bulb. To avoid damaging the bulb, do not touch the bulb with bare fingers. IMPORTANT: To avoid damage to grill grates, do not use a steel or fiber scraper. - Page 29 Check and clean burner/venturi tubes. SEARING SIDE BURNER 1. Remove grill grates and flame tamers. 2. Remove the screw and the clip that hold the burner in Cleaning Method: place. Remove gas burner from the grill. Clean the exterior of the sear burner with a wire brush. ROTISSIERE BURNER Cleaning Method: 1.
-
Page 30: Troubleshooting
Excessive flare-ups TROUBLESHOOTING Is there excessive fat in the food being grilled? Keep flame on low or turn one burner off. Grill will not light Keep the hood up when grilling to avoid excessive flare-ups. Is the 20 lb LP gas fuel tank valve turned off? Move food to the warming rack until flames subside. -
Page 31: Replacement Parts
REPLACEMENT PARTS 56 55... - Page 32 Part Part (description) Warranty Quantity Part Part (description) Warranty Quantity Number Coverage Number Coverage Grease box Main lid Front door, left Main lid screw Cabinet hinge Temperature gauge Lighting rod cover Logo Lighting rod Main lid handle seat, left Door handle Main lid handle seat, right Door handle seat Main lid handle tube...
- Page 33 Part Part (description) Warranty Quantity Part Part (description) Warranty Quantity Number Coverage Number Coverage Transformer Main burner igniter wire, Power cord Main burner igniter wire, Main lid bracket seat, right Main lid bracket seat, left Main burner Lamp Flame tamer Lamp case Cooking grid with hole Main burner igniter wire, A...
-
Page 34: Warranty
LIMITED WARRANTY Nexgrill warrants to the original consumer-purchaser only that this product (Model #720-0720) shall be free from defects in workmanship and materials after correct assembly and under normal and reasonable home use for the periods indicated below beginning on the date of purchase.