Table of Contents
Advertisement
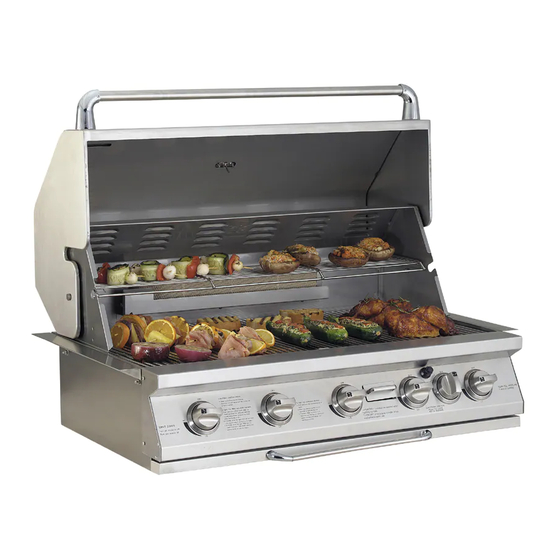
STAINLESS STEEL BUILT-IN GAS GRILL
MODEL #s: 720-0139-NG / 720-0142-LP
Jenn-Air is a Trademark of the Maytag Corporation and is used under license to Lowe's Companies, Incorporated.
PLEASE CONTACT 1-800-554-5799 FOR ASSISTANCE
DO NOT RETURN TO PLACE OF PURCHASE
LOWE'S ITEM #s: 168935/168934
FOR OUTDOOR USE ONLY
Advertisement
Table of Contents

Related Manuals for Jenn-Air 720-0142-LP


Summary of Contents for Jenn-Air 720-0142-LP
- Page 1 STAINLESS STEEL BUILT-IN GAS GRILL MODEL #s: 720-0139-NG / 720-0142-LP LOWE’S ITEM #s: 168935/168934 Jenn-Air is a Trademark of the Maytag Corporation and is used under license to Lowe’s Companies, Incorporated. FOR OUTDOOR USE ONLY PLEASE CONTACT 1-800-554-5799 FOR ASSISTANCE...
-
Page 2: Table Of Contents
Exploded View Model 720-0139-NG … … 23 Parts List Model 720-0139-NG … … … ... 24 Exploded View Model 720-0142-LP … …..25 Parts List Model 720-0142-LP … … … …..26 SECTION SIX Grilling Hints … … … … … … …………… 27-29 Grilling Recipes …... -
Page 3: Important Warnings
IMPORTANT WARNINGS WARNING FOR YOUR SAFETY If you smell gas: 1. Shut off gas to the appliance. 2. Extinguish any open flames. 3. Open the top cover or lid. 4. If the odor continues, immediately call your gas supplier or local fire department. 5. -
Page 4: Safety Instructions
SAFETY INSTRUCTIONS SAFETY SYMBOLS WARNING CAUTION Hazardous or unsafe practices that Hazardous or unsafe practices that could result in personal injury or death. could result in personal injury. COMMON CAUTIONS AND WARNINGS INSECT WARNING CAUTION Spiders and insects can nest inside the burners of Remove the warming rack when using the this and other grills, which could disrupt gas flow. - Page 5 SAFETY INSTRUCTIONS This grill is not intended to be installed in or on WARNING recreational vehicles or boats. Do not try lighting this appliance without first reading the “LIGHTING INSTRUCTIONS” section of this Children should not be left alone or unattended in an manual.
-
Page 6: Placement Of The Grill
Do not use briquettes of any kind in the grill. Clean the grill with caution. To avoid steam burns, The 720-0139-NG and 720-0142-LP grills are do not use a wet sponge or cloth to clean the grill designed for optimum performance without the use while it is hot. - Page 7 GRILL SPECIFICATIONS Description 720-0139-NG and 720-0142-LP Cutout Width 37 1/2 in. (95.25 cm) Cutout Depth 23 1/4 in. (59.05 cm) Cutout Height 10 1/4 in.(26.04 cm) Natural Gas: Standard residential 1/2 in. (1.3 cm) ID gas service line. Natural gas hose/regulator assembly included with quick- connect fitting for attachment to house natural gas line.
- Page 8 GRILL SPECIFICATIONS Description 720-0139-NG and 720-0142-LP Cutout Width 37 3/4 in. (95.89 cm) Cutout Depth 21 ½ in. (54.61 cm) Cutout Height 10 3/4 in.(27.31 cm) Natural Gas: Standard residential 1/2 in. (1.3 cm) ID gas service line. Natural gas hose/regulator assembly included with quick- connect fitting for attachment to house natural gas line.
-
Page 9: Island Construction
ISLAND CONSTRUCTION A minimum of 3 in.(7.62cm) clearance from the back of the grill is required to non-combustible material. 10 3/4 in.(27.31cm) WARNING 5 in.(12.70cm) Do not install this unit into combustible enclosures. There should be a minimum clearance of at least 24 in.(60.96cm) from all sides to combustible materials. - Page 10 SIDE VIEW FOR BUILT-IN OPENING A minimum of 3 in.(76.2mm) is required between the back of the grill and any non-combustible material. 26 1/4 in.(666.7mm) A minimum of 24 in.(609.6mm)is 24 6/8 in.(628.6mm) required between the back of the grill and any combustible material.
-
Page 11: Battery Installation
BATTERY INSTALLATION 1. To install the battery, remove the ignition button housing. 2. Insert the battery into the housing with the positive pole of the battery facing outward. 3. Replace the ignition button housing after the battery has been installed (See the image below). -
Page 12: Lp Gas Hook-Up
LP GAS HOOK-UP Only the pressure regulator and hose assembly LP GAS SUPPLY CYLINDER CONNECTION supplied with the grill should be used. Any Your grill is equipped with gas supply orifices for replacement pressure regulator and hose assembly use only with liquid propane gas. It is also equipped must be specified by the grill manufacturer. -
Page 14: Propane Tank Assembly
PROPANE TANK ASSEMBLY 1. Attach the regulator to the propane tank by turning the regulator handle clockwise. 2. Turn off the LP supply at the cylinder when the grill is not in use. -
Page 15: Installation Of Natural Gas Regulator
INSTALLATION OF NATURAL GAS REGULATOR 1. The Natural Gas regulator has been factory installed. Attach the PVC gas hose to the regulator (See drawing below). 2. Adjust the brass elbow so that it is pointing down. 2. Connect the other end of the PVC gas hose to the house gas line using the quick-connect fitting. -
Page 16: Natural Gas Hook-Up Xxxxxxxxxxxxxxxxxxxxxxxx
NATURAL GAS HOOK-UP XXXXXXXXXXXXXXXXXXXXXXXX Only the pressure regulator and hose assembly supplied with the grill should be used. Any replacement pressure regulator and hose assembly must be specified by the grill manufacturer. The installation of this appliance must conform with the local codes or, in the absence of local codes, to the national fuel gas code, ANSI Z223.1. -
Page 17: Leak Testing Xxxxxxxxxxxxxxxxxxxxxxxxxxxxxxxxxx
LEAK TESTING XXXXXXXXXXXXXXXXXXXXXXXXXXXXXXXXXX GENERAL Although all gas connections on the grill are leak Only those parts recommended by the tested at the factory prior to shipment, a complete manufacturer should be used on the grill. gas tightness check must be performed at the Substitutions will void the warranty. - Page 18 ½ psi (3.5 kpa). Model 720-0142-LP WARNING 1. Do not store spare LP gas cylinders under or near this appliance.
-
Page 19: Operating Instructions
OPERATING INSTRUCTIONS GENERAL USE OF THE GRILL AND ROTISSERIE Each main burner is rated at 12,000 BTU/Hr. The The grill is designed to grill efficiently without the main grill burners encompass the entire cooking use of lava rocks or briquettes of any kind. Heat is area and are side ported to minimize blockage from radiated by the stainless steel flame tamers falling grease and debris. - Page 20 LOADING THE ROTISSERIE SKEWER It is normal for the skewer to flex when larger cuts 1. Screw the bushing into the skewer rod at the of meat are being cooked. It may also be necessary opposite end from the point. to remove the cooking grids for larger cuts of meat.
-
Page 21: Lighting Instructions
LIGHTING INSTRUCTIONS BEFORE LIGHTING… FLAME CHARACTERISTICS Inspect the gas supply piping prior to turning the Check for proper burner flame characteristics. Each gas “ON”. If there is evidence of cuts, wear, or burner is adjusted prior to shipment. However, abrasion, it must be replaced prior to use. variations in the local gas supply may make minor adjustments necessary. -
Page 22: Easy Lighting Illustrations
EASY LIGHTING ILLUSTRATIONS MAIN BURNER LIGHTING ROTISSERIE BURNER LIGHTING ILLUSTRATION ILLUSTRATION 1. Open the top cover or lid. 1. Press and turn the Rotisserie knob to the “ON” setting. 2. Press and turn one of the main burner 2. Press the electric igniter button for 3 to 4 knobs to the “HI”... -
Page 23: Match Lighting The Grill
MATCH LIGHTING THE GRILL If the burner will not light after several attempts using the control knobs, the burner may be lit with a match. 1. If you have already attempted to light the burner with the igniter, allow 5 minutes for any accumulated gas to dissipate. -
Page 24: Care & Maintenance
CARE & MAINTENANCE STAINLESS STEEL GRILL BURNER REMOVAL/INSTALLATION The grill is made from non-rusting and non- The grill burners are factory installed. To remove magnetic stainless steel. There are many different the main burners for cleaning, stainless steel cleaners available. Always use the mildest cleaning procedure first, scrubbing in the 1. -
Page 25: Troubleshooting
TROUBLESHOOTING WHEN TO LOOK FOR SPIDERS INSECT WARNING You should inspect the burners twice a year or Spiders and insects can nest in the burners of immediately after any of the following conditions this and other grills, which could disrupt gas occur: flow. -
Page 26: Exploded View Model 720-0139-Ng
EXPLODED VIEW MODEL 720-0139-NG 19 18... -
Page 27: Parts List Model 720-0139-Ng
PARTS LIST MODEL 720-0139-NG REF# DESCRIPTION Q’TY REF# DESCRIPTION Lid, Front 90 Degree Brass Heat Indicator Regulator, NG Name Plate Gas Valve, Main Burner Heat Insulating Spacer Smoke Tray Bracket Handle Assembly, Lid Electronic Ignition Infrared Burner Gas Valve, Infrared Burner Gas Collector Gas Pipe Cooking Grid with Hole... -
Page 28: Exploded View Model 720-0142-Lp
EXPLODED VIEW MODEL 720-0142-LP... -
Page 29: Parts List Model 720-0142-Lp
PARTS LIST MODEL 720-0142-LP REF# DESCRIPTION Q’TY REF# DESCRIPTION Lid, Front Regulator, LP Heat Indicator 90 Degree Brass Name Plate Gas Valve, Main Burner Heat Insulating Spacer Smoke Tray Bracket Handle Assembly, Lid Gas Pipe Infrared Burner Gas Valve, Infrared Burner... -
Page 30: Grilling Hints
GRILLING HINTS The preparation of meat, whether rare, medium, or To get the juiciest meat, add seasoning or salt after well done, is affected to a large degree by the the cooking is finished and turn the meat only once thickness of the cut. - Page 31 WEIGHT OR FLAME APPROXIMATE SPEICAL INSTRUCTIONS FOOD THICKNESS SIZE TIME AND TIPS Place in aluminum foil pan. French Fries Medium 15 to 30 minutes Grill, stirring occasionally. MEATS BEEF Grill, turning once when juices rise to the surface. Do not leave hamburgers unattended since a flare-up Hamburgers 1/2 to 3/4 inch...
- Page 32 WEIGHT OR FLAME APPROXIMATE SPEICAL INSTRUCTIONS FOOD THICKNESS SIZE TIME AND TIPS Grill, turning occasionally. Ribs During last few minutes brush with barbecue sauce, turn Medium 30 to 40 minutes several times. Pork Ham steaks Remove excess fat from edge. Slash remaining fat at 2-inch (precooked) 1/2 inch slices...
-
Page 33: Grill Recipes
GRILL RECIPES BBQ SALMON Half-hour before cooking, turn the 1tsp. Worcestershire sauce 2 large salmon steaks burner to the grill on high. Drain 1tsp. Dry mustard 2 tbs. oil seafood-reserving marinade. On each ¼ tsp. Thyme, crushed Salt & pepper of twelve 10”... - Page 34 heat tortillas on grill. Slice meat across CHICKEN TANDOORI STYLE grain in thin slices. Place on hot platter. 8 large chicken thighs or drumsticks Time: 1-1/2 hours to 2 hours Squeeze lemon juice over. Wrap meat and 1 c. plain nonfat yogurt Bring pork to room temperature any of the following toppings in tortillas: ½...
- Page 35 LIMITED WARRANTY MODEL # 720-0139-NG/720-0142-LP STAINLESS STEEL BUILD-IN OUTDOOR GAS GRILL Nexgrill Industries, Inc. warrants to the original consumer/purchaser of each Jenn-Air Outdoor Gas Grill that when subject to normal residential use, it is free from defects in workmanship and materials for the periods specified below.