
Related Manuals for Ferroli Life M


Summary of Contents for Ferroli Life M
- Page 1 LIFE M Multisplit DC inverter in pompa di calore Multi Split DC inverter heat pump MANUALE INSTALLAZIONE E MANUTENZIONE INSTALLATION AND MAINTENANCE MANUAL...
- Page 2 FERROLI S.p.A Dear Customer, Thank you for having purchased a FERROLI Idustrial coolers. It is the result of many years experience, particular research and has been made with top quality materials and higlly advanced technologies. The CE mark guaranteed thats the appliances meets European Machine Directive requirements regarding safety. The qualitative level is kept under constant surveillance.
-
Page 3: Table Of Contents
SOMMARIO CARATTERISTICHE GENERALI . . . . . . . . . . . . . . . . . . . . . . . . . . . . . . . . . . . . . . . . . . . . . . . . . . . . . . . . .4 RICEVIMENTO. -
Page 4: Caratteristiche Generali
CARATTERISTICHE GENERALI RICEVIMENTO Al momento del ricevimento dell'unità è indispensabile controllare di aver ricevuto tutto il materiale indicato sul documento d'accompagnamento, ed inoltre che la stessa non abbia subito danni durante il trasporto. In caso affermativo, far costatare allo spedizioniere l'entità del danno subito, avvertendo nel frattempo il nostro ufficio gestione clienti. -
Page 5: Dati Tecnici Unita' Esterna
CARATTERISTICHE GENERALI DATI TECNICI UNITA’ ESTERNA UNITA’ ESTERNA 18-2 21-3 28-4 35-5 7 + 7 + 7 + Combinazione nominale 9 + 9 7 + 7 + 7 7 + 7 + 7 + 7 7 + 7 Alimentazione 230/1/50 V-Ph-Hz Refrigerante R410A... -
Page 6: Dati Tecnici Unita' Interna
CARATTERISTICHE GENERALI DATI TECNICI UNITA’ INTERNA UNITA’ INTERNA V-F- Alimentazione 230/1/50 Resa Frigorifera 2050 2785 3520 4980 Resa Termica 2340 2785 3810 5280 Portata aria (max-med-min) 530/460/350 650/530/400 630/490/380 900/700/600 Pressione sonora (max-med-min) dB(A) 40/37/28 43/38/28 41/37/28 47/40/34 1065 Dimensioni imballo Peso netto /Peso lordo 8/10 9/11... -
Page 7: Tabella Abbinamenti
CARATTERISTICHE GENERALI TABELLA ABBINAMENTI La tabella sotto riporta gli abbinamenti possibili tra unità esterna e diverse grandezze di unità interne... -
Page 8: Limiti Operativi
CARATTERISTICHE GENERALI LIMITI OPERATIVI Temperature Le tabelle sotto riportano i limiti di temperatura entro i quali è garantito il corretto funzionamento delle unità. Tipo di funzionamento Raffreddamento Temperatura massima aria ingresso U.I. 32 B.S. 23 B.U. (°C) Temperatura massima aria ingrasso U.E. 43 B.S. -
Page 9: Installazione
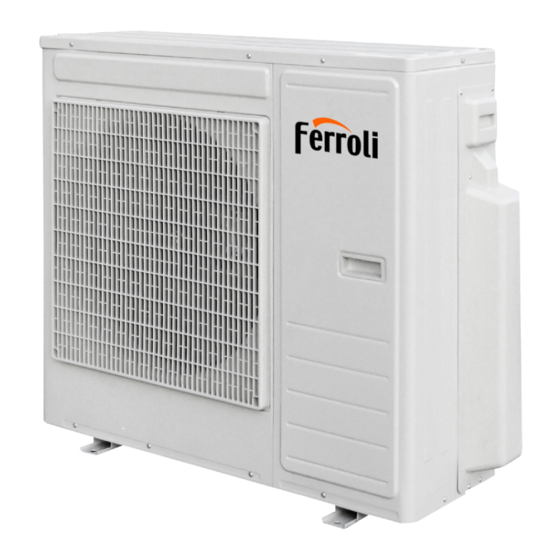
INSTALLAZIONE COMPONENTI UNITA' 1 . MOBILE DI COPERTURA Il mobile di copertura dell'unità esterna è realizzato in lamiera zincata verniciata a caldo con polveri poliestere dopo trattamento di passivazione. Questo trattamento conferisce all'unità resistenza agli agenti atmosferici. La struttura portante è realizzata in lamiera zincata stampata di notevole spessore, che ne conferisce una buona rigidità e non permette vibrazioni. -
Page 10: Imballo E Immagazzinamento
INSTALLAZIONE • In caso d'incendio usare un estintore a polvere. Non usare acqua. • Nel momento in cui si dovessero riscontrare anomalie nel funzionamento della macchina accertarsi che non siano dipendenti dalla mancata manutenzione ordinaria. In caso contrario richiedere l'intervento di un tecnico specializzato. •... -
Page 11: Limiti Su Lunghezza E Dislivello Delle Tubazioni Refrigeranti
INSTALLAZIONE LIMITI SU LUNGHEZZA E DISLIVELLO DELLE TUBAZIONI REFRIGERANTI Le unità operano correttamente se le condizioni installazione richiamate nello schema e riportate in tabella. Fig. 1 oil trap h >2,3m (solo per unità murale) UNITA’ ESTERNA 18-2 21-3 28-4 35-5 “... -
Page 12: Installazione Dell'unità Esterna
INSTALLAZIONE INSTALLAZIONE DELL’UNITÀ ESTERNA Nella scelta del luogo d'installazione dell'unità esterna tenere presente quanto segue: • Prima di procedere alla sua installazione, controllare che l'unità esterna sia stata trasportata in posizione verticale. Se ciò non fosse avvenuto, posizionarla correttamente e prima di avviarla, attendere per un tempo minimo di due ore. •... -
Page 13: Kit Scarico Condensa Per Unità Esterna
INSTALLAZIONE KIT SCARICO CONDENSA PER UNITÀ ESTERNA Nelle unità esterne a pompa di calore, nel funzionamento in riscaldamento, è prodotta della condensa. In tal caso può essere necessario convogliare la condensa verso uno scarico. Per fare ciò procedere come segue: 1. -
Page 14: Tubazioni Di Collegamento
INSTALLAZIONE TUBAZIONI DI COLLEGAMENTO Le tubazioni sono arrotolate, e già cartellate da ambo le parti. Le dimensioni sono quelle riportate nel paragrafo "LIMITI SU LUNGHEZZA E DISLIVELLO DELLE Fig. 1 TUBAZIONI REFRIGERANTI" . Effettuare il percorso dei tubi frigoriferi, a seconda delle necessità d'installazione, realizzando minor curve possibili e, utilizzando un idoneo piegatubi, rispettare un raggio minimo di curvatura per evitare lo schiacciamento degli stessi. - Page 15 INSTALLAZIONE TAB. Spessore da Ribordare A (mm) Diametro Diametro Spessore nominale (") esterno (mm) Ø tubo (mm) R22 - R407C R410A 1,0 ~ 1,5 1,5 ~ 2,0 6,35 0,80 1,0 ~ 1,5 1,5 ~ 2,0 9,52 0,80 1,5 ~ 2,0 2,0 ~ 2,5 12,70 0,80...
-
Page 16: Collegamenti Frigoriferi
INSTALLAZIONE Fig. 1 COLLEGAMENTI FRIGORIFERI Per collegare le linee frigorifere procedere come indicato di seguito: • Far combaciare le estremità del tubo cartellato precedentemente con quelle degli attacchi posti sulle unità interne ed esterne • Avvitare a mano il bocchettone e quindi serrarlo con l’ausilio di un chiave adeguata (per evitare tensioni sulle tubazioni è... - Page 17 INSTALLAZIONE OPERAZIONE DI VERIFICA DELLA TENUTA (consigliata) Prima di eseguire la fase di vuoto dell'impianto si consiglia di verificare la tenuta della parte di circuito frigorifero comprendente le giunzioni di collegamento tra le tubazioni e l'unità interna. Per l'esecuzione di tale fase si proceda come descritto: •...
- Page 18 INSTALLAZIONE OPERAZIONE DI VUOTO (OBBLIGATORIA) Aria ed umidità nel circuito frigorifero hanno effetti indesiderati sul funzionamento della unità quali: • Aumento della pressione. • Diminuzione dell'efficienza della macchina. • Possibilità di formazione di ghiaccio sul capillare e blocco dello stesso. •...
-
Page 19: Completamento Dell' Installazione
INSTALLAZIONE COMPLETAMENTO DELL' INSTALLAZIONE • Con una chiave a brugola aprire completamente i rubinetti (1-Fig.2) Fig. 2 ruotando in senso antiorario, fino a raggiungere il fermo. Non forzare ulteriormente per non danneggiare le valvole di tenuta • Fissare i tappi delle valvole (2-Fig.2). •... -
Page 20: Collegamenti Elettrici
COLLEGAMENTI ELETTRICI COLLEGAMENTI ELETTRICI Caratteristiche elettriche generali • Derivare una linea di alimentazione per il solo condizionatore, provvista di un dispositivo di protezione automatico (interruttore magnetotermico per carichi industriali), a carico dell'utente, posizionato a monte della linea stessa. • Accertarsi che il voltaggio della linea di alimentazione corrisponda alle esigenze riportate nei dati di targa. •... - Page 21 COLLEGAMENTI ELETTRICI Mod. 18-2 UNITA' INTERNA UNITA' INTERNA UNITA' ESTERNA Mod. 21-3 UNITA' INTERNA UNITA' INTERNA UNITA' INTERNA UNITA' ESTERNA...
- Page 22 COLLEGAMENTI ELETTRICI UNITA' UNITA' UNITA' UNITA' Mod. 28-4 INTERNA INTERNA INTERNA INTERNA UNITA' ESTERNA UNITA' UNITA' UNITA' UNITA' UNITA' Mod. 35-5 INTERNA INTERNA INTERNA INTERNA INTERNA UNITA' ESTERNA...
-
Page 23: Messa In Funzione
MESSA IN FUNZIONE PRIMO AVVIAMENTO Prima di eseguire il primo avviamento, prima di avviare l'impianto per il lavoro stagionale o dopo una lunga sosta è necessario eseguire i seguenti controlli preliminari che riguardano la parte elettrica e la parte frigorifera. CONTROLLO PRELIMINARE PARTE ELETTRICA N.B.: Prima di eseguire un qualsiasi controllo elettrico togliere l'alimentazione dalla macchina staccando la spina dalla presa di rete. -
Page 24: Certificato Di Garanzia
The manufacturer declines all responsibility for any inaccuracies in this manual due to printing or typing errors. - Page 25 SUMMARY GENERAL SPECIFICATIONS . . . . . . . . . . . . . . . . . . . . . . . . . . . . . . . . . . . . . . . . . . . . . . . . . . . . . .4 CONSIGNMENT OF THE MACHINE .
-
Page 26: General Specifications
GENERAL SPECIFICATIONS Consignment of the machine As soon as the machine is consigned, it is essential for the user to make sure that he has received all the items indicated on the consignment note and that the machine has not been damaged during transport. If damage is discovered, allow the forwarding agent to ascertain its entity and also inform our seller. -
Page 27: Technical Data Outdoor Unit
GENERAL SPECIFICATIONS Technical data outdoor unit OUTDOOR UNIT 18-2 21-3 28-4 35-5 Combination condition 9K+9K 7K+7K+7K 7K+7K+7K+7K 7K+7K+7K+7K+7K 230/1/50 Power supply V-Ph-Hz R410A Refrigerant tipo 6700 7070 9200 12450 5280 6150 8210 10550 Cooling capacity * 3700 4000 5340 6860 2090 2280 2790... -
Page 28: Technical Data Indoor Unit
GENERAL SPECIFICATIONS TECHNICAL DATA INDOOR UNIT INDOOR UNIT 230/1/50 V-F-Hz Power supply 2050 2785 3520 4980 Cooling capacity Heating capacity 2340 2785 3810 5280 m3/h Air flow rate (max-med-min) 530/460/350 650/530/400 630/490/380 900/700/600 40/37/28 43/38/28 41/37/28 47/40/34 dB(A) Sound pressure (max-med-min) 1065 Packging dimension Net weight / Gross weight... -
Page 29: Matching Table
GENERAL SPECIFICATIONS MATCHING TABLE La tabella sotto riporta gli abbinamenti possibili tra unità esterna e diverse grandezze di unità interne... -
Page 30: Operating Range
GENERAL SPECIFICATIONS OPERATING RANGE Temperature The table below show admissible operating temperature range. Type of operation Cooling Maximum inlet air temperature of I.U. 32 B.S. 23 B.U. (°C) Maximum inlet air temperature of O.U. 43 B.S. (°C) Minimum inlet air temperature of I.U. 17 B.S. -
Page 31: Unit Component
CARATTERISTICHE GENERALI UNIT COMPONENT 1 . CABINET FOR THE OUTDOOR UNIT The cabinet housing the outdoor unit is made from galvanised sheet metal hot-painted with polyester powders after passivation treatment. This makes it resistant to atmospheric agents. The bearing structure is in very thick press- moulded galvanised sheet metal giving overall rigidity and preventing vibrations from being transmitted. -
Page 32: Installation
INSTALLATION • Use a powder extinguisher in the event of a fire outbreak. Do not use water. • If the machine operates in an abnormal way, make sure that this does not depend on failure to carry out routine maintenance. Failing this, ask to have the machine checked by a specialized technician. •... -
Page 33: Limits To The Length And Height Difference Of Refrigerant Pipes
INSTALLATION LIMITS TO THE LENGTH AND HEIGHT DIFFERENCE OF REFRIGERANT PIPES The length of the refrigerant pipes between the indoor and outdoor units must be as short as possible and is in any case limited by compliance with the maximum height difference values between the units. Comply with the limits given in the following tables. -
Page 34: Installing The Outdoor Unit
INSTALLATION INSTALLING THE OUTDOOR UNIT Bear in mind the following when choosing the place in which the outdoor unit is to be installed: • Before installing the air conditioner make sure that it has been transported in an upright position. If this is not the case, position it correctly and wait at least two hours before starting it. -
Page 35: Condensation Drain Kit For Outdoor Unit
INSTALLATION CONDENSATION DRAIN KIT FOR OUTDOOR UNIT In the outdoor units with heat pump, condensation is created when running in heating mode. In this case it may be necessary to convey the condensation towards a drain. To do so, proceed as follows: 1 . -
Page 36: Connection Pipes
INSTALLATION CONNECTION PIPES The pipes are wound and already flared at both ends. The dimensions are those given in the "LIMITS TO THE LENGTH AND HEIGHT DIFFERENCE OF COOLANT Fig. 1 PIPES" section. Route the coolant pipes as required, with as few bends possible. Use an appropriate pipe bender and comply with a minimum bending radius to prevent them from being squashed. - Page 37 INSTALLATION Re-flanging thickness Tab. A (mm) Outer Nominal Pipe thickness diameter (") diameter (mm) Ø (mm) R22 - R407C R410A 1,0 ~ 1,5 1,5 ~ 2,0 6,35 0,80 1,0 ~ 1,5 1,5 ~ 2,0 9,52 0,80 1,5 ~ 2,0 2,0 ~ 2,5 12,70 0,80 1,5 ~ 2,0...
-
Page 38: Cooling Connections
INSTALLATION Fig. 1 COOLING CONNECTIONS Comply with the following indications when connecting the cooling pipes: • Match the ends of the previously flared pipe with those of the connections on the interior and exterior units. • Tighten the union by hand and then torque it with the aid of an adequate wrench (it is advisable to use a fox wedge to prevent tensions from being created on the pipes). - Page 39 INSTALLATION TIGHTNESS CHECK (RECOMMENDED OPERATION) Before setting the system in a vacuum, it is advisable to make sure that the cooling circuit is tight, including the connecting joints between the pipes and the indoor unit. Proceed as described below: • With the service valves of the outdoor unit completely shut, remove the cap from the service tap (1-Fig.2) and the union (2-Fig.2) of the gas valve (the larger one) •...
- Page 40 INSTALLATION VACUUM OPERATION (OBLIGATORY) Air and humidity in the cooling circuit impair the operation of the unit with effects such as: • Increased pressure. • Reduced efficiency. • Formation of ice on the capillary and subsequent blockage of the same. •...
-
Page 41: How To Complete The Installation
INSTALLATION HOW TO COMPLETE THE INSTALLATION • Using an Allen wrench, fully open the cocks (1-Fig.2) by turning Fig. 2 them in an anti-clockwise direction until the stop point is reached. Do not force any further or the retention valves could be damaged. •... -
Page 42: Electrical Connections
ELECTRICAL CONNECTIONS ELECTRICAL CONNECTIONS General electrical characteristics • The customer must provide a separate power line for the conditioner fitted with an automatic safety device (heavy- duty circuit breaker) upline from the line. • Make sure that the power line voltage matches that indicated on the rating plate. •... - Page 43 ELECTRICAL CONNECTIONS Mod. 18-2 INDOOR UNIT INDOOR UNIT OUTDOOR UNIT Mod. 21-3 INDOOR UNIT INDOOR UNIT INDOOR UNIT OUTDOOR UNIT...
- Page 44 ELECTRICAL CONNECTIONS INDOOR INDOOR INDOOR INDOOR Mod. 28-4 UNIT UNIT UNIT UNIT OUTDOOR UNIT INDOOR INDOOR INDOOR INDOOR INDOOR Mod. 35-5 UNIT UNIT UNIT UNIT UNIT OUTDOOR UNIT...
-
Page 45: Setting And Work
SETTING AND WORK STARTING UP FOR THE FIRST TIME Before starting the unit for the first time, before starting the system for seasonal work or after a long period at a standstill, carry out the following preliminary inspections with regard to the electrical and cooling parts. PRELIMINARY CHECKS ON THE ELECTRICAL PART Note: Before inspecting any electrical part, disconnect the power supply from the machine by unplugging it from the mains socket. - Page 46 C e r t i f i c a t o d i g a r a n z i a C e r t i f i c a t o d i g a r a n z i a CERTIFICATO DI GARANZIA La presente garanzia convenzionale è...
- Page 48 QUESTO PRODOTTO È CONFORME ALLA DIRETTIVA EU 2002/96/EC THIS PRODUCT CONFORMS TO DIRECTIVE EU 2002/96/EC. CE PRODUIT EST CONFORME À LA DIRECTIVE 2002/96/CE. ESTE PRODUCTO ES CONFORME A LA DIRECTIVA EU 2002/96/EC. DIESES PRODUKT ENTSPRICHT DER EU-RICHTLINIE 2002/96/EC. Il simbolo del cestino barrato riportato sull'apparecchio indica che il prodotto, alla fine della propria vita utile, dovendo esser smaltito seguendo le norme vigenti relative allo smaltimento differenziato e dovendo essere trattato separatamen- te dai rifiuti domestici, deve essere conferito in un centro di raccolta differenziata per apparecchiature elettriche ed elet- troniche oppure riconsegnato al rivenditore al momento dell'acquisto di una nuova apparecchiatura equivalente.
- Page 49 NOTE...
- Page 50 NOTE...
- Page 51 NOTE...
- Page 52 Ferroli spa ¬ 37047 San Bonifacio (Verona) Italy ¬ Via Ritonda 78/A tel. +39.045.6139411 ¬ fax +39.045.6100933 ¬ www.ferroli.it...