D-Link DAP-1665 User Manual
Wireless ac1200 dual band access point
Hide thumbs
Also See for DAP-1665:
- User manual (128 pages) ,
- Quick installation manual (57 pages) ,
- Quick install manual (21 pages)

Related Manuals for D-Link DAP-1665


Summary of Contents for D-Link DAP-1665
-
Page 1: User Manual
Version 1.0 | 1/3/2014 User Manual Wireless AC1200 Dual Band Access Point DAP-1665... -
Page 2: Preface
Trademarks D-Link and the D-Link logo are trademarks or registered trademarks of D-Link Corporation or its subsidiaries in the United States or other countries. All other company or product names mentioned herein are trademarks or registered trademarks of their respective companies. -
Page 3: Table Of Contents
Wireless Installation Considerations ........17 Bridge Mode .................58 Access Point Mode Installation ........18 Advanced Wireless ............58 Repeater or Wireless Client Mode Installation ..18 Bridge with AP Mode ............59 Configuration ..............21 Advanced Wireless ............59 Web-based Configuration Utility ..........21 D-Link DAP-1665 User Manual... - Page 4 Wireless Security .............76 Technical Specifications ..........100 What is WEP? ................76 What is WPS? ................76 Contacting Technical Support ........101 What is WPA? ................77 GPL Code Statement............102 Connecting to a Wireless Client ........78 Warranty .................117 WPS Button ...................78 Registration ..............124 D-Link DAP-1665 User Manual...
-
Page 5: Product Overview
Quick Install Guide If any of the above items are missing, please contact your reseller. Note: Using a power supply with a different voltage rating than the one included with the DAP-1665 will cause damage and void the warranty for this product. -
Page 6: Minimum Requirements
Utility Requirements • Firefox®20.0 or higher • Chrome™ 20.0 or higher • Safari® 4.0 or higher Windows Users: Make sure you have the latest version of Java installed. ® Visit www.java.com to download the latest version. D-Link DAP-1665 User Manual... -
Page 7: Introduction
Environmental factors will adversely affect wireless signal range. Wireless range and speed rates are D-Link RELATIVE performance measurements based on the wireless range and speed rates of a standard Wireless N product from D-Link. -
Page 8: Features
Environmental factors will adversely affect wireless signal range. Wireless range and speed rates are D-Link RELATIVE performance measurements based on the wireless range and speed rates of a standard Wireless N product from D-Link. -
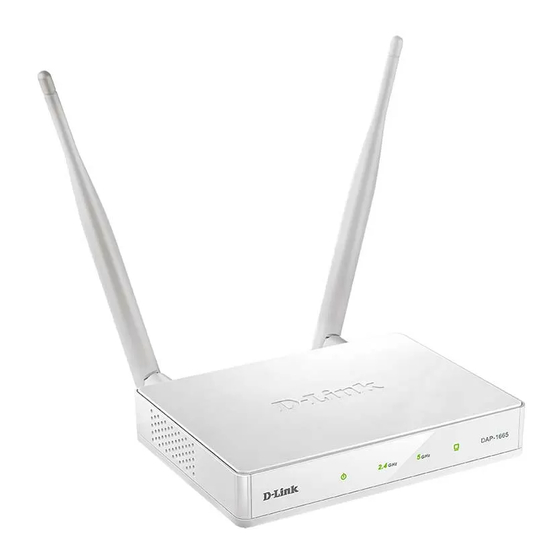
Page 9: Hardware Overview
Use an unfolded paper clip to press and hold the reset button for 10 seconds. This will reset the Reset Button DAP-1665 to its original factory default settings. Connect an Ethernet-based device such as a computer, video game console, Network Attached LAN Port Storage (NAS) device, or media player. -
Page 10: Leds
A solid green light indicates that the 5 GHz wireless band is active. The light will be off during 5GHz Wireless LED device reboot or if the wireless radio is disabled. LAN LED A solid green light indicates a connection to an Ethernet-enabled device. D-Link DAP-1665 User Manual... -
Page 11: Wps Button
WPS Button Press this button to use WPS (Wi-Fi Protected Setup) to establish a secure connection WPS Button with other wireless devices. 2 Kensington Slot Connect a Kensington® lock device to protect your access point against theft. D-Link DAP-1665 User Manual... -
Page 12: Installation
Installation You can simply connect a computer directly to the DAP-1665 with an Ethernet cable and then begin the configuration process. For Access Point Mode, you may use an Ethernet cable to connect the DAP-1665 to your wireless router. (Refer to “Access Point... -
Page 13: Access Point Mode
Use Access Point Mode (default mode) if you want to connect wireless clients (such as laptops, tablets and smartphones) to your existing wired network. The DAP-1665 acts as a central connection point for any wireless client that has an 802.11ac or backward compatible 802.11n, g, or a wireless network interface and is within range of the AP (access point). -
Page 14: Wireless Client Mode
Internet Router Video Game Console Note: If you would like to connect multiple Ethernet-enabled devices to your DAP-1665, connect the LAN port of the DAP-1665 to an Ethernet switch, then connect your devices to this switch. D-Link DAP-1665 User Manual... -
Page 15: Repeater Mode
Repeater Mode Wireless DAP-1665 Internet Router Wireless Devices Note: For best performance, place your DAP-1665 in between your router and your dead zone, making sure it’s placed in a location where the signal is still strong. D-Link DAP-1665 User Manual... -
Page 16: Bridge Mode
Note: Bridge mode is not specified in the Wi-Fi or IEEE standards. This mode will only work using two DAP-1665 units. Compatibility with other APs (even other D-Link APs) is not guaranteed. -
Page 17: Bridge With Ap Mode
DAP-1665s and have access to both networks via the wireless bridge. Note: The Bridge with AP mode is not specified in the Wi-Fi or IEEE standards. This mode will only work using two DAP-1665 units. -
Page 18: Wireless Installation Considerations
1. Keep the number of walls and ceilings between the D-Link access point and other network devices to a minimum. Each wall or ceiling can reduce your adapter’s range from 3-90 feet (1-30 meters.) Position your devices so that the number of walls or ceilings is minimized. -
Page 19: Access Point Mode Installation
Verify that the Power LED is lit. RESET Attach one end of the included Ethernet cable to the LAN port on the back of the DAP-1665, and the other end into the Ethernet port on your wireless router. RESET... - Page 20 WPS Button Within one minute, press and hold the WPS button on the side of the DAP-1665 for a minimum of one second. The WPS LED will blink. When the Security LED becomes a solid green, it means wireless security is enabled. Allow up to two minutes for the WPS process to complete.
- Page 21 Section 2 - Installation Note: Final installation step for Wireless Client Mode -- You can connect one Ethernet-enabled device to the AP using an Ethernet cable. RESET D-Link DAP-1665 User Manual...
-
Page 22: Configuration
“Troubleshooting” on page * Note: The default IP address is 192.168.0.50. Once the DAP-1665 (in Repeater or Client mode) connects to your router, it will get assigned a new IP address based on your router/network’s DHCP settings. You will need to log in to your router and view the DHCP table to see what IP address was assigned to the DAP-1665. The MAC address is printed on the label on the bottom of the AP. -
Page 23: Wireless Setup Wizard
Section 3 - Configuration Wireless Setup Wizard Click Launch Wireless Setup Wizard to configure your DAP-1665 in Access Point, Wireless Client, or Repeater mode. If you would like to configure the device in Bridge or Bridge with AP mode, skip to ”Manual Configuration”... -
Page 24: Access Point Mode
The Wi-Fi Connection Setup Wizard will assist you in configuring your DAP-1665 as an access point, allowing you to connect wireless clients to your wired network. The DAP-1665 can act as the wireless transmitter for your router or become a separate access point to expand your network. - Page 25 Click OK to save or click Cancel to continue without saving a bookmark. In order for your network settings to take effect AP will reboot automatically. D-Link DAP-1665 User Manual...
-
Page 26: Wireless Client Mode
Section 3 - Configuration Wireless Client Mode The Wi-Fi Setup Wizard will assist you in configuring your DAP-1665 as a wireless client. Then you will be able to connect an Ethernet-based device to your existing wireless network. Select Wireless Client from the drop-down menu. - Page 27 You will see a message that says a connection has been successfully made. Click Finish to complete the setup process. Note: If the connection was not successful, you will see a message that says the connection failed. Click Retry to try again, or Cancel to discontinue. D-Link DAP-1665 User Manual...
- Page 28 Section 3 - Configuration Select Manual configuration to setup your network manually. Click Next to continue. The DAP-1665 will scan for available wireless networks in your area. You will see a list of available wireless networks. Locate the SSID of the wireless network that you wish to connect to from the list.
- Page 29 Click OK to save or click Cancel to continue without saving a bookmark. In order for your network settings to take effect AP will reboot automatically. D-Link DAP-1665 User Manual...
-
Page 30: Repeater Mode
Section 3 - Configuration Repeater Mode The Wi-Fi Setup Wizard will assist you in configuring your DAP-1665 as a repeater to extend the range of your existing wireless network. Select Repeater from the drop-down menu. Select WPS as the configuration method only if your wireless device supports Wi-Fi Protected Setup (WPS). - Page 31 You will see a message that says a connection has been successfully made. Click Finish to complete the setup process. Note: If the connection was not successful, you will see a message that says the connection failed. Click Retry to try again, or Cancel to discontinue. D-Link DAP-1665 User Manual...
- Page 32 Section 3 - Configuration Select Manual configuration to setup your network manually. Click Next to continue. The DAP-1665 will scan for available wireless networks in your area. You will see a list of available wireless networks. Find the SSID of the wireless network that you wish to connect to from the list.
- Page 33 Click Next to continue. A summary page will be displayed showing the Repeater Network Name and Wi-Fi Password for the extended network. Make a note of this information for future reference. Click Save to save the configuration. D-Link DAP-1665 User Manual...
-
Page 34: Manual Configuration
Wireless Settings Configure your DAP-1665 manually from the web-based configuration utility by navigating to Setup > Wireless Setup. Refer to the following pages for detailed instructions on how to manually configure the DAP-1665 after selecting the Wireless Mode that you prefer. -
Page 35: Access Point Mode
Mixed 802.11n, 802.11g and 802.11b - Select if you are using a mix of 802.11n, 802.11g, and 802.11b wireless clients. Wireless Indicates the channel setting for the DAP-1665. The Channel Channel: can be changed to the channel setting for an existing wireless network or to reduce interference in congested areas. - Page 36 Select whether you would like the network name (SSID) of your Status: wireless network to be Visible or Invisible. If Invisible, the SSID of the DAP-1665 will not be shown by Site Survey utilities. Therefore, the SSID will have to be manually entered so wireless clients can connect.
- Page 37 Select whether you would like the network name (SSID) of your Status: wireless network to be Visible or Invisible. If Invisible, the SSID of the DAP-1665 will not be shown by Site Survey utilities. Therefore, the SSID will have to be manually entered so wireless clients can connect.
-
Page 38: Wireless Client Mode
“Configuring Wireless Security” on page Wireless MAC Check the box to Enable the cloning of another device’s MAC Clone: address by the DAP-1665. Wi-Fi Protected Check the box to Enable the use of Wi-Fi Protected Setup (WPS) Setup: for Wireless Client Mode. -
Page 39: Bridge Mode
Click Save Settings at the top of the page to save the current configuration. Note: The Bridge Mode is not completely specified in the Wi-Fi or IEEE standards. This mode will work with other DAP-1665 units. Communication with other APs (even other D-Link APs) is not guaranteed. -
Page 40: Bridge With Ap Mode
Click Save Settings at the top of the page to save the current configuration. Note: The Bridge with AP Mode is not completely specified in the Wi-Fi or IEEE standards. This mode will work with other DAP-1665 units. Communication with other APs (even other D-Link APs) is not guaranteed. - Page 41 Visibility Status: 2.4GHz wireless network to be Visible or Invisible. If Invisible is selected, the SSID of the DAP-1665 will not be shown by Site Survey utilities. Therefore, the SSID will have to be manually entered so wireless clients can connect.
- Page 42 Enable Auto Check the box to Enable Auto Channel Scan, if you would like Channel Scan: DAP-1665 to automatically choose the channel with the least amount of interference. Channel Width: When the Bridge Band selected above is 5GHz, the contents of this field will reflect the Channel Width selected above.
- Page 43 Status: 5GHz wireless network to be Visible or Invisible. If Invisible is selected, the SSID of the DAP-1665 will not be shown by Site Survey utilities. Therefore, the SSID will have to be manually entered so wireless clients can connect.
-
Page 44: Repeater Mode
Displays the name of the network to be repeated. Name: Local Wi-Fi Select a method for naming the DAP-1665’s extended network: Network Name: Same as Repeater Name - The extended network will have the same name (SSID) as the repeater network. - Page 45 Displays the name of the network which is to be repeated. Network Name: Local Wi-Fi Select a method for naming the DAP-1665’s extended network: Same as Repeater Name - The extended network will have the Network Name: same name (SSID) as the repeater network.
- Page 46 Select whether you want the wireless network name (SSID) of the 5GHz band to be Visible or Invisible. If Invisible, the SSID of the DAP-1665 will not be shown by Site Survey utilities. Therefore, the SSID will have to be manually entered so wireless clients can connect.
-
Page 47: Configuring Wireless Security
Section 3 - Configuration Configuring Wireless Security Wireless security encryption prevents unauthorized users from accessing your wireless network. The DAP-1665 provides two methods of wireless security encryption from which to choose: Wired Equivalent Privacy (WEP), and Wi-Fi Protected Access (WPA). It is recommended that you use WPA security if your wireless devices support this standard, as it is more secure than the older WEP standard. - Page 48 Security Mode: Select WPA-Personal from the drop-down menu. WPA Mode: There are two versions of WPA supported by the DAP-1665, WPA and WPA2. We recommended that you use AUTO(WPA or WPA2) so that WPA2 will be used whenever the connecting wireless clients support it.
- Page 49 Enter the port for the backup RADIUS authentication server. Server Port: Second RADIUS Enter the Shared Secret required by the backup RADIUS Server Shared authentication server. Secret: Click Save Settings at the top of the page to save the current configuration. D-Link DAP-1665 User Manual...
-
Page 50: Lan Setup
The LAN Setup page enables you to configure the Local Area Network (LAN) settings for the access point. From this page you can adjust your local network’s IP address settings. If you are connecting the access point to a network which is using IPv6, the DAP-1665 can be configured to operate using the IPv6 protocol. Dynamic/Static IP... -
Page 51: Dhcp Server
Check the box to Enable the built-in DHCP server function. If Server: you already have a DHCP server on your network, do not check the box to enable this function on the DAP-1665. DHCP IP Address Enter the Address Range of the DHCP address pool from which Range: requesting clients can be assigned addresses. - Page 52 Section 3 - Configuration IPv6 If you are connecting the access point to a network which is using IPv6, the DAP-1665 can be configured to operate using the IPv6 protocol. When Link-Local Only is selected, this will set the access point’s...
- Page 53 Servers, enter the Primary IPv6 DNS server address to be used. Secondary DNS Enter the Secondary IPv6 DNS server address to be used. Server: Click Save Settings at the top of the page to save the current configuration. D-Link DAP-1665 User Manual...
-
Page 54: Advanced
Section 3 - Configuration Advanced This section allows you to configure the advanced parameters of your DAP-1665. There will be different advanced features available for configuration based on the mode in which your device is operating. The instructions below are listed according to operation mode. -
Page 55: Advanced Wireless
40 MHz and there is another wireless network’s channel over- lapping and causing interference, the router will automatically change to 20 MHz. Click Save Settings at the top of the page to save the current configuration. D-Link DAP-1665 User Manual... -
Page 56: Wi-Fi Protected Setup
(Push-button) method. You will then have 120 seconds to press the WPS button on the new device that you wish to connect. Click Save Settings at the top of the page to save the current configuration. D-Link DAP-1665 User Manual... -
Page 57: User Limit
Enable User Check the box to Enable the user limit function. Limit: User Limit: Enter a number of wireless clients (between 1-32). Click Save Settings at the top of the page to save the current configuration. D-Link DAP-1665 User Manual... -
Page 58: Wireless Client Mode
40 MHz and there is another wireless network’s channel over- lapping and causing interference, the router will automatically change to 20 MHz. Click Save Settings at the top of the page to save the current configuration. D-Link DAP-1665 User Manual... -
Page 59: Bridge Mode
40 MHz and there is another wireless network’s channel over- lapping and causing interference, the router will automatically change to 20 MHz. Click Save Settings at the top of the page to save the current configuration. D-Link DAP-1665 User Manual... -
Page 60: Bridge With Ap Mode
40 MHz and there is another wireless network’s channel over- lapping and causing interference, the router will automatically change to 20 MHz. Click Save Settings at the top of the page to save the current configuration. D-Link DAP-1665 User Manual... -
Page 61: Repeater Mode
Client List drop-down menu, and click << to automatically populate the field. Click Clear to clear all fields. Click Save Settings at the top of the page to save the current configuration. D-Link DAP-1665 User Manual... -
Page 62: Advanced Wireless
40 MHz and there is another wireless network’s channel over- lapping and causing interference, the router will automatically change to 20 MHz. Click Save Settings at the top of the page to save the current configuration. D-Link DAP-1665 User Manual... -
Page 63: Wi-Fi Protected Setup
(Push-button) method. You will then have 120 seconds to press the WPS button on the new device that you wish to connect. Click Save Settings at the top of the page to save the current configuration. D-Link DAP-1665 User Manual... -
Page 64: User Limit
Enable User Check the box to Enable the user limit function. Limit: User Limit: Enter a number of wireless clients (between 1-32). Click Save Settings at the top of the page to save the current configuration. D-Link DAP-1665 User Manual... -
Page 65: Maintenance
Check the box to enable graphical authentication. Graphical Graphical authentication uses a challenge-response test to prevent Authentication: unauthorized users from gaining access to the configuration utility through automated means. Click Save Settings at the top of the page to save the current configuration. D-Link DAP-1665 User Manual... -
Page 66: System
Upload Settings to apply the configuration in the file to the access point. Note: This will overwrite any current configuration. Restore to Click Restore Device to reset the DAP-1665’s settings to the Factory Default factory defaults. Settings: Warning: This will erase all current settings and cannot be undone. -
Page 67: Firmware
Language Pack After you have downloaded the new language pack, click Upgrade: Browse to locate a language pack file on your computer. Once located, click Upload to commence the language pack upgrade process. D-Link DAP-1665 User Manual... -
Page 68: Time
Use the drop-down menus to manually configure the time and date. This option will not be available if the Enable NTP Server option is checked above. Click Save Settings at the top of the page to save the current configuration. D-Link DAP-1665 User Manual... -
Page 69: System Check
Host Name or Enter the Host Name or IPv6 Address and click Ping if you wish IPv6 Address: to conduct an IPv6 ping test. Ping Result: Displays results of the ping test above. D-Link DAP-1665 User Manual... -
Page 70: Schedules
Schedule Rules This table displays a summary of all current schedule rules. Click List. on the Edit icon to edit the rule, or click on the Delete icon to delete the rule from the list. D-Link DAP-1665 User Manual... -
Page 71: Status
Section 3 - Configuration Status Device Info This page displays the current information for the DAP-1665, such as LAN and Wireless LAN information and statistics. General: Displays the access point’s Time (as current date and time) and Firmware Version. LAN: Displays the MAC Address and the private (local) IP settings for the access point. -
Page 72: Logs
This button directs you to the next page of the log. Clear Log: This button clears all current log content. Save Log: This button allows you to save the current log to a file on your local computer. Refresh: This button refreshes the log. D-Link DAP-1665 User Manual... -
Page 73: Statistics
Statistics The DAP-1665 keeps statistics of the traffic that passes through it. You can view the number of packets that pass through the LAN and wireless portions of the network. The traffic counter will reset if the access point is rebooted. Use the buttons at the top of the page to Refresh or Clear the statistics. -
Page 74: Wireless
The wireless section allows you to view the wireless clients that are connected to your wireless access point. Connected Time: Displays the amount of time the wireless client has been connected to the access point. MAC Address: The Ethernet ID (MAC address) of the wireless client. D-Link DAP-1665 User Manual... -
Page 75: Ipv6
Section 3 - Configuration IPv6 This page displays IPv6 Internet and network connection details. D-Link DAP-1665 User Manual... -
Page 76: Help Menu
Section 3 - Configuration Help Menu D-Link DAP-1665 User Manual... -
Page 77: Wireless Security
This section will explain the different types of security you can use to protect your wireless network from intruders. Please note that some security methods may not be available for all operation modes. The DAP-1665 offers the following types of security: •... -
Page 78: What Is Wpa
• WPA/WPA2 - Enterprise is designed for medium-to-large scale networking environments and uses a centralized RADIUS server for authentication. Users must be registered and authorized by the RADIUS server in order to access the wireless network. D-Link DAP-1665 User Manual... -
Page 79: Connecting To A Wireless Client
WPS Button WPS (Wi-Fi Protected Setup) is a simple and secure way to connect your wireless devices with the DAP-1665 when using Repeater or Wireless Client mode. Most wireless devices such as wireless routers, media players, printers, and cameras will have a WPS button (or a software utility with WPS). -
Page 80: Connect To A Wireless Network
To join an existing network, locate the wireless network icon in the taskbar, next to the time display. Wireless Icon Clicking on this icon will display a list of wireless networks which are within connecting proximity of your computer. Select the desired network by clicking on the network name. D-Link DAP-1665 User Manual... - Page 81 WPS button on your router at this point to enable the WPS function. When you have established a successful connection to a wireless network, the word Connected will appear next to the name of the network to which you are connected. D-Link DAP-1665 User Manual...
-
Page 82: Windows ® 7
If you are joining an existing network, you will need to know the security key or passphrase being used. 1. Click on the wireless icon in your system tray (lower-right corner). Wireless Icon 2. The utility will display any available wireless networks in your area. D-Link DAP-1665 User Manual... - Page 83 If you get a good signal but cannot access the Internet, check your TCP/IP settings for your wireless adapter. Refer to the Networking Basics section in this manual for more information. 4. The following window appears while your computer tries to connect to the router. D-Link DAP-1665 User Manual...
- Page 84 It may take 20-30 seconds to connect to the wireless network. If the connection fails, please verify that the security settings are correct. The key or passphrase must be exactly the same as on the wireless router. D-Link DAP-1665 User Manual...
-
Page 85: Windows Vista
(displayed using the SSID) and click the Connect button. If you get a good signal but cannot access the Internet, check your TCP/ IP settings of your wireless adapter. Refer to the Networking Basics section in this manual for more information. D-Link DAP-1665 User Manual... -
Page 86: Wpa/Wpa2
1. Open the Windows Vista Wireless Utility by right-clicking on the wireless computer icon in your system tray (lower right corner of screen). Select Connect to a network. 2. Highlight the Wi-Fi name (SSID) you would like to connect to and click Connect. D-Link DAP-1665 User Manual... - Page 87 It may take 20-30 seconds to connect to the wireless network. If the connection fails, please verify that the security settings are correct. The key or passphrase must be exactly the same as on the wireless router. D-Link DAP-1665 User Manual...
-
Page 88: Wps/Wcn 2.0
Reset PIN to Default button. If you are using third party software to set up Wi-Fi Protection, carefully follow the directions. When you are finished, proceed to the next section to set up the newly-configured router. D-Link DAP-1665 User Manual... -
Page 89: Using Windows Xp
(displayed using the SSID) and click the Connect button. If you get a good signal but cannot access the Internet, check the TCP/ IP settings of your wireless adapter. Refer to the Networking Basics section in this manual for more information. D-Link DAP-1665 User Manual... -
Page 90: Configure Wpa-Psk
1. Open the Windows® XP Wireless Utility by right-clicking on the wireless computer icon in your system tray (lower-right corner of screen). Select View Available Wireless Networks. 2. Highlight the wireless network (SSID) you would like to connect to and click Connect. D-Link DAP-1665 User Manual... - Page 91 It may take 20-30 seconds to connect to the wireless network. If the connection fails, please verify that the WPA-PSK settings are correct. The WPA-PSK passphrase must be exactly the same as on the wireless router. D-Link DAP-1665 User Manual...
-
Page 92: Troubleshooting
1. Why can’t I access the web-based configuration utility? When entering the name or IP address of the D-Link access point (192.168.0.50 for example), you are not connecting to a website on the Internet or have to be connected to the Internet. The device has the utility built-in to a ROM chip in the device itself. - Page 93 DHCP settings. You will have to log in to your router and view the DHCP table to see what IP address was assigned to the DAP-1665. If you are using a D-Link router, follow these instructions to find the IP address that was assigned: Using the router’s Web-based configuration utility, go to Setup >...
- Page 94 95, 98, and ME users type in command (Windows ® ® (or click OK). • Once the window opens, you’ll need to do a special ping. Use the following syntax: ping [url] [-f ] [-l] [MTU value] Example: ping yahoo.com -f -l 1472 D-Link DAP-1665 User Manual...
- Page 95 • To change the MTU enter the number in the MTU field and click Save Settings to save your settings. • Test your email. If changing the MTU does not resolve the problem, continue changing the MTU in increments of ten. D-Link DAP-1665 User Manual...
-
Page 96: Wireless Basics
D-Link wireless products are based on industry standards to provide easy-to-use and compatible high-speed wireless connectivity within your home, business or public access wireless networks. Strictly adhering to the IEEE standard, the D-Link wireless family of products will allow you to securely and conveniently access your network. You will be able to enjoy the freedom that wireless networking delivers. -
Page 97: Tips
Don’t let your neighbors or intruders connect to your wireless network. Secure your wireless network by utilizing the WPA or WEP security feature on the extender and uplink router. Refer to “Wireless Security” on page 76 for more information. D-Link DAP-1665 User Manual... -
Page 98: Networking Basics
Check your IP address After you install your new D-Link wireless adapter and have established a wireless connection, by default, the TCP/IP settings should be set to obtain an IP address from a DHCP server (i.e. wireless router) automatically. To verify your IP address, please follow the steps below. -
Page 99: Statically Assign An Ip Address
• Press the Windows key and then type IP. Click Settings on the right side and then click View Network Connections. • Right-click on the adapter which represents your D-Link wireless network adapter. • Highlight Internet Protocol Version 4 (TCP /IPv4) and click Properties. -
Page 100: Windows® 7/ Vista® Users
If you are using Windows Vista, click on Manage network connections along the left panel in the window. For Windows® 7, click on Change adapter settings. • Right-click on the Local Area Connection which represents your D-Link wireless network adapter which will be connected to your network. -
Page 101: Technical Specifications
All Maximum transmission power values expressed are for dual-chain mode. Maximum transmission power and included antennas may vary depending on regional regulations. Frequency Range may vary depending on regional regulations. D-Link DAP-1665 User Manual... -
Page 102: Contacting Technical Support
• Hardware Revision (located on the label on the device (e.g. rev A1)) • Serial Number (s/n number located on the label on the device). You can find software updates and user documentation on the D-Link website as well as frequently asked questions and answers to technical issues. -
Page 103: Gpl Code Statement
WRITTEN OFFER FOR GPL AND LGPL SOURCE CODE Where such specific license terms entitle you to the source code of such software, D-Link will provide upon written request via email and/or traditional paper mail the applicable GPL and LGPLsource code files via CD-ROM for a nominal cost to cover shipping and media charges as allowed under the GPL and LGPL. - Page 104 Therefore, we have designed this version of the GPL to prohibit the practice for those products. If such problems arise substantially in other domains, we stand ready to extend this provision to those domains in future versions of the GPL, as needed to protect the freedom of users. D-Link DAP-1665 User Manual...
- Page 105 (except to the extent that warranties are provided), that licensees may convey the work under this License, and how to view a copy of this License. If the interface presents a list of user commands or options, such as a menu, a prominent item in the list meets this criterion. D-Link DAP-1665 User Manual...
- Page 106 The Corresponding Source need not include anything that users can regenerate automatically from other parts of the Corresponding Source. The Corresponding Source for a work in source code form is that same work. D-Link DAP-1665 User Manual...
- Page 107 License with respect to the covered work, and you disclaim any intention to limit operation or modification of the work as a means of enforcing, against the work’s users, your or third parties’ legal rights to forbid circumvention of technological measures. D-Link DAP-1665 User Manual...
- Page 108 “aggregate” if the compilation and its resulting copyright are not used to limit the access or legal rights of the compilation’s users beyond what the individual works permit. Inclusion of a covered work in an aggregate does not cause this License to apply to the other parts of the aggregate. D-Link DAP-1665 User Manual...
- Page 109 Corresponding Source of the work are being offered to the general public at no charge under subsection 6d. A separable portion of the object code, whose source code is excluded from the Corresponding Source as a System Library, need not be included in conveying the object code work. D-Link DAP-1665 User Manual...
- Page 110 Corresponding Source conveyed, and Installation Information provided, in accord with this section must be in a format that is publicly documented (and with an implementation available to the public in source code form), and must require no special password or key for unpacking, reading or copying. D-Link DAP-1665 User Manual...
- Page 111 ) Requiring indemnification of licensors and authors of that material by anyone who conveys the material (or modified versions of it) with contractual assumptions of liability to the recipient, for any liability that these contractual assumptions directly impose on those licensors and authors. D-Link DAP-1665 User Manual...
- Page 112 Termination of your rights under this section does not terminate the licenses of parties who have received copies or rights from you under this License. If your rights have been terminated and not permanently reinstated, you do not qualify to receive new licenses for the same material under section 10. D-Link DAP-1665 User Manual...
- Page 113 License, and you may not initiate litigation (including a cross-claim or counterclaim in a lawsuit) alleging that any patent claim is infringed by making, using, selling, offering for sale, or importing the Program or any portion of it. D-Link DAP-1665 User Manual...
- Page 114 D-Link DAP-1665 User Manual...
- Page 115 The terms of this License will continue to apply to the part which is the covered work, but the special requirements of the GNU Affero General Public License, section 13, concerning interaction through a network will apply to the combination as such. D-Link DAP-1665 User Manual...
- Page 116 USE THE PROGRAM (INCLUDING BUT NOT LIMITED TO LOSS OF DATA OR DATA BEING RENDERED INACCURATE OR LOSSES SUSTAINED BY YOU OR THIRD PARTIES OR A FAILURE OF THE PROGRAM TO OPERATE WITH ANY OTHER PROGRAMS), EVEN IF SUCH HOLDER OR OTHER PARTY HAS BEEN ADVISED OF THE POSSIBILITY OF SUCH DAMAGES. D-Link DAP-1665 User Manual...
- Page 117 Program, unless a warranty or assumption of liability accompanies a copy of the Program in return for a fee. D-Link DAP-1665 User Manual...
-
Page 118: Warranty
Any repair or replacement will be rendered by D-Link at an Authorized D-Link Service Office. The replacement hardware need not be new or have an identical make, model or part. D-Link may, at its option, replace the defective Hardware or any part thereof with any reconditioned product that D-Link reasonably determines is substantially equivalent (or superior) in all material respects to the defective Hardware. - Page 119 Software or to refund the portion of the actual purchase price paid that is attributable to the Software. Except as otherwise agreed by D-Link in writing, the replacement Software is provided only to the original licensee, and is subject to the terms and conditions of the license granted by D-Link for the Software.
- Page 120 • The customer must submit with the product as part of the claim a written description of the Hardware defect or Software nonconformance in sufficient detail to allow D-Link to confirm the same, along with proof of purchase of the product (such as a copy of the dated purchase invoice for the product) if the product is not registered.
- Page 121 Purolator Canada or any common carrier selected by D-Link. Return shipping charges shall be prepaid by D-Link if you use an address in Canada, otherwise we will ship the product to you freight collect. Expedited shipping is available upon request and provided shipping charges are prepaid by the customer.
-
Page 122: Limitation Of Liability
FOR WARRANTY SERVICE) RESULTING FROM THE USE OF THE PRODUCT, RELATING TO WARRANTY SERVICE, OR ARISING OUT OF ANY BREACH OF THIS LIMITED WARRANTY, EVEN IF D-LINK HAS BEEN ADVISED OF THE POSSIBILITY OF SUCH DAMAGES. THE SOLE REMEDY FOR A BREACH OF THE FOREGOING LIMITED WARRANTY IS REPAIR, REPLACEMENT OR REFUND OF THE DEFECTIVE OR NONCONFORMING PRODUCT. - Page 123 This equipment complies with FCC radiation exposure limits set forth for an uncontrolled environment. This equipment should be installed and operated with minimum distance 20cm between the radiator & your body.to match the intended destination. The firmware setting is not accessible by the end user. D-Link DAP-1665 User Manual...
- Page 124 Cet equipement est conforme aux limites d’exposition aux rayonnements IC etablies pour un environnement non controle. Cet equipement doit etre installe et utilise avec un minimum de 20 cm de distance entre la source de rayonnement et votre corps. D-Link DAP-1665 User Manual...
-
Page 125: Registration
Appendix G - Registration Registration Product registration is entirely voluntary and failure to complete or return this form will not diminish your warranty rights. Version 1.0 January 3, 2014 D-Link DAP-1665 User Manual...