Sign In
Upload
Manuals
Brands
Vaisala Manuals
Measuring Instruments
LT31
Vaisala LT31 Manuals
Manuals and User Guides for Vaisala LT31. We have
1
Vaisala LT31 manual available for free PDF download: User Manual
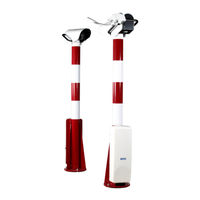
Vaisala LT31 User Manual (294 pages)
Transmissometer
Brand:
Vaisala
| Category:
Measuring Instruments
| Size: 17.92 MB
Table of Contents
Table of Contents
3
Chapter 1 General Information
15
About this Manual
15
Contents of this Manual
15
Version Information
16
Related Manuals
16
Feedback
16
Safety
16
General Safety Considerations
16
Table 1 Manual Revisions
16
Table 2 Related Manuals
16
Product Related Safety Precautions
17
ESD Protection
19
Recycling
20
Regulatory Compliances
21
Patent Notice
21
Trademarks
21
Warranty
21
Chapter 2 Product Overview
23
Description and Purpose
23
LT31 Key Features
23
Auto-Calibration
23
Range Extension
23
Alignment Quality Control
24
Auto-Alignment
24
Contamination Prevention
24
Double-Mast Construction
24
LED Light Source
24
Self-Diagnostics
24
Window Contamination Measurement
24
Compatibility
25
Introduction to LT31
25
Figure 1 Vaisala Transmissometer LT31
26
Figure 2 Receiver Unit LTR111 with LM21 Background Luminance
27
Figure 3 Transmitter Unit LTT111 with PWD Forward Scatter Sensor
28
Figure 4 Measurement Head
29
Mast with Support Unit
30
Figure 5 Support Unit
31
Figure 6 Measurement Unit
32
Measurement Unit
32
Figure 7 Measurement Unit Opened
33
Figure 8 Interface Unit
34
Interface Unit
34
Equipment Nomenclature
35
Table 3 LT31 Transmissometer Nomenclature
35
Table 4 LT31 Nomenclature for the Options
36
Table 5 LT31 Spare Parts
36
Table 6 LT31 Spare Parts for Options
37
Chapter 3 Functional Description
39
Operating Principles
39
Concept of Visibility
39
Meteorological Optical Range
40
Visibility Measurement
41
Auto-Calibration
41
Auto-Alignment
42
Alignment Quality Control
43
Figure 9 Alignment Mechanism
43
Figure 10 Window Contamination Prevention Principle
44
Measuring Window Contamination
44
Preventing Contamination
44
Hardware Descriptions
45
Figure 11 Window Contamination Measurement Principle
45
Figure 12 Communication Principle
46
Figure 13 Measurement Unit
47
Measurement Unit LTM112/212
47
Figure 14 Optics Unit Transmitter LTO112
48
Optics Unit LTO112/212
48
Figure 15 Optics Unit Receiver LTO212
49
Figure 16 Main Transmitter Module LTL112
49
Main Transmitter Module LTL112
49
Figure 17 Block Diagram LTL112
50
Main Receiver Module LTD112
50
Figure 18 Main Receiver Module LTD112
51
Figure 19 Block Diagram LTD112
52
Figure 20 Window Transmitter Module LTL212
52
Window Transmitter Module LTL212
52
Figure 21 Block Diagram LTL212
53
Figure 22 Measurement Head CPU LTC112
53
Measurement Head CPU LTC112
53
Figure 23 Block Diagram LTC112
55
Interface Unit LTI111/211
55
Figure 24 Interface Unit Receiver LTI211
56
Power Supply FSP102
56
Figure 25 Power Supply FSP102
57
Figure 26 Master CPU LTC212
58
Master CPU LTC212
58
Figure 27 PWD Forward Scatter Sensor
59
Present Weather Detector Forward Scatter Sensor
59
Software Descriptions
60
Master CPU
60
Measurement Cpus
60
Optional Equipment Descriptions
61
Background Luminance Sensor LM21
61
Figure 28 Installed Background Luminance Sensor LM21
61
Obstruction Light LT31OBS
62
Termbox-1200/Termbox-9000
62
Battery Backup LTBB111
63
Figure 29 Installed Obstruction Light LT31OBS
63
Figure 30 Installed Battery Charger Module QBR101
64
Figure 31 Installed Backup Battery
65
Chapter 4 Installation
67
Preparing Installation
67
Selecting Location
70
Unpacking Instructions
70
Storage
71
Unpacking Procedure
71
Equipment Grounding and Lightning Protection
72
Cable Selection
73
Figure 32 LT31 Equipment Grounding
73
Line Power Cable
74
Figure 33 TERMBOX-1200/Junction Box for Receiver
75
Figure 34 TERMBOX-9000/Junction Box for Transmitter
75
Communication Cable
76
Table 7 AC Cable Selection for LT31
76
Figure 35 Cable Grounding Instruction
77
Communication Options
78
Serial Communications Settings
78
Serial Transmission with RS-232
78
Table 8 Communication Cable Lengths
78
Figure 36 RS-232 Communication Option
79
Serial Multipoint Transmission with RS-485
79
Figure 37 RS-485 Communication Option
80
Figure 38 RS-485 Option
81
Modem DMX501 (Optional)
81
Figure 117 LTC212
82
Figure 39 Modem Wiring
82
Figure 40 AC and Battery Backup Switch
83
Figure 41 Installing DMX501
84
Multipoint Modem Connection
85
Installation Procedure
85
Figure 42 Casting Concrete Foundation
86
Foundation
86
Dowel Mounting
87
Figure 43 Positioning Drilling Holes
88
Figure 44 Foundation Screws
89
Molded Screw Mounting
89
Figure 45 LT31 Foundation Construction
91
Preparing Assembly of LT31
92
On-Site Receiver Installation
92
Figure 46 Receiver Installation Parts
93
Figure 47 Foundation Screws
94
Figure 48 Vertical Mast Alignment
94
Setting up Receiver Mast to Foundation
94
Figure 49 Tightening Nuts
95
Setting up Weather Protection Hood to Support Unit
95
Figure 50 Mounting Weather Protection Hood
96
Figure 51 Cable Routing for Optional Heated Hood
96
Figure 52 Fastening Screws of Support Unit
97
Figure 53 Aligning with Sight Hole
98
Mounting Optional LM21
98
Figure 54 LT31 with LM21 Option Installed
99
Figure 55 Routing LM21 Cable through Mounting Bracket
100
Figure 56 Routing LM21 Cable through LM21 Support Arm
100
Figure 57 Installing LM21 to Mounting Bracket and Attaching Connector
101
Figure 58 Mounting LM21 to Support Arm
102
Figure 59 Coarse Horizontal LM21 Alignment
103
Figure 60 Securing Support Arm
103
Figure 61 LM21 Fine Horizontal Alignment
104
Figure 62 LM21 Vertical Alignment
106
Figure 63 Opening Interface Unit Box
107
Figure 64 Wiring of LM21 to Receiver Interface Unit
108
Figure 65 Parts for Transmitter Installation
109
On-Site Transmitter Installation
109
Setting up Transmitter Mast to Foundation
110
Setting up Weather Protection Hood to Support Unit
110
Figure 66 Front Nut Adjustment to Tilt Mast
111
Foundation Level Differences
111
Tilting Transmitter Mast
111
Figure 67 LT31OBS Mounting Preparation
112
Mounting Optional Obstruction Light LT31OBS
112
Figure 68 Mounting LT31OBS
113
Figure 69 Cable Routing of LT31OBS
113
Figure 70 Cable Hole below Interface Unit
114
Figure 71 Cable Comb for Securing LT31OBS Cable
114
Mounting Transmitter Measurement Unit
114
Figure 72 Measurement Unit Cover Screws
115
Figure 73 Cutting Transportation Lock
115
Figure 74 Fastening Screws of Measurement Unit
116
Figure 75 Height of Measurement Unit
116
Figure 76 Parallel Position of Measurement Unit
117
Figure 77 Final Connector Position for Measurement Unit
117
Figure 78 Fastening Measurement Unit
118
Figure 79 Mounting PWD
118
Mounting PWD to Support Arm
118
Connecting Signal Lines to Transmitter Interface Unit
119
Figure 80 Connecting PWD
119
Figure 81 Transmitter Unit LTT111 Wiring
120
Figure 82 Grounding Cable for TERMBOX
121
Mounting and Connecting Optional TERMBOX-9000 (Junction Box)
121
Connecting Power Cable to Transmitter Interface Unit
122
Figure 83 LT31 System Wiring with TERMBOX Option
122
Finalizing On-Site Receiver Assembly
123
Foundation Level Differences
123
Orientation of Support Unit
123
Tilting the Receiver Mast
123
Mounting Optional Obstruction Light LT31OBS
124
Mounting Receiver Measurement Unit
124
Connecting Signal Lines to Receiver Interface Unit
125
Figure 84 Receiver Unit LTR111 Wiring
126
Mounting and Connecting Optional TERMBOX-1200 (Junction Box)
127
Connecting Communication and Power Cables
128
Connecting Communication Cable to Receiver Interface Unit
128
Connecting Power Cable to Receiver Interface Unit
128
Switching on LT31 System
128
Figure 85 Power Supply Switches
129
Figure 86 Power Supply Leds
129
Figure 87 Master CPU LTC212 Leds
130
Double-Checking Transmitter Alignment
131
Figure 88 Measurement Unit Leds
131
Startup Procedure
132
LT Maintenance Interface
132
Connection to Maintenance Terminal
132
Figure 89 External Maintenance Line Connector
132
Figure 90 LT Maintenance Interface
133
Entering and Exiting Command Mode
134
Figure 91 Maintenance Line Connector on LTC212
134
Settings for Maintenance Terminal
134
CLOSE Command
135
OPEN Command
135
Initial Settings
135
Figure 92 Main Menu
136
Table 9 Default Settings
136
Figure 93 Configuration Menu
137
Checking Operation
138
Figure 94 System Status
138
Final Alignment
139
Calibration
139
Finalizing Installation
140
Mounting Measurement Head Cover
140
Figure 95 Lock-Screws at Measurement Head Cover
140
Figure 96 Receptacle Inside the Measurement Head Cover
140
Figure 97 Using Lock Screws at Measurement Head Cover
141
Closing Interface Units
142
Mounting Interface Unit Covers
142
Figure 98 Interface Unit Locks
142
Figure 99 Lower Interface Unit Cover
143
Figure 100 Hooking-In Upper Interface Unit Cover
143
Disassembly for Transportation
144
Figure 101 Upper Interface Unit Cover
144
Chapter 5 Operation
145
LT31 Commands
145
Entering and Exiting Command Mode
145
OPEN Command
145
CLOSE Command
147
Available Commands
147
Command Completion
147
Table 10 User Level Commands
148
Table 11 Advanced Level Commands
150
Terminal Line Adjustment
153
Command Polling
153
CRC16 Checksum
155
Menu-Driven Operation
156
Figure 102 Main Menu
156
Configuration
157
Figure 103 Configuration Menu
157
Submenus
157
Figure 104 Configuration Menu: Data Port Speed
158
Figure 105 Configuration Message Interval
158
Free-Form Input
158
Item List
158
System Status
158
Alignment
159
Calibration
159
Figure 106 Status Menu
159
Linearity Test
159
Simulation
159
Events
160
Figure 107 Event Log
160
PWD Sensor
160
Service
160
Figure 108 Event Log: Reduced List
161
Message Formats
161
Table 12 Event Log Entry
161
Message 1 - LT31 Standard Message
162
MESSAGE Command
162
LT31 System
164
Status Codes
164
Table 13 Status Codes
164
Table 14 LT31 Overall Status (Byte Number 21)
164
Table 15 LT31 MOR Status (Byte Number 22)
165
Table 16 LT31 Power Supply (Byte Number 23)
166
Table 17 LT31 Auto-Calibration (Byte Number 24)
166
Table 18 LT31 Window Contamination (Byte Number 25)
166
Table 19 LT31 Alignment (Byte Number 26)
167
Table 20 LT31 Future Extension 1 (Byte Number 27)
167
Table 21 LT31 Future Extension 2 (Byte Number 28)
167
Table 22 LT31 Transmitter Status (Byte Number 29)
168
Table 23 LT31 Transmitter: Main Transmitter Module (Byte Number 30)
168
Table 24 LT31 Transmitter: Window Transmitter Module (Byte Number 31)
169
Table 25 LT31 Transmitter: Measurement CPU (Byte Number 32)
169
Table 26 LT31 Transmitter: Miscellaneous (Byte Number 33)
170
Table 27 LT31 Receiver Status (Byte Number 34)
170
Table 28 LT31 Receiver: Master CPU Status (Byte Number 35)
170
Table 29 LT31 Receiver: Main Receiver Module (Byte Number 36)
171
Table 30 LT31 Receiver: Window Transmitter Module (Byte Number 37)
171
Table 31 LT31 Receiver: Measurement CPU (Byte Number 38)
172
Table 32 LT31 Receiver: Miscellaneous (Byte Number 39)
172
Table 33 LT31 PWD Status (Byte Number 40)
173
Table 34 Background Luminance Sensor LM21 (Optional) Alarm Status Information (Byte Number 54)
173
Message 2 - LT31 Message Including PW Data (Optional)
174
Message 3 - Status Message
175
Message 4 - Vaisala System Standard Message
176
Message 5 - FD12 Message 2
177
Message 5 and 6 - FD12 Emulation
177
Message 6 - FD12 Message 7
178
Message 7 - MITRAS Emulation
179
Message 8 - Flamingo Emulation
180
Automatic Mode
181
Message 9 - Service Raw Values
181
Message Sending Modes
181
Polled Mode
182
METAR Messaging
183
System Configuration
184
Default Factory Settings
185
Background Luminance Sensor LM21
186
External Sensors (Optional)
186
RVR System Test Commands
186
Table 35 Default Factory Parameter Settings
186
Fixed Test Messages
187
Message 1
187
Message 2
187
Message 4
187
Message 5 - FD12 Message 2 Emulation
187
Manual Simulation Message
188
Message 6 - FD12 Message 7 Emulation
188
Message 7 - MITRAS Emulation
188
Message 8 - SKOPOGRAPH II Flamingo
188
Figure 109 Simulation Menu
189
Simulation Sequences
189
Figure 110 Summary of Sequence Data
190
Message 1
191
Message 2
191
Message 4
191
Message 7 (MITRAS)
191
Message 8 (SKOPO 2)
191
Chapter 6 Maintenance
193
Periodic Maintenance
193
Cleaning Instructions
194
Cleaning LT31 Windows and Weather Protection Hoods
194
Figure 111 LT31 Windows
194
Cleaning PWD Forward Scatter Sensor
195
Cleaning Lenses and Hoods
195
Figure 112 PWD Hardware Structure
195
Figure 113 PWD Sensor Lenses
196
Cleaning RAINCAP
197
Cleaning Window of Optional LM21
197
Inspection and Cleaning Winter Dirt
198
Blower System
198
Checking Operation
199
Replacing Particle Filter
199
Optional Heated Weather Protection Hoods
200
Figure 114 Particle Filter Holder
200
Figure 115 Particle Filter
200
Checking Operation
201
Repair Instructions
201
Replacing Fuses
201
Figure 116 Replacing Fuses
202
Replacing Power Supply FSP102
203
Replacing Master CPU LTC212
203
Replacing Optional Modem DMX501
204
Figure 118 DMX501
204
Replacing Receiver Measurement Unit LTM212
205
Figure 119 LTC212 with Optional Modem DMX501
205
Replacing Transmitter Measurement Unit LTM112
206
Replacing Receiver Optics Unit LTO212
207
Figure 120 Receiver Measurement Unit Opened
208
Replacing Transmitter Optics Unit LTO112
209
Figure 121 Transmitter Measurement Unit Opened
210
Replacing Measurement Cpu/Window Receiver LTC112
211
Figure 122 Fastening Screws of LTC112
212
Replacing Window Transmitter Module LTL212
213
Figure 123 Fastening Screws of LTL212
214
Replacing Main Transmitter Module LTL112
216
Figure 124 Securing Screw of LTL112
217
Replacing Main Receiver Module LTD112
218
Figure 125 Securing Screws of LTD112
219
Replacing Blower Unit LTB111
220
Figure 126 Fastening Screws of Blower Unit
221
Replacing Battery in Case of Optional LTBB111
222
Replacing PWD Sensor
223
Figure 127 Backup Battery
223
Replacing Optional LM21 Sensor
224
Alignment
225
Figure 128 Alignment Menu
225
Raw and Fine Alignment
226
Figure 129 Moving the Axes to MID-Position
227
Figure 130 Scanning Axes During Raw and Fine Alignment
230
Fine Alignment
231
Calibration
232
Figure 131 Scanning Axes During Fine Alignment
232
Calibration Menu
233
Figure 132 Calibration Menu
233
Offset and Visibility Calibration
234
Figure 133 Optical Blocker Mounted on Receiver Support Unit
235
Figure 134 Offset Calibration
236
Figure 135 Visibility Calibration
237
Figure 136 Choosing MOR Reading
238
Visibility Calibration
238
Figure 137 Visibility Calibration
239
Figure 138 Choosing MOR Reading
239
Command Line Calibration
240
Visibility Calibration
240
PWD Sensor
241
CLEAN Command
241
Figure 139 PWD Sensor Menu
241
ZERO Command
242
Figure 140 PWD Sensor Menu, CLEAN Command
242
CAL Command
243
CHEC Command
243
Other Commands
244
Spare Unit Init
244
Full Command Set Access
244
Linearity Test
245
Figure 141 PWD Maintenance Interface
245
Figure 142 Filter Holder Mounted to the Receiver Support Unit
246
Figure 143 Linearity Test Menu
246
Figure 144 Linearity Test Menu, Filter Applied
249
Service Menu
250
Figure 145 Linearity Test Menu, Reference Update
250
Blow
251
Displayed Values
251
Figure 146 Service Menu on User Command Level
251
Figure 147 Service Menu on Advanced Command Level
251
Transmitter/Receiver Measurement Unit
251
Beep
252
Freq (Advanced Command Level Only)
252
Heat
252
Mrdc (Receiver Only) (Advanced Command Level Only)
252
Mtdera (Transmitter Only) (Advanced Command Level Only)
252
Mtint (Transmitter Only) (Advanced Command Level Only)
252
Status
252
Wrdc (Advanced Command Level Only)
252
Wtint (Advanced Command Level Only)
252
Bgl
253
Hor (Advanced Command Level Only)
253
LM Sensor
253
Mrac (Receiver Only) (Advanced Command Level Only)
253
PWD Sensor
253
Ver (Advanced Command Level Only)
253
Visi
253
Wmo1Min
253
Wrac (Advanced Command Level Only)
253
Wtdera (Advanced Command Level Only)
253
Blower
254
Commands
254
Beeper
255
Figure 148 Switching off Receiver Unit/Blower
255
Heater
255
Frequency (Advanced Command Level Only)
256
Figure 149 Decreasing Main Transmitter Modulation Frequency
257
Figure 150 Setting Main Transmitter Modulation Frequency to 994 Hz
257
Movement (Advanced Command Level Only)
258
Scanning (Advanced Command Level Only)
259
Figure 151 Setting Main Receiver Response Time to Fast
260
Receiver Response Time (Advanced Command Level Only)
260
Chapter 7 Troubleshooting
261
Status Messages
261
Table 36 Events
262
Miscellaneous Problems
273
Table 37 Miscellaneous Problems
273
Technical Support
275
Return Instructions
276
Chapter 8 Technical Data
277
Operational Specifications
277
Table 38 LT31 Operational Specifications
277
Optical Specifications
278
Table 39 LT31 Transmitter Optical Specifications
278
Table 40 LT31 Receiver Optical Specifications
278
Electrical Specifications
279
Mechanical Specifications
279
Environmental Specifications
279
Table 41 LT31 Electrical Specifications
279
Table 42 LT31 Mechanical Specifications
279
Table 43 LT31 Environmental Specifications
279
Electromagnetic Compatibility
280
Table 44 LT31 CE Compliance
280
Appendix Aoptions Installation
281
Extension Poles Installation
281
LTEP100/200 Extension Pole Unit
281
Prerequisites
281
Installing LTEP100/200
282
Drilling Instructions
282
Figure 152 Positioning Drilling Holes
283
Figure 153 Frangible Mounting Rod and Foundation Screws
284
Setting up Receiver/Transmitter Mast to Foundation
284
Figure 154 Extension Pole Mounting
285
Figure 155 Vertical Extension Pole Alignment
286
Figure 156 Tightening Nuts
287
Figure 157 LTEP100/200 Installation
288
Index
291
Advertisement
Advertisement
Related Products
Vaisala LM21
Vaisala BAROCAP PTB330
Vaisala CARBOCAP GM70
Vaisala CARBOCAP GMP231
Vaisala CARBOCAP GMP343
Vaisala CL31
Vaisala CT25K
Vaisala DEWCAP DM500
Vaisala DMP Series
Vaisala DMP5
Vaisala Categories
Transmitter
Measuring Instruments
Accessories
Weather Station
Test Equipment
More Vaisala Manuals
Login
Sign In
OR
Sign in with Facebook
Sign in with Google
Upload manual
Upload from disk
Upload from URL