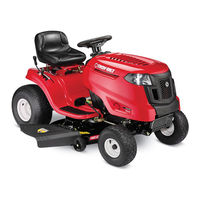
Sign In
Upload
Manuals
Brands
Troy-Bilt Manuals
Lawn Mower
Horse
Troy-Bilt Horse Manuals
Manuals and User Guides for Troy-Bilt Horse. We have
3
Troy-Bilt Horse manuals available for free PDF download: Owner's Manual, Operator's Manual
Troy-Bilt Horse Owner's Manual (181 pages)
Roto Tiller Power Composter
Brand:
Troy-Bilt
| Category:
Tiller
| Size: 74.14 MB
Table of Contents
Serial Number
4
Table of Contents
5
Information on Using the Index
6
Index
6
Order Parts
12
Introduction
13
Tiller Design
13
Gear Transmission Rotates Continuously in a Bath of Gear Oil
14
Look Inside the Transmission Case and Tiller Housing
15
Location of Parts
16
Easy Assembly
17
Removing from Shipping Container
18
Freight Damage or Missing Parts
20
Explanation of Right and Left Hand
20
Add Gear Oil to the Transmission
21
Gear Oil Is Provided
21
Adding Motor Oil to the Engine
22
6 HP Tecumsen-Lauson Engine
22
Attach Rewarded/Reverse Lever
23
Attach the Handlebars
23
7 HP Kohler Engine
23
Attach the Throttle Cable
24
Preparation and Operation
26
How to Remove a Battery
26
Poison/Danger Causes Severe Burns
26
Small Current Recharges Battery
26
How to Replace Battery
27
Testing Operation of Your Battery Electric Start System
27
Starter Motor Won't Turn over
28
Wires OK, Starter Motor Still Won't Go
28
Engine Runs, Starter Won't Energize
28
Turn Key to Start
28
Positive Cable Energizer Starter, Key Switch Won't Work
29
In Case of a Dead Battery
29
Touch Cable to Right and Center Posts
29
Jump Wires to Key Switch
29
Tiller Controls
30
Forward/Reverse Lever
31
Wheel Speed Shift Lever
32
Lever up High
32
Lever in Middle Level
32
Lever down Low
32
The Depth Regulator
33
To Till Deeper
33
For Shallower Depth
33
Handlebars
34
T Bar Adjustment
34
Practice before You Start
34
When Let Go in Reverse, Lever Returns to Neutral
34
How Your Tiller's Controls Function
35
Move Lever down
35
Operation of Clutch Assembly
35
Engine Mount Compresses Spring
35
Alternate Shift Method
36
Depth Regulator
37
Start Shallow in New Ground
37
Switch Ratchets to Vary Height
37
Switch Inside Ratchets
37
The Transmission Oil-Fill Hole
38
Explanation of Right-Hand and Left-Hand
38
Tiller Lubrication Points
38
Don't be Concerned about Small Amounts of Oil Seepage
38
Safety Precautions for the Operator
39
Rules for Operating and Adjusting the Tiller
39
Know Your Tiller and Its Engine
39
Rules for Operating the Engine
40
Poison/Danger
40
Engine Controls and Operation
41
Basic Engine Information
41
Clean Dirt from Cooling Fins
41
Keep the Air Cleaner Dirt Free
41
Change Engine Oil at These Intervals
42
6 HP Engines - Tecumseh-Lauson
43
6 HP Electric Start
43
Throttle Lever on Handlebar
43
6 HP, Speed Control
43
Choke
44
Throttle Cable
44
6 HP Engine, Full Choke
44
Half Choke
44
Governor
45
Carburetor
45
Engine Shutoff Clip
45
Carburetor for 6 HP Engine
45
Engine Oil Level and the Dipstick
46
Brand New Engines - 6 HP
46
Changing Oil
46
6 HP Engine
46
Spark Plug
47
Air Cleaner
47
Refuel with Care
48
Gasoline
48
Use Forward/Reverse Lever to Stop
48
Starting the 6 HP Engine
49
Stopping the Engine
49
Electric Start System on 6 HP Tecumseh Engine
49
Locating Engine Model Numbers
50
Left/Right Side of Tiller
50
6 HP Electric Start Engine Battery Recharging Line and Diode Details
50
On Side of Engine Blower Housing Opposite Starter Rope
50
Adding Oil
51
Replenising Oil
52
Hookup
52
Route Cable Outside of Yoke
52
THP Kohler Engine Throttle Cable Wire Goes into First Hole of Disc
52
Engine Stop Button
53
FULL Choke, Butterfly Closes
53
Choke OFF, Butterfly Opens
53
Push in on Stop Button and Hold It In, to Stop Engine
53
Starting 7 HP Engine
54
Stopping the Kohler Engine
54
General Information
54
External Governor Linkage for 7 HP Kohler Engine
54
Governor 6 HP Tecumseh-Lauson
55
Engine Cooling
55
Engine Covers Help to Cool Engine
55
Carburetor for THP Kohler Engine
55
Engine Head Bolt Tightening Order
56
Tightening Head Bolts on 6 HP Engine
56
Two Head Bolts G and H
56
6 HP Tecumseh Engine Head Bolt Tightening Sequence
56
If Oil Leaks from Engine
57
Tightening Head Bolts on 7HP Kohler with a Torque Wrench
57
Head Bolt Tightening Sequence for 7 HP Kohler Engine
57
Screwdriver Pcints to 6 HP Engine Oil Seal
57
Operating the Tiller
58
How to Operate Your Tiller-Power Composter and Use It in the Garden
58
Travel Position of Tines
58
Wheel Speed Select Lever
58
Stopping the Tiller and Engine
59
To Turn Around
59
Tilling in the Garden
60
Tilling Patterns
61
Raise Handlebars to Start Turn
61
Swing Handlebars Around
61
Let Wheels Drive Tiller in Turns
61
A Helpful Tip
62
Don't Make Footprints
62
Unwinding Tines
62
Tilling Narrow Strips
62
Bolo Tines
63
Pointed Pick Tines
63
Cultivating Tines
63
Match Speed to Job
63
Matching Wheel and Tine Speeds to Particular Jobs
64
Tilling Vertically on Slopes
64
Tilling Across Slopes
65
Satisfying Tilling Results
65
Making Terraces in 3 to 5 Passes
66
Tilling Across Slopes Without Terraces
66
Terraces Formed by Tilling on a Slope Are about Three Feet Wide
66
Uphill Tilling Note
67
Special Troy-Bilt Methods for Easier Gardening
67
Hood Aids in Pulverizing
67
Crop Residues Enrich Soil
67
No Footprints or Wheelmarks
68
The Wheel Axle Serves as a Pivot Point
68
Use One Hand
68
To Avoid Making Footprints
68
Buildup of Organic Matter
69
Uniform Tilling Depth
69
Earthworms Can Help Your Soil
69
Organic Matter in Soil
69
Sources of Organic Matter
70
Power Composting
70
Turn in Green Crops Early
70
Cover Crops
70
Use of Buckwheat to Prepare for a New Garden
71
Rye Grass Cover Crop
71
Tilling under Rye Grass
71
Kale Is a Good Cover Crop
71
Most Common Kinds of Cover Crops
72
Mulch
72
Mulch Is Placed in between Rows of Strawberry Plants
73
Using Hand Scythe on Cover Crop
73
Mowing down Sudan Grass
73
Leaf Compost Improves Soil
74
Tilling under Sudan Grass Stubble
74
Loading Cart with Leaf Compost
74
Adding Compost to New Garden Area
74
Broadcast Planting in Wide Rows Saves Space
75
Another Space Saving Method
75
Measuring off Row with String
75
Double Planted Rows Save Space
75
Improve any Kind of Soil
76
Soil and Moisture Conditions
76
Traction
76
Walk down Center of Double Rows
76
Tilling under Cornstalks
77
Right Wheel up Close
77
Guide so that Cornstalks Go between Left Wheel and Transmission Case
78
Use Full Power to Chop Stalks as They Are Knocked down
78
Third Pass Goes Back over Stalks
78
Fourth Pass Is between Rows
78
Options and Attachments
79
Wheel and Tire Assemblies
79
8 Standard Tires and Wheels
79
8 Bar Tread Tires and Wheels
79
Tire Chains
80
Ordering Tires and Wheels
80
Standard Tires with Chains
80
Bar Tread Tires with Chains
80
How to Install Chains
81
Chains Help in Tall Vegetation
81
Raise Wheel off Ground
81
Curled Ends Face Outside
81
Dozer/Snow Blade and Bumper Attachments Bracket
82
Ordering Chains
82
Fasten Chain Tightly (Tiller Side)
82
Fasten Chain Tightly on Outside
82
Built to be Ever-So-Useful
83
Enlarging a Pile of Soil
83
Clearing a Driveway of Snow
83
Dozer/Snow Blade Attachment
83
A Good Match between Blade and Tiller
84
Angle Blade to One Side to Put Soil Where You Want It
84
Moving Soil to Where It's Needed
84
Dozer/Snow Blade Components
85
Adjusting the Handlebars for Easy Usage
86
Dirt Dozing Suggestions
86
If Lever Hits Handlebar
86
Bend Lever
86
Snowplowing Suggestions
87
Bumper Attachment
88
The Multi-Purpose Bumper
88
Protects Carburetor and Engine from Fences
88
Protects Carburetor from Fences, Trees and Doorways
88
Bumper Protects Engine While Tiller Is Tilted for Maintenance
89
Solid Obstacles Like Stone Walls Won't Damage Recoil Starter
89
Protects the Recoil Starter
89
To Add the Dozer/Snow Blade to the Bumper
89
Troy-Built Hiller/Furrower
90
It Makes It Easier to
90
The Hiller/Furrower "Weeds" as It Hills between the Plants
90
Instant On-Off Hiller/Furrower Speeds and Simplifies Planting
90
Make Planting Corn Easy
91
Use Raised Rows for Wet Soil or Heavy Clay
91
To Get Best Results from Your Hiller/Furrower
91
Raised Rows Help in Wet Soil
91
Hiller Wings Push Dirt into Plant Rows
92
Wings and Tines Work Together
92
Dirt Smothers Weeds Within Row
92
Furrower Can Dig Drainage Ditch
92
The Furrower Is Held in Place or Released Quickly by Clinch Pin
93
Hiller/Furrower Wings Can be Quickly Adjusted or Removed
93
Complete Attachment and Its Parts Bolt Together Simply
93
Push "U" Shaped Bracket over Depth Adjustment Bar
93
Regular Maintenance Suggestions for the Tiller
94
Lubricate with Grease
94
Lubrication Points on Tiller
94
Belt Tension Affects Performance
95
How to Tell if Belts Need Tightening
95
Tightening Bolts and Nuts
95
Close-Up of Lubrication Points
95
Check the Parts for Wear
96
Tighten Forward/Reverse Lever
96
Tighten Drag Bar to Tiller
96
Tighten Drag Bar and Depth Regulator
96
Proper Belt Adjustment
97
Inspect the Tiller and Tines
97
Tighten Bolts on Hood Brackets
97
Tighten Bolt at End Cap
97
To Adjust Belt Tension
98
Tighten Reverse Disc
98
Measuring Belt Deflection
99
Adjusting Tension of Belts
99
Checking Belt Tension
99
How to Change Belts Without Removing the Engine from Your Tiller
100
To Remove Belts
100
Remove Bolt in Top Pulley
100
Remove Reverse Disc
100
To Install Belts
102
How to Adjust and Maintain Reverse
104
Check for Proper Reverse Disc Adjustment
104
New Block Has Neutral Position
104
Motor Mount Rests on Plunger Bolt
104
Watch Action of Reverse Disc and Pulley
105
If the Tiller Goes into Reverse by Itself
105
Reverse Disc and Lower Pulley Alignment
105
If Lever Doesn't "Pop" out of Reverse
105
With Clutch Lever in Neutral
106
Hold Clutch Lever in Reverse
106
Loosen Locknut on Adjustment Bolt
106
If Plunger Turns, Hold with Pliers
106
How to Rmove the Reverse Disc
107
Reverse Disc Removal and Replacement
107
Back off Motor Mount Bar Bolt B
107
Tap Bardown and out
107
Removing Engine Pulley Shims
108
Loosening Engine Pulley
108
Shims between Pulley and Engine
108
Replacing the Engine Pulley
108
Throttle Cable Hookup, Adjustments and Maintenance
109
6HP Tecumseh-Lauson Engines
109
6 Hpengine with Throttle Cable
109
6 HP Throttle Cable Hook-Up
109
Adjusting Throttle Cable on the 6HP Engine
110
6 HP Remote Speed Control
110
Throttle Lever
110
Adjusting Throttle Cable-6 HP
110
To Install a New Cable
111
Connect Wire to Speed Control Lever
111
Allow Overhang (6 HP)
111
Throttle Control Touches Tab
111
Cable Hook-Up and Adjustment for 7 HP Kohler Engine
112
Throttle Cable on 7 HP Tiller
112
Put Wire in Nearest Hole
112
Periodic Lubrication
113
Quick Engine Maintenance Reminders
113
Important Service Message about All Engines
114
How to Get the very Longest Engine Life
114
Clean Cooling Fins
114
If Your Air Cleaner Is the Polyurethane Type
114
For All Engines
115
If Your Air Cleaner Is of the Dry Element Type
115
How to Adjust the Carburetor to Correct Poor Tiller Performance
115
Remove Wing Nut
115
Adjusting the Power Adjustment Screw
116
Idle Speed Adjustment
116
If Your Engine Won't Start
116
7 HP Engine Carburetor
116
Idle Adjustment Needle
117
Engine Won't Run at All
117
Other Things to Remember
117
Cleaning out Debris and Inspecting the Engine
117
The Engine Crankcase Breather
118
Check Governor Lever Freedom
118
Check Oil Level on 6 HP Engines
118
Remove Valve Cover, Check Breather
118
Care and Maintenance of the 12-Volt Electric Start System
119
Checking for Faulty Key Switch or Its Wire
119
Pencil Points to Drain Hole
119
Remove Fuse and Tape
120
Touch Jumper to Right Post
120
Test Key Switch with Light
120
Testing Solenoid
120
Engine Stop Switch
121
Ignition System
121
Testing Key Switch Wires
122
Bend Shutoff Switch Away from Bracket a Little Way
122
Tiller Service Schedule
123
Engine Service Schedule
123
Transmission Service
123
Belts and Disc
123
General Engine Service
124
If the Tiller Locks in Forward
124
Grease the Block and Roller
124
Reduce Angle Shown by Bending Block down a very Small Distance
124
How to Replace Common Parts
125
Removing and Replacing Wheels
125
Removing 4:00X8 Single-Piece Steel Wheel
125
One Method of Holding Wheels up
125
How to Remove and Replace a Wheel Shaft Oil Seal
126
Helpful Tools
126
Drive Tip into both Sides of Seal
126
Rotate Seal in Bore to Loosen It
126
Pry Oil Seal out
127
Name and Number on Seal Face out
127
Apply Sealant to Outer Edge of Seal
127
Tiller Shaft Oil Leaks
128
Use 1" Washer between Pipe and Oil Seal
128
Use Wheel to Seat Oil Seal
128
Replacing the Tiller Shaft Oil Seals
129
How to Check an Oil Leak
129
Removing the Left-Hand Tiller Shaft Oil Seal
129
Removing the Right-Hand Tiller Shaft Oil Seal
129
Carefully Tap Seal out of Cover
130
Lift and Align Gear with Opening
130
Drive Oil Seal Outward
130
Check Key that Drives Bronze Gear
130
How to Replace Tiller Housing Seals
131
Hit with Mallet
131
Key Properly in Place
131
Replace Tiller Shaft
131
Replacing an Oil Seal in Tiller Housing Cover
132
Use 1 1/4 Washer between Pipe and Seal
132
Replacing Seal with Cover on
132
Turn Shaft Forward and Backward
132
How to Replace a Tiller Housing Cover
133
How to Replace the Front Oil Seal on the Tiller Transmission
133
Removing the Pulley Snap Rings
134
Removing Snap Ring on Lower Pulley
134
External Snap Ring Pliers
134
Remove Front Snap Ring
134
Adjusting the Play on the Drive Shaft
135
Shims Are Like Thin Washers
135
Shaft Wrapped with Thin Plastic
135
Install Seal Evenly
135
How to Identify Your Drive Shaft Style
136
Here's How to Go about Shimming from the Rear
136
Weld Behind Worm
136
Welded Drive Shaft
136
Remove Two Bolts
137
Remove Screws from Cap
137
Shims Remove Play in Shaft
137
Line up Holes, Tap on Cap
137
Removing the Tiller Hood
138
Replace Transmission Drive Pulley
138
Two Front Hood Bracket Bolts
138
Four Rear Hood Bracket Bolts
138
Assembly on Holders
139
Assembling Three a Gangs
139
Viewed from Front of Tiller
139
Tips down
139
Assembling One B Gang of Tines
140
Add Three Bolts
140
Three "A" Gangs and One "B" Gang
140
Gang Positions on Tine Holders
140
Installing Bolo Tines
141
Tine Rotation
141
"A" Gang at Position 3
141
Install an "A" Gang
141
"A" Gang at Position 2
142
"B" Gang at Position 1
142
Pry Tines to Align Holes
142
File Rough Spots in Groove
142
Removing Bolo Tine Gangs
143
Removing Bolo Tines and Holders
143
Remove One Bolt
143
First, Oil Tight Nuts
143
Replacing and Removing
144
Assembling Cultivating Tines on Holders
144
Start with Right Hand Side of Tiller
144
Cultivating Tines Installed on Tiller
144
Replacing Cultivating Tines and Holders on Tiller
145
Right Hand Side
145
Inside Holder
145
Cutting Edge of These Hits Soil
145
For Left Hand Side of the Tiller
146
Insert Tine
146
Tine Clamp
146
Two Wrenches Tighten
146
Removing Cultivating Tines
147
Assembling Pick Tines on Holders - for Right Hand Side of Tiller
147
Remove Nut and Washer
147
Pointed Pick Tines Installed on the Tiller
147
Tips Strike Soil First
148
Inside Holder, Right Side
148
Puton Clamp
148
Tighten Bolt and Nut
148
Replacing Pick Tines and Holders on Tiller
149
Removing Pick Tines
149
For Left Hand Side of Tiller
149
Tap on Holder
149
Removing the Engine from the Troy-Bilt Horse Model
150
Remove Throttle Cable - 6HP Tecumseh Engine
150
Throttle Cable Removal
150
Remove Battery
150
Disconnect Recharging Wire
151
Cable to Starter
151
Remove Battery Bracket
151
Bracket and All
151
All Engines
152
Remove the Reverse Disc
152
Remove the Belts
152
Detach the Yoke
152
Lift and Remove Engine Assembly
153
Separation of the Engine and Engine Mount
153
Lift with Care
153
Shims between Engine and Pulley
153
Separating the Engine from the Engine Mount
154
Pry Pulley out
154
Remove Pulley
154
Four Bolts on Mount
154
Replacing the Engine
155
Replacing Engine Mount Bars
155
Reinstalling the Matched Set of Belts
155
Replacing the Reverse Disc
155
Hook up the Throttle Cable and Check the Clutch Control
156
Start Bar in One Side
156
Tap Bars in Place
156
Hold Pressure on Bolt and Tap
156
Removing Tiller Transmission
157
Remove the Handlebar Assembly
157
Remove Forward/Reverse Lever and Entire Yoke Assembly
157
Don't Kink Throttle Wire
157
Remove the Engine
158
Remove Tiller Drive Pulley
158
Lift Yoke and Lever
158
Bolt for Engine Mount Bar
158
Remove Hood, Wheel Shift Lever and Depth Regulator as Single Assembly
159
Remove Snap Ring with Pliers
159
Disconnect Drag Bar
159
Remove Bracket Bolts from End Cap
159
Remove Tines and Holders
160
Remove Wheels
160
Nut on Swivel
160
Bracket Bolts to Cover
160
For Electric Start Engines - First Step in Transmission Removal
161
Knock out Key
161
Remove Tine Stud, Watch Threads
161
Prparing a Tiller Transmission for Shipment
162
The Transmission Should Look so When You Complete Dismantling
162
Disconnect Recharging Line
162
Remove Starter Cable
162
To Install a New, Repaired or Rebuilt Transmission
163
Add Gear Oil to Tiller and Install Bolo Tines
163
Replace Wheels
163
Unbolt Battery Bracket
163
Replace Hood, Wheel Shift Lever and Depth Regulator as Single Assembly
164
Remove Nicks and Install Tines
164
Put Roll Pin Back in Wheel
164
Replace Hood, Lever and Regulator
164
Install the Engine
165
Attach Loosely, at First
165
Attach Drag Bar
165
Bolt to End Cap
165
Install Forward/Reverse Lever and Yoke Assembly
166
Put Key and Snap Ring On, then Pulley
166
Line up Holes, Insert Bar
166
Replace the Handle Bar Assembly and Throttle Cable
167
Rehook Lever and Spring
167
Bolt Yoke to Motor Mount
167
Tighten Bolts on Lever
167
Troubleshooting: Tiller
168
Engine
172
Circle Engine Model and Specification Number
175
Handy Tools to Have
175
Horse Model Troy-Bilt Tiller Specifications
176
Engine Specifications
177
Time Proven Gardening Tips for TROY-BILT Owners
180
Advertisement
Troy-Bilt Horse Operator's Manual (64 pages)
Hydrostatic Lawn Tractor
Brand:
Troy-Bilt
| Category:
Lawn Mower
| Size: 3.26 MB
Table of Contents
English
2
Table of Contents
2
Safe Operation Practices
3
Spark Arrestor
6
Safety Symbols
7
Assembly & Set-Up
9
Controls & Features
12
Throttle Control Lever
13
Operation
15
Engaging the Parking Brake
16
Driving the Tractor
16
Setting the Cutting Height
16
Starting the Engine
16
Engaging the Blades
17
Maintenance & Adjustment
19
Seat Adjustment
21
Parking Brake Adjustment
21
Adjustments
21
Maintenance Schedule
22
Service
23
Cutting Blades
24
Battery
24
Changing the Deck Belt
25
Troubleshooting
27
Replacement Parts
28
Attachments & Accessories
29
CA. Emission Control Statement
30
Warranty
32
Espanol
33
Español
34
Medidas Importantes de Seguridad
35
Montaje y Configuración
41
Controles y Características
44
Controls and Features
44
Pedal de Freno
45
Freno de Estacionamiento
45
Funcionamiento
47
Mantenimiento y Ajustes
51
Servicio
55
Solución de Problemas
59
Piezas de Reemplazo
60
Aditamentos y Accesorios
61
Garantía
62
Troy Bilt Horse Operator's Manual (64 pages)
Hydrostatic Lawn Tractor
Brand:
Troy Bilt
| Category:
Lawn Mower
| Size: 3.44 MB
Table of Contents
English
2
Table of Contents
2
Safe Operation Practices
3
Spark Arrestor
6
Safety Symbols
7
Assembly & Set-Up
9
Controls & Features
12
Ignition Switch
13
Operation
15
Stopping the Engine
16
Engaging the Parking Brake
16
Setting the Cutting Height
16
Driving the Tractor
16
Starting the Engine
16
Engaging the Blades
17
Maintenance & Adjustment
19
Lubrication
20
Parking Brake Adjustment
22
Maintenance Schedule
22
Seat Adjustment
22
Service
23
Cutting Blades
24
Battery
24
Changing Deck Belt
25
Troubleshooting
27
Replacement Parts
28
Attachments & Accessories
29
CA. Emission Control Statement
30
Warranty
32
Español
33
Espanol
33
Medidas Importantes de Seguridad
34
Montaje y Configuración
40
Controles y Características
44
Freno de Estacionamiento
46
Funcionamiento
47
Mantenimiento y Ajustes
51
Servicio
55
Solución de Problemas
59
Piezas de Reemplazo
60
Aditamentos y Accesorios
61
Garantía
64
Advertisement
Advertisement
Related Products
Troy-Bilt HYDROSTATIC LAWN TRACTOR - HORSE 769-06304
Troy-Bilt Hydrostatic Lawn Tractor
Troy-Bilt Horse Tiller
Troy-Bilt PTO HORSE 12068
Troy-Bilt PTO HORSE 12069
Troy-Bilt PTO HORSE 12070
Troy-Bilt PTO HORSE 12071
Troy-Bilt Horse 12056
Troy-Bilt Horse 12057
Troy-Bilt Horse 12058
Troy-Bilt Categories
Lawn Mower
Tiller
Trimmer
Snow Blower
Pressure Washer
More Troy-Bilt Manuals
Login
Sign In
OR
Sign in with Facebook
Sign in with Google
Upload manual
Upload from disk
Upload from URL