Sign In
Upload
Manuals
Brands
Thermo Scientific Manuals
Laboratory Equipment
Cryofuge 16
Thermo Scientific Cryofuge 16 Manuals
Manuals and User Guides for Thermo Scientific Cryofuge 16. We have
2
Thermo Scientific Cryofuge 16 manuals available for free PDF download: Instruction Manual
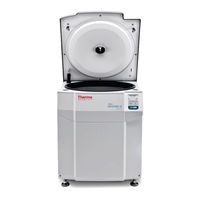
Thermo Scientific Cryofuge 16 Instruction Manual (82 pages)
Centrifuge and Heavy Duty Centrifuge
Brand:
Thermo Scientific
| Category:
Laboratory Equipment
| Size: 4.36 MB
Table of Contents
Table of Contents
2
Preface
7
Items Supplied
7
Table Preface-1: Items Supplied
7
Medical
8
In Vitro Diagnostics
8
Signal Words and Colors
9
Precautions
9
Table Preface-2: Signal Words and Colors
9
Symbols Used on the Centrifuge and Its Components
12
Symbols Used in the Manual
14
Table Preface-3: Symbols Used on the Centrifuge and Its Components
14
Table Preface-4: Symbols Used in the Manual
14
Transport and Set up
15
Location
15
Transporting
16
Figure I-1: Centrifuge Clearance, Example with Bar Code Scanner
16
Setting up
17
Table I-1: Overview of Necessary Tools for Setting up
17
Level the Centrifuge
18
Figure I-2: Position of the Bubble in the Water Level
18
Mains Connection
19
Storage
19
Figure I-3: Mains Connection on the Backside of the Centrifuge
19
Shipping
20
Thermo Scientific
21
Centri-Touch User Interface
21
Status
22
Run Parameters
23
Control and Configuration
23
Lighthouse Mode
24
Operation
25
Switch on the Centrifuge
25
Open the Centrifuge Door
25
Install a Rotor
25
Before Installation
26
Rotor Installation
27
Figure III-2: Align Windshield Knob and Drive Shaft
27
Figure III-4: Rotor Locking Tool
28
Figure III-5: Put the Rotor Locking Tool
28
Figure III-6: Tighten the Rotor to the Drive Shaft
29
Figure III-10: Correct Loading
31
Figure III-11: Incorrect Loading
31
Maximum Loading
32
Figure III-12: Insert Windshield Lid into Holder
32
Use of Tubes and Consumables
33
Close the Centrifuge Door
33
Entering Parameters
33
Acceleration / Deceleration Profiles
33
Preselect Speed / RCF-Value
33
Runtime Preselection
34
Preselect Temperature
34
Pre-Warm or Pre-Cool the Centrifuge
34
Programs
35
Figure III-13: Select Program
35
Centrifugation
36
Start
36
Stop
36
Using the Drain Box
37
Figure III-14: Drain Box (75007730)
37
Figure III-15: Installing the Drain Box (75007730)
37
Figure III-16: Remove the Plug
37
Remove a Rotor
38
Figure III-17: Remove the Rotor from the Drive Shaft
38
Switch off the Centrifuge
39
Maintenance and Care
40
Cleaning Intervals
40
Basics
40
Rotor and Components Inspection
41
Cleaning
42
Touchscreen
43
Figure IV-1: Cleaning Rotor Bolts and Bucket Bearing Surfaces
43
Filter Mat
44
Disinfection
45
Decontamination
45
Autoclaving
46
Maintenance
47
Preventive Maintenance
47
Service
47
Shipping and Disposal
48
Troubleshooting
49
Mechanical Emergency Door Release
49
Figure V-1: Marking on Windshield Lid
49
Ice Formation
50
Figure V-2: Position of the Mechanical Emergency Door Release
50
Troubleshooting by Guide
51
Figure V-3: Example for an Error Message
51
Table V-1: Error Messages
51
Information for the Customer Service
52
Technical Specifications
53
Table A-1: Technical Data Thermo Scientific Cryofuge 8 / 16 and Cryofuge 16 Heavy Duty
53
Directives, Standards and Guidelines
54
Table A-2: Directives, Standards and Guidelines Cryofuge 8 / 16 and Cryofuge 16 Heavy Duty
54
Refrigerants
55
Mains Supply
55
Table A-3: Refrigerants Used in the Cryofuge 8 / 16 and Cryofuge 16 Heavy Duty
55
Table A-4: Mains Supply
55
Components
56
Table A-5: Components
57
Rotors
58
Items Supplied for Rotors
58
Table B-1: Items Supplied for Rotors
58
Haemaflex 6 Rotor
59
Table B-2: Haemaflex 6 Rotor with Single Blood Bag Buckets (Oval
59
Table B-3: Haemaflex 6 Rotor with Single Blood Bag Buckets (Round
60
Haemaflex 6 Rotor
61
Table B-4: Haemaflex 6 Rotor with Single Blood Bag Buckets with Filter Pack
61
Haemaflex 8 Rotor
62
Table B-5: Haemaflex 8 Rotor with Single Blood Bag Buckets (Oval
62
Table B-6: Haemaflex 8 Rotor with Single Blood Bag Buckets (Round
63
Haemaflex 8 Rotor
64
Table B-7: Haemaflex 8 Rotor with Single Blood Bag Buckets with Filter Pack
64
Haemaflex 12 Rotor
65
Haemaflex 16 Rotor
67
Advertisement
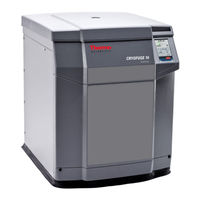
Thermo Scientific Cryofuge 16 Instruction Manual (67 pages)
Heavy Duty Water Cooled Centrifuge
Brand:
Thermo Scientific
| Category:
Laboratory Equipment
| Size: 4.74 MB
Table of Contents
Table of Contents
3
Preface
8
Items Supplied
8
Table Preface-1: Items Supplied
8
Intended Use for Cryofuge 16 Heavy Duty Water Cooled
9
Intended User
9
Associated Rotors and Components
9
Precautions
10
Set up Conditions
10
Table Preface-2: Signal Words and Colors
10
Preparation
11
Hazardous Substances
11
Operating
12
Maintenance
12
Symbols Used on the Centrifuge
13
Symbols Used in the Manual
14
Table Preface-3: Symbols Used on the Centrifuge
14
Table Preface-4: Symbols Used in the Manual
14
Transport and Set up
15
Location
15
Figure I-1: Centrifuge Clearance, Example with Barcode Scanner
16
Transporting
17
Storage
17
Shipping
17
Thermo Scientific
18
Centri-Touch User Interface
18
Status
19
Run Parameters
20
Control and Configuration
20
Lighthouse Mode
21
Operation
22
Switch on the Centrifuge
22
Open the Centrifuge Door
22
Install a Rotor
23
Before Installation
23
Rotor Installation
23
Figure III-2: Align Windshield Knob and Drive Shaft
24
Figure III-4: Rotor Locking Tool
25
Figure III-5: Put the Rotor Locking Tool
25
Figure III-6: Tighten the Rotor to the Drive Shaft
26
Figure III-9: Correctly Assembled Round Bucket
27
Figure III-10: Correct Loading
28
Figure III-11: Incorrect Loading
28
Maximum Loading
29
Figure III-12: Insert Windshield Lid into Holder
29
Use of Tubes and Consumables
30
Close the Centrifuge Door
30
Entering Parameters
30
Acceleration / Deceleration Profiles
30
Preselect Speed / RCF-Value
30
Runtime Preselection
31
Preselect Temperature
31
Pre-Warm or Pre-Cool the Centrifuge
31
Programs
32
Figure III-13: Select Program
32
Centrifugation
33
Start
33
Stop
33
Remove a Rotor
34
Switch off the Centrifuge
34
Figure III-14: Remove the Rotor from the Drive Shaft
34
Maintenance and Care
35
Cleaning Intervals
35
Basics
35
Rotor and Components Inspection
36
Cleaning
37
Touchscreen
38
Figure IV-1: Cleaning Rotor Bolts and Bucket Bearing Surfaces
38
Filter Mat
39
Disinfection
40
Decontamination
40
Autoclaving
41
Maintenance
42
Preventive Maintenance
42
Service
42
Shipping and Disposal
43
Troubleshooting
44
Mechanical Emergency Door Release
44
Figure V-1: Marking on Windshield Lid
44
Ice Formation
45
Figure V-2: Position of the Mechanical Emergency Door Release
45
Troubleshooting by Guide
46
Figure V-3: Example for an Error Message
46
Table V-1: Error Messages
46
Information for the Customer Service
47
Technical Specifications
48
Table A-1: Technical Data Cryofuge 16 Heavy Duty Water Cooled
48
Directives, Standards and Guidelines
49
Refrigerants
49
Table A-2: Directives, Standards and Guidelines Cryofuge 16 Heavy Duty Water Cooled
49
Table A-3: Refrigerants Used in the Cryofuge 16 Heavy Duty Water Cooled
49
Mains Supply
50
Water Supply
50
Components
51
Rotors
52
Items Supplied for Rotors
52
Haemaflex 12 Rotor
53
Haemaflex 16 Rotor
54
Advertisement
Related Products
Thermo Scientific Cryofuge 8
Thermo Scientific Cryotome
Thermo Scientific Dionex CRS 500 Series
Thermo Scientific CL10
Thermo Scientific BioCane CK509X2
Thermo Scientific BioCane CK509X6
Thermo Scientific Orion COD165
Thermo Scientific CY50985-70
Thermo Scientific CY509106CN
Thermo Scientific CY509108CN
Thermo Scientific Categories
Laboratory Equipment
Measuring Instruments
Accessories
Refrigerator
Freezer
More Thermo Scientific Manuals
Login
Sign In
OR
Sign in with Facebook
Sign in with Google
Upload manual
Upload from disk
Upload from URL