Sign In
Upload
Manuals
Brands
Shuttle Manuals
Motherboard
FB61
Shuttle FB61 Manuals
Manuals and User Guides for Shuttle FB61. We have
2
Shuttle FB61 manuals available for free PDF download: User Manual
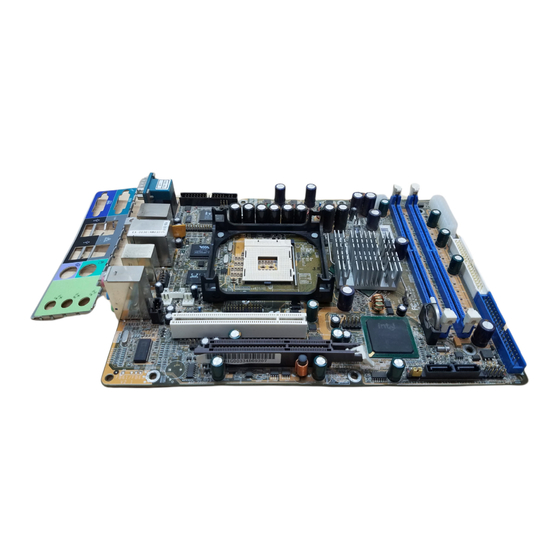
Shuttle FB61 User Manual (85 pages)
Pentium 4/Celeron, 478-pin Processor Based MAIN BOARD
Brand:
Shuttle
| Category:
Motherboard
| Size: 3 MB
Table of Contents
Table of Contents
5
What's in the Manual
9
Quick Reference
9
About this Manual
9
1 Introduction
10
To Different Users
10
First-Time Diy System Builder
10
Experienced Diy User
10
System Integrator
10
Item Checklist
11
2 Features
12
Specifications
12
3 Hardware Installation
15
Step by Step Installation
15
Accessories of FB61
15
STEP 1 CPU Installation
16
STEP 2 Set Jumpers
17
STEP 3 Install DDR SDRAM System Memory
17
STEP 4 Install Internal Peripherals in System Case
18
STEP 5 Mount the Mainboard on the Computer Chassis
19
STEP 6 Connect Front Panel Switches/Leds/Usb/1394A/MIC/Line-In/Line- out
20
STEP 7 Connect IDE, Floppy, and Serial ATA Disk Drives
22
STEP 8 Connect Other Internal Peripherals
23
STEP 9 Connect the Power Supply
25
STEP 10 Install Add-On Cards in Expansion Slots
25
STEP 11 Connect External Peripherals to Back-Panel
26
STEP 12 First Time System Boot up
27
STEP 13 Install Drivers & Software Components
28
Jumper Settings
29
Jumpers & Connectors Guide
30
Jumpers
31
Clear CMOS Setting (JP1)
33
10/100 Base-T LAN Port Connector
34
Back-Panel Connectors COM1 Port Connector
34
IEEE 1394A Port Connectors
34
USB0/1 Port Connectors
34
USB2/3 Port Connectors
34
VGA Port Connector
34
Bass/Center-Out Port Connector
35
Front-Out Port Connector
35
PS/2 Keyboard & PS/2 Mouse Connectors
35
Rear-Out Port Connector
35
ATX Power On/Off Switch Header (PWON)
36
Front-Panel Connectors
36
HDD LED Header (HLED)
36
Green LED / Power LED Header (GLED/PLED)
37
Hardware Reset Header (RST)
37
Front Panel Connector (JP16)
38
Enhanced IDE, Floppy ATA Connectors
39
Internal Peripherals Connectors
39
Serial ATA Connectors
39
ATX Power Supply Connector (ATX1 and ATX2)
40
Other Connectors
40
Audio CD_IN Connector (JP11) (Black)
41
CPU and System Fan Connector (FAN1/2/3)
41
Wireless Keyboard and Mouse Headers (JP6)
41
IR Header (JP7)
42
Parallel Port Header (JP8)
42
Extend USB Header (USB4)
43
SPDIF-Out/In Header (JP3)
43
System Memory Configuration
44
Install Memory
44
Upgrade Memory
44
4 Software Utility
45
Mainboard CD Overview
45
Install Mainboard Software
46
A Install Intel Chipset Driver
47
B Install VGA Driver
48
C Install Realtek Audio Driver
49
D Install Realtek LAN Driver
50
E Install USB2.0 Driver
51
View the User's Manual
52
5 Bios Setup
53
Enter Bios
53
The Main Menu
54
Standard Cmos Features
56
Advanced Bios Features
59
Advanced Chipset Features
63
Integrated Peripherals
66
Power Management Setup
73
Pnp/Pci Configurations
77
Pc Health Status
79
Frequency/Voltage Control
81
Load Fail-Safe Defaults
83
Load Optimized Defaults
83
Set Password
84
Save & Exit Setup
85
Exit Without Saving
85
Advertisement
Shuttle FB61 User Manual (78 pages)
Pentium 4/Celeron, 478-pin Processor Based MAINBOARD
Brand:
Shuttle
| Category:
Motherboard
| Size: 4 MB
Table of Contents
Table of Contents
5
What's in the Manual
9
Quick Reference
9
About this Manual
9
1 Introduction
10
To Different Users
10
First-Time Diy System Builder
10
Experienced Diy User
10
System Integrator
10
Item Checklist
11
2 Features
12
Specifications
12
3 Hardware Installation
15
Step by Step Installation
15
Accessories of FB61
15
STEP 1 CPU Installation
16
STEP 2 Set Jumpers
17
STEP 3 Install DDR SDRAM System Memory
17
STEP 4 Install Internal Peripherals in System Case
18
STEP 5 Mount the Mainboard on the Computer Chassis
19
STEP 6 Connect Front Panel Switches/Leds/Usb/1394A/MIC/Line-In/Line-Out
20
STEP 7 Connect IDE, Floppy, and Serial ATA Disk Drives
21
STEP 8 Connect Other Internal Peripherals
22
STEP 9 Connect the Power Supply
24
STEP 10 Install Add-On Cards in Expansion Slots
24
STEP 11 Connect External Peripherals to Back-Panel
25
STEP 12 First Time System Boot up
26
STEP 13 Install Drivers & Software Components
27
Jumper Settings
28
Jumpers & Connectors Guide
29
Jumpers
30
Clear CMOS Setting (JP1)
31
10/100 Base-T LAN Port Connector
32
Back-Panel Connectors COM1 Port Connector
32
IEEE 1394A Port Connectors
32
USB0/1 Port Connectors
32
USB2/3 Port Connectors
32
VGA Port Connector
32
Bass/Center-Out Port Connector
33
Front-Out Port Connector
33
PS/2 Keyboard & PS/2 Mouse Connectors
33
Rear-Out Port Connector
33
Front-Panel Connectors ATX Power On/Off Switch Connector (PWON)
34
HDD LED Connector (HLED)
34
Green LED / Power LED Connector (GLED/PLED)
35
Hardware Reset Connector (RST)
35
Front Panel Connector (JP16)
36
Internal Peripherals Connectors Enhanced IDE, Floppy Connectors
37
Serial ATA Connectors
37
ATX Power Supply Connector (ATX1 and ATX2)
38
Other Connectors
38
Audio CD_IN Connector (JP11) (Black)
39
CPU and System Fan Connectors (FAN1/2/3)
39
Wireless Keyboard and Mouse Header (JP6)
39
IR Header (JP7)
40
Parallel Port Header-EXT. Print Port (JP8)
40
SPDIF-Out / in Header (JP3)
41
USB Headers (USB4/USB5)
41
System Memory Configuration
42
Install Memory
42
Upgrade Memory
42
4 Software Utility
43
Mainboard CD Overview
43
Install Mainboard Software
43
A Install Intel Chipset Driver
44
B Install VGA Device Driver
44
C Install Realtek Audio Driver
45
D Install Realtek LAN Driver
45
E Install USB2.0 Driver
46
View the User's Manual
46
5 Bios Setup
47
Enter Bios
47
The Main Menu
48
Standard Cmos Features
50
Advanced Bios Features
53
Advanced Chipset Features
57
Integrated Peripherals
60
Power Management Setup
67
Pnp/Pci Configurations
71
Pc Health Status
73
Frequency/Voltage Control
75
Load Fail-Safe Defaults
76
Load Optimized Defaults
76
Set Password
77
Save & Exit Setup
78
Exit Without Saving
78
Advertisement
Related Products
Shuttle FB62
Shuttle FB65
Shuttle FB95
Shuttle FB86
Shuttle FB83
Shuttle FB75
Shuttle FB81
Shuttle FB51
Shuttle FB52
Shuttle FB54
Shuttle Categories
Desktop
Motherboard
Computer Hardware
Fitness Equipment
Digital Signage
More Shuttle Manuals
Login
Sign In
OR
Sign in with Facebook
Sign in with Google
Upload manual
Upload from disk
Upload from URL