Sign In
Upload
Manuals
Brands
Roland Manuals
Printer
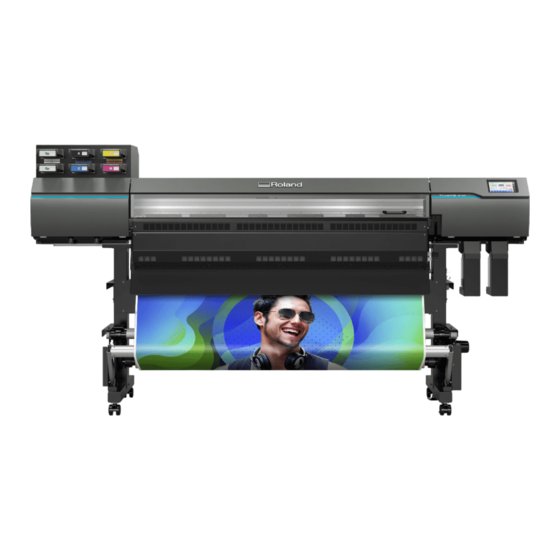
TrueVIS AP-640
User Manuals: Roland TrueVIS AP-640 Format Printer
Manuals and User Guides for Roland TrueVIS AP-640 Format Printer. We have
2
Roland TrueVIS AP-640 Format Printer manuals available for free PDF download: User Manual, Setup Manual
Roland TrueVIS AP-640 User Manual (249 pages)
Brand:
Roland
| Category:
Printer
| Size: 3 MB
Table of Contents
Table of Contents
2
Basic Handling Methods
7
Basic Information
8
Part Names and Functions
9
Printer Unit
9
Take-Up Unit
14
Operation Panel
15
About the Media Used
20
Types of Media
20
Conditions for Usable Media
21
Take-Up Unit
22
Take-Up Unit Use Conditions
22
About the Paper Tube
22
Basic Operations
23
Power Supply Operations
24
Turning the Power on
25
Turning the Power off
26
Sleep Mode (Power-Saving Feature)
27
Setup of New Media
28
Setup of Roll Media
28
Setup of Sheet Media
49
Setup of Registered Media
61
Setup of Roll Media
61
Setup of Sheet Media
79
Checking before Output
88
LAN (Local Area Network) Settings
88
Pausing and Canceling Output
89
Pausing and Resuming Output
89
Canceling Output
90
Separating the Media
91
Removing Media from the Take-Up Unit
93
Ink Pouch Replacement
95
Out-Of-Ink Warnings
95
Ink Pouch Replacement
96
Cleaning Liquid Replenishment
102
Out-Of-Cleaning-Liquid Warnings
102
Cleaning Liquid Replenishment Method
103
Output Method
105
Printing Method
106
Preparations before Printing Output
107
Step 1: Performing a Nozzle Drop-Out Test
107
Step 2: Performing Normal Cleaning
108
Printing Output
110
Optimizing Quality and Efficiency
111
Optimizing the Output Quality
112
Using the Correction Functions
113
Automatically Making Required Adjustments
113
Manual Adjustment: Reducing Horizontal Bands (Feed Correction)
115
Manual Adjustment: Adjusting the Misalignment of the Ink Landing Position (Media Gap Adjustment)
117
Configuring Settings to Match the Properties of the Media
119
Changing the Print Head Height
119
Using Media that Wrinkles Easily/Does Not Move Smoothly
121
Using Sticky Media
122
Using Heat-Resistant Media with Minimal Waste
123
Setting the Take-Up Unit
124
Adjusting the Ink-Drying Method
126
Setting the Print Heater Temperature
127
Setting the Dryer Temperature
128
Setting the Temperature During Standby
129
Optimizing Work Efficiency
130
Managing the Media Settings
131
Changing the Media Settings
131
Checking the Registered Media Settings
132
Changing the Media Name
133
Duplicating Media Settings
134
Deleting Media Settings
135
Adjusting the Output-Start Location
136
Setting the Base Point
136
Reducing Output Time
138
Speeding up Output for Narrow Media
138
Other Useful Functions
139
Using the Print Light (Interior Light)
139
Performing Printing Tests Arranged Horizontally
140
Optimizing Operation Management
141
Managing the Operations Appropriately and Efficiently
142
Setting the Current Date/Time and Using It for Maintenance
142
Checking the Remaining Media
143
Showing/Hiding Notifications
145
Setting the Activation Interval for Sleep Mode (Power-Saving Feature)
146
Managing the Basic Settings of the Printer
147
Changing the Display Language
147
Changing the Units of Measurement
148
Viewing Printer Information
149
Adjusting the Brightness of the Operation Panel
150
Turning off Operation Panel Sounds
151
Returning All Settings to Factory Defaults
152
Maintenance
153
Introduction
154
Important Notes on Handling and Use
155
Printer
155
Ink Pouches
156
Basic Maintenance Knowledge
157
Types and Timing of Maintenance
157
Measures When the Printer Is Not in Use for a Prolonged Period
158
Regular Maintenance
159
Print Head Check before Printing
160
Performing a Nozzle Drop-Out Test
160
Cleaning the Machine
161
Cleaning the Media Path
161
Cleaning the Knife Carriage Roller
163
Cleaning Around the Print Heads
164
Cleaning the Print Head Caps and Flushing Frames
166
Cleaning the Nozzle Guards
171
Disposing of Discharged Fluid
174
Precautions for Disposing of Discharged Fluid
175
If the Discharged Fluid Disposal Message Appears
176
Advanced Maintenance
178
When Dot Drop-Out or Dot Displacement Occurs
179
Performing Normal Cleaning
179
When Normal Cleaning Is Not Effective
181
Medium Cleaning Method
181
Powerful Cleaning Method
183
Cleaning the Wiper Tray
185
Handling Severe Dot Drop-Out and Dot Displacement
186
Ink Renewal Inside Heads Method
186
Emergency Measure) Cleaning the Print Head Surface
190
When the Operation Panel Is Dirty
191
Operation Panel Cleaning Method
191
Replacing Consumable Parts
192
Replacing Parts for Maintenance
193
Replacing the Wipers
193
Flushing Pad Replacement
196
Replacing the Separating Knife
201
Troubleshooting Methods
204
Output Quality Problems
205
Printed Results Are Coarse or Contain Horizontal Stripes
206
Do the Print Heads Cause Dot Drop-Out
206
Is the Print Head Height Appropriate
206
Have You Carried out [Feed Correction]
206
Have You Carried out [Media Gap Adjustment] (Ink Landing Position Correction)
206
Is the Printer Installed in a Level and Stable Location
206
Have You Carried out [Media Gap Adjustment]
206
Tion)
206
Is the Print Heater at a Suitable Temperature
207
Is the Print Mode Suitable
207
Is the Media Loaded Correctly
207
Are the [Media Settings] Appropriate
207
The Media Becomes Soiled When Printed
208
Do the Print Heads Come into Contact with the Media
208
Are the Print Heads Dirty
208
Are the Pinch Rollers or the Media Clamps Dirty
208
Colors Are Unstable or Uneven
209
Have You Tried Mixing the Ink by Shaking the Pouch Trays
209
Is the Media Wrinkled
209
Was Printing Paused Partway through
209
Is the Printer Installed in a Level and Stable Location
209
Is the Media Loaded Correctly
209
Are the Operating Parameters Set to Appropriate Values
209
Are the [Media Settings] Appropriate
210
Media Feed Problems
211
Media Wrinkles
212
Is the Media Loaded and Set up Straight and Securely
212
Was Loaded Media Allowed to Stand for some Time
212
Are the Media Clamps Attached
212
Was the Media Loaded While the Print Heater was Hot
212
Is the Temperature of the Dryer too High
212
Is [Pullback after Printing] Enabled
212
Have You Stored the Media in a Low-Temperature Room
212
Is the Humidity of the Room too High
213
Is the Media Sagging
213
Media Feeding Is Not Straight
214
Is the Media Loaded and Set up Straight and Securely
214
Media Feeding Is Not Smooth
215
Is some Other Object Coming into Contact with the Media
215
Is the Media too Thick
215
Are the Grit Rollers Dirty
215
A Media Jam Occurs
216
Is an Error Message Displayed
216
Is the Media Warped or Wrinkled
216
Is the Height of the Print Heads too Low
216
Are the Grit Rollers Dirty
216
Are the Media Clamps Installed
216
Is the Media Loaded and Set up Straight and Securely
216
Is some Other Object Coming into Contact with the Media
217
Is the Media too Thick
217
Machine Problems
218
The Print Heads Do Not Move
219
What to Do First
219
If the Print Heads Still Do Not Move
219
The Printer Unit Does Not Run
221
Is the Power Switched on
221
Is [Output Possible.] Displayed
221
Are any Covers Open
221
Is the Message [Output Is Currently Paused.] Displayed on the Screen
221
Is a Message Displayed on the Screen
221
Are the Cables Connected
221
Is the LAN Routing Appropriate
222
Are the LAN Settings Correct
222
DID the Software RIP End Abnormally
222
Is an [Ink Pouch Tray Error] Displayed
222
The Print Heater/Dryer Does Not Become Hot
224
Is the Media Loaded
224
Is the Temperature of the Room too Low
224
Cannot Separate the Media
225
Is the Separating Knife Installed
225
Messages on the Operation Panel
226
Messages
227
[When Output, Cleaning, and Other Operations Are Completed, Discard the Discharged Fluid.]
227
[The Time for Manual Cleaning Has Arrived.]
227
[The Time for Wiper Replacement Has Arrived.]
227
[The Time for Flushing Pad Replacement Has Arrived.]
227
[Print Head Protection Mode Has Activated.]
227
[Fill the Cleaning Liquid Tank with Cleaning Liquid.]
228
[Operation of the Take-Up Unit Stopped.]
228
[Install the Media Clamps Correctly.]
228
[Media Clamps Could Not be Detected.]
228
[The LAN Cable Is Not Connected.]
229
[Connection Is Requiring too Much Time. Manually Setting the IP Address will Improve the Connection Speed.]
229
[There Is Ink that Has Expired.]
229
[The Temperature Around the Machine Is too Low. Adjust the Room Temperature.]
229
[The Temperature Around the Machine Is too Low. Adjust the Room Tem- Perature.]
229
[The Temperature Around the Machine Is too High. Adjust the Room Temperature.]
229
[The Temperature Around the Machine Is too High. Adjust the Room Tem- Perature.]
229
Error Messages
230
[Ink Pouch Tray Error]
230
[Cover Open Error]
230
[Media End Error]
230
[Pinch Lever Error]
231
[Media Loading Error]
231
[Loose Media Error]
232
[Drain Bottle Error]
232
[Unable to Fill Wiper Cleaning Liquid]
232
[Print Head Height Mismatch]
232
[Insufficient Media Width]
233
[Ink Supply Error]
233
[Temperature Increase Timeout Error]
233
[Motor Error]
233
[Print Head Dry-Out Error]
234
[Low Temperature Error]
234
[High Temperature Error]
234
[Take-Up Unit Communication Error]
234
[Dryer Error]
235
[Service Call]
235
[Software Error]
235
Appendix
236
Operations When Moving the Unit
237
Preparing to Move the Machine
238
Step 1: Removing the Media
238
Step 2: Discharging the Tray Cleaning Liquid
239
Step 3: Secure the Print Heads in Place Using the Retainer
240
Step 4: Reinstalling the Machine
241
Main Specifications
243
Maximum Printing Area and Margins
244
Maximum Printing Area When Using Crop Marks
246
Media Separation Location During Continuous Printing
247
Memo
248
Advertisement
Roland TrueVIS AP-640 Setup Manual (72 pages)
Brand:
Roland
| Category:
Printer
| Size: 2 MB
Table of Contents
Table of Contents
2
Introduction
3
Checks before Installation
4
About the Documentation for this Machine
4
About Placement and Installation Work
4
Power Supply for this Machine
5
Deciding on an Installation Site
6
Temperature and Humidity
7
Installation Space
8
Checking the Included Items
9
Installation
11
Assembly and Ink Filling
12
Checks before Operations
12
Step 1: Assembling the Stand
13
Step 2: Attaching the Printer Unit and the Stand
16
Step 3: Installing the Media Holders and Media Stays
19
Step 4: Assembling the Media Take-Up Unit
23
Step 5: Installing the Dryer
33
Step 6: Installing the Drain Bottle
41
Step 7: Removing the Retainers
44
Step 8: Installing the Print Heads
45
Step 9: Filling with Cleaning Liquid
46
Step 10: Preparing the Ink
48
Step 11: Connecting the Cables
52
Step 12: Initial Settings and Ink Filling
54
Network Settings
57
Setting a Fixed IP Address
57
Directly Connecting to the Computer
59
Adjustment
64
Adjusting
64
Downloading and Installing Software
65
Downloading Roland DG Connect Hub
65
Installing the Software
66
Setting the Software RIP
68
Appendix
69
Location of the Power Rating and Serial Number Label
70
Specifications
71
Advertisement
Related Products
Roland AJ-1000
Roland Advanced Jet AJ-1000i
Roland TrueVIS VG-640
Roland TrueVIS VG-540
Roland TrueVIS SG-300
Roland TrueVIS SG-540
Roland TrueVIS VG2-640
Roland TrueVIS VG2-540
Roland TrueVIS SG2-640
Roland TrueVIS SG2-540
Roland Categories
Musical Instrument
Synthesizer
Recording Equipment
Drums
Electronic Keyboard
More Roland Manuals
Login
Sign In
OR
Sign in with Facebook
Sign in with Google
Upload manual
Upload from disk
Upload from URL