Sign In
Upload
Manuals
Brands
Radwin Manuals
Radio
5000
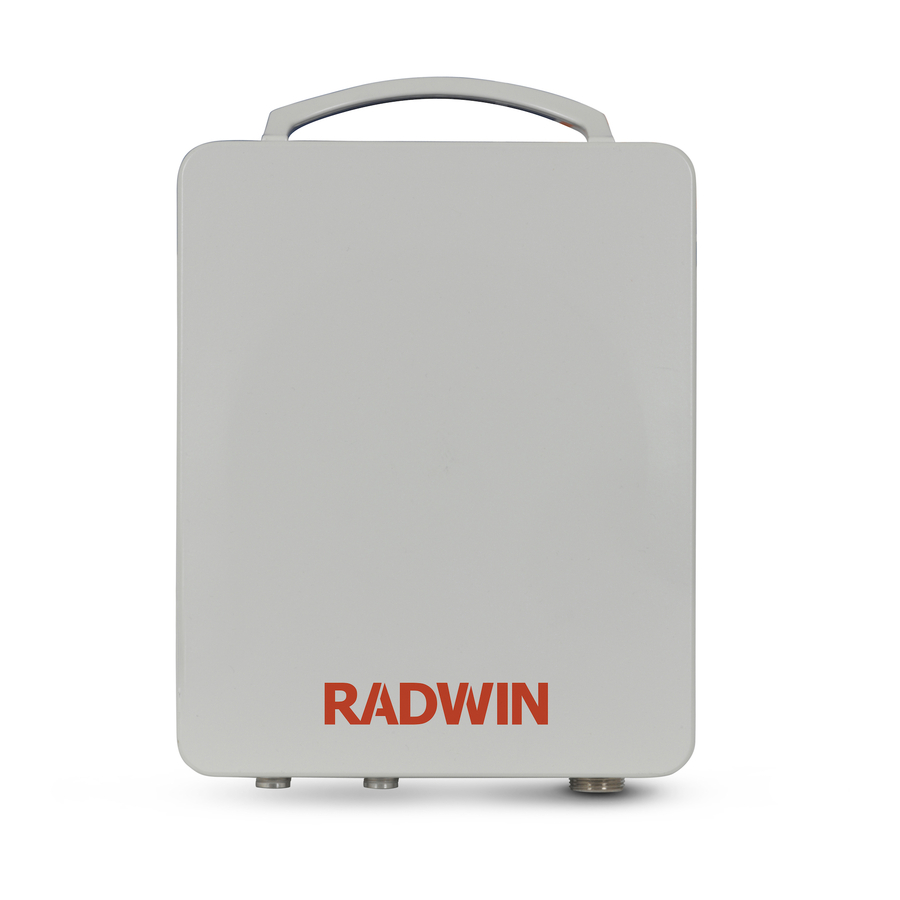
Radwin 5000 Base Station Radio Manuals
Manuals and User Guides for Radwin 5000 Base Station Radio. We have
7
Radwin 5000 Base Station Radio manuals available for free PDF download: Configuration Manual, User Manual, Installation Manual, Reference Manual
Radwin 5000 User Manual (211 pages)
Broadband Wireless Transmission System
Brand:
Radwin
| Category:
Microphone system
| Size: 3 MB
Table of Contents
Notice
2
RADWIN Worldwide Offices
3
Regulatory Compliance
4
Table of Contents
6
Chapter 1 Introduction
14
Welcome
14
Key Applications
15
Wimax and IP Backhaul
15
Broadband Access
15
Figure 1-1 Typical Wimax and Figure 1-2 Typical Broadband
15
Private Networks
16
Key Features of RADWIN 1000/2000/5000
16
Figure 1-3 Private Network
16
RADWIN 1000/2000/5000 Link
18
The Radio Outdoor Unit (ODU)
19
Figure 1-4 Example of Linka
19
The Indoor Units (IDU)
21
Idu-C
21
Idu-E
22
Power over Ethernet (Poe) Devices
22
Antennas
23
Figure 1-9 P Oedevice
23
Figure 1-11 Flat Panel Antenna
24
Flat Panel Antennas
24
Parabolic Dish Antennas
25
RADWIN Manager
25
Figure 1-12 External Antennas
25
Accessories
26
Documentation Set Supplied with RADWIN 1000/2000/5000
26
How to Use this Manual
27
A Little Terminology
27
Conventions Used in this Manual
29
Notifications
29
Typographical Conventions
29
General
29
Software
29
Windows Terminology
30
Figure 1-14 Sitec
31
Chapter 2 Site Preparation
32
Planning the Link Site
32
Overview
32
The Site Survey
32
Introduction
32
Recommended Equipment
32
Stage 1: Preliminary Survey
33
Stage 2: Physical Survey
34
Additional Outdoor Site Requirements
35
Additional Indoor Site Requirements
35
Stage 3: RF Survey
35
Chapter 3 Hardware Installation
36
Safety Practices
36
Preventing Overexposure to RF Energy
36
Grounding
36
Protection against Lightning
37
General
37
Package Contents
37
ODU Package Contents
37
Figure 3-2 Connectorized Odu - F
38
IDU Package Contents
39
Figure 3-3 Integrated Odu - F
39
External Antenna Package Contents
40
Additional Tools and Materials Required
40
Tools and Materials
40
Cables and Connectors
40
Hardware Installation Sequence
40
Outdoor Installation
41
Mounting the ODU
41
Figure 3-6 Typical Installation
41
Mounting External Antennas
42
Mounting the Lightning Protection Devices
42
Outdoor Connections
43
Indoor Installation
43
IDU-E Installation
43
Mounting the IDU-C
43
Figure 3-7 New Style Idu-E: R
43
Connecting Power to the IDU
46
Connecting the ODU to the IDU
47
Installing a Link Using Poe Devices
47
Connecting User Equipment
47
Connecting and Aligning Odus / Antennas
48
Figure 3-12 Beeps
49
Chapter 4 Link Installation: the RADWIN Manager
50
Installing Theradwin Manager Application
50
Minimum System Requirements
50
Installing the Software
50
Starting the RADWIN Manager
51
Figure 4-2 Pinging an Uninstalled and Unconfigured Link
52
Figure 4-3 Login Screen
52
Login Errors
54
Unsupported Device
54
Figure 4-4 Login Screen with
54
Figure 4-5 Unsupported Device Message
54
Incorrect IP Address
55
Incorrect Password
55
Continuing Without an IP Address
55
Figure 4-6 Unreachable Device Message
55
Changing the Log on Password
56
Installing the Link: First Steps
56
Figure 4-7 Opening Radwin M
57
Default Settings
58
Front Panel Leds on the IDU-C
58
Table 4-3 Default Settings
58
Installation Menu and Toolbar Functionality
59
Table 4-4 Front Panel Led S
59
Installing the Link: Overview
62
Table 4-7 Link Installationw
62
Installing the Link: Step 1, Start the Wizard
63
Installing the Link: Step 2, System Parameters
63
Figure 4-9 Link Installationw
63
Figure 4-10 : Installationw
64
Changing the Link Password
65
Figure 4-11 Change Linkp
65
Installing the Link: Step 3, Channel Settings
66
Figure 4-12 Lost or Forgotten
66
Figure 4-13 Channel Settings
67
Installing the Link: Step 4, Tx Power and Antenna Settings
68
General
69
Dual Antennas at both Sites
69
Figure 4-15 Transmissionp
69
Single Antennas at both Sites
70
Single and Dual Antennas
70
Considerations for Changing Antenna Parameters
71
Figure 4-16 a
72
Figure 4-17 Antenna Parameters Change Warning
73
Figure 4-18 T Xpower Limits
73
Installing the Link: Step 5, Services
74
Figure 4-19 Services Andr
74
Installing the Link: Step 6, Installation Summary and Exit
75
Figure 4-20 Installation Wizard
75
Figure 4-21 M
76
Chapter 5 Configuring the Link
77
Link Configuration: Getting Started
77
The Main Window of the RADWIN Manager
77
The RADWIN Manager Toolbar
78
Figure 5-1 Main Window , W
78
The RADWIN Manager Main Menu
79
Elements of the RADWIN Manager Main Window
82
Table 5-3 Link Details
82
Table 5-4 Link Site Details , Site
83
Figure 5-2 Ethernet Bandwidth
84
Table 5-5 Status Bar Indicators
85
Configuring the Link: Overview
86
Table 5-6 Link Configuration
86
Configuring the Link: Step 1, Start the Wizard
87
Configuring the Link: Step 2, System Parameters
87
Figure 5-3 Link Configuration
87
Configuring the Link: Step 3, Channel Settings
88
Figure 5-4 Configuration Wizard
88
Figure 5-5 Channels
89
Figure 5-6 Searching for the Best Operating Channel
90
Figure 5-7 Channels
91
Figure 5-8 Channel Frequency Options
92
Figure 5-9 Choosing an "Other
93
Configuring the Link: Step 4, Tx Power and Antenna Settings
94
Figure 5-10 Transmissionp
94
Figure 5-11 a
95
Configuring the Link: Step 5, Services
96
Figure 5-12 Services Andr
96
Configuring the Link: Step 6, Configuration Summary and Exit
97
Figure 5-13 Configurationw
97
Figure 5-14 M
98
Chapter 6 Site Configuration
99
Configuring the Site
99
Editing the Configuration Parameters by Site
99
Functions on the Left of the Dialog Box
100
Functions at the Top of the Dialog Box
100
Figure 6-1 Configuration Dialog
100
Viewing Air Interface Details
101
Figure 6-2 Air Interface Details
101
Changing the Transmit Power
102
Site Management: IP Address and VLAN
102
Configuring the ODU Address
102
Figure 6-3 Changing the Transmit
102
Configuring VLAN Settings
103
Figure 6-4 Management Addresses
103
Figure 6-5 Configuring Management Traffic
104
Lost or Forgotten VLAN ID
105
Setting the Date and Time
105
Figure 6-6 Date and Timec
106
Figure 6-7 Change Date Andt
106
Ethernet Properties
107
Configuring the Bridge
107
Figure 6-8 Date Andt
107
Figure 6-9 Bridge Configuration
108
IDU Aging Time
108
ODU Mode
108
Configuring Ethernet Ports Mode
109
Setting the Maximum Information Rate
110
Displaying the Inventory
110
Security Features
111
Figure 6-10 Inventory Screen
111
Changing the Link Password
112
RADWIN Manager Community Strings
112
Figure 6-11 Available Security Features
112
Editing Community Strings
113
Figure 6-12 Changing Thec
114
Forgotten Community String
114
Muting the Alignment Tone
115
Setting External Alarm Inputs
115
Figure 6-13 Alternative Community
115
Managing Configuration Files
116
Backup Configuration to a File
116
Figure 6-14 External Alarmc
116
Restoring a Configuration File
117
Resetting
117
Configuration with Telnet
118
Table 6-2 Telnet Commands
118
Figure 6-15 Telnet Management
120
Chapter 7 Monitoring and Diagnostics
121
Retrieving Link Information (Get Diagnostics)
121
Figure 7-1 Get Diagnosticsd
122
Table 7-1 Get Diagnosticsd
122
Link Compatibility
123
Reinstalling and Realigning a Link
123
Table 7-2 Link Compatibilityt
123
The Link Budget Calculator
124
Performance Monitoring
124
The Monitor Log
124
Saving the Monitor Log
124
Viewing Performance Reports
125
Figure 7-2 Preferences Dialog Box
125
Figure 7-3 Basic Performance
126
Figure 7-4 Atypical Performance
126
Table 7-3 Explanation of Performance Data
128
Performance Monitoring Report Toolbar
129
Setting Air Interface Thresholds
129
Figure 7-5 Threshold Configuration Dialog Box
129
Table 7-4 Action of the Toolbar Buttons
129
The Events Log
130
Figure 7-6 Events Log Display
130
RADWIN Manager Traps
131
Setting the Events Preferences
132
Saving the Events Log
133
Figure 7-7 Preferences Dialog Box
133
Reverting Alarm Messages
134
Active Alarms
134
Remote Power Fail Indication
135
Figure 7-8 Active Alarms Summary
135
Table 7-6 Activea
135
Troubleshooting
136
Replacing an ODU
136
Table 7-8 Troubleshooting
136
Restoring Factory Setup
137
Online Help
137
Customer Support
137
Figure 7-9 Online Help for Figure B-1 Example for Connecting the Alarm Connector
137
Appendix A Technical Specifications
138
Configuration
138
Radio
139
Ethernet Interface
141
Management
142
Mechanical
142
Power
142
Environmental
142
Safety
142
Emc
142
Air Interface
142
Appendix B Wiring Specifications
144
ODU-IDU Cable
144
User Port Connectors
144
LAN Port
144
Table B-2 Fast Ethernetc
145
IDU-C Alarm Connector
147
Table B-4 Terminal Block 3- Pin
147
Appendix C Pole and Wall Installation
148
ODU Mounting Kit Contents
148
Table C-1 Bill of Materials : Odu
148
Mounting RADWIN 1000/2000/5000 on a Pole
149
Figure C-4 Mounting on a Pole
149
Mounting RADWIN 1000/2000/5000 on a Wall
150
Mounting an External Antenna
150
Figure C-5 Mounting on a Wall
150
Appendix D Link Budget Calculator
151
Overview
151
User Input
151
Link Budget Calculator Internal Data
151
Calculations
152
Eirp
152
Expected RSS and Fade Margin
152
Min and Max Range
152
Service
152
Availability
152
Antenna Height
153
Running the Link Budget Calculator
153
Figure D-1 Accessing the Link
154
Figure D-2 Link Budget Screen
155
Figure D-3 Product Selector
157
Figure D-4 Rate Selector
158
Figure D-5 Calculation of Distance from Site Coordinates
159
Figure D-6 Climacticc Factors
160
Figure D-7 Climacticc F
161
Figure D-8 World Map Showing
162
About the Fresnel Zone
163
Figure D-9 Fresnel Zone
163
Appendix E Lightning Protection and Grounding Guidelines
165
Grounding for Antenna Cable
165
Grounding for Indoor/Outdoor Units
166
ODU Grounding
166
IDU Grounding
166
Figure E-1 Grounding Antenna Cables
166
External Lightning Surge Suppressors and Grounding
167
Figure E-2 Grounding a Typical Pole Installation
167
Figure E-3 Grounding a Typical Wall Installation
168
Figure E-5 Transtector
169
Internal ESD Protection Circuits
171
Figure E-6 Surges
171
Appendix F MIB Reference
172
Introduction
172
About the MIB
172
Terminology
172
Interface API
172
Control Method
172
Community String
173
Private MIB Structure
173
Figure F-1 Top Levels
174
MIB Parameters
175
Supported Variables from the RFC 1213 MIB
175
Table F-1 Supported Rfc 1213
175
MIB Parameters
176
Table F-2 Private Mib Parameters
176
MIB Traps
189
General
189
Trap Parameters
189
RADWIN Manager Traps
192
Appendix G External Alarms Specification
193
External Alarms Specification
193
Table G-1 Output Alarms Pinout
193
Appendix H Combo Configuration Tool
194
What Is the Combo Configuration Tool
194
Who May Use the Combo Configuration Tool
194
Caveat to the Use of the Combo Configuration Tool
194
Prerequisites to Using the Combo Configuration Tool
195
Operating the Combo Configuration Tool
195
Before Using the Combo Configuration Tool
195
Using the Combo Configuration Tool
195
If You Receive an Error Message
199
Advertisement
Radwin 5000 Configuration Manual (252 pages)
Brand:
Radwin
| Category:
Radio
| Size: 16 MB
Table of Contents
Table of Contents
2
Chapter 1: Introduction
7
Scope of this Document
7
Notifications
7
RADWIN 5000 Overview
8
Sector
8
Base Station
8
Subscriber Unit
8
Method of Work
9
Sector Management Tools
9
Key Features of RADWIN 5000
10
General
10
Beamforming Solution (Optional)
10
What's New in Release 4.9.17
10
Chapter 2: RADWIN Manager Overview
12
Scope of this Chapter
12
Installing the RADWIN Manager Application
12
Minimum System Requirements
12
Installing the Software
13
Initial Connection and Logon
13
The RADWIN Manager Log-On Concept
14
Log-On Errors and Cautions
17
Unsupported Device
17
Incorrect IP Address
18
Incorrect Password
18
Invalid Read/Write Community String or Snmpv3 Passwords
18
Sector Display Views
19
Map View
22
List View
23
Switching between Views
24
Display View Persistence
24
Using the Map View
24
Exploring the RADWIN Manager Main Window - HBS
27
HBS Main Button Menu
27
Sector Status Panel
28
Base Station Panel
28
HBS Events Log
30
HBS Main Window - Hsus Panel
31
Logging on to an HSU Directly
38
HSU Main Button Menu
40
HSU Link Status
41
HSU Events Log
41
HSU Link Performance
41
Setting RADWIN Manager Preferences
41
Monitor
42
Events
43
Advanced
44
Chapter 3: Installing a Sector
47
Scope of this Chapter
47
Concepts
47
Working with Nomadic Hsus
48
Workflow
49
The Initial RADWIN Manager Main Window
49
Activating an HBS
51
Configuring a Fixed HSU from the HBS
60
Configuring a Nomadic HSU from the HBS
66
Registering a Fixed HSU for Service
67
Registering a Nomadic HSU for Service
73
Deactivating the HBS
74
Deregistering an HSU
76
Where Has My HSU Gone
76
Saving the HBS Settings for Reuse as a Template
76
Creating Nomadic Entries for a Sector from a HBS Template
76
Chapter 4: Managing the Sector
79
Scope of this Chapter
79
Configuring an HBS
79
Configuration Menu Buttons
79
System
80
Air Interface
81
Tx and Antenna
83
Hub Site Sync [HSS]
85
Management
86
Inventory
98
Security
99
Date and Time
106
Ethernet
109
Nomadic
112
Radius
113
Operations
122
HSU Connection Table
124
Configuring an HSU from the HBS Main Window
125
Configuration Menu Buttons
125
System
127
Tx & Antenna
128
Management
129
Inventory
130
Security
131
Date & Time
132
Ethernet
132
Nomadic
136
Operations
138
Replacing an HSU
138
Updating HSU Services
141
Suspending an HSU
141
Changing the Sector Band
142
Configuring AES 256 Encryption Support
149
Configuration with Telnet
151
Chapter 5: SU PRO/AIR Configuration
154
Scope of this Chapter
154
Wintouch
155
SU PRO/AIR Web Interface (Via PC or Laptop)
155
Overview
157
Configure
158
System
158
Radio
158
Network
159
Wifi
159
Security
160
Tools
160
Unit
160
Network
161
Operations
162
Antenna Alignment
163
SU PRO/AIR Web Interface (Via Smartphone)
164
Chapter 6: Direct HSU Configuration
165
Scope of this Chapter
165
Overview
165
Configuration Menu Buttons
167
Air Interface
168
Security
170
Chapter 7: Monitoring and Diagnostics
172
Scope of this Chapter
172
Retrieving Link Information (Get Diagnostics)
172
Link Compatibility
175
Software Upgrade Available
176
Software Upgrade Recommended
176
Software Upgrade Required
176
Throughput Checking
176
Recent Events
178
Performance Monitoring
180
Hbs
180
Hsu
182
More on the Thresholds
185
RADWIN Manager Traps
186
Active Alarms
187
Customer Service
188
Chapter 8: Backup, Restore, and Upgrade
189
Scope of this Chapter
189
System Backup
189
Bulk Software Backup
190
Configuration Restore
190
Full Restore
192
To Upgrade from a Non-JET Based HBS to a JET Based HBS
194
Upgrading an Installed Sector
194
Chapter 9: VLAN Functionality
199
Scope of this Chapter
199
VLAN Tagging - Overview
199
VLAN Terminology
199
VLAN Background Information on the Web
199
Requirements
199
VLAN Tagging
199
Qinq (Double Tagging) for Service Providers
200
VLAN Untagging
201
Port Functionality
201
VLAN Configuration Using the RADWIN Manager
204
Management Traffic and Ethernet Service Separation
204
Managing the HBS over the Air from an HSU
205
Configuration of VLAN Tagging for Ethernet Service
205
Chapter 10: Quality of Service
209
Scope of this Chapter
209
Prerequisites
209
Qos - Overview
209
Setting up Qos
210
Mapping Qos Priority Levels to Queues (from the HBS)
210
Setting up an HSU for Qos
211
Enabling a Voice-Over-IP (Voip) Queue
213
Enabling Voip from an HBS
214
Enabling Voip from an HSU
215
Chapter 11: License-Dependent Upgrades
216
Scope of this Chapter
216
Overview
216
Receiving a License Key
216
Applying a License Key
217
Individual HSU Upgrade
217
Bulk (Sector) HSU Upgrade
217
Completing the Upgrade
217
Persistency of the Upgrade
218
Chapter 12: Spectrum View
219
Scope of this Chapter
219
What Is Spectrum View
219
Who Needs It
219
Two Ways to Run Spectrum View
220
Where Is the Spectrum View Data Stored
220
Spectrum View Main Window: HBS
220
Spectrum View Display Function Buttons
223
Running Spectrum View from the HBS
224
Running Spectrum View from a HSU
225
Zooming in and out
227
Chapter 13: Using the Web Interface
228
Scope of this Chapter
228
Who Needs It
228
How It Works
228
Prerequisites
229
Hardware
229
Software
229
Technical Background
229
Special Considerations Working with the WI
229
Advanced Configurations
229
Operational Effects
229
Some Working Tips
229
Logging on
230
HBS Management
231
The Main Window
231
Configure
232
Events
237
Reset
237
HSU Management
237
The Main Window
237
Radwin 5000 Installation Manual (139 pages)
Brand:
Radwin
| Category:
Wireless Access Point
| Size: 5 MB
Table of Contents
Table of Contents
2
Introduction
6
Scope of this Document
6
RADWIN 5000 Overview
6
Sector
6
Base Station
6
Subscriber Unit (SU)
8
External Antennas
10
Method of Work
10
Worldwide Single PN Products
11
Management Tools
12
Web Interface
12
RADWIN Manager
12
Wintouch
12
Which Management Tool to Use
13
Release Versions
14
Notifications
14
Miscellaneous Cautions and Warnings
14
Installation Steps
15
Prepare Laptop
16
Connect Laptop to Radio Unit
16
LFF and SFF Units
16
Integrated Units
17
Multisector Base Station Connectorized Units
19
SU PRO/AIR EMB Units
20
SU Integrated Units, JET-AIR DUO and NEO DUO Units
20
Update Connectivity Parameters of Radio Unit
21
SU: LFF or SFF Radio Units
22
SU PRO/AIR EMB, SU Integrated, and SU Connectorized Units
23
HBS: LFF or JET Radio Units
24
AIR DUO Radio Units
25
Check Items to be Installed
26
Install Standard Mounting Kit
26
Standard Mounting Kit
26
Vertical Pole
28
Horizontal Pole
30
Wall
32
Install Mounting Kit for the SU PRO/ AIR EMB
33
Mounting the Multisector Base Station Connectorized
35
Mounting a Unit with the Standard Mounting Kit
40
Mounting Back-To-Back Multisector Integrated Units
46
Flat Panel Antenna
48
Mounting the SU Connectorized
50
Mounting the SU PRO/AIR EMB
51
Mounting the Lightning Protection Units
53
Ground Radio Unit
56
LFF Units
56
SFF Units
57
JET, JET PRO, and NEO Units
57
JET-DUO 3/5 Ghz Units
58
NEO DUO, JET-AIR and JET-AIR DUO Units
58
SU Integrated Units
59
Multisector Integrated Units
59
Multisector Connectorized Units
59
SU Connectorized Units
60
SU PRO/AIR EMB Units
60
Connect External Antenna (if Applicable)
61
Connecting LFF, SFF, and SU Connectorized Units to Antennas
61
Connecting SU PRO/AIR EMB Units to Antennas
62
Connecting Multisector Integrated Units to Antennas
64
Connecting Multisector Connectorized Units to Antennas
67
Connect Radio (External Connections)
68
LFF, SFF, SU Integrated, and JET Units
68
JET-DUO 3/5 Ghz, JET AIR, JET PRO, JET-AIR DUO and NEO DUO Units
70
Multisector Base Station Integrated
72
Multisector Base Station Connectorized
73
SU PRO/AIR EMB Units
74
Power Supplies
75
Waterproofing
80
Check Connectivity to Radio
81
Activate Base Station
81
Align Subscriber Unit
82
LFF and SFF Units
83
SU PRO/AIR EMB, and SU Integrated, and SU Connectorized Units
84
Safety Practices and Provisions
88
Scope of this Chapter
88
Preventing Overexposure to RF Energy
88
Grounding
88
Protection against Lightning
88
General
88
Internal ESD Protection Circuits
89
Ratings
89
Appendix A. Wiring Specifications
91
Scope of this Appendix
91
Radio Unit-Poe Cable (HBS and SU)
91
User Port Connectors
92
LAN Port
92
DC Power Terminals
92
DC Poe
92
Appendix B. about Antennas
93
Scope of this Appendix
93
Antenna Issues
93
About Single and Dual Antennas
93
Dual Antennas at the HBS and an SU
93
Single Antennas at both Sites
94
Single at One Site, Dual Antennas at the Other
94
Considerations for Changing Antenna Parameters
95
Appendix C. Regional Notice: French Canadian
96
Procédures de Sécurité
96
Généralités
96
Mise à la Terre
96
Protection Contre la Foudre
96
Précautions de Sécurité pendant le Montage de ODU
97
Connecter la Terre à IDU-C
97
Installation Sur Pylône et Mur
97
Contenu du Kit de Montage ODU
98
Montage Sur un Pylône
99
Montage Sur un Mur
99
Montage D'une Antenne Externe
99
Contenu du Kit de Montage D'une Antenne Externe
99
Appendix D. Terminology
101
Advertisement
Radwin 5000 Installation Manual (112 pages)
Brand:
Radwin
| Category:
Radio
| Size: 2 MB
Table of Contents
Table of Contents
2
Chapter 1: Introduction
4
Scope of this Document
4
RADWIN 5000 Overview
4
Sector
4
Base Station
5
Subscriber Unit
6
Method of Work
8
Management Tools
9
Wintouch
9
Web Interface
10
RADWIN Manager
10
Which Management Tool to Use
10
Key Features of RADWIN 5000
11
General
11
Beamforming Solutions
11
What's New in Release 4.9.80
12
Release Versions
12
Notifications
12
Chapter 2: Installation Steps
14
Prepare Laptop
16
Connect Laptop to Radio Unit
16
RADWIN 5000 (LFF and SFF) Units
17
JET and JET DUO Units
18
SU PRO/AIR EMB Units
19
SU PRO/AIR INT Units
19
Update Connectivity Parameters of Radio Unit
20
HSU: RADWIN 5000 (LFF or SFF Radio Units)
20
SU PRO/AIR EMB and SU PRO/AIR INT Units
21
HBS: RADWIN 5000 or RADWIN 5000 JET Radio Units
22
HBS: JET DUO, and JET AIR/PRO Radio Units
23
Check Items to be Installed
24
Prepare Tools
24
Install Standard Mounting Kit
24
Standard Mounting Kit
24
Vertical Pole
25
Horizontal Pole
28
Wall
30
Install Mounting Kit for the SU PRO/AIR EMB
31
Mounting a Unit with the Standard Mounting Kit
34
Ground Radio Unit
40
LFF Units
41
SFF Units
41
JET and JET AIR/PRO and JET PRO Units
41
JET DUO Units
42
SU PRO/AIR INT Units
42
SU PRO/AIR EMB Units
42
Mounting the SU PRO/AIR EMB
44
Mounting the SU PRO/AIR INT
46
Mounting the Lightning Protection Units
46
Connect External Antenna (if Applicable)
48
LFF and SFF Units
49
SU PRO/AIR EMB Units
49
Waterproofing
51
Connect Radio (External Connections)
52
LFF, SFF, SU PRO/AIR INT, and JET Units
52
JET DUO and JET AIR/PRO Units
53
SU PRO/AIR EMB Units
57
Check Connectivity to Radio
58
Activate Base Station
58
Align Subscriber Unit
59
LFF and SFF Units
60
SU PRO/AIR EMB, SU PRO/AIR INT Units
61
Chapter 3: Safety Practices and Provisions
64
Scope of this Chapter
64
Preventing Overexposure to RF Energy
64
Grounding
64
Protection against Lightning
64
General
65
Internal ESD Protection Circuits
65
Ratings
66
Appendix A: Wiring Specifications
67
A.1 Scope of this Appendix
67
A.1 Radio Unit-Poe Cable (HBS and HSU
67
A.2 User Port Connectors
68
A.3 DC Power Terminals
69
Appendix B: about Antennas
70
B.1 Scope of this Appendix
70
B.1 Antenna Issues
70
B.2 about Single and Dual Antennas
70
B.3 Considerations for Changing Antenna Parameters
72
Appendix C: Regional Notice: French Canadian
74
C.1 Procédures de Sécurité
74
C.2 Installation Sur Pylône Et Mur
76
Appendix D: Terminology
79
Radwin 5000 Installation Manual (94 pages)
Brand:
Radwin
| Category:
Conference System
| Size: 5 MB
Table of Contents
Table of Contents
2
Introduction
5
Scope of this Document
5
RADWIN 5000 Overview
5
Sector
5
System Components and Connectivity
6
Base Stations
7
Subscriber Units (SU)
8
POE Sources
9
POE Cable
10
External Antennas
11
Worldwide Regulation Products
11
Lightning Protector Units (LPU)
12
Installation Steps
13
Check Items to be Installed
13
Required Tools
13
Connect to Radio Unit
13
Accessing Web UI
13
Updating Network Settings
14
SU Models
14
HBS Models
14
Mounting Integrated Odus
15
Standard Mounting Kit
15
Pole Mount Installation
15
Wall Mount Installation
18
SU or Alpha Integrated, 5000L Integrated, NEO, NEO DUO, JET-AIR, JET-AIR DUO, Multisector Integrated, Outdoor POE
19
Jet Pro, Jet Duo
20
Mounting Multisector Integrated for 360-Degree Coverage
22
Mounting Multisector Connectorized
25
Vertical Pole
25
Wall
27
Mounting SU or Alpha PRO Connectorized
29
Installing SU ECO
30
Initial Assembly
31
Mounting on a Vertical Pole
32
Lightning Protection Units
33
Connect Ground Cable
36
Jet Pro
36
Jet Duo
36
NEO, NEO DUO, JET-AIR and JET-AIR DUO
37
Multisector Integrated
37
Multisector Connectorized
38
SU PRO/AIR Integrated
38
SU PRO/AIR Connectorized
39
Connect External Antenna
39
SU or Alpha PRO Connectorized
40
Multisector Integrated
40
Multisector Connectorized
43
Connect POE Cable
44
Su Eco
44
SU PRO/AIR Integrated or Connectorized
45
JET DUO, JET PRO, JET AIR, JET-AIR DUO, NEO and NEO DUO
46
Multisector Integrated
47
Multisector Connectorized
48
Connect POE Device
49
Waterproofing
52
Activate Base Station
53
Activate and Align Subscriber Unit
54
Activation / RSS Monitoring
54
Aligning SU AIR, SU PRO or Alpha-PRO Integrated
55
Safety Practices and Provisions
56
Scope of this Chapter
56
Preventing Overexposure to RF Energy
56
Grounding
56
Protection against Lightning
56
General
56
EMC and Safety Compliance
57
Appendix A. Power over Ethernet
59
POE Compatibility
59
POE Pinout for 2-Pair POE
60
POE Pinout for 4-Pair POE
60
Appendix B. about Antennas
61
Scope of this Appendix
61
Antenna Issues
61
About Single and Dual Antennas
61
Dual Antennas at the HBS and an SU
61
Single Antennas at both Sites
62
Single at One Site, Dual Antennas at the Other
62
Considerations for Changing Antenna Parameters
62
Appendix C. Terminology
64
Appendix D. Certified Antennas
67
For Deployment in Us/Canada
67
For Deployment in EU Member States
77
Appendix E. Regulatory Compliance
81
General Note
81
Radwin 5000 Installation Manual (72 pages)
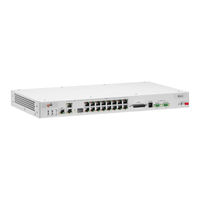
High-capacity PtMP solution that delivers up to 250 Mbps per sector
Brand:
Radwin
| Category:
Radio
| Size: 9 MB
Table of Contents
Table of Contents
2
Chapter 1: Introduction
4
Scope of this Document
4
Notifications
4
RADWIN 5000 Overview
5
Sector
5
Base Station
5
Subscriber Unit
6
Method of Work
7
Sector Management Tools
8
Key Features of RADWIN 5000
9
General
9
Beamforming Solution (Optional)
9
Chapter 2: Installation Steps
11
Prepare Laptop
12
Connect Laptop to Radio Unit
12
LFF and SFF Units
13
JET Units
14
SU PRO/AIR Units
14
Update Connectivity Parameters of Radio Unit
14
Hbs
15
SU PRO/AIR Units
16
Check Items to be Installed
16
Prepare Tools
17
Standard Mounting Kit
17
Install Standard Mounting Kit
17
Vertical Pole
18
Horizontal Pole
21
Wall
23
Install Mounting Kit for the SU PRO/AIR Radio Unit
23
Mounting a Unit with the Standard Mounting Kit
26
Ground Radio Unit
29
LFF Units
30
SFF Units
30
JET Units
30
SU PRO/AIR Units
31
Mounting the SU PRO/AIR Radio Unit
32
Mounting the Lightning Protection Units
34
Mounting the LPU on a Pole
34
Connect External Antenna (if Applicable)
37
Waterproofing
37
Connect Radio
38
LFF, SFF and JET Units
38
SU PRO/AIR Units
40
Check Connectivity to Radio
41
Activate Base Station
41
Align Subscriber Unit
41
LFF and SFF Units
42
SU PRO/AIR Units
43
Chapter 3: Safety Practices and Provisions
45
Scope of this Chapter
45
Preventing Overexposure to RF Energy
45
Grounding
45
Protection against Lightning
45
General
46
Internal ESD Protection Circuits
46
Appendix A: Terminology
47
AppendixB:WiringSpecifications
50
B.1 Radio Unit-Poe Cable (HBS and HSU
50
B.2 User Port Connectors
51
B.2.1 LAN Port
51
B.3 DC Power Terminals
52
B.3.1 DC Poe
52
B.4 SU2-AC Power Terminal
52
Appendix C: Setting Antenna Parameters
53
C.1 Antenna Issues
53
C.2 about Single and Dual Antennas
53
C.3 Considerations for Changing Antenna Parameters
55
Appendix D: Regional Notice: French Canadian
57
D.1 Procédures de Sécurité
57
D.2 Installation Sur Pylône Et Mur
59
Radwin 5000 Reference Manual (6 pages)
5 GHz Outdoor PtP/PtMP High Gain Radio Unit
Brand:
Radwin
| Category:
Radio
| Size: 0 MB
Table of Contents
Regulatory Compliance
2
Condition of Use
4
Overview
4
FCC Rules and ISED Regulation Restrictions
4
Antenna
4
Maximum Output Power
5
Certified Antenna
5
Radio Parameters Accessed by End-User
5
Channel Bandwidths and Carrier Frequency Ranges
6
Advertisement
Related Products
RADWIN 5000 HPMP
Radwin 5000 HBS
Radwin 5000 HSU
Radwin 5000 SCB JET Series
Radwin 5000L
Radwin 2000 Alpha INT
Radwin 2000 C PLUS
Radwin TV White Space
Radwin Categories
Microphone system
Radio
Wireless Access Point
Network Router
Wireless Router
More Radwin Manuals
Login
Sign In
OR
Sign in with Facebook
Sign in with Google
Upload manual
Upload from disk
Upload from URL