Sign In
Upload
Manuals
Brands
Overland Storage Manuals
Storage
REO 4600
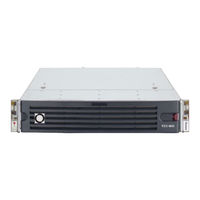
Overland Storage REO 4600 Manuals
Manuals and User Guides for Overland Storage REO 4600. We have
5
Overland Storage REO 4600 manuals available for free PDF download: User Manual, Installing Or Replacing, Installing, Quick Start Manual, Installation
Overland Storage REO 4600 User Manual (151 pages)
With Protection OS 6.0
Brand:
Overland Storage
| Category:
Storage
| Size: 8 MB
Table of Contents
Table of Contents
6
Chapter 1 - Introduction and Requirements
11
Overview
11
Reviewing Pre-Installation Requirements
11
Network
12
Initiators
12
Browser
12
Chapter 2 - Hardware Setup
13
First Things First-Activate Your Warranty
13
Installation Preparation
14
Unpacking the REO Appliance
14
Installing the Rail Kit
14
Attach the Inner Rails to Chassis
15
Squared-Holed Rack Installation
16
Round-Holed Rack Installation (Early Models)
16
Round/Threaded-Holed Rack Installation
17
Rack Installation
18
Installing the Appliance in the Rack
18
Installing Disk Drives
19
Attaching Cables
20
Connecting a UPS
21
Chapter 3 - Powering up the Appliance
22
Disk Insertion Verification
22
Enabling Power
22
Power Supplies
22
Shutting down the Appliance
24
Backup Power
25
UPS Power Monitoring
25
Behavior When Connected to UPS
26
Supported UPS Models
26
Chapter 4 - Configuring Your Appliance
27
Set up Network Addressing
27
Logging on
27
Entering Configuration Settings for the Management Port
29
Configuring the Gbe Data Ports
30
Configuring FC Data Ports
31
Entering the System Information
32
Setting the Local Time
35
RAID Setup
37
RAID Setup with One or more Expansion Units
37
Chapter 5 - Virtual Tape Library Setup
38
Adding a VTL
38
Modifying Target Configuration Settings
41
Adding Initiators
43
Displaying VTL Status
45
Backing up the Appliance Configuration
46
Restoring Configuration Settings from Backup File
47
Chapter 6 - Configuring Virtual Devices
48
Virtual Device Overview
48
Standalone Disk Devices
48
Creating Standalone Disk Devices
48
Modifying Standalone Disk Devices
49
Setting the SCSI Time-Out Value in Windows Environments
50
Standalone Virtual Tape Devices
51
Creating Standalone Tape Devices
51
Dynamic Virtual Tapes
51
Virtual Tapes
52
Modifying Standalone Tape Devices
52
Add Iscsi Initiator Access for Standalone Devices
53
Add FC Initiator Access for Standalone Devices
54
Configuring a Static Route
55
Removing a Route
56
Making a Backup Copy of the Configuration File
56
Restoring Configuration Settings from Backup File
57
Chapter 7 - Working with the Appliance
58
Logging on from any System with Network Access
58
Logging off the GUI
58
Establishing Communication between the Systems
59
Connecting the REO Ports
59
Looking at How Dynamic Tape Devices Work
60
Checking Communication with Other Appliances or Systems
60
Refreshing the GUI Display
61
Reviewing How the Disk Drives Are Numbered
61
Understanding What the Leds Represent
62
Front Panel Leds
62
Back Panel Leds
63
Relocating (Moving) an Appliance
64
Chapter 8 - Expanding Capacity
66
Attaching Expansion Arrays
66
Chapter 9 - Hardware Compression
68
Using Compression
68
GUI Screens Impacted
68
Error Messages
68
Hardware
68
Compression Algorithm
69
Appendix A - Basic Troubleshooting
70
Alerts
70
List of Appliance-Specific Alerts
71
List of Generic SNMP Alerts (Traps
73
Using the Log Files
75
Windows Application Event Log Errors
76
Unable to Access the Appliance
76
Appliance Does Not Start Correctly
76
Unable to Log on to the GUI
77
Internet Explorer Does Not Redirect from IP Address on Windows Server 2003
77
Reset Internet Explorer Security Settings
77
GUI Stops Responding or Displays a Refresh Error
78
Addressing an Unresponsive GUI
78
Addressing a Refresh Error Message
78
Out of Resources Message When Trying to Create a VTL
80
Unexpectedly Logged off
80
Unable to Connect to the Disks Via Windows Explorer
80
Perpetual Loop of Audible Alerts on the Appliance
81
Disabling the Audible Alarm on the Appliance
81
Recover System Page Appears in the GUI
82
Troubleshooting a Disk Drive Problem
84
Rebuilding a RAID Volume (Without Hot Spare
85
Re-Creating a Hot Spare (RAID with Hot Spares
86
Purchasing a Spare Disk Drive
86
Impact of a Power Outage
86
Restoring a Configuration
86
Appendix B - Specifications
88
Capacities, Requirements and Limits
88
Electromagnetic Emissions
90
Notice
90
Industry Canada
90
Industrie Canada
90
FCC Notice
90
Japan Voluntary Control Council for Interference (VCCI
90
Translation
90
Taiwan BSMI Class a Warning
90
Appendix C - Protection os Options
91
Design Overview
91
Title Bar
91
Submenu Bar
92
Content Page
92
Create Tab
93
Virtual Tape Library
93
Dynamic Virtual Tape
95
Virtual Tape
95
Disk
96
Iscsi Initiator Access
97
FC Initiator Access
98
Manage Tab
99
VTL Summary
99
Capacity Summary
99
Resources
99
Current VTL Summary
100
Standalone Device Summary
100
Initiator Summary
101
FC LUN Map
101
System Tab
102
System Summary
103
Disk Management
104
RAID Setup
105
Network Configuration
106
Default Gateway
106
Management Port
106
Data Ports One & Two
106
Static Route Configuration
107
Route Configuration
107
Add Route
107
Remove Route
108
FC Network Configuration
108
System Configuration
109
System Information
110
Logon Information
110
E-Mail Notification
110
SNMP Configuration
110
Set Time
111
Setting the Time Manually
112
Setting the Time by NTP Server
112
Disabling NTP Time Synchronization
112
Maintenance
113
Save/Restore Appliance Configuration
113
Shut Down/Restart
113
Update System
113
System Information
114
RAID Controller Firmware Updates
114
Fibre Channel Firmware Updates
114
Update Using Downloaded File
114
Troubleshoot Tab
115
System Diagnostics
115
Support Request File
115
Ping an IP Address
115
Contact Us
115
Appendix D - Backup Networks
116
Backup Network Concepts
116
Iscsi Protocol
116
Iscsi Architecture
116
Fibre Channel (FC
116
Disk-To-Disk-To-Tape (D2D2T™) Backup Capabilities
117
Redundant Array of Independent Disks (RAID
120
Tape Emulation
121
Virtual Tape Libraries
121
Appendix E - Initiators and Targets
122
About Initiators and Targets
122
Iscsi Naming Conventions
122
Iscsi-Qualified Names
122
IEEE Iscsi Names
123
How Targets and Initiators Are Associated
123
Appendix F - Customer Support
126
Registering Your Product
126
Locating Additional Information for Your Product
127
Updating the Appliance
128
Determining the Version of Your Protection os Software
128
Checking for and Downloading Updates
129
Updating the Appliance
129
Master Glossary & Acronym List
131
Index
147
Advertisement
Overland Storage REO 4600 Quick Start Manual (4 pages)
Brand:
Overland Storage
| Category:
Storage
| Size: 0 MB
Table of Contents
First Things First—Activate Your Warranty!
1
Rack Installation
1
Attach Inner Rails to Chassis
1
Square-Holed Rack Installation
2
Round-Holed Rack Installation (Early Models)
2
Round/Threaded-Holed Rack Installation
2
Installing the Appliance in the Rack
3
Installing Drives
3
Attach the Bezel
4
Attaching Cables
4
Powering up the REO 4600
4
Launching the REO 4600 GUI
4
Additional Information
4
Overland Storage REO 4600 Installing (4 pages)
Brand:
Overland Storage
| Category:
PCI Card
| Size: 0 MB
Table of Contents
Shut down the Server
1
Remove the Chassis Cover
1
Replace a Pcie Card
2
Locate the Card to be Replaced
2
Replace a SAS UIO Module (Snapserver NAS N2000 Only)
2
Replace a RAID Controller (Snapserver SAN S2000 Only)
3
Replace the Journal Drive/Bbu Assembly (Snapserver SAN S2000 Only)
3
Install a New Pcie Card
4
Restore Power to the Server
4
Verify Hardware Compression Status (REO 4600 Only)
4
Replace the Chassis Cover
4
Return Removed Parts to Overland
4
Advertisement
Overland Storage REO 4600 Installing Or Replacing (5 pages)
PCIe Card
Brand:
Overland Storage
| Category:
PCI Card
| Size: 0 MB
Table of Contents
Remove Cover
2
Install a New Card
4
Replace the Cover
4
Power on the Server
5
Overland Storage REO 4600 Installation (3 pages)
Brand:
Overland Storage
| Category:
Racks & Stands
| Size: 0 MB
Table of Contents
Attach the Inner Rails to the Chassis
1
Attach Adapters to Outer Rails (Round-Hole or Threaded Rack Only)
1
Attach Early-Model Adapters to Outer Rails (Round Hole Rack Only)
2
Attach the Outer Rails to the Rack
2
Insert the Server into the Rack
3
Remove the Server from the Rack
3
Advertisement
Related Products
Overland Storage REO 1000
Overland Storage REO 9000
Overland Storage REO Series
Overland Storage REO 4000
Overland Storage Ultamus Raid 1200
Overland Storage 104370-102
Overland Storage LoaderXpress
Overland Storage Categories
Storage
Server
Chassis
Network Storage Server
DC Drives
More Overland Storage Manuals
Login
Sign In
OR
Sign in with Facebook
Sign in with Google
Upload manual
Upload from disk
Upload from URL