Sign In
Upload
Manuals
Brands
Nilfisk-ALTO Manuals
Floor Machine
Floortec 760
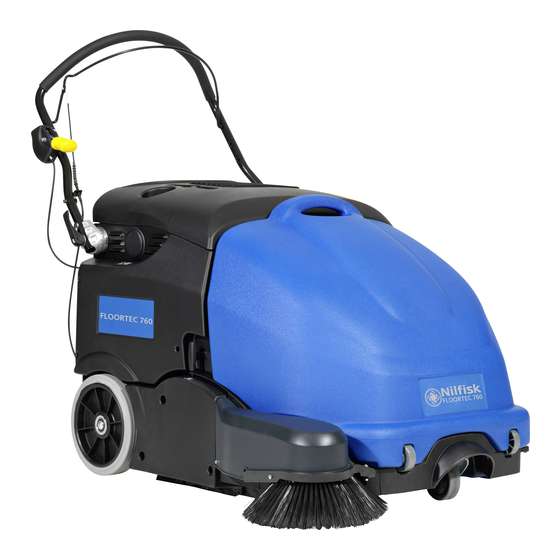
User Manuals: Nilfisk-ALTO Floortec 760 Sweeper
Manuals and User Guides for Nilfisk-ALTO Floortec 760 Sweeper. We have
2
Nilfisk-ALTO Floortec 760 Sweeper manuals available for free PDF download: Service Manual, User Manual
Nilfisk-ALTO Floortec 760 User Manual (92 pages)
Brand:
Nilfisk-ALTO
| Category:
Floor Machine
| Size: 11 MB
Table of Contents
Deutsch
3
Table of Contents
3
Einleitung
4
Ziel und Inhalt der Anleitung
4
Adressaten
4
Aufbewahrung der Anleitung
4
Konformitätserklärung
4
Identifizierungsdaten
4
Andere Referenzanleitungen
4
Ersatzteile und Wartung
4
Änderungen und Technische Verbesserungen
4
Funktionseigenschaften
5
Vereinbarungen
5
Auspacken/Lieferung
5
Sicherheit
5
An dem Gerät Angebrachte Symbole
5
IM Handbuch Verwendete Symbole
6
Allgemeine Hinweise
6
Gerätebeschreibung
8
Geräteaufbau
8
Zubehör/Sonderausstattung
10
Technische Daten
10
Schaltplan
11
Betrieb
12
Batterien eines Neuen Geräts Überprüfen/Vorbereiten
13
Vor dem Einschalten des Geräts
14
Gerät Einschalten und Abstellen
14
Gerät IM Kehrbetrieb
14
Abfallbehälter Entleeren
15
Nach der Gerätebenutzung
15
Schubbewegung der Maschine
15
Lange Stilllegung des Geräts
15
Wartung
15
Übersichtstabelle Planmässige Wartung
16
Ladegerätkabel Überprüfen
16
Batterien Laden
16
Hauptkehrwalzenhöhe Überprüfen und Einstellen
17
Hauptkehrwalze Auswechseln
18
Seitenbesenhöhe Überprüfen und Einstellen
19
Seitenbesen Ausbauen/Einbauen
19
Prüfung und Einstellung der Höhe der Schmutzfangklappen
20
Staubfilter Reinigen und auf Schäden Überprüfen
21
Prüfung der Funktionsfähigkeit des Positionsmikroschalters des Abfallbehälters
22
Prüfung/Wiederherstellung/Auswechseln der Sicherungen
22
Kontrolle des Elektrolytstands der Batterien (nur für Wet-Batterien)
22
Fehlersuche
23
Verschrottung
24
Français
25
Introduction
26
But Et Contenu du Manuel
26
Destinataires
26
Conservation du Manuel
26
Déclaration de Conformité
26
Données D'identification
26
Autres Manuels de Référence
26
Pièces de Rechange Et Entretien
26
Modifications Et Améliorations
26
Capacités Opérationnelles
27
Conventions
27
Sécurité
27
Symboles Visibles Sur la Machine
27
Symboles Utilisés Dans Le Manuel
28
Instructions Générales
28
Déballage / Livraison
27
Description de la Machine
30
Structure de la Machine
30
Accessoires / Options
32
Caractéristiques Techniques
32
Schéma Électrique
33
Utilisation
34
Contrôle / Préparation des Batteries Sur Une Machine Neuve
35
Avant la Mise en Marche
36
Mise en Marche Et Arret de la Machine
36
Machine Au Travail
36
Vidange du Conteneur Déchets
37
Après L'utilisation de la Machine
37
Déplacement Par Poussée de la Machine
37
Inactivité Prolongée de la Machine
37
Entretien
37
Plan D'entretien Programmé
38
Contrôle du Câble du Chargeur de Batterie
38
Chargement des Batteries
38
Contrôle Et Réglage de la Hauteur du Balai Central
39
Remplacement du Balai Central
40
Contrôle Et Réglage de la Hauteur du Balai Latéral
41
Dépose / Repose du Balai Latéral
41
Contrôle Et Réglage des Volets
42
Nettoyage Et Contrôle de L'intégrité du Filtre a Poussière
43
Contrôle de la Fonctionnalité du Microinterrupteur de Position Conteneur Déchets
44
Contrôle / Rétablissement / Remplacement des Fusibles
44
Contrôle du Niveau de L'électrolyte des Batteries (Uniquement Pour Batteries Wet)
44
Dépistage des Pannes
45
Mise À la Ferraille
46
English
47
Introduction
48
Manual Purpose and Contents
48
Target
48
How to Keep this Manual
48
Declaration of Conformity
48
Identification Data
48
Other Reference Manuals
48
Spare Parts and Maintenance
48
Changes and Improvements
48
Operation Capabilities
49
Conventions
49
Unpacking/Delivery
49
Safety
49
Visible Symbols on the Machine
49
Symbols that Appear on this Manual
50
General Instructions
50
Machine Description
52
Machine Structure
52
Accessories/Options
54
Technical Data
54
Machine Material Composition and Recyclability
55
Wiring Diagram
55
Use
56
Battery Check/Setting on a New Machine
57
Before Machine Start-Up
58
Starting and Stopping the Machine
58
Machine Operation
58
Hopper Dumping
59
After Using the Machine
59
Pushing the Machine
59
Machine Long Inactivity
59
Maintenance
59
Scheduled Maintenance Table
60
Battery Charger Cable Check
60
Battery Charging
60
Main Broom Height Check and Adjustment
61
Main Broom Replacement
62
Side Broom Height Check and Adjustment
63
Side Broom Disassembly/Assembly
63
Skirt Check and Adjustment
64
Dust Filter Cleaning and Integrity Check
65
Hopper Position Microswitch Operation Check
66
Fuse Check/Replacement/Reset
66
Battery Electrolyte Level Check (for Wet Batteries Only)
66
Troubleshooting
67
Scrapping
68
Dutch
69
Inleiding
70
Doel en Inhoud Van Deze Handleiding
70
Betreffende Personen
70
Opbergen Van de Handleiding
70
Conformiteitsverklaring
70
Identificatiegegevens
70
Andere Gebruikershandleidingen
70
Vervangingsonderdelen en Onderhoud
70
Modificaties en Verbeteringen
70
Bedrijfscapaciteit
71
Algemene Opmerkingen
71
Veiligheid
71
Symbolen Op de Machine
71
Symbolen in de Handleiding
72
Algemene Instructies
72
Verpakking Verwijderen/Aflevering
71
Beschrijving Van de Machine
74
Bouw Van de Machine
74
Accessoires/Opties
76
Technische Eigenschappen
76
Elektrisch Schema
77
Gebruik
78
Controle / Voorbereidingen Voor Accu's Op Een Nieuwe Machine
79
Voor Het Starten Van de Machine
80
De Machine Starten en Stoppen
80
Machine in Bedrijf
80
De Afvalcontainer Legen
81
Na Gebruik Van de Machine
81
Maximale Voorwaartse Beweging
81
Lange Periode Van Stilstand
81
Onderhoud
81
Onderhoudsschema
82
Controle Van de Kabel Van de Acculader
82
Accu's Opladen
82
De Hoogte Van de Hoofdborstel Controleren en Afstellen
83
De Hoofdborstelvervangen
84
De Hoogte Van de Zijborstel Controleren en Afstellen
85
Demontage/Montage Van de Zijborstel
85
Controle en Afstelling Van de Flaps
86
Reiniging en Controle Van de Integriteit Van Het Stoffilter
87
Controle Van de Werking Van de Microschakelaar Voor de Positie Van de Afvalcontainer
88
Controle / Herstel / Vervanging Van de Zekeringen
88
Controle Van Het Elektrolytpeil Van de Accu's (Alleen Voor Accu's Van Het Type Wet)
88
Storingen Lokaliseren
89
Verwijdering
90
Advertisement
Nilfisk-ALTO Floortec 760 Service Manual (137 pages)
Brand:
Nilfisk-ALTO
| Category:
Floor Machine
| Size: 12 MB
Table of Contents
Service Manual
1
Table of Contents
2
General Information
5
Machine General Description
5
Service Manual Purpose and Field of Application
5
Other Reference Manuals
5
Conventions
6
Service and Spare Parts
6
Serial Number Label
6
Safety
7
Visible Symbols on the Machine
7
Symbols
7
General Instructions
7
Machine Lifting
11
Machine Transportation
11
Machine Nomenclature (Floortec 760 B) (Know Your Machine)
12
Machine Nomenclature (Floortec 760 P) (Know Your Machine)
16
Service and Diagnostic Equipment
20
Technical Data
21
Machine Material Composition and Recyclability
22
Dimensions
23
Maintenance
24
Scheduled Maintenance Table (Floortec 760 B)
24
Scheduled Maintenance Table (Floortec 760 P)
25
Frame System
26
Frame (Main Parts)
26
Dust Control System
27
Functional Description
27
Wiring Diagram (Floortec 760 B with Electric Filtershaker)
27
Wiring Diagram (Floortec 760 B with Manual Filtershaker)
28
Wiring Diagram (Floortec 760 P)
28
Component Locations
29
Maintenance and Adjustments
30
Panel Dust Filter, Cleaning and Integrity Check/Replacement
30
Troubleshooting
32
Removal and Installation
33
Electrical Filter Shaker Motor Amperage Check
33
Electrical Filter Shaker Motor Disassembly/Assembly
35
Specifications
37
Electrical and Control System
38
Functional Description (Floortec 760 B)
38
Electrical Protections
39
Wiring Diagram
40
Wiring Diagram (Floortec 760 B with Electric Filtershaker)
41
Wiring Diagram (Floortec 760 B with Manual Filtershaker)
41
Wiring Diagram (Floortec 760 P)
42
Component Locations (Floortec 760 B)
43
Component Locations (Floortec 760 P)
46
Maintenance and Adjustments
49
Charging the Batteries (Floortec 760 B)
49
Fuse Check/Replacement/Reset (Floortec 760 B)
51
Fuse Check/Replacement/Reset (Floortec 760 P)
53
Troubleshooting (Floortec 760 B)
54
Removal and Installation
55
Battery Installation and Battery Type Setting (WET or GEL) (Floortec 760 B)
55
Machine Check/Setting
57
Main Motor Amperage Check (Floortec 760 B)
59
Dynamotor Voltage Check (Floortec 760 P)
61
Main Motor Carbon Brush Replacement (Floortec 760 B)
63
Dynamotor Carbon Brush Replacement (Floortec 760 P)
64
Main Motor or Fan Removal/Installation (Floortec 760 B)
65
Dynamotor Removal/Installation (Floortec 760 P)
69
Reduction Unit Removal/Installation
73
Main Broom Shaft (Small) Gear Removal/Installation
74
Drive Shaft (Big) Gear Removal/Installation
77
Battery Charger Removal/Installation (Floortec 760 B)
80
Hopper Position Switch Operation Check, Removal/Installation
82
Specifications
84
Petrol Engine System
85
Functional Description
85
Wiring Diagram
85
Component Locations
86
Maintenance and Adjustments
87
Engine RPM Check and Adjustment
87
Troubleshooting
89
Removal and Installation
90
Engine Belt Check/Adjustment/Replacement
90
Petrol Engine Assembly Removal/Installation
93
Specifications
97
Hopper System
98
Functional Description
98
Component Locations
99
Specifications
100
Main Broom System
101
Functional Description
101
Wiring Diagram
101
Component Locations
102
Maintenance and Adjustments
103
Main Broom Height Check and Adjustment
103
Skirt Height Check and Adjustment
104
Troubleshooting
107
Removal and Installation
108
Main Broom Removal/Installation
108
Main Broom Belt Check/Replacement
111
Main Broom Pulley and Hexagonal Drive Hub Replacement
113
Skirt Removal/Installation
114
Specifications
117
Side Broom System
118
Functional Description
118
Battery Version
118
Petrol Version
118
Wiring Diagram (Floortec 760 B)
119
Wiring Diagram (Floortec 760 P)
119
Component Locations
120
Maintenance and Adjustments
121
Side Broom Height Check and Adjustment
121
Troubleshooting
122
Removal and Installation
123
Side Broom Disassembly/Assembly
123
Side Broom Motor Amperage Check
124
Side Broom Reduction Unit Removal/Installation
125
Right Side Broom Control Cable Removal/Installation
126
Side Broom Microswitch Adjustment and Removal/Installation
128
Specifications
130
Wheel System, Traction
131
Functional Description
131
Component Locations
132
Maintenance and Adjustments
133
Troubleshooting
134
Removal and Installation
135
Drive System Control Cable, Disassembly/Assembly
135
Drive Belt, Check/Replacement
136
Specifications
137
Advertisement
Related Products
Nilfisk-ALTO SCRUBTEC 784 L
Nilfisk-ALTO SCRUBTEC 795 S
Nilfisk-ALTO FLOORTEC R 580 P
Nilfisk-ALTO FLOORTEC R 680 B
Nilfisk-ALTO FLOORTEC 350
Nilfisk-ALTO FLOORTEC 480M
Nilfisk-ALTO FLOORTEC 560 P
Nilfisk-ALTO Floortec R 870
Nilfisk-ALTO POSEIDON 7-66
Nilfisk-ALTO ATTIX 761-2MXC
Nilfisk-ALTO Categories
Pressure Washer
Vacuum Cleaner
Floor Machine
Scrubber
Steam Cleaner
More Nilfisk-ALTO Manuals
Login
Sign In
OR
Sign in with Facebook
Sign in with Google
Upload manual
Upload from disk
Upload from URL