Sign In
Upload
Manuals
Brands
Leica Manuals
Digital Camera
V-LUX
Leica V-LUX Manuals
Manuals and User Guides for Leica V-LUX. We have
2
Leica V-LUX manuals available for free PDF download: Instructions Manual
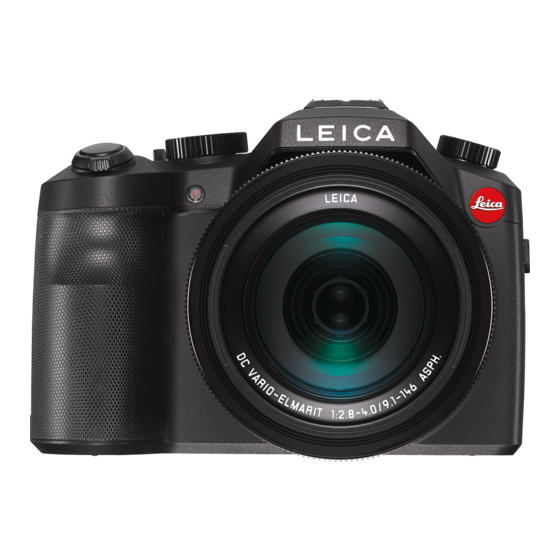
Leica V-LUX Instructions Manual (338 pages)
Leica V-Lux Digital Camera Instructions
Brand:
Leica
| Category:
Digital Camera
| Size: 8 MB
Table of Contents
Contents
2
Table of Contents
4
Contents by Function
9
Before Use
12
Care of the Camera
12
About Condensation
12
Scope of Delivery/Accessories
13
The Main Parts
14
Drive Mode Dial
16
Diopter Adjustment Dial
16
Monitor
17
Shooting with Different Camera Positions
17
Taking Pictures at a High Angle
17
Taking Pictures at a Low Angle
17
Rear Dial
18
Displaying/Not Displaying the Operation Guide
18
Cursor Buttons/Button
19
Preparations before Recording
20
Attaching the Lens Hood
20
Attaching the Lens Cap/The Shoulder Strap
22
Charging the Battery
23
Charging
23
About the Charge Indicator
24
Charging Time
24
Battery Indication
24
Approximate Operating Time and Number of Recordable Pictures
25
Recording Still Pictures
25
Recording Conditions by CIPA Standard
25
Recording Motion Pictures
26
Playback (When Using the Monitor)
26
Inserting and Removing the Card/The Battery
27
About Cards that Can be Used with this Camera
29
About Motion Picture Recording and Speed Class
29
Access to the Card
29
Formatting the Card (Initialization)
30
Approximate Number of Recordable Pictures and Available Recording Time
31
Setting Date/Time (Clock Set)
34
Changing the Clock Setting
35
Setting the Menu
36
Setting Menu Items
36
Quick Menu
39
Customizing Quick Menu
41
Assigning Frequently Used Functions to the Function Buttons
43
The Function Button Settings Available for Recording
44
The Function Button Settings Available for Playback
45
Configuring Basic Settings
46
Entering Text
54
Basic Operation
55
Tips for Taking Good Pictures
55
Camera Direction Detection Function
55
Using the Viewfinder
56
[EVF] Button
56
About Eye Sensor AF
57
Diopter Adjustment
57
Taking a Still Picture
58
About the Focusing Range
59
Selecting the Recording Mode
61
Switching the Information Displayed on the Recording Screen
63
About the Tilt Display
66
Playing Back Pictures/Motion Pictures
67
Using the Playback Zoom
68
Displaying Multiple Screens (Multi Playback)
69
Displaying Pictures by Recording Date (Calendar Playback)
69
Playing Back Motion Pictures
70
Operations During Motion Picture Playback
70
Changing the Information Displayed on the Playback Screen
71
Deleting Pictures
73
To Delete a Single Picture
73
To Delete Multiple Pictures or All the Pictures
74
Recording Modes
75
Using the Snapshot Modes
75
Switching between Snapshot Plus and Snapshot Modes
76
Scene Detection
76
When Recording Motion Pictures
77
About Flash Operation
77
Functions that Work Automatically
78
Menus that Can be Set
79
Recording Night Scenes
80
Combining Pictures into a Single Picture with Rich Gradation
81
Taking a Picture with a Blurred Background (Defocus Control)
82
Changing the Brightness or Color Tone
83
Setting Brightness
83
Setting Color
83
Program Mode
84
Program Shift
85
Aperture-Priority Mode
86
Shutter-Priority Mode
87
Manual Exposure Mode
88
Confirming the Effects of Aperture and Shutter Speed
91
Easily Setting Aperture/Shutter Speed for a Suitable Exposure
92
Using the Scene Modes
93
Switching the Scene Selection Screen Display
93
Clear Portrait
95
Silky Skin
95
Backlit Softness
95
Clear in Backlight
96
Relaxing Tone
96
Sweet Child's Face
96
Distinct Scenery
97
Bright Blue Sky
97
Romantic Sunset Glow
97
VIVID Sunset Glow
97
Glistening Water
98
Clear Nightscape
98
Cool Night Sky
98
Warm Glowing Nightscape
99
Artistic Nightscape
99
Glittering Illuminations
99
Handheld Night Shot
100
Clear Night Portrait
100
Soft Image of a Flower
101
Appetizing Food
102
Cute Dessert
102
Freeze Animal Motion
102
Clear Sports Shot
103
Monochrome
103
Panorama Shot
104
About Playback
106
Using Creative Control Mode
107
Switching the Image Effect (Filter) Selection Screen Display
107
Adjust the Effect to Fit Your Preferences
108
Expressive
109
Retro
109
Old Days
109
High Key
110
Low Key
110
Sepia
110
Dynamic Monochrome
111
Rough Monochrome
111
Silky Monochrome
111
Impressive Art
112
High Dynamic
112
Cross Process
112
Toy Effect
113
Toy Pop
113
Bleach Bypass
113
Miniature Effect
114
Setting the Type of Defocus
114
Soft Focus
115
Fantasy
115
Star Filter
115
One Point Color
116
Set the Color to Retain
116
Sunshine
117
Setting the Light Source
117
Recording Motion Pictures with Manually Set Aperture Value/Shutter Speed
118
Recording Slow Motion Pictures
119
Registering Your Preffered Settings
120
Registering Personal Menu Settings
120
Using Registered Custom Settings
121
Changing the Settings
121
Image and Picture Quality Settings
122
Adjusting the Picture Quality by Adding an Effect
122
Adjusting the Picture Quality
123
Registering Settings to Custom
123
Adjusting Bright/Dark Sections
124
Setting the White Balance
126
Auto White Balance
127
Setting the White Balance Manually
128
Setting the Color Temperature
128
Finely Adjusting the White Balance
129
White Balance Bracketing
130
Setting the Aspect Ratio
131
Setting the Resolution
132
Setting the Compression Rate
133
Using Image Correction Functions
135
Compensating the Contrast and Exposure
135
Raising the Resolution
135
Combining Pictures with Different Exposures
136
What Is HDR?
136
Reducing the Long Shutter Noise Caused by Slower Shutter Speeds
137
Setting the Color Space
138
Focus and Exposure Settings
139
Using Autofocus
139
About the Focus Modes
140
Autofocus Modes
141
Setting the Shape of the AF Area
144
Setting up the Position/Changing the Size of the AF Area
146
Setting the Desired Focus Method
149
Turning On/Not Turning on the AF Assist Lamp
150
Recording/Not Recording Even When Focus Is Not Achieved
150
Adjusting/Not Adjusting the Focus Manually after Achieving Autofocus Operation
150
Manual Focusing
151
Highlighting/Not Highlighting In-Focus Parts
153
MF Assist
154
Displaying the MF Assist
154
Changing the Display of the MF Assist
154
Moving the Enlarged Area
154
Technique for Manual Focus
155
Taking Close-Up Pictures
156
Focus and Exposure Memory Lock
158
Exposure Compensation
160
Setting the ISO Sensitivity
161
Setting the Upper ISO Sensitivity Limit
163
Setting the ISO Sensitivity Setting Increments
163
Selecting the Exposure Metering Mode
164
Shutter and Drive Settings
165
Setting the Shutter Type
165
Selecting a Drive Mode
167
Using Continuous Mode
168
Using Auto Bracket
171
Using the Self-Timer
173
Taking Pictures Automatically at Set Intervals
174
Creating Stop Motion Pictures
178
Changing the Settings of Stop Motion Animation
180
Adding Pictures to the Stop Motion Animation Group
180
Functions Customized for Various Subjects and Purposes
182
Making Multiple Exposures on One Picture
182
About Automatic Gain Control Setting
183
Combining RAW Images on the Card
183
Disabling Operational Sounds and the Light Sources at Once
184
Taking Pictures of Registered Faces
185
Face Settings
187
Point of Recording When Registering the Face Images
187
When a Face Is Not Recognized During Recording
187
Recording Profiles of Children and Pets on Images
190
Using Screens and Displays Suitable for Recording
191
Recording While Monitoring Camera Images
192
Switching the Information Displayed
192
Optical Image Stabilizer
193
Using the Lens' Zoom Function
195
Optical Zoom
195
Extended Optical Zoom
196
Intelligent Zoom
196
Changing the Zoom Setting
198
Using the Flash
199
Opening/Closing the Built-In Flash Unit
199
The Available Flash Range
199
Changing the Flash Modes
201
Shutter Speed for each Flash Mode
202
Available Flash Modes According to the Recording Mode
202
Setting 2Nd Curtain Synchro
204
Flash Exposure Compensation
205
Synchronizing the Output of the Built-In Flash Unit to the Set Exposure Compensation
205
Changing the Firing Mode
206
Correcting Red Eyes
206
Setting the Luminosity Ratio
206
Setting the Resolution and Frame Rate
207
About the Compatibility of the Recorded Motion Pictures
208
How to Focus When Recording a Motion Picture
209
Indication of the Icon
209
Recording Motion Pictures in 4K
213
Recording Still Pictures While Recording Motion Pictures
214
Using the Motion Picture Menu
216
Level Shot
217
Luminance Level
217
Flkr Decrease
217
MIC Level Disp.
218
MIC Level Adj.
218
Adjusting the Sound Input Level Automatically
218
Wind Cut
219
Zoom MIC
219
Playing Back and Editing Images
220
Playing Back Group Pictures
220
Continuously Playing Back Group Pictures
220
Operation During Group Pictures Playback
220
Playing Back each Group Pictures
221
Creating Still Pictures from a Motion Picture
222
Using the Playback Menu
223
Slide Show
223
Changing the Slide Show Settings
224
Playback Mode
225
Location Logging
226
To Pause the Recording of Location Information
226
To Delete the Received Location Information
226
RAW Processing
227
Title Edit
230
Text Stamp
231
Video Divide
234
Time Lapse Video
235
Stop Motion Video
235
Resize
236
Cropping
237
Rotate
238
Favorite
239
Print Set
240
Canceling All the Print Set Settings
241
To Print the Date
241
Protect
242
Canceling All the Protect Settings
242
Face Rec Edit
243
Picture Sort
243
Delete Confirmation
244
Using the Wi-Fi Function
245
Wi-Fi Function/Nfc Function
245
This Camera Is Compatible with NFC
246
About the Wi-Fi Connection Lamp
246
About the Wifi Button
246
Describing Method
247
What You Can Do with the Wi-Fi Function
249
Controlling with a Smartphone/Tablet
250
Installing the Smartphone/Tablet App "Image Shuttle"
250
Connecting to a Smartphone/Tablet
251
Changing the Connection Method
254
Terminating the Connection
254
Connecting to a Smartphone/Tablet by Using the NFC Function
255
Taking Pictures Via a Smartphone/Tablet (Remote Recording)
256
Playing Back Images in the Camera
257
Saving Images Stored in the Camera
257
Transferring Images Stored in the Camera Easily
258
Sending Images in the Camera to an SNS
259
Adding Location Information to Images Stored in the Camera from a Smartphone/Tablet
259
Starting Recording Location Information
260
Finishing Recording the Location Information
260
Sending and Writing Location Information
260
Sending Images to a Smartphone/Tablet by Controlling the Camera
261
Methods for Sending and Images that Can be Sent
261
Sending an Image each Time a Recording Is Made
262
Sending Selected Images
263
About Connections
264
Connecting from Your House (Via the Network)
265
If You Are Not Sure about the WPS Compatibility
266
Connecting from a Location Away from Your House (Direct Connection)
267
Connecting Quickly with the same Settings as the Previous Ones
268
Editing the Items Registered to Favories
269
About Settings for Sending Images
270
Sending Images While Recording
271
Send Images Stored in the Camera
271
Changing the Settings for Sending Images
271
Wi-Fi Setup Menu
272
Connecting to Other Equipment
274
Watching Motion Pictures in 4K
274
Playing Back on a TV
274
Storing 4K Motion Pictures
274
Playing Back Picture on a TV
275
To Connect with an HDMI Micro Cable
275
To Connect with an AV Cable
276
Using HDTV Link (HDMI)
278
Other Linked Operations
279
Turning the Camera off
279
Automatic Input Switching
279
Copying the Recorded Image Data to a Computer
280
Installing the Software
280
Copying the Data
281
Copying to a Computer Without Using the Available Software
282
Connection in Hte PTP Mode
282
Saving Still Pictures and Motion Pictures on a Recorder
283
Dubbing with Non-Compatible Equipment
283
Printing the Pictures
284
Selecting a Single Picture and Printing It
286
Selecting Multiple Pictures and Printing Them
286
Print Settings
287
Layout Printing
289
Miscellaneous
290
Accessories
290
External Flash Units
290
Using the Compatible Flash Units
290
Monitor/Viewfinder Displays
292
In Recording
292
In Playback
296
Detailed Information Display
297
Histogram Display
297
Message Displays
298
Menu List
302
Motion Picture
304
Custom
305
Setup
308
Playback
310
Troubleshooting
311
Battery and Power Source
311
Recording
311
Motion Pictures
314
Wi-Fi Function
320
General Tips for Using a Wi-Fi Connection
320
About a Wireless Access Point
320
TV, Computer and Printer
322
Cautions for Use
326
Optimal Use of the Camera
326
Cleaning
327
About the Monitor/Viewfinder
327
About the Lens
327
Battery
328
Charger
328
Card
329
About the Personal Information
330
When Not Using the Camera for a Long Period of Time
331
About the Picture Data
331
Technical Data
336
Advertisement
Leica V-LUX Instructions Manual (335 pages)
Leica V-LUX
Brand:
Leica
| Category:
Digital Camera
| Size: 9 MB
Table of Contents
Finding the Information You Need
2
How to Use These Instructions
3
Table of Contents
4
Contents by Function
9
1 Before Use
12
Care of the Camera
12
Scope of Delivery / Accessories
13
The Main Parts
14
2 Preparations before Recording
20
Attaching the Lens Hood
20
Attaching the Lens Cap/The Shoulder Strap
22
Charging the Battery
23
Charging
23
Approximate Operating Time and Number of Recordable Pictures
25
Inserting and Removing the Card/The Battery
27
About Cards that Can be Used with this Camera
29
Formatting the Card (Initialization)
30
Approximate Number of Recordable Pictures and Available Recording Time
31
Setting Date/Time (Clock Set)
34
Changing the Clock Setting
35
Setting the Menu
36
Setting Menu Items
36
Quick Menu
39
Customizing Quick Menu
41
Assigning Frequently Used Functions to the Function Buttons
43
Configuring Basic Settings (Setup Menu)
46
Entering Text
47
Entering Text
54
3 Basic Operation
55
Tips for Taking Good Pictures
55
Camera Direction Detection Function
55
Using the Viewfinder
56
[EVF] Button (Switching between Monitor and Viewfinder)
56
About Eye Sensor AF
57
Taking a Still Picture
58
Recording Motion Pictures
60
Selecting the Recording Mode
61
Switching the Information Displayed on the Recording Screen
63
Playing Back Pictures/Motion Pictures
67
Playing Back Pictures
67
Playing Back Motion Pictures
70
Changing the Information Displayed on the Playback Screen
71
Deleting Pictures
73
4 Recording Modes
75
Using the Snapshot Modes
75
Backlight Compensation
79
Recording Night Scenes
80
Combining Pictures into a Single Picture with Rich Gradation
81
Taking a Picture with a Blurred Background (Defocus Control)
82
Changing the Brightness or Color Tone
83
Program Mode
84
Program Shift
85
Aperture-Priority Mode
86
Shutter-Priority Mode
87
Manual Exposure Mode
88
Confirming the Effects of Aperture and Shutter Speed (Preview Mode)
91
Easily Setting Aperture/Shutter Speed for a Suitable Exposure (One Push AE)
92
Using the Scene Modes
93
Glistening Water
98
Clear Nightscape
98
Warm Glowing Nightscape
99
Artistic Nightscape
99
Glittering Illuminations
99
Handheld Night Shot
100
Clear Night Portrait
100
Appetizing Food
102
Cute Dessert
102
Freeze Animal Motion
102
Using Creative Control Mode
107
Setting Brightness
108
Recording Motion Pictures with Manually Set Aperture Value/Shutter Speed
118
Recording Slow Motion Pictures
119
Registering Your Preferred Settings (Custom Mode)
120
Registering Personal Menu Settings
120
Using Registered Custom Settings
121
Adjusting the Picture Quality by Adding an Effect ([Photo Style])
122
5 Image and Picture Quality Settings
123
Adjusting Bright/Dark Sections ([Highlight Shadow])
124
Setting the White Balance
126
Setting the Aspect Ratio
131
Setting the Resolution
132
Setting the Compression Rate
133
Using Image Correction Functions
135
Compensating the Contrast and Exposure ([I.dynamic])
135
Raising the Resolution ([I.resolution])
135
Combining Pictures with Different Exposures ([HDR])
136
Reducing the Long Shutter Noise Caused by Slower Shutter Speeds
137
Setting the Color Space
138
6 Focus and Exposure Settings
139
Using Autofocus
139
About the Focus Modes (AFS/AFF/AFC)
140
Autofocus Modes
141
Setting the Desired Focus Method
149
Manual Focusing
151
Taking Close-Up Pictures
156
Focus and Exposure Memory Lock (AF/AE Lock)
158
Exposure Compensation
160
Setting the ISO Sensitivity
161
Setting the Upper ISO Sensitivity Limit
163
Setting the ISO Sensitivity Setting Increments
163
Extending ISO Sensitivity
163
Selecting the Exposure Metering Mode
164
7 Shutter and Drive Settings
165
Setting the Shutter Type
165
Selecting a Drive Mode
167
Using Continuous Mode
168
Using Auto Bracket
171
Using the Self-Timer
173
Taking Pictures Automatically at Set Intervals
174
Creating Stop Motion Pictures
178
8 Functions Customized for Various Subjects and Purposes
182
Making Multiple Exposures on One Picture
182
Disabling Operational Sounds and the Light Sources at Once
184
Taking Pictures of Registered Faces
185
Recording Profiles of Children and Pets on Images
190
Using Screens and Displays Suitable for Recording
191
Recording While Monitoring Camera Images
192
9 Stabilizer, Zoom and Flash
193
Optical Image Stabilizer
193
Using the Lens' Zoom Function
195
Using the Flash
199
Changing the Flash Modes
201
Setting 2Nd Curtain Synchro
204
Flash Exposure Compensation
205
Synchronizing the Output of the Built-In Flash Unit to the Set Exposure Compensation
205
Changing the Firing Mode (Manual Flash)
206
Correcting Red Eyes
206
10 Recording Motion Pictures
207
Setting the Resolution and Frame Rate
207
How to Focus When Recording a Motion Picture ([Continuous AF])
209
[Format]
209
Recording Motion Pictures
210
Recording Motion Pictures in 4K
213
Recording Still Pictures While Recording Motion Pictures
214
Using the [Motion Picture] Menu
216
[Rec Quality]
216
[Exposure Mode]
216
[High Speed Video]
216
[Picture Mode]
216
[Continuous AF]
216
[Level Shot]
217
[Luminance Level]
217
[Flkr Decrease]
217
[MIC Level Disp.]
218
[MIC Level Adj.]
218
Adjusting the Sound Input Level Automatically ([MIC Level Limiter])
218
[Wind Cut]
219
[Zoom MIC]
219
11 Playing Back and Editing Images
220
Playing Back Group Pictures
220
Creating Still Pictures from a Motion Picture
222
Using the [Playback] Menu
223
[Slide Show]
223
[Playback Mode]
225
[Location Logging]
226
[RAW Processing]
227
[Title Edit]
230
[Text Stamp]
231
[Video Divide]
234
[Time Lapse Video]
235
[Stop Motion Video]
235
[Resize]
236
[Cropping]
237
[Rotate]/[Rotate Disp.]
238
[Favorite]
239
[Print Set]
240
[Protect]
242
[Face Rec Edit]
243
[Picture Sort]
243
[Delete Confirmation]
244
12 Using the Wi-Fi Function
245
Wi-Fi R Function/Nfc Function
245
What You Can Do with the Wi-Fi Function
249
Controlling with a Smartphone/Tablet
250
Installing the Smartphone/Tablet App "Image Shuttle
250
Connecting to a Smartphone/Tablet
251
Taking Pictures Via a Smartphone/Tablet (Remote Recording)
256
Playing Back Images in the Camera
257
Saving Images Stored in the Camera
257
Sending Images in the Camera to an SNS
259
Adding Location Information to Images Stored in the Camera from a Smartphone/Tablet
259
Sending Images to a Smartphone/Tablet by Controlling the Camera
261
About Connections
264
Connecting from Your House (Via the Network)
265
Connecting from a Location Away from Your House (Direct Connection)
267
Connecting Quickly with the same Settings as the Previous Ones ([Select a Destination from History]/[Select a Destination from Favorite])
268
About Settings for Sending Images
270
[Wi-Fi Setup] Menu
272
13 Connecting to Other Equipment
274
Enjoying Motion Pictures in 4K
274
Playing Back Pictures on a TV
275
Using HDTV Link (HDMI)
278
Automatic Input Switching
279
Copying the Recorded Image Data to a Computer
280
Saving Still Pictures and Motion Pictures on a Recorder
283
Printing the Pictures
284
14 Miscellaneous
290
Accessories
290
Monitor/Viewfinder Displays
292
Message Displays
298
Menu List
302
[Rec]
302
[Motion Picture]
304
[Custom]
305
[Setup]
308
[Playback]
310
Troubleshooting
311
Motion Pictures
314
Cautions for Use
326
Leica Service Addresses
334
Advertisement
Related Products
Leica V-Lux 30
Leica V-LUX 2
Leica V-LUX 1
Leica V-Lux 3
Leica V-LUX 20
Leica V-LUX 40
Leica V-LUX 5
Leica V-LUX 4
Leica VT1200
Leica VT1200 S
Leica Categories
Digital Camera
Microscope
Measuring Instruments
Laboratory Equipment
Laser Level
More Leica Manuals
Login
Sign In
OR
Sign in with Facebook
Sign in with Google
Upload manual
Upload from disk
Upload from URL