Sign In
Upload
Manuals
Brands
Kramer Manuals
Matrix Switcher
VP-16x18AK
Kramer VP-16x18AK Manuals
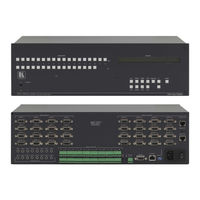
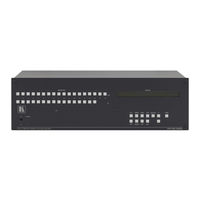
Manuals and User Guides for Kramer VP-16x18AK. We have
2
Kramer VP-16x18AK manuals available for free PDF download: User Manual
Kramer VP-16x18AK User Manual (59 pages)
user manual for Matrix switcher
Brand:
Kramer
| Category:
Matrix Switcher
| Size: 1 MB
Table of Contents
Table of Contents
2
1 Introduction
5
2 Getting Started
5
Recycling Kramer Products
5
Quick Start
6
3 Overview
8
Recommendations for Best Performance
9
Shielded Twisted Pair and Unshielded Twisted Pair
9
4 Defining the VP-16X18Ak 16 X 18 PC Uxga/Audio Router
10
Figure 1: VP-16X18Ak 16 X 18 PC Uxga/Audio Router Front Panel
10
Table 1: VP-16X18Ak 16 X 18 PC Uxga/Audio Router Front Panel Features
10
Figure 2: VP-16X18Ak 16 X 18 PC Uxga/Audio Router Rear Panel
12
Table 2: VP-16X18Ak 16 X 18 PC Uxga/Audio Router Rear Panel Features
13
Using the IR Transmitter
14
5 Installing the VP-16X18Ak in a Rack
15
6 Connecting and Configuring the VP-16X18Ak
16
Connecting the VP-16X18Ak
16
Connecting the Audio Outputs to Balanced/Unbalanced Acceptors
17
Figure 3: Connecting the VP-16X18Ak 16 X 18 PC Uxga/Audio Router
17
Figure 4: Connecting to a Balanced Acceptor
17
Connecting to the VP-16X18Ak Via RS-232
18
Connecting to the VP-16X18Ak Via RS-485
18
Figure 5: Connecting to an Unbalanced Acceptor
18
Connecting to the VP-16X18Ak Via the Ethernet Port
19
Connecting Directly to the Ethernet Port
19
Figure 6: Local Area Connection Properties Window
20
Figure 7: Internet Protocol (TCP/IP) Properties Window
20
Connecting Via a Network Hub, Switch, or Router
21
Configuring the Ethernet Port on the VP-16X18Ak Using K-Upload
21
Setting the RS-485 Termination and Machine Number DIP-Switches
21
Figure 8: VP-16X18Ak DIP-Switches
21
Table 3: DIP-Switch Settings
21
Table 4: Machine Number DIP-Switch Settings
22
7 Operating the VP-16X18Ak Locally Via the Front Panel Buttons
23
The Status Display
23
Switching Inputs to Outputs
23
The at Once and Confirm Modes
24
Toggling between at Once and Confirm Modes
24
Confirming a Switching Action
24
Setting the Audio Gain for Inputs and Outputs
25
Audio Output Bass and Treble Level Setting
25
Setting the Audio-Follow-Video or Breakaway Option
26
Setting the Audio-Follow-Video Option
26
Setting the Breakaway Option
26
Storing and Recalling Setup Configurations
26
Storing a Setup Configuration
27
Recalling a Setup Configuration
27
Locking and Unlocking the Front Panel Buttons
27
Reading and Writing the EDID
27
8 Operating the VP-16X18Ak Remotely
28
Operating the VP-16X18Ak Via RS-232
28
Figure 9: Control Configuration Via RS-232
29
9 Operating the VP-16X18Ak Remotely Using a Web Browser
30
Connecting to the VP-16X18Ak Via Your Browser
30
Figure 10: Java Test Page Success Message
30
Figure 11: Entering the IP Address in the Address Bar
30
Figure 12: the Loading Page
31
Figure 13: First Time Security Warning
31
The Main Switching Matrix Page
32
Figure 14: Main Switching Matrix Page
32
Switching an Input to an Output
33
Setting the AFV Mode
33
Figure 15: Selecting a Switching Point on the Matrix
33
Figure 16: Switching an Input to an Output
33
Operating in the Offline Mode
34
Figure 17: AFV Mode Warning
34
Figure 18: AFV Mode Audio Channels Switched
34
Storing and Recalling Setups
35
Locking the Front Panel Buttons
37
Audio Input Gain Control Page
37
The Configuration Page
38
10 Firmware Upgrade Using K-Upload
39
11 Technical Specifications
40
Table 5: Technical Specifications of the VP-16X18Ak
40
12 Default Communication Parameters
41
13 Factory Default EDID
41
Table 6: Communication Parameters
41
14 Table of ASCII Codes for Serial Communication (Protocol 3000)
43
Table 7: VP-16X18Ak Video Signal Codes for Protocol 3000
43
Table 8: VP-16X18Ak Audio Signal Codes for Protocol 3000
43
Table 9: VP-16X18Ak Audio Input Gain Codes
43
15 Table of Hex Codes for Serial Communication (Protocol 2000)
44
Table 10: VP-16X18Ak Audio Output Gain Codes
44
Table 11: VP-16X18Ak Hex Codes for Switching Video Channels Via RS-232/RS-485
44
Table 12: VP-16X18Ak Hex Codes for Switching Audio Channels Via RS-232/RS-485
44
Table 13: VP-16X18Ak Hex Codes for Increasing/Decreasing the Audio Input Gain
44
Table 14: VP-16X18Ak Hex Codes for Setting the Audio Input Gain
45
Table 15: VP-16X18Ak Hex Codes for Increasing/Decreasing the Output Gain
45
Table 16: VP-16X18Ak Hex Codes for Setting the Audio Output Gain
45
16 Kramer Protocol
46
Switching Protocols
46
Switching Protocols Via the Front Panel Buttons
46
Switching Protocols Via Protocol Commands
46
Kramer Protocol 3000
46
Protocol 3000 Syntax
47
Command Parts Details
47
Table 17: Instruction Codes for Protocol 3000
48
Kramer Protocol 2000
54
Kramer: Simple Creative Technology
54
Table 18: Protocol Definitions
54
Table 19: Instruction Codes for Protocol 2000
54
Advertisement
Kramer VP-16x18AK User Manual (60 pages)
16 x 18 PC UXGA/Audio Router
Brand:
Kramer
| Category:
Matrix Switcher
| Size: 2 MB
Table of Contents
Table of Contents
2
Introduction
5
Getting Started
5
Achieving the Best Performance
6
Safety Instructions
6
Recycling Kramer Products
7
Quick Start
7
Overview
9
Shielded Twisted Pair and Unshielded Twisted Pair
10
Defining the VP-16X18Ak 16 X 18 PC Uxga/Audio Router
11
Figure 1: VP-16X18Ak 16 X 18 PC Uxga/Audio Router Front Panel
11
Table 1: VP-16X18Ak 16 X 18 PC Uxga/Audio Router Front Panel Features
12
Figure 2: VP-16X18Ak 16 X 18 PC Uxga/Audio Router Rear Panel
13
Table 2: VP-16X18Ak 16 X 18 PC Uxga/Audio Router Rear Panel Features
14
Using the IR Transmitter
15
Installing the VP-16X18Ak in a Rack
16
Connecting and Configuring the VP-16X18Ak
17
Connecting the VP-16X18Ak
17
Connecting the Audio Outputs to Balanced/Unbalanced Acceptors
18
Figure 3: Connecting the VP-16X18Ak 16 X 18 PC Uxga/Audio Router
18
Figure 4: Connecting to a Balanced Acceptor
18
Connecting to the VP-16X18Ak Via RS-232
19
Connecting to the VP-16X18Ak Via RS-485
19
Figure 5: Connecting to an Unbalanced Acceptor
19
Connecting to the VP-16X18Ak Via the Ethernet Port
20
Connecting Directly to the Ethernet Port
20
Figure 6: Local Area Connection Properties Window
21
Figure 7: Internet Protocol (TCP/IP) Properties Window
21
Connecting Via a Network Hub, Switch, or Router
22
Configuring the Ethernet Port on the VP-16X18Ak Using K-Upload
22
Setting the RS-485 Termination and Machine Number DIP-Switches
22
Figure 8: VP-16X18Ak DIP-Switches
22
Table 3: DIP-Switch Settings
22
Table 4: Machine Number DIP-Switch Settings
23
Operating the VP-16X18Ak Locally Via the Front Panel Buttons
24
The Status Display
24
Switching Inputs to Outputs
24
The at Once and Confirm Modes
25
Toggling between at Once and Confirm Modes
25
Confirming a Switching Action
25
Setting the Audio Gain for Inputs and Outputs
26
Audio Output Bass and Treble Level Setting
26
Setting the Audio-Follow-Video or Breakaway Option
27
Setting the Audio-Follow-Video Option
27
Setting the Breakaway Option
27
Storing and Recalling Setup Configurations
27
Storing a Setup Configuration
28
Recalling a Setup Configuration
28
Locking and Unlocking the Front Panel Buttons
28
Operating the VP-16X18Ak Remotely
29
Operating the VP-16X18Ak Via RS-232
29
Figure 9: Control Configuration Via RS-232
30
Operating the VP-16X18Ak Remotely Using a Web Browser
31
Connecting to the VP-16X18Ak Via Your Browser
31
Figure 10: Java Test Page Success Message
31
Figure 11: Entering the IP Address in the Address Bar
31
Figure 12: the Loading Page
32
Figure 13: First Time Security Warning
32
The Main Switching Matrix Page
33
Figure 14: Main Switching Matrix Page
33
Switching an Input to an Output
34
Setting the AFV Mode
34
Figure 15: Selecting a Switching Point on the Matrix
34
Figure 16: Switching an Input to an Output
34
Operating in the Offline Mode
35
Figure 17: AFV Mode Warning
35
Figure 18: AFV Mode Audio Channels Switched
35
Storing and Recalling Setups
36
Locking the Front Panel Buttons
38
Audio Input Gain Control Page
38
The Configuration Page
39
Firmware Upgrade Using K-Upload
40
Technical Specifications
41
Table 5: Technical Specifications of the VP-16X18Ak
41
Default Communication Parameters
42
Factory Default EDID
42
Table 6: Communication Parameters
42
Table of ASCII Codes for Serial Communication (Protocol 3000)
44
Table 7: VP-16X18Ak Video Signal Codes for Protocol 3000
44
Table 8: VP-16X18Ak Audio Signal Codes for Protocol 3000
44
Table 9: VP-16X18Ak Audio Input Gain Codes
44
Table of Hex Codes for Serial Communication (Protocol 2000)
45
Table 10: VP-16X18Ak Audio Output Gain Codes
45
Table 11: VP-16X18Ak Hex Codes for Switching Video Channels Via RS-232/RS-485
45
Table 12: VP-16X18Ak Hex Codes for Switching Audio Channels Via RS-232/RS-485
45
Table 13: VP-16X18Ak Hex Codes for Increasing/Decreasing the Audio Input Gain
45
Table 14: VP-16X18Ak Hex Codes for Setting the Audio Input Gain
46
Table 15: VP-16X18Ak Hex Codes for Increasing/Decreasing the Output Gain
46
Table 16: VP-16X18Ak Hex Codes for Setting the Audio Output Gain
46
Kramer Protocol
47
Switching Protocols
47
Switching Protocols Via the Front Panel Buttons
47
Switching Protocols Via Protocol Commands
47
Kramer Protocol 3000
47
Protocol 3000 Syntax
48
Command Parts Details
48
Table 17: Instruction Codes for Protocol 3000
49
Kramer Protocol 2000
55
Table 18: Protocol Definitions
55
Table 19: Instruction Codes for Protocol 2000
56
Advertisement
Related Products
Kramer VP-1608
Kramer VP-16X18AK/110V
Kramer VP-12x8
Kramer VP-128H
Kramer VP-4x4
Kramer VP-32K
Kramer VP-436
Kramer VP-88ETH
Kramer VP-84ETH
Kramer VP-727
Kramer Categories
Matrix Switcher
Switch
Media Converter
Amplifier
Receiver
More Kramer Manuals
Login
Sign In
OR
Sign in with Facebook
Sign in with Google
Upload manual
Upload from disk
Upload from URL