Sign In
Upload
Manuals
Brands
Kramer Manuals
Matrix Switcher
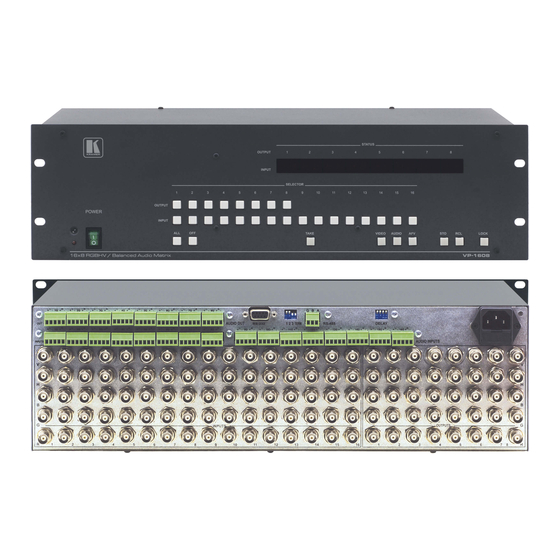
VP-1608
Kramer VP-1608 Manuals
Manuals and User Guides for Kramer VP-1608. We have
3
Kramer VP-1608 manuals available for free PDF download: User Manual
Kramer VP-1608 User Manual (42 pages)
16x8 RGBHV/Balanced Audio Matrix
Brand:
Kramer
| Category:
Matrix Switcher
| Size: 4 MB
Table of Contents
Table of Contents
2
1 Introduction
4
2 Getting Started
4
Quick Start
5
3 Overview
6
4 Your VP-1608 16X8 Rgbhv/Balanced Audio Matrix
6
Figure 1: VP-1608 16X8 Rgbhv/Balanced Audio Matrix
7
Table 1: Front Panel VP-1608 16X8 Rgbhv/Balanced Audio Matrix Features
8
Figure 2: VP-1608 Underside Flash Program Switches
9
Table 2: Rear Panel VP-1608 16X8 Rgbhv/Balanced Audio Matrix Features
9
Table 3: VP-1608 Underside (Flash Program Switches) Features
9
5 Installing the VP-1608 in a Rack
10
6 Connecting a VP-1608 16X8 Rgbhv/Balanced Audio Matrix
11
Figure 3: Connecting the VP-1608
12
Connecting the Balanced/Unbalanced Stereo Audio Input/Output
13
Controlling Via RS-232 (for Example, Using a PC)
13
Figure 4: Connecting the Balanced Stereo Audio Input/Output
13
Figure 5: Connecting the Unbalanced Stereo Audio Input
13
Figure 6: Connecting an Unbalanced Stereo Audio Output
13
Controlling Via RS-485
14
Figure 7: Connecting a PC Without Using a Null-Modem Adapter
14
Setting the MACHINE # DIP-Switches
15
Figure 8: Controlling Via RS-485 (for Example, Using an RC-3000)
15
Table 4: MACHINE # DIP-Switch Settings
15
Setting the DELAY DIP-Switches
16
7 Controlling 16X8 Rgbhv/Balanced Audio Matrix Units
16
Controlling from a PC or Serial Controller
16
Table 5: DELAY DIP-Switch Settings
16
Controlling Via an RS-485 Controller
17
Figure 9: Control Configuration Via RS-232 and RS-485
17
Figure 10: Controlling Via an RS-485 Controller
19
8 Operating Your VP-1608 16X8 Rgbhv/Balanced Audio Matrix
20
Choosing the Audio-Follow-Video or Breakaway Option
20
Setting the Audio-Follow-Video Option
20
Figure 11: DIP-Switch Setup on a Single Machine
20
Setting the Breakaway Option
21
Switching OUT-IN Combinations
21
Confirming Settings
21
Toggling between the at ONCE and CONFIRM Modes
22
Confirming a Switching Action
22
Storing/Recalling Input/Output Configurations
22
Storing an Input/Output Configuration
23
Recalling an Input/Output Configuration
23
Deleting an Input/Output Configuration
23
Adjusting the Audio Gain Control
23
Locking and Unlocking the Front Panel
24
Resetting the VP-1608 16X8 Rgbhv/Balanced Audio Matrix
24
Resetting to the Current Status
24
Resetting to the Factory Default State
24
Displaying Unit Characteristics
25
9 Flash Memory Upgrade
25
Downloading from the Internet
25
Figure 12: VP-1608 Unit Characteristics
25
Connecting the PC to the RS-232 Port
26
Upgrading the Firmware
26
Figure 13: VP-1608 Underside Flash Program Switches Set for Upgrade
26
Figure 14: Splash Screen
27
Figure 15: Atmel - Flip Window
27
Figure 16 Device Selection Window
27
Figure 17: Device Selection Window
28
Figure 18: Loading the Hex
28
Figure 19: RS-232 Window
29
Figure 20: Atmel - Flip Window (Connected)
29
Figure 21: Atmel - Flip Window (Operation Completed)
30
10 Technical Specifications
31
Table 6: Technical Specifications of the VP-1608
31
3 Table of Hex Codes for Serial Communication
32
Table 7: VP-1608 Hex Codes for Switching Via RS-232/RS-485 in Breakaway Mode
32
12 Hex Tables for Audio Input/Output Gain Control
33
Hex Tables for Audio Input Gain Control
33
Table 8: VP-1608 Hex Codes for Audio Input Gain Control
34
Hex Tables for Audio Output Gain Control
35
Table 9: VP-1608 Hex Codes for Audio Output Gain Control
36
13 Kramer Protocol 2000
37
Table 10: Protocol Definitions
37
Table 11: Instruction Codes for Protocol 2000
38
Advertisement
Kramer VP-1608 User Manual (43 pages)
16x8 RGBHV / Balanced Audio Matrix
Brand:
Kramer
| Category:
Matrix Switcher
| Size: 1 MB
Table of Contents
Table of Contents
3
1 Introduction
5
2 Getting Started
5
3 Overview
5
4 Summary of How to Operate a Single Machine
6
5 Your VP-1608 16X8 RGBHV / Balanced Audio Matrix
6
Figure 1: Dipswitch Setup on a Single Machine
6
Figure 2: VP-1608 16X8 RGBHV / Balanced Audio Matrix
7
Table 1: Front Panel VP-1608 16X8 RGBHV / Balanced Audio Matrix Features
8
Figure 3: VP-1608 Underside Flash Program Switches
9
Table 2: Rear Panel VP-1608 16X8 RGBHV / Balanced Audio Matrix Features
9
Table 3: VP-1608 Underside (Flash Program Switches) Features
9
Displaying Unit Characteristics
10
Figure 4: VP-1608 Unit Characteristics
10
6 Connecting a VP-1608 16X8 RGBHV / Balanced Audio Matrix
11
Figure 5: Connecting the Video Sources and Acceptors to the Rear Panel
11
Connecting the Balanced/Unbalanced Stereo Audio Input/Output
12
Figure 6: Connecting the Balanced Stereo Audio Input/Output
12
Figure 7: Connecting the Unbalanced Stereo Audio Input
12
Figure 8: Connecting an Unbalanced Output
12
Controlling Via RS-232 (for Example, Using a PC)
13
Figure 9: Connecting a PC Without Using a Null-Modem Adapter
13
Controlling Via RS-485
14
Setting the MACHINE # Dipswitches
15
Figure 10: Controlling Via RS-485 (for Example, Using an RC-3000)
15
Table 4: MACHINE # Dipswitch Settings
15
Setting the DELAY Dipswitches
16
7 Controlling 16X8 RGBHV / Balanced Audio Matrix Units
16
Control Configuration Via RS-232 and RS-485
16
Table 5: DELAY Dipswitch Settings
16
Figure 11: Control Configuration Via RS-232 and RS-485
17
Control Configuration Via RS-485
18
Figure 12: Control Configuration Via RS-485
19
8 Operating Your VP-1608 16X8 RGBHV / Balanced Audio Matrix
20
Choosing the Audio-Follow-Video or Breakaway Option
20
Setting the Audio-Follow-Video Option
20
Setting the Breakaway Option
20
Switching OUT-IN Combinations
21
Confirming Settings
21
Toggling between the at ONCE and CONFIRM Modes
21
Confirming a Switching Action
22
Storing/Recalling Input/Output Configurations
22
Storing an Input/Output Configuration
22
Recalling an Input/Output Configuration
23
Deleting an Input/Output Configuration
23
Adjusting the Audio Gain Control
23
Locking and Unlocking the Front Panel
24
Resetting the VP-1608 16X8 RGBHV / Balanced Audio Matrix
24
Resetting to the Current Status
24
Resetting to the Factory Default State
24
9 Flash Memory Upgrade
25
Downloading from the Internet
25
Connecting the PC to the RS-232 Port
25
Figure 13: VP-1608 Underside Flash Program Switches Set for Upgrade
25
Upgrading Firmware
26
Figure 14: Splash Screen
26
Figure 15: Atmel - Flip Window
26
Figure 16 Device Selection Window
26
Figure 17: Device Selection Window
27
Figure 18: Loading the Hex
27
Figure 19: RS-232 Window
28
Figure 20: Atmel - Flip Window (Connected)
28
Figure 21: Atmel - Flip Window (Operation Completed)
29
10 Technical Specifications
30
11 Table of Hex Codes for Serial Communication
30
Table 6: Technical Specifications of the VP-1608
30
Table 7: VP-1608 Hex Codes for Switching Via RS-232/RS-485 in Breakaway Mode
31
12 Tables of Hex Codes for Audio Input/Output Gain Control
32
Tables of Hex Codes for Audio Input Gain Control
32
Table 8: VP-1608 Hex Codes for Audio Input Gain Control
33
Tables of Hex Codes for Audio Output Gain Control
34
Table 9: VP-1608 Hex Codes for Audio Output Gain Control
35
13 Kramer Protocol 2000
36
Table 10: Protocol Definitions
36
Table 11: Instruction Codes for Protocol 2000
37
Kramer VP-1608 User Manual (46 pages)
16x8 RGBHV/Balanced Audio Matrix
Brand:
Kramer
| Category:
Matrix Switcher
| Size: 3 MB
Table of Contents
Table of Contents
3
1 Introduction
5
2 Getting Started
6
Achieving the Best Performance
6
3 Overview
7
Defining the VP-1608 16X8 Rgbhv/Balanced Audio Matrix
7
Figure 1: VP-1608 16X8 Rgbhv/Balanced Audio Matrix Front Panel
8
Figure 2: VP-1608 16X8 Rgbhv/Balanced Audio Matrix Rear Panel
10
Figure 3: VP-1608 Underside Flash Program Switches
11
4 Installing in a Rack
12
5 Connecting a Single VP-1608
13
Figure 4: Connecting the VP-1608
14
Connecting a Balanced/Unbalanced Stereo Audio Input/Output
15
Connecting to the VP-1608 Via RS-232
15
Connecting a PC or Controller to the RS-485 Port
15
Figure 5: Balanced Stereo Audio Connection
15
Figure 6: Unbalanced Stereo Audio Input Connection
15
Figure 7: Unbalanced Stereo Audio Output Connection
15
Setting the MACHINE # DIP-Switches
16
Setting the DELAY DIP-Switches
17
6 Connecting Multiple VP-1608 Units
18
Connecting Via a PC or Serial Controller
18
Connecting Via an RS-485 Controller
19
Figure 8: Control Configuration Via RS-232 and RS-485
19
7 Operating Your VP-1608 16X8 Rgbhv/Balanced Audio Matrix
21
Using the Audio-Follow-Video or Breakaway Option
21
Figure 9: DIP-Switch Setup on a Single Machine
21
Switching OUT-IN Combinations
22
Confirming Settings
23
Storing/Recalling Input/Output Configurations
24
Adjusting the Audio Gain Control
26
Locking and Unlocking the Front Panel
26
Resetting the VP-1608 16X8 Rgbhv/Balanced Audio Matrix
26
Displaying Unit Characteristics
27
Figure 10: VP-1608 Unit Characteristics
27
8 Flash Memory Upgrade
28
Downloading from the Internet
28
Connecting the PC to the RS-232 Port
28
Upgrading the Firmware
29
Figure 11: VP-1608 Underside Flash Program Switches Set for Upgrade
29
Figure 12: Splash Screen
29
Figure 13: Atmel - Flip Window
30
Figure 14: Device Selection Window
30
Figure 15: Device Selection Window
31
Figure 16: Loading the Hex
31
Figure 17: RS-232 Window
32
Figure 18: Atmel - Flip Window (Connected)
32
Figure 19: Atmel - Flip Window (Operation Completed)
33
9 Technical Specifications
34
10 Table of Hex Codes for Serial Communication
35
11 Hex Tables for Audio Input/Output Gain Control
37
Hex Tables for Audio Input Gain Control
37
Hex Tables for Audio Output Gain Control
39
12 Kramer Protocol 2000
41
Advertisement
Advertisement
Related Products
Kramer VP-16x18AK
Kramer VP-12x8
Kramer VP-128H
Kramer VP-16X18AK/110V
Kramer VP-4x4
Kramer VP-32K
Kramer VP-436
Kramer VP-88ETH
Kramer VP-84ETH
Kramer VP-727
Kramer Categories
Matrix Switcher
Switch
Media Converter
Amplifier
Receiver
More Kramer Manuals
Login
Sign In
OR
Sign in with Facebook
Sign in with Google
Upload manual
Upload from disk
Upload from URL