Sign In
Upload
Manuals
Brands
Idex Manuals
Control Systems
Hale Sam
Idex Hale Sam Manuals
Manuals and User Guides for Idex Hale Sam. We have
2
Idex Hale Sam manuals available for free PDF download: Technical Manual, Operation Installation Maintenance Manual
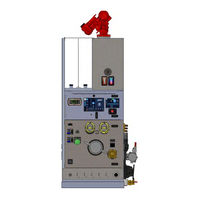
Idex Hale Sam Technical Manual (223 pages)
Brand:
Idex
| Category:
Control Systems
| Size: 5 MB
Table of Contents
Table of Contents
3
Safety
21
Ppe
21
Environmental Protection
22
Training
22
Safety Summary
22
Introduction
29
How to Use this Manual
29
Disclaimer
30
SAM Overview
30
SAM User Interfaces
30
SAM Control Center Interfaces
30
SAM Auto Mode Interface
31
SAM Manual Mode Interface
31
Figure 1. Entering Manual Mode (from Landing or Home Screen)
31
Figure 2. Popup Yes/No Buttons
31
SAM Control Center Menu Tabs
32
Bam
32
Figure 3. SAM Oem/Technician Menu Tabs
32
Figure 4. BAM Tab
32
Calibration
33
Pump Controller Interfaces
33
Pump Controller Tabs
33
Figure 5. Calibration Tab
33
Figure 6. Pump Controller Tabs
33
Tank
34
Figure 7. Pump Controller Tabs (Indicating Maintenance Required)
34
Figure 8. TANK Screen
34
Figure 9. TANK Screen (Optional Water Tank Graphical Status)
34
Figure 11. PUMP INFO Screen (Maintenance Required)
35
Figure 12. ENGINE DATA Screen
35
Pump Info
35
Engine Data
35
Figure 10. PUMP INFO Screen (no Maintenance Required)
35
Figure 13. VIDEO Screen
36
Video
36
SAM System Diagrams
36
Figure 14. SAM Blue CAN Buss Architecture (with Three SAM Control Centers) Diagram
37
Figure 15. SAM Green CAN Buss Architecture (with Three SAM Control Centers) Diagram
38
Figure 16. SAM Red CAN Buss Architecture (with Three SAM Control Centers) Diagram
39
Figure 17. SAM System Drain and Pneumatic Diagram
40
Figure 18. SAM Speaks Diagram
41
Principles of Operation
43
System Power
43
Circuit Breaker Box
43
System Modules
43
AFS Sensor
43
Afs MIV-A
43
Matriix Pressure Governor
43
MIV Valve Drive
44
System Sensors
44
Barometric Sensor
44
Flowmeters
44
Gearbox Oil Level Sensor (Single Point Level Switch)
44
Pressure Sensors
44
Temperature Sensors
44
Water Detection Sensors
45
Autolube Water Detection Sensor Protection Solenoid
45
Pump Priming and Air Bleed
45
Pump Primer (ESP)
45
Priming Feature Valve Assembly
45
Air Bleed and Check Valves
45
Table 1. Akron Brass Valve Applications (Intake/Special)
46
Manual Prime/Air Bleed
46
Manual Pump Priming
46
Manual Air Bleed
46
Water Supply Management
46
Figure 19. SAM Pump Controller Tank Screen - Default Water Level Status Indicator
47
SAM Pump Controller Tank Screen
47
Figure 20. SAM Pump Controller Tank Screen - Optional Water Level Graphical Indicator
48
Master Intake Valves
48
Discharge Management
48
Discharge Valve
48
Pressure Sensor
48
Flowmeter
48
Figure 21. 9323 and 9335 Navigator Pro Displays
49
Figure 22. 9327 Mini Navigator Pro Display
49
Navigator (Optional Equipment)
49
Governor Function
49
Emergency Idle Switch
50
Twister Electronic Throttle
50
SAM Speaks
50
Audio Amplifier and Ground Loop Isolator
50
Speakers
51
Remote Capability
51
Secure Wi-Fi (SAM Control Center)
51
Wi-Fi Router
51
DC-To-DC Converter
51
Ruggedized Tablet
51
Figure 23. SAM Tablet
52
SAM Auto Mode
52
Figure 24. SAM Control Center USB Dongle (USB Key Connected)
53
SAM Manual Mode
53
SAM Specifications and Numbering
53
SAM Passwords
53
System Options (Accessing SAM Password Screens)
53
Figure 25. SAM Control Center System Options Button and Loading Icon
54
Figure 26. SAM Control Center Password Screen
54
Figure 27. SAM Control Center System Options Menu Screen
54
SAM Control Center Password Screen
54
Table 2. SAM Control Center Password List
55
Figure 28. SAM Pump Controller System Options Button and Loading Icon
55
SAM Control Center Password List
55
SAM Pump Controller Password Screen Access
55
Figure 29. SAM Pump Controller Menu Screen
56
SAM Pump Controller Password List
56
Table 3. SAM Pump Controller Password List
57
Preventive Maintenance
59
Preventive Maintenance Plan and Schedule
59
Table 4. Recommended Preventive Maintenance
59
Table 5. Pump Preventive Maintenance Cross References
60
Reset Gearbox Oil Life
61
Figure 30. SAM Pump Controller Pump Info Screen (Single Gearbox)
61
Figure 31. SAM Pump Controller Pump Info Screen (Dual Gearboxes)
61
Corrective Maintenance
63
General Repair Guidelines
63
Match Mark or Note Component Orientation
64
Recommended Tools
64
Recommended Cleaners
64
Recommended Lubricants
64
Thread Lock and Sealant Compounds
64
Table 6. Recommended O-Ring Lubricant
64
Cleaning and Inspection Guidelines
65
Table 7. Recommended Thread Lock and Sealant Compounds
65
Cleaning Required for Thread Lock Compounds
65
Removal and Replacement Guidelines
65
Tag and Disconnect Electrical Connections
66
Tag and Disconnect Pneumatic (Air) Connections
66
Tag and Disconnect Drain Connections
66
Datalogger Guidelines
67
Export Datalogger from SAM Control Center
67
Export Datalogger from SAM Pump Controller
68
SAM Wire Harness Guidelines
68
Removal and Replacement of SAM Panel Components
69
Figure 32. SAM Panel Components Locations (Operator Panel)
69
Figure 33. SAM Panel Components Locations (Officer Side)
70
Table 8. SAM Control Center (Master or Auxiliary) Tools and Consumables List
71
SAM Control Center (Master or Auxiliary)
71
Figure 34. SAM Control Panel R&R
72
Table 9. SAM Pump Controller Tools and Consumables List
73
SAM Pump Controller
73
Figure 35. SAM Pump Controller R&R
74
Table 10. Buzzer Wiring (From/To Listing)
75
Table 11. Buzzer Tools and Consumables List
75
Buzzer
75
Figure 36. Buzzer R&R
75
Table 12. Emergency Idle Switch Wiring (From/To Listing)
76
Table 13. Emergency Idle Switch Tools and Consumables List
76
Emergency Idle Switch
76
Figure 37. Emergency Idle Switch Panel
76
Twister Throttle Controller
77
Figure 38. Hale Twister
77
Table 14. Twister Wiring (From/To Listing)
78
Table 15. Twister Tools and Consumables List
78
Table 16. ITL-40 Wiring (From/To Listing) (Water)
79
Tank Level (Onboard Water or Foam Tank)
79
Figure 39. ITL-40 Tank Level Indicator
79
Table 17. ITL-40 Tools and Consumables List
80
Figure 41. Hale Pressure Transducer and Pin Layout
81
Table 18. Onboard Tank Water Level Sensor Wiring (From/To Listing)
81
Table 19. ITL-40 Pressure Transducer Tools and Consumables List
81
Onboard Tank Water or Foam Tank Level Sensor
81
Figure 40. Onboard Water Tank Level Transducer Installation
81
Figure 42. MIV-E Override Panel
82
MIV-E Override Panel
82
Table 21. MIV-E Override Panel Tools and Consumables List
83
Table 20. MIV-E Override Switch Wiring (From/To Listing)
83
Figure 43. MIV-E Override Panel Air Bleed Valve Assembly
84
Figure 44. Hale MIV Activation Button
84
MIV Activation Button
84
Table 22. MIV Activation Button Wiring (From/To Listing)
85
Table 23. MIV Activation Button Tools and Consumables List
86
Optional Navigator Controllers
87
Removal and Replacement of Akron Brass Valves
87
Recording SAM System Information Parameters
87
Discharge and Special Purpose Valve Removal and Replacement
88
Table 24. Akron Brass Valve R&R Tools and Consumables List
89
Table 25. Akron Brass Valve Operation Verification Tools and Consumables List
91
Verifying Valve Operation after Valve Clocking
91
Removal and Replacement of SAM Sensors
92
Barometer (Atmospheric Pressure)
92
Figure 45. Barometric Sensor
92
Table 26. Barometric Sensor Wiring (From/To Listing)
92
Removal and Replacement of SAM Mivs
92
Figure 46. Barometric Sensor R&R
93
Table 27. Barometer Sensor Tools and Consumables List
93
Flowmeter (Optional - Used with SAM or Navigator Pro 9335 Only)
94
Figure 47. Flowmeter R&R
94
Table 28. Flowmeter Tools and Consumables List
94
Pressure Sensors/Transducers
95
Figure 48. Hale Pressure Sensor/Transducer and Pin Layout
95
Table 29. Hale Discharge Valve Pressure Sensor Wiring (From/To Listing)
95
AB Swing-Out Valve Pressure Sensor
96
Table 30. Pump Intake/Discharge Pressure Sensor Wiring (From/To Listing)
96
Table 31. Hale Water Column Pressure Sensor Wiring (From/To Listing)
96
Table 32. Discharge Valve Pressure Sensor Tools and Consumables List
97
Legacy AB Valve Pressure Sensor
98
Pump Master Pressure Sensors
98
Figure 49. Legacy AB Valve Pressure Sensor and Layout
98
Table 33. Legacy Akron Brass Pressure Sensor Wiring (From/To Listing)
98
Water Column Sensor
99
Table 34. Water Column Sensor Tools and Consumables List
99
Gearbox Oil Level
100
Figure 50. Gearbox Oil Level Sensor
100
Table 35. Gearbox Oil Level Sensor Wiring (From/To Listing)
100
Table 36. Gearbox Oil Level Sensor Tools and Consumables List
100
Figure 51. Gearbox Oil Level Sensor R&R
101
Temperature
102
Table 37. Gearbox Temperature Sensor Wiring (From/To Listing)
102
Table 38. Suction Water Temperature Sensor Wiring (From/To Listing)
102
Table 39. Temperature Sensor Tools and Consumables List
102
Gearbox Temperature Sensor
103
Pump Temperature Sensor
103
Figure 52. Gearbox Temperature Sensor
103
Figure 53. Pump Temperature Sensor
103
Water Detection Sensors
104
Figure 54. Water Detection Sensor
104
Table 40. Water in Gearbox Sensor Wiring (From/To Listing)
104
Table 41. Water in Autolube Assembly Sensor Wiring (From/To Listing)
104
Figure 55. Water Detection Sensor R&R (Autolube and Gearbox)
105
Table 42. Water in Primer Sensor Wiring (From/To Listing)
105
Table 43. Water Detection Sensor Tools and Consumables List
105
Zero Pressure Solenoid
106
Figure 56. Water Detection Sensor R&R (Primer)
106
Figure 57. Zero Pressure Solenoid
106
Figure 58. Removal of the Module Mounting Brackets
107
Table 44. Zero Pressure Solenoid Wiring (From/To Listing)
107
Table 45. Zero Pressure Solenoid Tools and Consumables List
107
Figure 59. Circuit Breaker Box Removal
108
Figure 60. Autolube and Zero Pressure Solenoid Removal
108
Smart Anode Removal and Replacement
109
Figure 61. Smart Anode
109
Table 46. Smart Anode Wiring (From/To Listing)
109
Figure 62. Indication of Failed Smart Anode
110
Table 47. Smart Anode Tools and Consumables List
110
Removal and Replacement of SAM Modules
111
Figure 63. Indication of Good Smart Anode
111
Figure 64. Module Health Indicators
111
Matriix/Pressure Governor Module
112
Figure 65. SAM Module Locations
112
Figure 66. SAM Modules General Appearance
112
Figure 67. Matriix Pressure Governor Module
113
Figure 68. Governor Module Interface Layout
113
Table 48. Matriix/Pressure Governor Module Wiring (From/To Listing)
113
Table 49. Matriix Pressure Governor Module Tools and Consumables List
114
Sensor Module
115
Figure 69. Sensor Module
115
Figure 70. Sensor Module Interface Layout
115
Table 50. Sensor Module Wiring (From/To Listing)
116
Table 51. Sensor Module Tools and Consumables List
117
SAM MIV-A Module
117
Figure 71. MIV-A Module
118
Figure 72. SAM Module (MIV-A)
118
Table 52. MIV-A Module Wiring (From/To Listing)
118
Table 53. MIV-A Module Tools and Consumables List
119
Figure 73. MIV-A Drive Module
120
MIV 2.0 Drive Module
120
Table 54. MIV-A Drive Module Wiring (From/To Listing)
121
Table 55. MIV-A Drive Module Tools and Consumables List
121
Figure 74. PF Valve Diode
122
Table 56. MIV-A Drive Module Address List
122
Table 57. PF Valve Diode Wiring (From/To Listing)
122
Removal and Replacement of Pump Primer and Air Bleed Components
122
Priming Feature Valve Diodes
122
Figure 75. Priming Feature Assembly
123
Priming Feature Assembly
123
Table 58. Priming Feature Assembly Tools and Consumables List
124
Figure 76. SAM Drain Valve Block Assembly
125
SAM Drain Valve Block Assembly
125
Air Bleed Valves (MIV and Pump Body)
126
Table 59. Air Bleed Valve (Solenoid) Wiring (From/To Listing)
127
Table 60. Air Bleed Valve (Solenoid) Tools and Consumables List
127
Removal and Replacement of Miscellaneous SAM Components
128
Audio Amplifier
128
Figure 77. Audio Amplifier
129
Figure 78. Ground Loop Isolator
129
Table 61. Audio Amplifier Wiring (From/To Listing)
129
Figure 79. Speaker Mounting and Wiring
130
Table 62. Auxiliary Cooling Solenoid Wiring (From/To Listing)
130
Audio Speakers
130
Auxiliary Cooling Solenoid
130
Figure 80. Auxiliary Cooling Solenoid and Fittings
131
Table 63. Auxiliary Cooling Solenoid Tools and Consumables List
131
Figure 81. DC-To-DC Converter
132
Table 64. DC-To-DC Converter Wiring (From/To Listing)
132
DC-To-DC Converter
132
Figure 82. Wi-Fi Booster Antenna
133
Table 65. Wi-Fi Router/Antenna Tools and Consumables List
133
Wi-Fi Router
133
Figure 83. Wi-Fi Router/Antenna Connectors
134
Figure 84. Circuit Breaker Box
135
Figure 85. Circuit Breaker Box Connector/Pin Layout
135
SAM System Power
135
Circuit Breaker Box
135
Table 66. Circuit Breaker Box Wiring (From/To Listing)
136
Table 67. Circuit Breaker Box Connector 1 Pin 3 Connections
136
Table 68. Circuit Breaker Box Tools and Consumables List
137
Figure 86. Legacy CB Junction Box Location
138
Legacy Circuit Breaker Junction Box
138
Figure 87. OEM Located Legacy CB Junction Box
139
Figure 88. Legacy CB Junction Box Layout
139
Circuit Breaker Checks
140
SAM Tablet
140
Figure 89. Tablet Power Supply Converter/Fuse
141
Figure 90. Tablet Docking Station/Mount
141
SAM Tablet Replacement
141
Figure 91. Tablet Password Screen
142
Figure 92. Tablet
142
Bench Procedures
143
AB Swing-Out Valve Motor Rotation
143
4-Way Air Valve R&R
143
Figure 93. Auto Mode Screen (Tablet/Sam Control Center)
143
Table 69. 4-Way Air Valve Wiring (From/To Listing)
144
Figure 94. 4-Way Air Valve
144
Table 70. 4-Way Air Valve Consumables List
145
Figure 95. 4-Way Valve Air Line Labels and Mounting
145
PF Air Cylinder R&R
146
Table 71. PF Air Cylinder R&R Tools and Consumables List
146
Figure 96. PF Air Cylinder R&R
146
PF Valve Assembly R&R
147
Table 72. PF Valve R&R Tools and Consumables List
147
Figure 97. PF Valve Block Mounting Screw Access
148
Figure 98. PF Valve Block Disassembly
148
Figure 99. PF Valve Block Removal from Bracket
149
Figure 100. PF Valve R&R
150
Post Removal and Replacement Configuration Procedures
151
Enable Master SAM Control Center Wi-Fi
151
Figure 101. MENU Screen
152
Figure 102. Enter Password Screen
152
Auxiliary SAM Control Center Setup
152
Figure 103. System Option Screen (BAM Tab Selected)
153
Figure 104. SELECT DEVICE MENU Screen
153
Figure 105. Configuration Mode MENU Screen
154
Figure 106. Configuration Mode more Settings Screen
154
Figure 107. Set Time and Date Screen
155
Configuration/Setup for SAM Pump Controller
155
How to Set Time and Date
155
How to Set Units
155
Figure 108. Governor Menu Screen (Set Units)
156
Figure 109. Select Units Screen
156
Enable/Disable Suction Pressure Governor
156
Figure 110. Suction Pressure Governor Enable Row Selected
157
Figure 111. SPG Enable Settings Screen
157
Figure 112. SPG Enable Settings Screen - Enable Button Selected
157
How to Change/Set Low Intake Alert Trigger Point
158
Figure 113. Suction Pressure Governor Enable Row Selected
158
Figure 114. SPG User Set Point Screen
158
Suction Pressure Hysteresis (PSI)
159
Figure 115. Suction Pressure Hysteresis (PSI) Row Selected
159
Figure 116. SPG Hysteresis Screen
159
Set MIV-A Module Address (Master) (Slave)
160
Wi-Fi Router Configuration
161
Figure 117. MIV-A Module Address Switch
161
Configuration Procedures
162
Water Tank
162
Figure 118. ITL-40 Address Switch Locations
162
Figure 119. System Options Loading Icon
163
Foam Tank a
163
Foam Tank B
163
Updating the Tablet after SAM Setup/Configuration Changes
163
Figure 120. System Options Screen
164
Figure 121. BAM Request Screen
164
Updating Another SAM Control Center after SAM Setup/Configuration Changes
164
Table 73. 4-Way Air Valve Resistance Per °C (°F)
165
Post Removal and Replacement Testing
165
4-Way Air Valve Test
165
Water Detection Sensor Tests
165
Using SAM Pump Controller to Test Sensor
165
Figure 122. Input Screen (Red Balloons)
166
Testing Master Intake Valve Inputs/Outputs
166
Figure 123. SAM Pump Controller I/O Testing (Outputs Screen)
167
Figure 124. SAM Pump Controller I/O Testing (Inputs Screen)
167
Figure 125. SAM Pump Controller I/O Testing (CAN Outputs Screen)
167
Table 74. MIV-A Output Testing
168
Figure 126. SAM Pump Controller I/O Testing (with Active Output)
168
Testing MIV Outputs
168
Table 75. MIV-A Input Testing
169
Table 76. Priming and Air Bleed Component Testing
169
Figure 127. TS Outputs Screen - Pre-Prime #1 Active
169
Testing MIV Inputs
169
Testing Priming and Air Bleed Component (CAN Inputs)
169
Figure 128. TS Input Screen
170
Figure 129. TS CAN Output Screen
170
Testing Priming and Air Bleed Component (CAN Outputs)
170
Testing MIV-E Override Panel (Manually Operated ABV)
170
Figure 131. SAM Speaks Verbal Alerts
171
Figure 130. SAM Speaks Verbal Alerts
171
Testing SAM Speaks (Audio Alerts)
171
Test Audio Page
171
Error Messages and System Level SCR Table
172
Table 77. Audio Files Useful for Audio Testing/Adjustment
172
Troubleshooting
172
Special Tools
172
CAN Bus Capture Tool
172
Akroview
172
Table 78. Hale SAM System Level SCR Table
173
Barometric Sensor Troubleshooting
185
Figure 132. Barometric Sensor Check/Test
185
Table 79. Barometric Sensor Output
185
Flowmeter Troubleshooting
186
Figure 133. Calibrate Valve Flow Screen
186
Figure 134. Level Sensor Troubleshooting
187
Level Sensor Troubleshooting
187
PF Valve Troubleshooting
187
Pressure Sensor Troubleshooting
187
Figure 135. Output/Input Screen
188
Temperature Sensor Troubleshooting
188
Water Present Sensor Troubleshooting
188
Figure 136. Forward Bias Test
189
Figure 137. Reverse (or Forward ??) Bias Test
189
Diode Troubleshooting
189
Figure 138. Terminating Resistor
190
Figure 139. Bus Termination Test Setup
190
General CAN Troubleshooting
190
Verify SAM Ready to Return to Service
191
Figure 140. Akron Valve Serial Number
193
Adjustments
193
Akron Valve Firmware Information (S/N and USB Update)
193
Akron Brass Swing-Out™ Valve Calibrations
193
Valve Position Procedures (SAM Control Center)
193
Figure 141. Valve Calibrate Menu
194
SAM Control Center
194
Figure 142. Calibrate Valve Stops Screen-Red Bus
195
Figure 143. Calibrate Valve Stops Screen-Green Bus
196
Figure 144. Calibrate Valve Stops Screen-Selected and Active
196
Figure 145. Zero Pressure Sensor Screen
197
Pressure Procedures (SAM Control Center)
197
Figure 146. Span Pressure Sensor Screen
198
Flowmeter Calibration Procedures
198
Set Flow to Factory Defaults
198
Flow Calibration
198
Figure 147. Calibrate Valve Flow Screen
199
Figure 148. Enter Externally Determined Flow Rate
200
Calibration with AKROVIEW Diagnostic Software
200
Figure 149. Water Tank Calibration Step 1
201
Figure 150. Water Tank Calibration Step 2
201
Calibration Procedure
201
Water Tank
201
Figure 151. Water Tank Calibration Step 3
202
Foam Tank a
202
Foam Tank B
202
Pump (Master Intake and Discharge) Pressure Alternate Calibration
202
Figure 152. SAM Pump Controller System Options Menu Screen
203
Figure 153. Governor Menu Screen
203
Figure 154. Temperature Calibration Screen (Pump Shown)
204
Temperature Sensor Calibration
204
Voltage Calibration
204
Figure 155. Voltage Adjustment Screen
205
Figure 156. SAM Configuration Mode MENU Screen
207
Figure 157. Real Time Clock Screen
207
Sam Setup/Configuration
207
SAM Control Center Setup/Configuration
207
How to Set Time and Date
207
Figure 158. SELECT DEVICE MENU Screen
208
How to Set Units
208
Setup and Configurations Using the BAM Tab (Configuration Mode)
208
Setup and Configurations Using the Device Select Menu
208
How to Assign/Change Low Tank Water Alarm Trigger Level
209
How to Assign/Change a Valves Friendly Name
209
Figure 159. Edit Valve Screen
209
Identifying Which Physical Valve a UID Corresponds to
209
Assigning Quicksets to the Home Screen
209
How to Change the Order of (or Delete) Quicksets on the Home Screen
209
Change User/Dealer Password
209
How to Change a Friendly Name
210
Figure 160. Edit Valve Screen - Keyboard, Number Pad, and DONE Buttons
210
Figure 161. Edit Valve Screen -Number Pad, CLEAR and ENTER Buttons
211
How to Assign/Change a Valves Index Number
211
How to Assign/Change a Valves Function
211
Table 81. SAM Discharge Valve Max PSI Defaults
212
How to Assign/Change a Valves MAX PSI
212
Table 80. SAM Discharge Valve Function Defaults
212
Table 82. SAM SCC Balloon Types
213
Table 83. SAM Valve Capability Settings
213
How to Assign/Change a Valves Preset Pressure (Preset PSI)
213
How to Assign/Change the SCC Balloon Types
213
How to Assign/Change a Valves CAFS/FOAM Capability
213
How to Assign/Change a Valves Size (Diameter)
213
How to Change/Set Discharge Colors
213
Figure 162. Valve Edit - Color Assignments
214
Figure 163. Color Assignment Swatches
214
How to Change the Order of Intakes on the Home Screen
215
Configuring SAM for a Foam System
215
Configuring a Foam Preset
215
Configuring a Foam Quickset
216
Configuring a CAFS Preset
216
Table 84. Captium to SAM Wiring (From/To Listing)
217
Configuring a Foam Quickset
217
Connecting Captium to SAM
217
Configuring Captium for SAM
217
Saving the Configuration Changes
217
Figure 164. Update Network with New Configuration Information Screen
218
Figure 165. Screen During Network Update
218
Software Updates
219
Table 85. Hale General Torque Recommendations
221
Appendix A. Torque Specification
221
Hale General Torque Recommendations
221
Appendix B. Manufacturer's Information
223
Advertisement
Idex Hale Sam Operation Installation Maintenance Manual (141 pages)
Brand:
Idex
| Category:
Industrial Equipment
| Size: 2 MB
Table of Contents
Table of Contents
3
Safety
15
Safety Headings
15
Safety Summary
15
General Instructions
21
Figure 1. Hale ID Tag with Sample Markings
22
SAM Numbering and Specifications References
22
Transportation and Storage
23
EAR99 Restrictions
23
Shipping, Movement, and Installation Preparations
23
Pump Gearbox Shipped Without Fluid
23
Storage
23
UV1100 and UV800 Storage
23
System Overview
25
Figure 2. SAM Network Diagram (CAN Buses)
27
SAM Touchscreens Navigation and Icon Definitions
29
Table 1. SAM Control Center Icons
29
Table 2. SAM Water Supply Icons
30
Table 3. Touchscreen Icon Definitions
30
Figure 3. Set Pressure Icon Group
31
Icon Groups
31
Set Pressure Icon Group
31
Figure 4. Discharge Setup Confirmation Screen
32
Figure 5. Password Icon Group
32
Password Icon Group
32
Governor Icon Groups
32
Figure 6. RPM Mode Governor Icon Group
33
Figure 7. PSI Mode Governor Icon Group
33
Figure 8. Low Intake Pressure Governing Governor Screens (Auto Mode/Manual Mode)
34
Figure 9. Tank Fill Icon Group
34
Figure 10. Tank-To-Pump Icon Group
34
Valve Close/Open Icon Groups
34
Figure 11. Manual Discharge Valve Control Icon Group
35
Figure 12. Manual Intake Valve Control Icon Group
35
Figure 13. Engine Data Icon Group
35
Engine Data Icon Group
35
Figure 14. Buttons/Targets
36
Figure 15. Intake State Popup Examples
36
Buttons/Targets (Drag and Drop Navigation)
36
Figure 16. Force INTAKE X Open? Popup
37
SAM Touchscreens
37
Figure 17. SAM Control Center Splash (Boot) Screen
38
Figure 18. SAM Control Center Landing Screen (Pump NOT Engaged)
38
Figure 19. SAM Control Center Auto Mode Main Screen
38
SAM Control Center Screens
38
Figure 20. SAM Control Center Touchscreen Areas/Sections
39
Figure 21. System Options Button and Loading Icon
39
System Options Button
39
Figure 22. SAM Control Center Password Screen
40
Figure 23. SAM User/Dealer Menu Tabs
40
SAM Control Center Menu Tabs
40
Figure 24. Display Tab
40
Display Tab
40
Figure 25. Security Tab
41
Security Tab
41
HOME Button
41
Intake Control Area/Section
41
Figure 26. Select Discharge Screen
42
Figure 27. Discharge Valve Control Screen
42
Discharge Control Area/Section
42
Onboard Levels Area/Section
42
SAM Information Center Area/Section
43
User Assignable Quicksets Area/Section
43
SAM Control Center Customizable/Configurable Items
43
Figure 28. Manual Mode Confirmation Popup
43
Mode Control Area/Section
43
Discharge Valve Preset Pressure
44
Discharge Valve Quickset Pressure
44
Pump Controller
44
Pump Controller Screens
44
Figure 29. DM1 Message Pass Thru Example
44
Pressure Governor
45
Figure 30. Pump Controller Boot Screen
45
Figure 31. Pump Controller During SAM Auto Mode
45
PSI Mode
46
Figure 32. Pump Controller PSI Mode (SAM Manual Mode Only)
46
Figure 33. Intake PSI Components
47
Figure 34. Discharge PSI Components
47
Low Intake Pressure Control Mode
48
Figure 35. PSI Set Point Icon Group Components
48
Figure 36. Pump Capacity Icon Group
48
Figure 39. Pump Controller RPM Mode (SAM Manual Mode Only)
49
RPM Mode
49
Figure 37. Low Intake Pressure Control Mode Screen
49
Figure 38. Low Intake Pressure Control Mode Popup Alert
49
Figure 40. Hale Twister
50
Figure 41. Pump Controller Tank Info Screens
50
Twister Electronic Throttle (in SAM Manual Mode)
50
Tank Screen
50
Figure 42. Pump Controller Pump Info Screen-No Action Required
51
Figure 43. Pump Controller Pump Info Screen-Action Required
51
Pump Info Screens
51
Figure 44. Pump Controller Pump Info Details Screen
52
Figure 45. Pump Controller Pump Info History Screen
52
Figure 46. Pump Controller Pump Info History Factory Test Data Screen
52
Figure 47. Pump Controller Pump Info History Field Test Data Screen
53
Figure 48. Pump Controller Engine Data Screen
53
Figure 49. Pump Controller Optional Video Screens
53
Engine Data Screen
53
Optional Video Screens
53
Figure 50. Pump Controller System Options Menu
54
Pump Controller System Options Menu
54
Optional Remote Capability
54
Auxiliary SAM Control Center Screens
54
Secure WI-FI (Router/Antenna)
54
Ruggedized Tablet
54
Figure 51. SAM Tablet
55
SAM Automated Pump Cooling
55
Pump Priming
56
SAM Auto Prime
56
Manual Prime
57
Establishing a Pressurized Water Source (Hydrant) with SAM
57
Master Intake Valve
57
Auxiliary Intake
57
SAM Water Tank Auto Fill
57
SAM and Foam Systems
58
Smartfoam
58
Smartcafs
58
Installation
59
Drive Line Requirements
60
Power Requirements
61
Table 4. Maximum Recommended Drive Line Lengths
61
Figure 52. Connect System Power Tag
62
Compressed Air Requirements
63
CAN Bus Requirements
63
Figure 53. Connect to Truck Air Tag
63
Valve Mechanical Override Access Requirements
64
OEM Connections to SAM
64
Figure 54. Mechanical Valve Override Shaft(S)
64
Figure 55. SAM Connections Labels (And/Or Tags)
64
SAM Software and Configuration Passwords
66
Table 5. SAM to OEM Connection Point Cross Reference Listing
66
Table 6. SAM Control Center Password List
66
Table 7. SAM Pump Controller User/Dealer Password List
67
Commissioning, Startup, Operation, and Shutdown
69
Commissioning
70
SAM Power on and Default Verifications
71
Mode Selection Verifications
72
SAM Auto Mode
72
Switching to SAM Manual Mode
72
Figure 56. Entering Manual Mode (from Landing or Home Screen)
72
Figure 57. Popup Confirm/Deny (Yes/No) Buttons
72
Startup
73
Changing End User Customizable/Configurable Items
73
Assigning Quicksets to the Home Screen
74
How to Change the Order of (or Delete) Quicksets on the Home Screen
74
Figure 58. Discharge Settings Screen
74
Change User/Dealer Password
75
How to Assign/Change Low Tank Water Alarm Trigger Level
76
How to Configure Pump Controller Parameters
76
Figure 59. Security Tab - Password Saved
76
Set the Volume for SAM Speaks (Spoken Alerts)
77
Figure 60. Pump Controller System Options Button and Loading Icon
77
Figure 61. Pump Controller System Options Password Entry Screen
77
Set Camera Names
78
Figure 62. Set the Volume for SAM Speaks
78
Figure 63. Set Camera Names
78
Calibration
79
Show/Hide VIDEO Tab (Cameras 1 Thru 3)
79
Figure 64. Set Camera Names Keyboard Screen
79
Figure 65. Camera Names Saved Acknowledgment
79
Tank Level Off/On
80
SELECT DEVICE Screen Displayed-Reboot to GUI Required
80
Figure 66. Tank Level Set to Graphical (On)
80
Figure 67. SELECT DEVICE MENU Screen
80
SAM Operation
81
Figure 68. (HOME ICON) MENU Screen
81
Auto Mode
82
Figure 69. SAM Control Center (Transition Landing to Auto Mode Home Screen)
82
Figure 70. Pump Controller (Transition Splash to Auto Mode Home Screen)
82
Selecting the Desired Pumping Method
83
Pumping from Hydrant (or any Positive Pressure Source)
83
Figure 71. Toggle to Desired Pumping Method
83
Figure 72. Activating an Intake
84
Figure 73. Activating a Hydrant Intake Sequence (Air Bleed)
84
Figure 74. Activating a Hydrant Intake Sequence (MIV Disc Opening)
85
Figure 75. Activating a Hydrant Intake Sequence (Hydrant Established)
85
Bypass Venting
86
Figure 76. Activating a Hydrant Intake Sequence (Complete)
86
Figure 77. Active Force Intake X Open Popup
86
Bypass Opening
87
Using Discharge Quicksets, Presets, and the SET PRESSURE Icon Group
87
Activating a Quickset
87
Using the ADD LINE Button/Target
87
Figure 78. Activating Quickset Discharges (Touch-Drag-Drop)
87
Figure 79. Activating Additional Discharges
88
Changing a Discharges Pressure/Closing the Valve
89
Figure 80. Change a Discharge Pressure
89
Figure 81. Closing a Discharge (Using Stop Button)
89
Low Intake Pressure Control Mode
90
Figure 82. Stop Button Popup Confirmation Window
90
Pumping from Draft
90
Figure 83. Initiating a Draft (Transition Shown Top-Left to Bottom-Right)
91
Twister Operations (in SAM Auto Mode)
92
Emergency IDLE Button
92
Figure 84. Emergency Idle Button Panel
92
Figure 85. Governor MODE off Screen
92
Figure 86. Press and Hold Power Button (to Power on Tablet)
93
Figure 87. Tablet Touch Screen (Left) SAM Control Center (Right)
93
Emergency IDLE Activation (from a Locked Screen)
94
Figure 88. Emergency IDLE Activation (from a Locked Screen)
94
Figure 89. Emergency IDLE Activation (Popup Confirmation)
94
Figure 90. Emergency IDLE Activated Screen
95
Figure 91. Press + Button to Unlock the Tablet
95
Figure 92. Unlock Screen Popup
95
Unlocking the Tablet Display
95
Additional Tablet Indicators (% Battery and Signal Strength)
96
Figure 93. Unlock Screen Popup Button and Target
96
Figure 94. % Battery and Wi-Fi Signal Strength Indicators
96
Loosing Wi-Fi Signal
97
Manual Operation (NOT Available from the SAM Tablet)
97
Mobile Operations-From Tablet
93
Figure 95. Wi-Fi Signal Strength Warning Example
97
Figure 96. Navigator Pro Controllers (9323, 9335, 9327)
97
Navigator Pro Operations (in SAM Auto Mode)
97
Manual Mode
98
Figure 97. Manual Valve Control Screen
98
Opening an Intake
99
MIV Manual/Physical Procedures
99
MIV SAM Manual Mode Procedures
99
Figure 98. Intake Close/Open Icon Group (Open)
99
Auxiliary (Pony) Intake (Akron Brass Valve) Manual Procedures
100
Closing a Discharge
101
Opening a Discharge
101
Closing an Intake
102
Figure 99. Intake Close/Open Icon Group (Close)
102
Figure 100. Return to SAM Auto Mode
103
Figure 101. Exit Manual Mode Confirmation
103
Figure 102. SAM Auto Mode after Manual Mode Indications
103
Return to SAM Auto Mode
103
Miscellaneous Tasks
104
Tank Fill and Tank-To-Pump Valve Controls
104
Using an Optional Navigator to Manually Control a Discharge
104
Using Smartfoam with SAM
104
Activating a Smartfoam Quickset
105
Figure 103. Activating a Foam Quickset
105
Figure 104. Smartfoam with SAM Quickset Activated
105
Activating a Smartfoam Preset
106
Close a Foam Discharge (with SAM)
106
Figure 105. Selecting a Foam Capable Discharge
106
Figure 106. Activating a Foam Preset
106
Figure 107. Closing a Foam Discharge Sequence
107
Figure 108. Close Line Popup Confirmation
107
Turn off Smartfoam (with SAM)
108
Figure 109. Smartfoam Display with no FOAM Discharges Active
108
Figure 110. Foam off Popup Confirmation
108
Using Smartcafs with SAM
109
Activating a Smartcafs Quickset
109
Activating a Smartcafs Preset
110
Figure 111. Activating a CAFS Quickset
110
Changing a CAFS Discharge to FOAM ONLY
111
Figure 112. Selecting a CAFS Capable Discharge
111
Figure 113. Activating a CAFS Preset
111
Turning a CAFS FOAM ONLY Discharge off
112
Figure 114. FOAM off Button (Transitions CAFS to Foam Only)
112
Figure 115. Closing a CAFS Discharge Sequence
113
Figure 116. Smartcafs Display
113
Figure 117. Foam off Popup Confirmation
114
Turning off CAFS (When Activated with SAM)
114
Exporting the Datalogger File
114
Exporting the SAM Control Center Datalogger File
114
Figure 118. SAM Control Center USB Dongle
115
Figure 119. Pump Controller USB Dongle
115
Exporting the Pump Controller Datalogger File
115
Governor Operations from the Pump Controller
116
Changing Governor Modes
116
Activating a Preset
116
Figure 120. Preset Popup Confirmation
117
Using PSI Mode
117
Using RPM Mode
118
Twister Operations (in SAM Manual Mode)
118
PSI Mode Operations
118
RPM Mode Operations
119
Using Physical Overrides
119
Hale MIV Physical Override
119
Figure 121. MIV Manual Override Placard (Handwheel NOT Shown)
120
Akron Brass Swing-Out Valve Physical Override
120
Figure 122. Akron Brass Valve Power Connector
121
Operator Responses to SAM Alarms
122
Table 8. SAM Operator Troubleshooting
122
Figure 123. System Options Buttons
130
Figure 124. Shutdown Screens
130
Shutdown
130
SAM Tablet Shutdown
130
Figure 125. Shutdown Confirmation
131
SAM at the Apparatus Shutdown
131
Figure 126. SAM Home Screen (with Active Quickset Shown)
132
Table 9. Recommended Preventive Maintenance
133
Preventive Maintenance
133
Preventive Maintenance Plan and Schedule
133
Table 10. Recommended Preventive Maintenance-Ancillary Equipment
134
After each Use
135
SAM Display Cleaning
135
Annually
136
NFPA 1901/1911 Testing Tips and Hints for the SAM System
136
Flush Pump
136
Akron Brass Swing-Out™ Valve Motor Operating Current Check
137
Adjustments
139
Calibration Using SAM Pump Controller
139
Figure 127. ITL-40 Display
139
Figure 128. ITL-40 Calibration Screen
139
Figure 129. ITL-40 Calibration Screen
140
Figure 130. ITL-40 Calibration Screen
140
Appendix A. Manufacturers Information
141
Manufacturers Information
141
Warranty
141
Advertisement
Related Products
Idex HALE SmartCAFS
Idex HALE SPV
Idex HALE FYR-PAK
Idex LIQUID CONTROLS HML210
Idex Warren Rupp Sandpiper HDF3-M
Idex Warren Rupp Sandpiper HDF4-M
Idex WARREN RUPP SANDPIPER HDB40
Idex WARREN RUPP SANDPIPER HDB11/2
Idex Warren Rupp SANDPIPER HDF1
Idex Warren Rupp SANDPIPER HDF25
Idex Categories
Water Pump
Control Unit
DC Drives
Dispenser
Industrial Equipment
More Idex Manuals
Login
Sign In
OR
Sign in with Facebook
Sign in with Google
Upload manual
Upload from disk
Upload from URL