Sign In
Upload
Manuals
Brands
Hettich Manuals
Laboratory Equipment
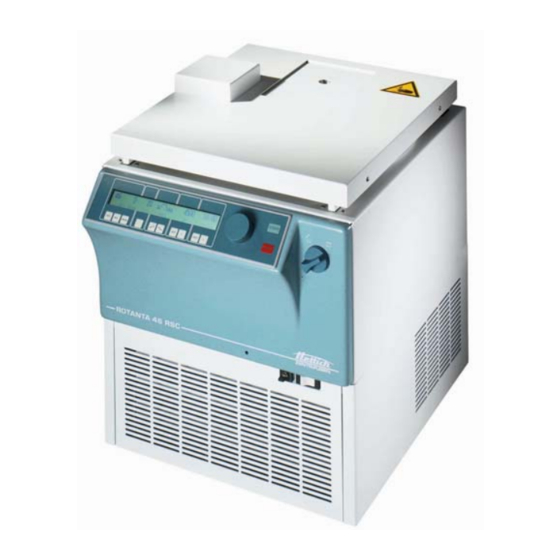
ROTANTA 46 RSC ROBOTIC
Hettich ROTANTA 46 RSC ROBOTIC Manuals
Manuals and User Guides for Hettich ROTANTA 46 RSC ROBOTIC. We have
2
Hettich ROTANTA 46 RSC ROBOTIC manuals available for free PDF download: Repair Instructions, Operating Instructions Manual
Hettich ROTANTA 46 RSC ROBOTIC Repair Instructions (104 pages)
Brand:
Hettich
| Category:
Laboratory Equipment
| Size: 1 MB
Table of Contents
Table of Contents
3
1 Introduction
7
2 Symbol Meanings
7
3 Disposal
8
4 Operational Modes
8
5 Description of the Centrifuge
9
Control Panel (A5)
9
Supply Board (A1)
10
Frequency Converter (A2)
11
Positioning Board (A14)
11
Sliding Hatch Board (A15)
12
Special Features
12
Braking Chopper (A3) / Brake Resistor (R1)
12
Motor / Tacho System
12
Magnetic Brake (Y2)
13
Lid Lock (Y1)
13
Micro Switch "Lid Contact" (S8)
13
Hatch End Switches (S6, S7)
13
Imbalance Switch (S1)
13
Key-Operated Switch (A7)
13
Machine Concept
14
Cooling System
14
Diagram of the Cooling Versions
15
Ventilator Control
16
Ventilator
16
Offset Compensation
16
Safety Devices
17
Handling of the Centrifuge Without a Serial Interface
17
Key-Operated Switch in Middle Position
17
Key-Operated-Switch Position LOCK 1
17
Key-Operated-Switch Position LOCK 2
18
General Information about Positioning
18
Address of the Centrifuge
18
6 Troubleshooting Procedures
19
7 Error Messages
20
Mains Reset
20
Brief Description
20
Description and Elimination of Errors
23
8 Settings and Interrogations
47
Option: Program Linkage
47
Linking Programs
47
Changing Program Links
48
Centrifugation Run with Program Linking
48
Deleting Program Linking
48
Optical Interface
49
Key-Operated Switch
49
Setting the Lid Lock Mode
49
Setting the Machine and Cooling Version
50
Function of the Additional Jumpers
50
Initialization
50
Prerequisites for the Initialization
51
Initializing the Centrifuge
51
OFFSET Compensation
54
Imbalance Mode
56
Setting the Imbalance Mode on the Supply Board
56
Setting the Imbalance Mode in the Program
56
Temp. Average Time
57
Leading Time
58
Parameter for Error Message °C / *ERROR 58
59
Temperature Monitor until Reaching the Temperature Set Value
59
Permissible Temperature Difference after Reaching the Temperature Set Value
59
Set the Address at the Centrifuge
60
Parameter Interrogation
60
Acoustic Signal
61
Hours of Operation
61
Checking the Motor Slippage
61
Checking the Temperatures
62
Setting the Date and Time
63
Centrifugation Data Displayed after Switching on
63
Immediate Display of the Centrifugation Data after Switching on
63
Logging
64
Error Messages
64
Imbalance Messages
65
Modification Logs
65
Note on the Display of Date and Time
65
Setting the Display Contrast
66
Imbalance Switch-Off
67
Positioning-Mode
67
POS-MENU 1: Activate the Drive Motor for Testing the Function of the Hatch
69
POS-Menu 2: Determine and Adjust the Zero Position from the Incremental Encoder
70
POS-Menu 3: Determine Rotor Position 1 and Store in the Control Panel
71
POS-Menu 4: Test Positioning
72
9 Functional Check after a Repair
73
10 Removing and Mounting Components
74
Removing the Front Panel
74
Removing the Support Sheet of the Electronic Components
74
Hook in the Front Panel at the Support Sheet of the Electronic Components
75
Motor (M1) Inclusive Magnetic Brake (Y2)
76
Rubber-Metal Bearings
76
Vibration Absorbers
77
Speed Sensor (B5)
78
Incremental Encoder (B7)
78
Magnetic Brake (Y2)
78
Drive Motor of the Hatch (M6)
79
Supply Board (A1)
79
Frequency Converter (A2)
80
Control Panel (A5)
80
10.14 EPROM in the Control Panel
81
Brake Resistor (R1)
81
Braking Chopper (A3)
81
10.17 Battery in the Control Panel
82
Flat Ribbon Cable between Positioning Board (A14) and Sliding-Hatch Board (A15)
82
Appliance Plug (X1) and Overvoltage Protection (F1)
83
Mains Switch (F3) (with Integrated Overcurrent Cutout)
83
Lid Lock (Y1)
83
10.21.1 Left Lid Lock
83
10.21.2 Right Lid Lock
84
10.22 Pneumatic Spring
84
Sealing Ring (between the Upper Part of the Centrifuge Housing and the Lid)
84
Temperature Sensor at the Top of the Centrifuge Chamber (B1)
85
Temperature Sensor at the Bottom of the Centrifuge Chamber (B2)
85
Temperature Sensor on the Condenser (B3)
85
Imbalance Switch (S1)
86
Key-Operated Switch (A7)
86
11 Technical Documents
87
Tachometer Code Configuration of the Rotors
87
Cooling Diagram
88
Abbreviations of Cable Colours in Connecting Diagrams
89
Transformer Connection Diagram
90
Connecting Diagram Centrifuge
91
Component Layout Optical Interface (A6)
95
Circuit Diagram Optical Interface (A6)
96
Component Layout Interface RS 232 to RS 485 with Security Isolation (A16)
97
Circuit Diagram Layout Interface RS 232 to RS 485 with Security Isolation (A16)
98
Component Layout Transformer Board (A9)
99
Circuit Diagram Transformer Board (A9)
99
Component Layout Sliding Hatch Board (A15)
100
Circuit Diagram Sliding Hatch Board (A15)
100
Component Layout Positioning Board (a 14)
101
Circuit Diagram Positioning Board (a 14)
102
11.16 Technical Specifications
103
Advertisement
Hettich ROTANTA 46 RSC ROBOTIC Operating Instructions Manual (70 pages)
Serial communication and PC parameters
Brand:
Hettich
| Category:
Laboratory Equipment
| Size: 1 MB
Table of Contents
Table of Contents
3
Robotic Functions
5
Operating Modes
5
Normal Robotic Operation
5
Adjusting / Teaching Operation and Handling of the Centrifuge Without Serial Interface
5
2 Communication with Hettich Centrifuges
6
Definition
6
General Description
6
Setting of Serial Interface
6
Control Characters and Abbreviations
6
Used Telegrams
6
Additional Explanation for the Protocol
7
Time Behaviour for Serial Operation
7
Time for One ENQUIRY-Telegram
7
Time for One SELECT-Telegram
7
Rhythm of Request
7
Examples for Telegrams
8
Example for an ENQUIRY-Telegram
8
Example for a SELECT-Telegram
8
Address of the Centrifuge / Change the Address
9
Principle for Serial Communication
9
Detection of the "Generation 2
9
General Information for Positioning and Hatch Commands
10
General Format of Parameter Content ( V = VAL = Value )
10
Synopsis of the Parameters
12
Short Introduction of Positioning with the "New" Communication of Generation 2
13
Parameter 00524 (Definition of the Target)
13
Parameter 00526 (Control Commands for Positioning and Hatch)
14
Parameter 00528 (Information about Positioning and Hatch State)
14
Parameter 00521 (Control Commands for Centrifugation)
15
Special Functions: ACK, NAK and SIOF
15
Detailed Description of the Parameters
16
Parameters for "Generation 2" (Only Valid / Possible with / for Generation 2)
16
Parameters for Generation 1 and Generation 2
29
Additional Features of Communication with "Generation 2
43
Serial Communication and Visual Detection of the Communication
43
Software-Lock
43
Checking Values for Validity (Value Has to be Inside the Allowed Range)
43
Limitations
43
Query of Actual Values
43
Hatch and Positioning Commands
44
Bit of Modification
44
State of the Centrifuge after Power on and General Operating States
44
3 Cookbook for Serial Control of "Generation 2
46
Open the Hatch
46
Close the Hatch
47
Set Rotor Position
48
Start Centrifugation
49
Stop Centrifugation
49
How to Store and Recall Programs
50
Recall Program to Edit
50
Recall Program and Set this Program Active
50
Store Program
50
Store Program and Set this Program Active
50
Write a New Program and Store It in the Machine Memory (EEPROM)
51
Recall and Activate an Already Stored Program
52
Protocol Examples
52
Sequence after Starting PC Communcation
53
Cyclic Enquiry During Standstill and Positioning
54
Change the Nominal Values in Stand Still or During the Run
55
The PC Writes a Program Which will be Stored in the Centrifuge
56
The PC Recalls and Activates a Program
56
Open the Hatch
57
Set Rotor Target Rotor Position 1
57
Set Target Rotor Position 4
58
Close the Hatch
58
Recall Program no 6
58
Start Centrifugation
59
Stop Centrifugation
59
Wait for Standstill and the Automatical Position 1 and Terminate Positioning
60
Rotor Cycles Commands
60
General Description
60
Cycle Counter
60
Check the General Information about the "Conditions" of Rotor Cycle Counter
61
4 Comparison between the Serial Communication Generation 1 and Generation 2
63
The Serial Protocol (Hardware, Settings and Telegrams) Remain Constant
63
Brief Introduction of the Differences
63
List of Parameters
63
5 Communication with Generation 2 According to the Still Valid Communication of Generation 1
67
Open the Hatch
67
Go to Position 1 and Check the Reached Position
67
Go to Position 2 and Check the Reached Position
67
Go to Position 3 and Check the Reached Position
68
Go to Position 4 and Check the Reached Position
68
Close the Hatch
68
Start the Centrifuge
69
STOP Per PC = Emergency Stop
69
Cancel Software-Lock LOCK 4 or LOCK 5
69
Change the Nominal Values in Stand Still or During the Run
70
Recall (RCL) a Program Stored in the Control Panel, Ready to Start
70
Change and Store the Values of a Program
70
Advertisement
Related Products
Hettich ROTANTA 460
Hettich ROTANTA 460 R
Hettich ROTANTA 460 RC
Hettich ROTANTA 460 RF
Hettich ROTANTA 460 S
Hettich ROTANTA 460 RS
Hettich ROTOFIX 46
Hettich ROTOFIX 46 H
Hettich 4600
Hettich 4600-50
Hettich Categories
Laboratory Equipment
Indoor Furnishing
Door Opening System
DC Drives
Drill
More Hettich Manuals
Login
Sign In
OR
Sign in with Facebook
Sign in with Google
Upload manual
Upload from disk
Upload from URL