Sign In
Upload
Manuals
Brands
GRASS VALLEY Manuals
Recording Equipment
KARRERA K-FRAME
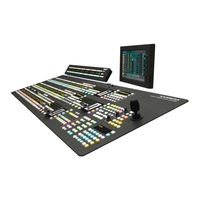
GRASS VALLEY KARRERA K-FRAME Switcher Manuals
Manuals and User Guides for GRASS VALLEY KARRERA K-FRAME Switcher. We have
3
GRASS VALLEY KARRERA K-FRAME Switcher manuals available for free PDF download: User Manual, Installation & Service Manua, Installation & Service Manual
GRASS VALLEY KARRERA K-FRAME User Manual (410 pages)
VIDEO PRODUCTION CENTER
Brand:
GRASS VALLEY
| Category:
Switch
| Size: 55.31 MB
Table of Contents
User Manual
3
Table of Contents
5
Preface
15
About this Manual
15
Standard Documentation Set
15
Other Documentation
15
Section 1 - Introduction
17
Overview
17
Features
17
K-Frame Video Processor
18
K-Frame Control Surfaces
19
Karrera
19
Touch Screen Menu Panel Option
20
Soft Panel (KSP) Option
21
Menu Application
21
K-Frame System Examples
22
Basic Single Suite Karrera Panel System
22
Multiple Suites and Control Surfaces
22
Supported Control Protocols
23
Section 2 - Setting Panel Preferences
25
Control Panel Source Select Button Mapping
25
The Button Mapping Menu
26
Default Control Panel Source Select Button Mapping
29
Setting Control Panel Source Select Button Mapping Preferences
30
Assigning Colors to Control Panel Source Select Buttons
31
Assigning User-Defined Colors
32
Mapping Remote aux Panel Source Select Buttons on the Control Panel
33
Mapping Remote aux Panel Delegation Buttons
34
Section 3 - Setting Suite Preferences
35
Source Patching
35
Engineering Names, Eng Ids, and Logical Ids
36
Alternative Source Names
36
Multiple Suites and Source Names
37
Source Name Display Hierarchy
37
Source Patching and Effects Portability
38
Patching Engineering and Fixed Sources to Logical Ids
39
Enable Source Correction on any Source (Globally)
40
Patching a Key Input from One Source to a Different Source Using Patch Key
41
Default Keyframe
42
Learning a Default Keyframe
43
Preview Prefs
44
Safe Area
44
Crosshair
45
About ME Viewer
45
About Multiviewer Preferences
46
Set Multiviewer Layout Preferences
47
File Operations
48
Features
49
Introduction
49
File Storage Organization
49
GV Switcher Drive Access
49
Managing Files Using the Utilities Pane Buttons in the File Ops Menus
50
Copy/Pasting Files
51
Creating a Folder
52
Deleting Files
52
Renaming Files
52
GV Switcher File Type Extensions
53
Show Files
53
Show File Buttons
53
Creating a Show File
55
Loading a Show File
56
Updating a Show File
57
All File Type and Directory Management
59
Saving Panel Prefs and Suite Prefs Files
60
Loading Panel Prefs and Suite Prefs Files
61
Saving Source Tables
62
Loading Source Tables
63
Register Files
63
Saving Register Files
64
Loading Register Files
66
Loading to a Different Set of Registers
67
Saving Source Rules Files
68
Loading Source Rules Files
69
Saving Eng Setup Files
70
Loading Eng Setup Files
71
File Translation from Kayenne
72
About K-Frame and Kayenne Show Files
72
Loading a Kayenne Show into a K-Frame
72
Importing Kalypso Image Store File Types into K-Frame
75
Section 4 - Video MIX/Effects
77
Mes and Keyers
77
Chroma Key
77
Chroma Key Auto Setup
78
Manual Chroma Key Adjustments
78
Access Keyer Menu and Delegate Keyer
79
Primary Suppression
79
Extra Chroma Key Controls
81
Setting up a Chroma Key
82
Using Auto Setup
82
Reshaping a Chroma Key Using Auto Setup
83
Adjusting Chroma Key Controls
83
Reshaping Chroma Key
85
Applying Chroma Key Secondary Color Suppression
85
Generating Background Mattes
87
Splitting a Key
88
Setting Keyer Priority
90
Transitioning between Different Keyer Priorities
91
Key Store
92
Grabbing a Key Store Image
94
Setting a Pattern MIX
95
About Source Memory
96
Learning Source Memory for a Keyer
97
Deleting Source Memory from a Keyer
98
Acquiring Dpms
99
Acquire an ME Resource for Edpm
99
Release/Acquire DPM Resources between Edpms/Idpms
100
Enable/Delegate DPM Channels
101
Enable an Idpm on a Keyer at the Control Panel
101
Delegate Edpm Channels at the Control Panel
101
Enable a 2D DPM on a Keyer at the Control Panel
102
Enable Dpms from the Menu
102
About Dpms
103
About 2D DPM
103
DPM Source and Target Space Explained
103
Tally and DPM
104
DPM Transform Menu
104
Enable DPM Transforms in the Menu
105
DPM Global Channel Assignments
105
Key off Control
107
Easy Cube Control
108
Keyer Partition Visibility
108
Transform Controls
109
Crop Controls
109
Reverse Controls
109
Path Controls
109
Clear Transforms
110
Border Menu
110
Idpm Borderline Menu
111
Shadow Controls
111
Idpm Shadow Crop Controls
112
Glow Pane Controls
112
Glow Color
113
Glow Path Control Pane
113
Idpm Film Look Menu
114
Idpm Kurl Menu
114
Kurl Position/Size Modulation Mode
115
Modulation Pane
116
Mod Type Pane
117
Pattern Pane
117
Page Turn/Roll Mode
118
Page Turn Pane
119
Show Sides Pane
120
Ripple Mode
121
Slits Mode
123
Sphere Mode
124
Idpm Splits Mirrors Menu
125
Splits Pane
125
Splits & Mirrors Modifiers Pane
126
Idpm Defocus Menu
127
Defocus Pane
127
NAM Matte Pane
128
Idpm Lighting Menu
128
Shadow Control Pane
129
Light Type Pane
129
Light Type
130
Light Control Pane
130
Lighting Path Controls
131
Lighting with Page Turn/Roll Effects
131
Lighting and Post Transform Space
131
Output Recursive Menu
131
Output Recursive Presets
132
Output Recursive Modes
133
Motion Decay Mode
134
Freeze Mode
134
Montage Mode
135
DPM Global Channel Control over Multiple Mes
139
Set up a DPM Secondary Global Channel
140
Adjust Idpm/2D DPM Border Edges
141
Idpm/2D DPM Border Color
142
Adjust Idpm/2D DPM Border Edges
142
About Edpms
144
Edpm and Effects
144
Edpm Partitioning
145
Edpm Definable Sub-Levels
146
Assign Sources
146
Button Mapping Edpms to an ME
147
Edpm Mode Menus
148
Edpm 2DPM Menu
149
Enabling Edpm 2D Dpms
149
Edpm Effects Menus
149
Edpm Category Menus
150
File Ops Menu
150
E-MEM & Timeline Menu
151
Source Ops Menu
152
Picture Menu
153
Section 5 - Switcher Control
155
Basic E-MEM Operations
155
Time Value Entry
155
Learning E-MEM Registers from the Control Panel
156
Learn a Register in the Current Bank
156
Learn a Register to a Different Bank
156
Copying E-MEM Timeline Information with Get and Put
157
Recalling E-MEM Registers from the Control Panel
157
Clearing E-MEM Registers
158
Running an E-MEM Effect and Auto Run
159
Learning E-MEM Sequences
159
Macros
160
Introduction
160
Macro Recording
160
Macro Playback
161
Macro Attachments
162
Macro Control Button Group
162
Macro Button Function Summary
164
Macro Menus
164
Accessing Shifted Macros
165
Performing Macro Operations from the Control Panel
165
Recording Macros
165
Inserting a Macro Delay
165
Playing Back a Macro Register
165
Pre-Attaching a Macro
166
Post-Attaching a Macro
166
Attaching Multiple Macros to the same Button
166
Removing a Macro Attachment
167
Appending to a Macro
167
Performing Macro Operations from the Menu
167
Recording a Macro
167
Enter a Macro Panel Name
168
Attaching a Macro
169
Playing an Attached Macro
170
Appending to a Macro
170
Appending a Macro to Another Macro
170
Saving Macro Registers
170
Loading Macro Registers
171
Macros for Multiple Copies or Swaps
171
Macros and E-Mems
171
E-MEM Recalls in a Macro
171
About Macros, Suites, and Surfaces
172
GPI Macros
172
Bus Linking
172
Bus Linking Examples
173
Bus Linking Menu
173
Bus Linking Source Substitution Tables
175
Linked Source Buttons
175
Configuring a Source Table with Source Substitutions
176
Storing (Copying) Source Table Substitutions to Another Source Table
177
Changing Source Tables for a Bus Link
177
Source Table File Operations
178
Linking Busses One-To-One
178
Creating Parallel Bus Links
179
Creating Cascading Bus Links
180
Bus Linking Rules and Restrictions
182
Bus Linking Management
182
Section 6 - Device Control
185
Device Control
185
Karrera Control Groups
185
E-MEM Control of External Devices
186
Configuration
187
Operation
187
Timecode Entry
188
Multiple Events on the same Keyframe
188
Device Control with the Menu
189
Clip Loading
189
Clip Directory (AMP Protocol)
190
Timeline Event Information and Work Buffer Values
190
Operating an External Device from the GV Switcher
191
Preparing the External Device for Control
191
Controlling an External Device (Example)
192
Controlling an External Device Using Timeline Events and E-MEM
193
Playing a Video and Key Pair of Sources in Sync from an External Device
194
Loading a Clip to Play on Air Later with Auto Start
195
Building an Event List
196
Ganging External Devices with Karrera
196
Router Interface Operation
198
Introduction
198
Features
200
Menu Panel Router Interface Operation
200
Router Control of aux Buses
202
Controlling aux Bus Source Selections from a Router
203
R-Mem
204
Introduction
204
Features
204
R-MEM Menu Operation
205
E-MEM Control of R-MEM
207
Introduction
207
E-MEM Prefs Assignment
208
Learning R-Mems on the Control Panel
208
Changing R-MEM on an Existing E-MEM Register
209
Empty R-MEM Keyframes
210
Loading R-MEM Registers
210
Camera Control with Ethernet Camera Tally
211
Camera Operations
211
Source Ops
211
Newton Modular Control
215
Introduction
215
Installation on GV Switcher
215
Newton Controls Configuration
216
External Device Newton Menu Description
217
Delegation Pvw Bus
218
Input Selection
218
Newton Channel Information
218
Newton Controls
218
Setup Selector
218
Section 7 - Switching Basics
219
About Switching
219
Control Panel Delegation
219
ME Delegation
220
Automatic Delegation
220
Multiple Keyer Delegations
220
Karrera Control Panel DPOP and SPOP Menu Delegation
221
Menu Panel Overview
223
Touch Screen
223
Menu Selection
223
Soft Knobs
223
Menu Screen Organization and Components
224
History Mode
227
Favorites Mode
228
Creating a Last Menu Assignment in Favorites Mode
229
Quick Tabs
229
Data Pads and Touch Buttons
230
Menu Top Line
231
Menu Category Selection
231
Delegation Group
232
Parameter Control Area
232
Numeric Keypad
233
Alphanumeric Keypad
234
Scrolling Lists
234
Menu and Panel Interactions
235
Transitions
236
Manual Transitions
236
Setting up a Lever Arm Transition
237
Performing a Lever Arm Transition
237
Performing an Auto Transition
238
Performing a MIX through Video Transition
238
NAM and FAM Mixed Transitions
239
Transitions from the Master Keyer Transition Area
240
Transitions Using E-MEM
241
Aux Bus Transitions
241
Trans Lock Button
242
Setting Wipe Transition Parameters
243
Allocating Resources and Setting up the Transition
243
Performing aux Bus Transitions
244
Advertisement
GRASS VALLEY KARRERA K-FRAME Installation & Service Manua (290 pages)
VIDEO PRODUCTION CENTER
Brand:
GRASS VALLEY
| Category:
Recording Equipment
| Size: 47.38 MB
Table of Contents
Copyright
4
Recycling
4
Table of Contents
5
Preface
13
About this Manual
13
Standard Documentation Set
13
Other Documentation
13
Safety Summary
15
Safety Terms and Symbols
15
Terms in this Manual
15
Terms on the Product
15
Symbols on the Product
16
Warnings
16
Cautions
17
Sicherheit - Überblick
19
Consignes de Sécurité
23
Regulatory Notices
27
Certifications and Compliances
27
Canadian EMC Notice of Compliance
27
EN55022 Class a Warning
27
FCC Emission Control
27
Canadian Certified AC Adapter
28
Canadian Certified Power Cords
28
Certification
28
FCC Emission Limits
28
Section 1 - Introduction
31
Overview
31
Features
32
General
32
K-Frame Standard Frame
33
K-Frame Compact Frame
33
K-Frame Compact S-Series Frame (Differences)
34
K-Frame Video Processor
34
K-Frame Control Surfaces
35
Karrera
35
Touch Screen Menu Panel Option
36
Menu Application
37
Soft Panel (KSP) Option
37
Karrera K-Frame System Examples
38
Basic Single Suite Karrera Panel System
38
Multiple Suites and Control Surfaces
38
Supported Control Protocols
40
Section 2 - Control Surface Installation
41
Overview
41
3-ME Karrera Control Panel Installation
41
2-ME Karrera Control Panel Installation
43
2-ME Compact Karrera Control Panel Installation
44
Karrera Menu on User PC Installation
46
PC Requirements
46
Macintosh Computer Operation
46
Hardware Installation
46
Menu on User PC Software Installation
47
User PC Configuration
47
Optional Touch Screen Menu Panel Installation
47
Menu Panel Dimensions
48
Menu Panel Connectors
49
Menu Panel Cooling
49
Fanless PC Dimensions and Connectors
50
Menu Panel Articulated Arm Installation
51
Menu Panel Hardware Installation with Articulated Arm
52
Wall Mounting Without Articulated Arm
52
Optional Local aux Panel Installation
53
Local aux 35 Panel Dimensions
53
Local aux 25 Panel Dimensions
54
Local aux Panel Installation Options
54
Rear Screw Hole Dimensions
54
Tabletop/Backsplash Cutout Installation
55
Tabletop Bracket Installation: 2-ME and 3-ME Main Panels
56
Tabletop Bracket Installation: 2-ME Compact Panel
57
Section 3 - Frames Installation
59
General Rack Mounting Instructions
59
Weight Distribution
59
Cooling Requirements
59
Power Connections
59
13-RU Standard Video Processor
60
6-RU Compact Video Processor
65
6RU Compact S-Series Front Views with Doors Removed
67
6RU Compact Front Views with Doors Removed
68
6RU Rear View
69
K-Frame Controller Connections
69
K-Frame Standard Power Supply Frame Installation
70
K-Frame Standard Power Supply Frame Rack Placement
71
K-Frame Standard Power Supply Cooling
73
K-Frame Standard Power Supply AC Requirements
73
Supplied Power Cables for Standard K-Frame
73
About High Line (208V-240V) Verses Low Line (120V) Operations
74
About Low Line (120V) Operational Considerations
74
K-Frame Compact Power Supply AC Requirements
75
About Low Line (120V) Operational Considerations
75
About High Line (208V-240V) Verses Low Line (120V) Operations
75
Replacing Compact Power Supplies
76
Video Processor Door Removal Clearance
77
Section 4 - System Cabling
79
Overview
79
K-Frame Network Cabling
80
K-Frame Ethernet Switch
80
Suites and Control Surfaces
80
Control Panel Network Cabling
81
Suites and Control Surfaces
81
Customer Supplied Ethernet Routers and Switches
82
Factory Default Network Settings
84
Optional Touch Screen Menu Panel Cabling
84
Optional Local aux Panel Cabling
85
Video Cabling
86
Inputs
86
Outputs
86
Matchdef and Setdef Format Conversion
87
Reference Input
87
K-Frame System Video Timing and Delay
87
Timing Analyzer
89
Time Zones and the Autotiming Window
90
Clipstore Cabling
91
Clipstore Video Cabling
91
Overview
91
Video Processor Frame Gpi/Tally Interface
94
GPI and Tally Connections
95
GPI Inputs
95
Tally/Gpi Outputs
96
Pin Assignments
98
RS-232 Ports
98
RS-422/485 Ports
98
GPI In, Tally, GPI out
99
Section 5 - Basic Configuration
101
Introduction
101
Configuration Steps
101
Karrera K-Frame Configuration Data
102
Eng Setup
102
Network Ips and Node Settings
102
User Setups
102
GV Switcher Menu Application
103
Data Pads and Touch Buttons
104
Menu Top Line
104
Data Pads and Soft Knobs
105
Menu Selection
105
System Power up and Initialization
105
Default Karrera K-Frame System Communications
106
Karrera K-Frame Menu Application Initialization
106
Power and Initialization Indications
106
Connecting the Menu Application to a Frame
107
Establishing Menu to Frame Communication
107
Network Configuration
109
IP Address Background Information
109
Gateway IP Addresses
110
Karrera K-Frame Default IP Addresses on Isolated Network
110
Connecting to an Existing Network
110
Setting Ips with the K-Frame Switcher Installer Program
111
Karrera K-Frame System Names
111
Set IP Procedure Using K-Frame Installer Program
112
Other K-Frame Switcher Installer Program Functions
114
Setting Ips with Device Web Pages
114
Set IP Procedure Using Device Web Pages
114
Changing Image Store IP Address
116
Changing Control Panel IP Addresses
116
Control Panel EMEM IP Address Mode
116
Changing Menu Panel IP Address
119
Setting 32-Crosspoint Remote aux Panel IP Address
119
Setting the IP Address
119
Restoring the Default IP Address
122
Registering Karrera K-Frame System Nodes
122
Menu Panel Registration
122
Control Panel Registration
122
Remote aux Panel Registration
123
Control Panel Brightness Adjustment
124
Lever Arm and Joystick Calibration
125
Engineering Setups
126
Source Definition
126
Source Definition Inputs
127
Source Definition Outputs
127
Direct Source Definition
128
Source Definition Menu
128
External Device Source Definition
129
Source Naming Background Information
129
Name Display Hierarchy
130
Fixed Sources
132
Source Patch Feature
132
Button Mapping
133
Output Assignments
133
Default Output Assignments
133
Changing Output Assignments
134
Aux Bus Configuration
135
ME Viewer
137
Switcher Tally Configuration
138
About Tally Systems
139
Switcher Tally Calculator Menus
140
Relay Assign Menu
144
About MV Green Tally Calculations for Multiviewer On-Air and Green
146
Configure MV Green Tally for Look Ahead Preview
146
Set Source Names with External Ethernet Tally
147
Clipstore Configuration
149
Summit Preparation
149
Summit/Solo Software Version
149
Karrera K-Frame Configuration
150
Karrera K-Frame System Preparation
150
Clipstore Config Menu
156
Assigning Clipstore Channel Resources to a Suite
157
Setting the Summit/Solo IP Address
158
Camera Control with Ethernet Tally Configuration
162
Node Settings
163
Source Definitions
164
Acquire Resources
166
Switcher Ethernet Camera Tally
168
Button Mapping Menu
170
Panel Prefs
170
User Setups
170
Default Keyframe
172
Source Patch Menu
172
Suite Prefs
172
Configuration File Save and Load
173
Karrera K-Frame File Browser
173
File Storage Organization
174
Karrera K-Frame Drive Access
174
File Type Extensions
175
Eng Setup File Operations
176
Left Navigation Pane
176
Right Load Granularity Pane
176
File Operations Pane
177
To Load Eng Setup Files
177
To Save Eng Setup Files
177
Utilities Pane
177
Collaborative Resource Sharing
178
Introduction
178
Multiple Suite Resource Sharing
178
Independent Resource Sharing
179
Control Surface
180
Suite
180
External Control Points
181
Logical aux Buses
181
Remote aux Panels
181
Preparation
182
Prepare Worksheet
182
Setting up Resource Sharing
182
Configure Control Surfaces
183
Define Default Multi-Suite Engineering Resources
183
Divide Resources between Suites
185
Define and Save Default Panel Prefs
187
Define and Save Default Suite Prefs
187
Save Default Multi-Suite Engineering Setups File
187
Delegate Stripes to Mes in each Suite
188
Multi Suite Independent Operation
188
Engineering Login
189
Setdef and Matchdef
190
Setdef Output Conversion
190
Matchdef Input Conversion
191
Reference Sync Selection
193
Video Settings
193
About PSF Video, Supported Live Mode, and Film Mode
194
Frame Operating Mode
194
Command Processing
195
Matte Limiting
195
Other Settings
195
Output Blanking
195
Default Idpm Crop
196
Timing Analyzer
196
Node Settings
196
Frame Suite Nodes & ID Menu
197
Mapping Logical Remote aux Panels
197
Remote aux Button Mapping
199
About the Status Menu
200
Acquire Resources
201
Acquire Multiviewer Resources with a Standard Frame
201
Acquire Multiviewer Resources with a Compact Frame
203
Acquire Multiviewer Resources with a Compact S-Series (Four-Keyer) Frame
205
GRASS VALLEY KARRERA K-FRAME Installation & Service Manual (278 pages)
VIDEO PRODUCTION CENTER
Brand:
GRASS VALLEY
| Category:
Recording Equipment
| Size: 64.4 MB
Table of Contents
Table of Contents
5
Preface
13
About this Manual
13
Standard Documentation Set
13
Other Documentation
13
Safety Summary
15
Safety Terms and Symbols
15
Terms in this Manual
15
Terms on the Product
15
Symbols on the Product
16
Warnings
16
Cautions
17
Sicherheit - Überblick
19
Consignes de Sécurité
23
Regulatory Notices
27
Certifications and Compliances
27
Canadian EMC Notice of Compliance
27
EN55022 Class a Warning
27
FCC Emission Control
27
Canadian Certified AC Adapter
28
Canadian Certified Power Cords
28
Certification
28
FCC Emission Limits
28
Section 1 - Introduction
31
Overview
31
Features
31
K-Frame Video Processor
32
K-Frame Control Surfaces
33
Karrera
33
Touch Screen Menu Panel Option
34
Menu Application
35
Soft Panel (KSP) Option
35
K-Frame System Examples
36
Basic Single Suite Karrera Panel System
36
Multiple Suites and Control Surfaces
36
Supported Control Protocols
37
Section 2 - Control Surface Installation
39
Overview
39
3-ME Karrera Control Panel Installation
39
2-ME Karrera Control Panel Installation
41
2-ME Compact Karrera Control Panel Installation
42
Karrera Menu on User PC Installation
44
PC Requirements
44
Macintosh Computer Operation
44
Hardware Installation
44
Menu on User PC Software Installation
45
User PC Configuration
45
Optional Touch Screen Menu Panel Installation
45
Menu Panel Dimensions
46
Menu Panel Connectors
47
Menu Panel Cooling
47
Fanless PC Dimensions and Connectors
48
Menu Panel Articulated Arm Installation
49
Menu Panel Hardware Installation with Articulated Arm
50
Wall Mounting Without Articulated Arm
50
Optional Local aux Panel Installation
51
Local aux 35 Panel Dimensions
51
Local aux 25 Panel Dimensions
52
Local aux Panel Installation Options
52
Rear Screw Hole Dimensions
52
Tabletop/Backsplash Cutout Installation
53
Tabletop Bracket Installation: 2-ME and 3-ME Main Panels
54
Tabletop Bracket Installation: 2-ME Compact Panel
55
Section 3 - Frames Installation
57
General Rack Mounting Instructions
57
Weight Distribution
57
Cooling Requirements
57
Power Connections
57
13-RU Standard Video Processor
58
6-RU Compact Video Processor
63
K-Frame Controller Connections
66
K-Frame Power Supply Frame Installation
67
K-Frame Power Supply Frame Rack Placement
68
K-Frame Power Supply Cooling
70
K-Frame Power Supply AC Requirements
70
Supplied Power Cables
70
About High Line (208V-240V) Verses Low Line (120V) Operations
71
Low Line (120V) Operational Considerations
71
Video Processor Door Removal Clearance
72
Section 4 - System Cabling
73
Overview
73
K-Frame Network Cabling
74
K-Frame Ethernet Switch
74
Suites and Control Surfaces
74
Control Panel Network Cabling
75
Suites and Control Surfaces
75
Customer Supplied Ethernet Routers and Switches
76
Factory Default Network Settings
78
Optional Touch Screen Menu Panel Cabling
78
Optional Local aux Panel Cabling
79
Video Cabling
80
Inputs
80
Outputs
80
Matchdef and Setdef Format Conversion
81
Reference Input
81
K-Frame System Video Timing and Delay
81
Timing Analyzer
83
Time Zones and the Autotiming Window
84
Clipstore Cabling
85
Clipstore Video Cabling
85
Overview
85
Video Processor Frame Gpi/Tally Interface
88
GPI and Tally Connections
89
GPI Inputs
89
Tally/Gpi Outputs
90
Pin Assignments
92
RS-232 Ports
92
RS-422/485 Ports
92
GPI In, Tally, GPI out
93
Section 5 - Basic Configuration
95
Introduction
95
Configuration Steps
95
Karrera K-Frame Configuration Data
96
Eng Setup
96
Network Ips and Node Settings
96
User Setups
96
GV Switcher Menu Application
97
Data Pads and Touch Buttons
98
Menu Top Line
98
Data Pads and Soft Knobs
99
Menu Selection
99
System Power up and Initialization
99
Karrera K-Frame Menu Application Initialization
100
Power and Initialization Indications
100
Connecting the Menu Application to a Frame
101
Default Karrera K-Frame System Communications
101
Establishing Menu to Frame Communication
101
Network Configuration
103
IP Address Background Information
103
Connecting to an Existing Network
104
Gateway IP Addresses
104
Karrera K-Frame Default IP Addresses on Isolated Network
104
Karrera K-Frame System Names
105
Setting Ips with the K-Frame Switcher Installer Program
105
Set IP Procedure Using K-Frame Installer Program
106
Other K-Frame Switcher Installer Program Functions
108
Set IP Procedure Using Device Web Pages
108
Setting Ips with Device Web Pages
108
Changing Control Panel IP Addresses
110
Changing Image Store IP Address
110
Control Panel EMEM IP Address Mode
110
Changing Menu Panel IP Address
113
Setting 32-Crosspoint Remote aux Panel IP Address
113
Setting the IP Address
113
Restoring the Default IP Address
115
Registering Karrera K-Frame System Nodes
115
Menu Panel Registration
116
Control Panel Registration
116
Remote aux Panel Registration
117
Control Panel Brightness Adjustment
118
Lever Arm and Joystick Calibration
119
Engineering Setups
119
Source Definition
119
Source Definition Inputs
120
Source Definition Outputs
120
Direct Source Definition
121
Source Definition Menu
121
External Device Source Definition
122
Source Naming Background Information
122
Name Display Hierarchy
123
Fixed Sources
125
Source Patch Feature
125
Button Mapping
126
Output Assignments
126
Default Output Assignments
126
Changing Output Assignments
127
Aux Bus Configuration
128
ME Viewer
130
Switcher Tally Configuration
131
About Tally Systems
132
Switcher Tally Calculator Menus
133
Relay Assign Menu
137
About MV Green Tally Calculations for Multiviewer On-Air and Green
139
Configure MV Green Tally for Look Ahead Preview
139
Set Source Names with External Ethernet Tally
140
Clipstore Configuration
142
Summit Preparation
142
Summit/Solo Software Version
142
Karrera K-Frame Configuration
143
Karrera K-Frame System Preparation
143
Clipstore Config Menu
149
Assigning Clipstore Channel Resources to a Suite
150
Setting the Summit/Solo IP Address
151
Camera Control with Ethernet Tally Configuration
155
Node Settings
156
Source Definitions
157
Acquire Resources
159
Switcher Ethernet Camera Tally
161
User Setups
163
Panel Prefs
163
Button Mapping Menu
163
Suite Prefs
165
Default Keyframe
165
Source Patch Menu
165
Configuration File Save and Load
166
Karrera K-Frame File Browser
166
File Storage Organization
167
Karrera K-Frame Drive Access
167
File Type Extensions
168
Eng Setup File Operations
169
Left Navigation Pane
169
Right Load Granularity Pane
169
File Operations Pane
170
To Load Eng Setup Files
170
To Save Eng Setup Files
170
Utilities Pane
170
Collaborative Resource Sharing
171
Introduction
171
Multiple Suite Resource Sharing
171
Independent Resource Sharing
172
Control Surface
173
Suite
173
External Control Points
174
Logical aux Buses
174
Remote aux Panels
174
Preparation
175
Prepare Worksheet
175
Setting up Resource Sharing
175
Configure Control Surfaces
176
Define Default Multi-Suite Engineering Resources
176
Divide Resources between Suites
178
Define and Save Default Panel Prefs
180
Define and Save Default Suite Prefs
180
Save Default Multi-Suite Engineering Setups File
180
Delegate Stripes to Mes in each Suite
181
Multi Suite Independent Operation
181
Engineering Login
182
Setdef and Matchdef
183
Matchdef Input Conversion
184
Setdef Output Conversion
184
Reference Sync Selection
186
Video Settings
186
About PSF Video, Supported Live Mode, and Film Mode
187
Frame Operating Mode
187
Command Processing
188
Matte Limiting
188
Other Settings
188
Output Blanking
188
Default Idpm Crop
189
Node Settings
189
Timing Analyzer
189
Frame Suite Nodes & ID Menu
190
Mapping Logical Remote aux Panels
190
Remote aux Button Mapping
192
About the Status Menu
193
Acquire Multiviewer Resources with a Standard Frame
194
Acquire Resources
194
Acquire Multiviewer Resources with a Compact Frame
196
Advertisement
Advertisement
Related Products
GRASS VALLEY KARRERA
GRASS VALLEY K2 DYNO -
GRASS VALLEY KAYENNE - V2.0
GRASS VALLEY Kayenne ClipStore
GRASS VALLEY KAMELEON Series
GRASS VALLEY KAM-DEC-4ADC-MUX
GRASS VALLEY KAM-ENC-4DAC-DMX
GRASS VALLEY KAM-SD-2AES-DMX
GRASS VALLEY KAHUNA Series
GRASS VALLEY KayakDD-2
GRASS VALLEY Categories
Media Converter
Software
Amplifier
Switch
Network Router
More GRASS VALLEY Manuals
Login
Sign In
OR
Sign in with Facebook
Sign in with Google
Upload manual
Upload from disk
Upload from URL