Sign In
Upload
Manuals
Brands
GRASS VALLEY Manuals
Recording Equipment
KARRERA
GRASS VALLEY KARRERA Manuals
Manuals and User Guides for GRASS VALLEY KARRERA. We have
4
GRASS VALLEY KARRERA manuals available for free PDF download: User Manual, Installation & Service Manual
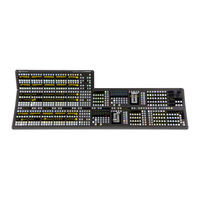
GRASS VALLEY KARRERA User Manual (415 pages)
Video Production Center
Brand:
GRASS VALLEY
| Category:
Recording Equipment
| Size: 41.52 MB
Table of Contents
Patent Information
2
Table of Contents
3
Documentation & Media
17
About this Manual
17
Standard Documentation Set
17
Other Documentation
17
Video Tutorials & Training
18
Introduction
19
Overview
19
Features
19
General
19
K-Frame Control Surfaces
22
Kayenne Control Surface
22
Flat or Curved Control Panel Orientation
23
Control Panel Stripes
23
Touch Screen Menu Panel
23
Basic Single Suite Kayenne Panel System
24
Multiple Suite Kayenne Panel System Example
24
Karrera Control Surface
26
Basic Single Suite Karrera Panel System
27
GV Korona Control Surfaces
28
Basic Single Suite GV Korona Panel System Example
28
Multiple Suites and Control Surfaces Example
28
Supported Control Protocols
29
Panel Preferences
31
Panel Preference Settings
31
About Control Panel Default Button Mapping
31
Map Control Panel Source Select Buttons
33
Assign a Control Panel Color Scheme
33
Assign Control Panel Source Colors
34
Map Remote Aux Panel Sources to the Control Panel
36
Map Remote Aux Panel Delegation Buttons (Logical Mapping)
37
Suite Preferences
39
Suite Preference Settings
39
About Suite Resources
39
Aux Bus Transitions
39
About Suite Signal Type-HDR Mode
39
About Re-Entry
41
About Source Patching
41
Engineering Names, Eng Ids, and Logical Ids
43
Alternative Source Names
43
Multiple Suites and Source Names
43
Source Name Display Hierarchy
43
Source Patching and Effects Portability
44
Patch Engineering and Fixed Sources to Logical Ids
45
Patch a Key Input from Another Source
46
About Default Keyframe
47
About the Preview Prefs Menu
48
About the Multiviewer Prefs Menu
49
Set Multiviewer Layout Preferences
50
About MV Green Relay Tally Calculations for Multiviewer On-Air and Green
51
Configure MV Green Relay Tally for Look Ahead Preview
51
About File Operations
52
Introduction
52
About the File Ops Menus
53
GV Switcher File Type Extensions
54
About Show Files
55
About the File Ops, All Files Menu
61
Save User Setups
62
Load User Setups
63
Save Source Tables or Source Rules
64
Load Source Tables or Source Rules
65
About Register-Based File Ops Menus
65
Save Eng Setups
69
Load User Setups
69
Video MIX/Effects
71
M/Es and Keyers
71
Chroma Key
72
Chroma Key Auto Setup
72
Manual Chroma Key Adjustments
72
Primary Suppression
73
Extra Chroma Key Controls
74
Configure Auto Setup
75
Reshape a Chroma Key Using Auto Setup
76
Adjust Chroma Key Controls
76
Apply Chroma Key Secondary Color Suppression
77
Generate Background Mattes
79
Split a Key
80
Set Keyer Priority
81
Transition between Different Keyer Priorities
81
About Key Store
82
Set a Pattern MIX
84
Source Memory
85
About Acquiring Dpms
88
Acquire an M/E Resource for Edpm
89
Release/Acquire DPM Resources between Edpms/Idpms
89
Enable/Delegate DPM Channels
90
Enable Idpms on a Karrera Control Panel
91
Delegate Edpm Channels
91
Enable a 2D DPM on a Keyer
91
Enable Dpms from the Menu
91
Idpms
92
2D Dpms
93
Kayenne (Only) Parameter and Soft Knob Controls
93
DPM Source and Target Space Explained
94
Tally and Dpms
94
DPM Transform Menu
94
Enable DPM Transforms in the Menu
94
DPM Global Channel Assignments
94
Key off Control
96
Easy Cube Control
97
Transform Controls
97
Crop Controls
97
Reverse Controls
97
Path Controls
97
Clear Transforms
98
Border Menu
98
DPM Borderline Menu
98
Shadow Controls
99
Idpm Shadow Crop Controls
99
Glow Pane Controls
99
Glow Color
100
Glow Path Control Pane
100
Idpm/2D DPM Film Look Menus
101
Idpm Kurl Menu
101
Kurl Position/Size Modulation Mode
101
Modulation Pane
101
Mod Type Pane
102
Pattern Pane
102
Page Turn/Roll Mode
102
Page Turn Pane
103
Show Sides Pane
103
Ripple Mode
103
Slits Mode
104
Sphere Mode
104
DPM Splits Mirrors Menu
105
Splits Pane
105
Splits & Mirrors Modifiers Pane
105
DPM Defocus Menu
105
Defocus Pane
105
NAM Matte Pane
106
DPM Lighting Menu
106
Shadow Control Pane
106
Light Type Pane
106
Light Type
107
Light Control Pane
107
Lighting Path Controls
108
Lighting with Page Turn/Roll Effects
108
Lighting and Post Transform Space
108
Output Recursive Menu
108
Output Recursive Presets
108
Output Recursive Modes
108
Motion Decay Mode
109
Freeze Mode
109
Montage Mode
110
Trails Mode
111
DPM Global Channel Control over Multiple M/Es
112
Set up a DPM Secondary Global Channel
113
Adjust Idpm/2D DPM Border Edges
113
Idpm/2D DPM Border Color
113
Adjust Idpm/2D DPM Border Edges
114
Edpms
114
Edpm and Effects
114
Edpm Partitioning
115
Edpm Definable Sub-Levels
116
Assign Sources
117
Button Mapping Edpms to an M/E
118
Edpm Mode Menus
118
Edpm Effects Menus
118
Edpm Category Menus
118
File Ops Menu
119
E-MEM & Timeline Menu
119
Source Ops Menu
120
Picture Menu
120
Switcher Control
123
Basic E-MEM Operations
123
Time Value Entry
123
Learning E-MEM Registers from the Control Panel
124
Learn a Register in the Current Bank
124
Learn a Register to a Different Bank
124
Copying E-MEM Timeline Information with Get and Put
124
Recalling E-MEM Registers from the Control Panel
125
GV Korona E-MEM Run from the Control Panel
125
Clearing E-MEM Registers
126
Running an E-MEM Effect with Auto Run
127
Learn a Sequence of E-MEM Registers
127
Play a Sequence of E-MEM Registers
127
Break a Sequence
127
E-MEM Numeric Recall
128
Recall of E-MEM Registers
131
Learning of E-MEM Registers
132
Interaction with Macros
132
Use of Effects Dissolve and Sequence
132
Advanced E-MEM Operations: Partial Keyframe/Define E-MEM Settings
133
Macros
133
About Multiple Macros and Player Groups
134
Macro Control Menu
135
Macro Recording
136
Macro Playback
137
About Playing a Macro from the Control Menu (Important)
137
Macro Attachments
137
Disabled" Is the Default for the Macro Attachable Control Panel Preference
138
Macro Attachments and Importing Show Files
138
Kayenne Macro Operations
138
Record a Macro
139
Insert a Macro Delay
139
Insert a Macro User Pause
140
Playback a Macro Register
141
Pre-Attach a Macro
141
Post-Attach a Macro
141
Attach Multiple Macros to the same Button
141
Delete a Macro Attachment
142
Append to a Macro
142
Karrera Macro Operations
142
Macro Control Button Group
142
Macro Button Function Summary
143
Record a Macro
143
Insert a Macro Delay
143
Insert a Macro User Pause
144
Recall a Macro Register from the Master E-MEM
145
Pre-Attach a Macro
145
Post-Attach a Macro
145
Attach Multiple Macros to the same Button
145
Remove a Macro Attachment
145
Append to a Macro
146
GV Korona Macro Operations
146
Record a Macro
147
Insert a Macro Delay
147
Insert a Macro User Pause
147
Run a Macro
148
Pre-Attach a Macro
149
Post-Attach a Macro
149
Attach Multiple Macros to the same Button
149
Remove a Macro Attachment
149
Append to a Macro
150
Performing Macro Operations from the Menu
150
Recording a Macro
150
Enter a Macro Panel Name
151
Insert a Macro Delay
151
Insert a Macro User Pause from the Catalog Menu
152
Insert a Macro User Pause from the Macro Editor
153
Learn a Run from Pause E-MEM Command
154
Learn a Select E-MEM Command
155
Attaching a Macro
156
Playing an Attached Macro
156
Appending to a Macro
156
Appending a Macro to Another Macro in the Menu
157
Saving Macro Registers
157
Loading Macro Registers
157
Macros for Multiple Copies or Swaps
157
Macros and E-Mems
158
E-MEM Recalls in a Macro
158
Learn a Run from Pause E-MEM Command
159
Learn a Select E-MEM Command
160
Source Select Button Row Mode Delegation
160
Delegate a Switcher Mode to a Source Select Button Row
161
Source Select Button Row to Aux Mode Delegation
161
Panel Memory and P-MEM Registers
162
Learn a Kayenne P-MEM Register
162
Recall a Kayenne P-MEM Register
163
Learn a Karrera/Gv Korona P-MEM Register
163
Recall a Karrera/Gv Korona P-MEM Register
163
Panel Memory Default Setting
163
GV Korona M/E Background Button Row Delegation
164
Change Background Buses with Panel Mems
165
Source Rules
165
Create a Source Rules Pattern
166
Store a Source Rules Pattern
166
Apply a Source Rules Pattern to Other Sources
167
Source Rules Hold
167
Bus Linking
167
Bus Linking Examples
167
Bus Linking Menu
168
Bus Linking Source Substitution Tables
169
Linked Source Buttons
169
Configuring a Source Table with Source Substitutions
170
Storing (Copying) Source Table Substitutions to Another Source Table
170
Changing Source Tables for a Bus Link
171
Source Table File Operations
171
Linking Buses One-To-One
171
Creating Parallel Bus Links
172
Creating Cascading Bus Links
173
Bus Linking Rules and Restrictions
174
Bus Linking Management
175
Switching Basics
176
Basic Switcher Control Surfaces
176
Kayenne Control Panel Overview
176
Setting Panel Saver Mode
177
Module Overview
178
Transition Module
178
Local E-MEM Module
182
Master E-MEM Module
183
Multi-Function Module
184
Source Select Module
186
Local Aux Module
190
System Bar
191
Device Control Module
193
Kayenne Delegation
195
Automatic Delegation
196
Menu Panel and Touch Screen Overview
197
Touch Screen
198
Menu Selection
198
Soft Knobs
198
Data Pads and Touch Buttons
198
Advertisement
GRASS VALLEY KARRERA Installation & Service Manual (389 pages)
Brand:
GRASS VALLEY
| Category:
Media Player
| Size: 50.97 MB
Table of Contents
FCC Compliance
2
Copyright and Trademark Notice
2
Safety and EMC Standards
13
Safety Standards
13
EMC Standards
13
Table of Contents
15
Introduction
25
Overview
25
Features
25
General
25
GV K-Frame XP Compact Frame
27
GV K-Frame XP Standard Frame
27
K-Frame Control Surfaces
27
Kayenne Control Surface
27
Flat or Curved Control Panel Orientation
29
Control Panel Stripes
29
Touch Screen Menu Panel
29
Basic Single Suite Kayenne Panel System
30
Multiple Suite Kayenne Panel System Example
30
Karrera Control Surface
32
Basic Single Suite Karrera Panel System
33
GV Korona Control Surfaces
34
Basic Single Suite GV Korona Panel System Example
34
Multiple Suites and Control Surfaces Example
34
Supported Control Protocols
35
Frame Installation
37
Overview
37
Weight Distribution
37
Cooling Requirements
37
Power Connections
37
8-RU (GV K-Frame XP Compact) Video Processor Dimensions
38
8RU Video Processor Installation and Airflow
40
8RU Video Processor Views
41
Compact Power Supply AC Requirements
42
Supplied Power Cables for 8-RU
42
About High Line (208V-240V) Versus Low Line (120V) Operations
43
About Low Line (120V) Operational Considerations
43
GV K-Frame XP Compact Video Processor Door Removal Clearance
44
Replacing Compact Power Supplies
44
15-RU (GV K-Frame XP Standard) Video Processor Dimensions
46
15RU Video Processor Installation and Airflow
48
15RU Video Processor Views
49
15RU Power Supply Views
51
15RU Power Supply Frame Rack Installation and Airflow
53
Standard Power Cooling
54
Standard Power Supply AC Requirements
54
Supplied Power Cables for 8-RU
54
About High Line (208V-240V) Versus Low Line (120V) Operations
55
About Low Line (120V) Operational Considerations
55
GV K-Frame XP Standard Video Processor Door Removal Clearance
56
Replacing Standard Power Supplies
56
Control Surface Installation
58
Control Surfaces
58
Kayenne Control Surfaces
58
Control Panel and Support Structure Assembly
58
Control Panel Variations
58
Control Panel Cooling
59
Truck and High Vibration Environment Considerations
59
4-M/E 35 Control Panel, Curved Assembly
60
4-M/E 35 Control Panel, Flat Assembly
60
4-M/E 25 Control Panel
64
3-M/E 35 Control Panel, Curved Assembly
65
3-M/E 35 Control Panel, Flat Assembly
68
3-M/E 25 Control Panel
70
2-M/E 35 Control Panel, Curved Assembly
70
2-M/E 35 Control Panel, Flat Assembly with Local Aux
73
2-M/E 35 Control Panel, Flat Without Local Aux
75
2-M/E 25 Control Panel
76
1-M/E 15 Control Panel
77
Separately Mounted Local Aux Stripe (35 & 25 Models)
78
Control Panel Stripe-PCU Connections
78
Touch Screen Menu Panel Installation
79
Karrera Control Surface
82
3-M/E Karrera Control Panel Installation
83
2-M/E Compact Karrera Control Panel Installation
85
PC Requirements
87
Macintosh Computer Operation
87
Hardware Installation
87
Menu on User PC Software Installation
87
User PC Configuration
88
Optional Touch Screen Menu Panel Installation
88
Menu Panel Dimensions
89
Menu Panel Connectors
90
Menu Panel Cooling
90
Fanless PC Dimensions and Connectors
91
Menu Panel Articulated Arm Installation
92
Menu Panel Hardware Installation with Articulated Arm
93
Wall Mounting Without Articulated Arm
93
Optional Local Aux Panel Installation
94
Local Aux 25 Panel Dimensions
95
GV Korona Control Surfaces
99
3-M/E GV Korona Control Panel Dimensions
99
2-M/E GV Korona Control Panel Dimensions
102
2-M/E GV Korona Control Panel Cutout Dimensions
104
1-M/E GV Korona Control Panel Dimensions
105
1-M/E GV Korona Control Panel Cutout Dimensions
107
System Cabling
108
About the GV K-Frame XP System Cabling Section
108
System Cabling Overview
108
Ethernet Tally Verses Serial Tally
108
Suites and Control Surfaces
108
Network Cabling
108
Ethernet Switch
109
Customer Supplied Ethernet Routers and Switches
109
Factory Default Network Settings
110
System Cabling for Kayenne Control Panels
111
Kayenne Network Cabling
111
Kayenne Suites and Control Surfaces
112
Kayenne Control Panel Cabling
114
Kayenne M/E and Local Aux Stripe Connections
114
Kayenne Satellite Panel Cabling
115
Kayenne Touch Screen Menu Panels (Used with PCU)
116
System Cabling for the Karrera Control Panel
116
Karrera Suites and Control Surfaces
116
Karrera Control Panel Network Cabling
117
Optional Touch Screen Menu Panel Cabling
117
Optional Karrera Local Aux Panel Cabling
117
System Cabling for the GV Korona Control Panel
120
GV Korona Suites and Control Surfaces
120
GV K-Frame XP Video Cabling
121
SDI Inputs
121
SDI Outputs
122
Reference Input
122
Supported Media Port Frame Rates
122
GV K-Frame XP Video Processor Frame Gpi/Relay Tally Interface
122
GPI and Relay Tally Connections
122
GPI Inputs
123
Relay Tally/Gpi Outputs
123
GPI In, GPI Out, Relay Tally Pin Assignments
125
RS-422/485 Port Pin Assignments
129
RS-232 Port Pin Assignments
130
Remote Aux Panels
131
GV-RAP-100 and GV-RAP-200 Remote Aux Panels
132
Basic Configuration
133
Introduction
133
Configuration Steps
133
Configuration Data
133
GV Switcher Menu Application
134
Menu Top Line
135
Data Pads and Touch Buttons
135
Data Pads and Soft Knobs
136
Menu Selection
136
Power up and Initialize the System
136
Power and Initialization Indications
137
Menu Application Initialization
137
Default System Communications
137
Establishing Menu to Frame Communication
137
Connecting the Menu Application to a Frame
138
About Network Configuration
138
IP Address Background Information
138
Gateway IP Addresses
139
Default IP Addresses on Isolated Network
139
Connecting to an Existing Network
139
About NMOS AMWA IS-04 and IS-05
139
Menu
140
Configure the Global Registry
140
About Using NMOS IS-04/IS-05 to Change Receivers/Senders
141
About the Group Hint Prefix
141
Configure the Group Hint Prefix
141
Unicast DNS-SD
142
Requirements for In-Band Unicast-SD
142
Unicast-SD Sequence of Events
143
Static Routes for the Primary and Secondary Control Systems
144
Set the Ips Using Device Web Pages
144
Changing the Image Store IP Address
145
Changing Control Panel IP Addresses
145
Changing the Kayenne or Karrera Menu Panel IP Address
146
32-Crosspoint Remote Aux Panel IP Address
146
Restoring the Default IP Address
148
GV-RAP-100 and GV-RAP-200 Remote Aux Panels
149
Install Remote Aux Panel Software
150
Configure the Remote Aux Panel System
150
Configure the Remote Aux Panel Network
150
Connect the Remote Aux Panel to the Switcher IP Network
151
Delegate Control of a Switcher Aux Bus to the Remote Aux Panel
151
Map Switcher Sources to Remote Aux Bus Buttons
151
About S25/S50 Remote Aux Panel Upgrade
152
Switcher Remote Aux Button Functionality
152
Install S25/S50 Remote Aux Panel Software
153
Configure the Remote Aux Panel System
153
Configure the Remote Aux Panel Network
153
Connect the Remote Aux Panel to the Switcher IP Network
154
Delegate Control of a Switcher Aux Bus to the Remote Aux Panel
154
Map Switcher Sources to Remote Aux Bus Buttons
154
IP I/O Configuration Menus
155
About Single Stream Full Frame UHD-4K
160
Streams/Sfps
160
I/O IP Config Bulk Configuration
160
About 4K TICO Compression Formats in the IP I/O Config Menu
164
About IP I/O Address and Port Configuration
164
Configure the IP I/O IP Address and Ports
165
Configure ST 2110-40 Ancillary
167
SDI/IP Input Output Configuration
167
Hot Swappable IP I/O Boards and Sfps
170
Troubleshooting
170
Configure the IP Board Sfps
172
About Board Bulk Configuration and the Import/Export Config File
174
About IP Audio, Ancillary, and Redundancy
175
About Extended Input Buffer
176
K-Frame IP Switcher System Auto-Timing (771-0741-01 Board)
176
Menu
177
Video I/O IP Setup and Configuration Overview
177
Configure the Port Config Sfps
178
Configure System Inputs/Outputs
178
Configure System Input or Output Sfps in Bulk from the Menu
179
Bulk Configure Sfps Using a Spreadsheet
184
IP SFP Statistics Web Access
185
Setting the RTP Payload Type
186
Registering System Nodes
187
Kayenne and Karrera Menu Panel Registration
187
Control Panel Registration
187
Remote Aux Panel Registration
189
Control Panel Brightness Adjustment
189
Engineering Setups
190
Source Definition Inputs
190
Change Direct Source Definition
191
Source Naming Background Information
191
Engineering Names, Eng Ids, and Logical Ids
191
Alternative Source Names
192
Source Patch Feature
194
Output Assignments
195
Default Output Assignments
195
Change Output Assignments
195
Configuring Aux Buses
197
Switcher Relay Tally Configuration
199
About Relay Tally Systems
199
Grass Valley KARRERA User Manual (370 pages)
VIDEO PRODUCTION CENTER
Brand:
Grass Valley
| Category:
Media Converter
| Size: 23.71 MB
Table of Contents
Table of Contents
5
Preface
15
About this Manual
15
Standard Documentation Set
15
Other Documentation
15
Section 1 - Introduction
17
Overview
17
Features
17
Karrera Video Processor Frames
18
Karrera Control Surfaces
19
Karrera Menu Application
19
Soft Panel (KSP) Option
20
Touch Screen Menu Panel Option
20
Karrera System Examples
21
Basic Single Suite System
21
Multiple Suites and Control Surfaces
21
Section 2 - User Setups and Preferences
23
Introduction
23
Button Mapping
23
Source Button Mapping
26
Local Panel Source Button Mapping
27
Remote aux Panel Source Button Mapping
27
Aux Bus Delegation Button Mapping
29
Map Remote aux Panel Delegation Buttons
29
Source Colors
29
Assign Source Colors
30
Assign User Colors
31
Source Patching
33
Source Naming Background Information
33
Alternative Source Names
33
Engineering Names, Eng Ids, and Logical Ids
33
Multiple Suites and Source Names
34
Name Display Hierarchy
34
Source Patch Feature
35
Logical Sources
36
Using Source Patching for Effects Portability
36
Source Patching Procedure
37
Default Keyframe
38
File Operations
39
Features
40
Introduction
40
File Storage Organization
41
File Type Extensions
41
Karrera Drive Access
41
Utilities Pane Operation
42
Copy/Pasting Files
42
Create Folder
43
Delete Files
43
Multi-Select Button
43
Rename Files
43
Show File Operations
44
Choose Load
45
Load Show
45
Update Show
45
All Files Operations
46
User Setups File Operations
47
Save Panel Prefs or Suite Prefs Files
47
Load Panel Prefs, Suite Prefs, or Source Memory Files
48
Save Source Memory Files
48
Panel MEM, E-MEM, Macros, Cues, E-DPM, and Router MEM File Ops
48
Load Register Files
49
Loading to a Different Set of Registers
49
Save Register Files
49
Source Rules File Operations
50
Load Source Rules Files
50
Save Source Rules Files
50
Eng Setup Operations
51
Section 3 - Video MIX/Effects
53
Introduction
53
Mes and Keyers
53
Chroma Key Operating Notes
54
Auto Setup
54
Manual Chroma Key Adjustments
56
Access Keyer Menu and Delegate Keyer
57
Primary Suppression
57
Key Controls
59
Secondary Color Suppression
60
Extra Chroma Key Controls
62
Background Mattes
63
Split Key
64
Keyer Priority
65
Key Store
68
Grabbing and Using a Key Store Image
69
Pattern MIX
70
Idpm Operations
71
Multi-Function Area Idpm Delegation
71
Turn on the Keyer Idpm
71
Parameter Controls
72
Turning on Idpms from the Menu
72
Transform Menu
73
Global Channel Assignments
74
Transforms Menu Delegation
74
Global Channel Control over Multiple Mes
77
Secondary Global Channel
77
Easy Cube Control
79
Key off Control
79
Keyer Partition Visibility
79
Split Layered Mode
80
Transform Controls
80
Clear Transforms
81
Crop Controls
81
Path Controls
81
Reverse Controls
81
Border Menu
82
Border Edge Adjustments
82
Borderline Menu
85
Shadow Controls
85
Glow Pane
86
Shadow Crop Controls
86
Film Look Menu
87
Kurl Menu
88
Position/Size Modulation Mode
89
Page Turn/Roll Mode
91
Ripple Mode
93
Slits Mode
94
Sphere Mode
95
Splits Mirrors Menu
97
Splits Pane
97
Splits & Mirrors Modifiers Pane
98
Defocus Menu
99
Defocus Pane
99
NAM Matte Pane
100
Lighting Menu
100
Light Type Pane
101
Shadow Control Pane
101
Light Control Pane
102
Lighting and Post Transform Space
103
Lighting Path Controls
103
Lighting with Page Turn/Roll Effects
103
Output Recursive Menu
104
Output Recursive Presets
104
Output Recursive Modes
105
Edpm Operations
111
Edpm and Effects
111
Edpm Partitioning
112
Edpm Definable Sub-Levels
113
Assigning Sources
114
Button Mapping Edpms to an ME
115
Edpm Mode Menus
116
Edpm Effects Menus
116
Edpm Category Menus
117
File Ops Menu
117
E-MEM & Timeline Menu
118
Source Ops Menu
119
Picture Menu
120
Edpm Menu
121
Keyer Menu
121
Wipes Menu
121
Setdef Matchdef
122
Setdef Output Conversion
123
Matchdef Input Conversion
124
Section 4 - Switcher Control
127
Introduction
127
Basic E-MEM Operations
127
Time Value Entry
127
Learning Registers
128
Learn a Register in the Current Bank
128
Get and Put
129
Learn a Register to a Different Bank
129
Recalling Registers
130
Recall a Register from a Different Bank
130
Recall a Register in the Current Bank
130
Clearing Registers
130
To Clear a Different Register
130
To Clear the Current Register
130
To Run an Effect
131
E-MEM Sequences
131
To Break a Sequence
131
To Learn a Sequence of Registers
131
To Play a Sequence of Registers
131
Macros
132
Introduction
132
Macro Recording
132
Macro Playback
133
Macro Attachments
134
Macro Control Button Group
134
Macro Button Function Summary
136
Macro Menus
136
Using Macros
137
Accessing Shifted Macros
137
Recording a Macro with the Control Panel
137
Recording a Macro with the Menu Panel
137
Panel Name
138
Attaching a Macro to a Panel Button Using the Control Panel
139
Inserting a Delay
139
Playing Back a Macro Register
139
Attaching a Macro Using the Menu
140
Appending to a Macro in the Menu
141
Appending to a Macro with the Control Panel
141
Playing an Attached Macro
141
Removing a Macro Attachment
141
Appending a Macro to Another Macro in the Menu
142
Loading Macro Registers
142
Saving Macro Registers
142
Using a Macro for Multiple Copies or Swaps
142
Macros and E-Mems
143
E-MEM Recalls in a Macro
143
Bus Linking
144
Overview
144
Examples
144
Bus Linking Menu
145
Source Substitution Tables
146
Configuring Source Tables
147
Changing Source Tables for a Bus Link
148
Storing (Copying) Source Table Substitutions to Another Source Table
148
Source Table File Operations
149
Linking Busses
149
Linking Busses One-To-One
149
Linking Multiple Busses
150
Link Management
154
Bus Linking Operation
154
Bus Pair Rules
155
Source Override
155
Advertisement
GRASS VALLEY KARRERA Installation & Service Manual (292 pages)
VIDEO PRODUCTION CENTER
Brand:
GRASS VALLEY
| Category:
Recording Equipment
| Size: 20.39 MB
Table of Contents
Table of Contents
5
Preface
13
About this Manual
13
Standard Documentation Set
13
Other Documentation
14
Safety Summary
15
Safety Terms and Symbols
15
Terms in this Manual
15
Terms on the Product
15
Symbols on the Product
16
Warnings
16
Cautions
17
Sicherheit - Überblick
19
Consignes de Sécurité
23
Regulatory Notices
27
Certifications and Compliances
27
Canadian EMC Notice of Compliance
27
EN55022 Class a Warning
27
FCC Emission Control
27
Canadian Certified AC Adapter
28
Canadian Certified Power Cords
28
Certification
28
FCC Emission Limits
28
Section 1 - Introduction
31
Overview
31
Features
31
Karrera Video Processor Frames
32
Karrera Control Surfaces
33
Karrera Menu Application
33
Soft Panel (KSP) Option
34
Touch Screen Menu Panel Option
34
Karrera Local aux Panel Option
35
Karrera System Examples
35
Basic Single Suite System
35
Multiple Suites and Control Surfaces
36
Section 2 - Control Surface Installation
37
Overview
37
3-ME Karrera Control Panel Installation
37
2-ME Karrera Control Panel Installation
39
Karrera Menu on User PC Installation
40
PC Requirements
40
Macintosh Computer Operation
40
Hardware Installation
41
Menu on User PC Software Installation
41
User PC Configuration
41
Optional Touch Screen Menu Panel Installation
41
Menu Panel Dimensions
42
Menu Panel Connectors
43
Menu Panel Cooling
43
Fanless PC Dimensions and Connectors
44
Menu Panel Articulated Arm Installation
45
Menu Panel Hardware Installation with Articulated Arm
46
Wall Mounting Without Articulated Arm
46
Optional Local aux Panel Installation
47
Local aux 35 Panel
47
Local aux 25 Panel
47
Local aux Panel Installation Options
48
Section 3 - Frames Installation
49
General Rack Mounting Instructions
49
Weight Distribution
49
Cooling Requirements
49
Power Connections
49
Door Removal Clearance
50
Karrera 8-RU Video Processor Frame Installation
51
8-RU Frame Dimensions
51
8-RU Frame Rack Mounting
53
8-RU Frame Connectors
54
8-RU Frame Power Supplies
55
Karrera 4-RU Video Processor Frame Installation
56
4-RU Frame Dimensions
56
4-RU Frame Rack Mounting
57
4-RU Frame Connectors
58
4-RU Frame Power Supplies
59
Section 4 - System Cabling
61
Overview
61
Network Cabling
62
Karrera Frame Ethernet Switch
62
Suites and Control Surfaces
62
Customer Supplied Ethernet Routers and Switches
63
Factory Default Network Settings
65
Optional Touch Screen Menu Panel Cabling
65
Optional Local aux Panel Cabling
66
Video Cabling
67
Inputs
67
Outputs
67
Matchdef and Setdef Format Conversion
68
Reference Input
68
Karrera System Video Timing and Delay
68
Timing Analyzer
70
Time Zones and the Autotiming Window
71
Clipstore Cabling
72
Clipstore Video Cabling
72
Overview
72
Video Processor Frame Gpi/Tally Interface
74
GPI and Tally Connections
75
GPI Inputs
75
Tally/Gpi Outputs
76
Pin Assignments
78
RS-422/485 Ports
78
RS-232 Ports
79
4-RU and 8-RU Frame (GPI in 1-8, Tally 1-24, GPI out 1-8)
80
4-RU and 8-RU Frame (GPI in 9-16, Tally 25 - 48, GPI out 9-16)
81
8-RU Frame (GPI in 17-24, Tally 49 - 72, GPI out 17-24)
82
8-RU Frame (GPI in 25-32, Tally 73 - 96, GPI out 25 - 32)
83
Advertisement
Related Products
GRASS VALLEY KARRERA K-FRAME
GRASS VALLEY K2 DYNO -
GRASS VALLEY KAYENNE - V2.0
GRASS VALLEY Kayenne ClipStore
GRASS VALLEY KAMELEON Series
GRASS VALLEY KAM-DEC-4ADC-MUX
GRASS VALLEY KAM-ENC-4DAC-DMX
GRASS VALLEY KAM-SD-2AES-DMX
GRASS VALLEY KAHUNA Series
GRASS VALLEY KayakDD-2
GRASS VALLEY Categories
Media Converter
Software
Amplifier
Switch
Network Router
More GRASS VALLEY Manuals
Login
Sign In
OR
Sign in with Facebook
Sign in with Google
Upload manual
Upload from disk
Upload from URL