Sign In
Upload
Manuals
Brands
FARGO electronics Manuals
Printer
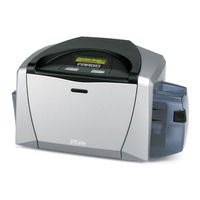
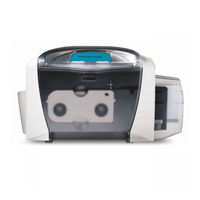
Persona Persona M30e
FARGO electronics Persona Persona M30e Manuals
Manuals and User Guides for FARGO electronics Persona Persona M30e. We have
2
FARGO electronics Persona Persona M30e manuals available for free PDF download: User Manual
FARGO electronics Persona Persona M30e User Manual (284 pages)
Brand:
FARGO electronics
| Category:
Printer
| Size: 4 MB
Table of Contents
Table of Contents
3
Section 1: Introduction
8
How to Use the Manual
8
Safety Messages (Review Carefully)
9
Dtc400E/C30E/M30E Card Printer Overview
10
Reviewing the Dtc400E/C30E/M30E Block Diagram
10
Reviewing the Dtc400E/C30E/M30E Card Printer Sequence of Operations
11
Reviewing the Dtc400E/C30E/M30E Boot up Sequence
14
Section 2: Specifications
15
Regulatory Compliances
15
Agency Listings
16
Technical Specifications
16
Functional Specifications
19
Printer Components: Front Cover to USB Port
20
Printer Components: Print Ribbons
21
Printer Components: Resin-Only Print Ribbons
22
Printer Components: Dye-Sublimation Print Ribbons
23
Printer Components: Dye-Sublimation/Resin Print Ribbons
24
Dye-Sublimation Ribbons for M30E
24
Printer Components: Blank Cards
25
Section 3: Printer Setup & Installation
27
Choosing a Good Location
27
About Moisture Condensation
27
Unpacking and Inspection
28
Reviewing the Printer (Front View)
28
Connecting the Printer Power
29
Flipper Table Module Assembly
30
Installing the Print Ribbon Cartridge
31
Installing Blank Cards into the Card Hopper
33
Lowering the Card Output Hopper
36
Printer Driver Installation
37
Printing a Test Print Image
46
Printer Transport
47
Section 4: General Troubleshooting
48
Safety Messages (Review Carefully)
48
Communications Errors
49
Print Process Errors
51
Resolving a Card Not Fed Error (Cards will Not Feed off the Hopper)
51
Resolving a Card Not Fed Error (Two (2) or more Cards Feed at the same Time)
54
Resolving a Ribbon RFID Error (Ribbon RFID Antenna Is Corrupted)
56
Resolving the Mag Verify Error
57
Resolving the no Magnetic Encoder Installed Error
60
Resolving the no Mag Stripe Present Error
62
Resolving the no Smart Card Encoder Error
63
Resolving the no Prox Card Encoder Error
65
Resolving a Ribbon Sensor Error (Ribbon Miscue) Dtc400E & C30E
67
Resolving a Ribbon Break Jam Error
68
Resolving a Ribbon out Error
71
Resolving a no Ribbon Installed Error
72
Resolving a Invalid Ribbon Error
73
Resolving a Wrong Ribbon Error
75
Resolving a Card Jam Error
77
Resolving a Card Jam (Encoder) Error
79
Resolving a Headlift Motor or Sensor Error
81
Resolving the Cover Open Issue
83
Resolving the Blank Output Issues
84
Resolving the Remove Ribbon Message (Rewriteable Job)
86
Flipper Table Module Assembly Problems
87
Resolving the no Flipper Table Module Problem
87
Resolving the Flipper Jam Error
88
Diagnosing Image Problems
90
Resolving the Pixel Failure Problems
90
Resolving the Card Surface Debris Problems
91
Resolving the Incorrect Image Darkness Problems
92
Resolving Ribbon Wrinkle Problems
94
Resolving the Excessive Resin Printing Problems
96
Resolving the Incomplete Resin Printing Problems
98
Resolving the Image Placement Problems
99
Resolving the Poor Image Quality Problems
103
Running the Self Test
104
Running the Standard Self Test Print
105
Section 5: Ethernet Option Introduction
107
Technical Specification - Ethernet Option
107
Functional Specification - Ethernet Option
108
Network Services - Overview
109
Reviewing the Web Page Server
109
Reviewing the Print Server
109
Reviewing the Network Management Interface
109
Reviewing the Telnet Server
109
Network Management Interface
110
Telnet Command Line Interface
110
Initiating a Telnet Session
110
Reviewing the Telnet Command Table
111
Ethernet Printer Troubleshooting Procedures
115
Verifying the Printer Connection
116
Verifying the Printer IP Address
116
Verify that the PC Can Access the Printer Using the Ping Command
117
Printing a Test Page
118
Reviewing Frequently-Asked Questions
119
Glossary of Terms
123
Section 6: Printer Adjustments
125
Safety Messages (Review Carefully)
125
Dtc400E/C30E/M30E Print Driver Options
126
Using the Card Tab (Dtc400E/C30E/M30E)
127
Adjusting the Card Size Option
127
Adjusting the Orientation Option
128
Selecting the Number of Copies
129
Using the Diagnostics Button under the Card Tab
130
Using the Clean Printer Option
131
Using the Test Print Button
133
Using the about Button
134
Using the Device Options Tab (Dtc400E/C30E or M30E)
135
Adjusting the Ribbon Type Option
137
Selecting the Auto Ribbon Select Option
140
Adjusting the Color Matching Option
144
Adjusting for the Resin Dither
145
Using the Print both Sides Option
146
Using the Split 1 Set of Ribbon Panels Option
147
Using the Print Back Side First Option
148
Using the Print Back Side Only Option
149
Using the Rotate Front 180 Degrees or Rotate Back 180 Degrees Options
150
Using the Disable Printing Option
151
Using the Image Color Tab (Dtc400E/C30E/M30E)
152
Using the Resin Heat (K) Option (Front and Back)
153
Using the Overlay Heat (O) Option
154
Using the Color Matching Option and Default Button
155
Using the Calibrate Tab (Dtc400E/C30E/M30E)
156
Using the Image Position Controls
157
Using the Sensors Button
159
Using the Settings Button
161
Using the Magnetic Encoding Tab
162
Using the Encoding Mode Dropdown List
163
Selecting the Coercivity/Magnetic Track
169
Reviewing the Shift Data Left Function
170
Reviewing the Magnetic Track Options
171
Using the Character Size Buttons
173
Using the ASCII Offset Dropdown List
174
Using the Bit Density Dropdown List
175
Using the LRC Generation Dropdown List
176
Using the Character Parity Dropdown List
177
Reviewing the ISO Track Locations
178
Sending the Track Information
179
Reviewing the Sample String
180
Reviewing the ASCII Code and Character Table
181
Using the Overlay / Print Area Tab (Dtc400E/C30E/M30E)
182
Enabling the Back Options
183
Using the Front Option (Overlay / Print Area)
184
Using the Back Option (Overlay / Print Area)
185
Using the Overlay / Print Area Dropdown Menu
186
Using the Overlay / Print Area
188
Using the Defined Area Option
190
Using Security Options (Visual Security Solutions) (Front Option Only)
194
Selecting Orientation - Landscape under Card Tab
195
Selecting the Visual Security Solutions Dropdown Menu (a to D)
196
Selecting Orientation - Portrait under Card Tab
197
Selecting the Visual Security Solutions Dropdown Menu (E to H)
198
Selecting the Verimark Radio Button (Frontside Option Only)
199
Selecting Holomark (Front Option Only)
200
Reviewing the Custom Verimark Card (Custom Graphic in a 2D Foil)
201
Reviewing the Custom Holomark Card (Custom Graphic in a 2D Foil)
202
Using the K Panel Resin Tab (Dtc400E/C30E/M30E)
203
Enabling the Frontside and Backside Options
204
Enabling the Frontside Option (K Panel Resin)
205
Enabling the Backside Option (K Panel Resin)
206
Selecting from the Print All Black with K Panel Options (Front and Back Options)
207
Selecting the Full Card Option (Front and Back Options)
208
Selecting the Defined Area(S) Option (Front and Back Options)
209
Selecting the Undefined Area(S) Option (Front and Back Options)
210
Selecting the Defined Area(S) Function (Front and Back Options)
211
Selecting the Print YMC under K and Print K Only Options
218
Using the Printer Info Tab (Dtc400E/C30E/M30E)
219
Reviewing the Ribbon Information
220
Reviewing the Ribbon Level Indicator
220
Using the Printer Calibration Utility (Dtc400E/C30E/M30E)
221
Using the Image Darkness Option
222
Using the Print Top of Form Option
223
Using the Print End of Form Option
224
Using the Print Left of Form Option
225
Using the Magnetic Encoder Voltage Offset Option
226
Adjusting the Hi-Co Voltage Offset
227
Adjusting the Lo-Co Voltage Offset
228
Using the Mag Top of Form Option
229
Using the Ribbon Tension Option
231
Using the Flipper Home Offset Option
232
Using the Flipper Center Offset Option
232
Using the Flipper Smart Angle Offset Option
233
Using the Resin Heat (K) Adjustment (Settings)
234
Using the Print Temperature Offset
235
Using the Erase Temperature Offset
236
Using the Flipper Prox Offset Option
237
Using the Flipper Prox Angle Offset Option
238
Section 7: Using the YMCFKO Ribbon in the Workbench
239
Adding a Secure ID to the Card
242
Changing the Secure ID Properties
243
Adding a Logo to the Card
244
Changing the Logo Properties
245
Adding a Text on the Card
246
Changing the Text Properties
247
Fluorescing Panel - Application Specifications
248
Inserting Fluorescent Text
248
Insert Fluorescent Image
249
Printing Dynamic Text
249
Selecting the NONE- Re-Writable Ribbon Type Dtc400E/C30E
250
Using the Workbench (to Erase the Card)
251
Using the Erase Intensity Option (Dtc400E/C30E)
253
Using the Erase Temperature Offset
254
Section 8: Cleaning
256
Safety Messages (Review Carefully)
256
Supplies (Included with the Cleaning Kit)
257
Cleaning the Printhead
258
Cleaning the Platen and the Card Feed Rollers
259
Cleaning the Printer's Interior
261
Cleaning the Printer's Exterior
261
Packing the Card Printer
262
Section 9: Firmware Upgrades
263
Requirements
263
Safety Messages (Review Carefully)
263
Upgrade the Printer Firmware
264
Section 10: Fargo Technical Support
267
Contacting Fargo Technical Support
267
Reading the Serial Numbers on a Fargo Printer
268
Finding out When a Fargo Card Printer was Manufactured
268
Reviewing Example No. 1: Serial Number A9020001
268
Section 11: Glossary of Terms
269
Advertisement
FARGO electronics Persona Persona M30e User Manual (224 pages)
Fargo Persona Persona M30e: User Guide
Brand:
FARGO electronics
| Category:
Printer
| Size: 2 MB
Table of Contents
Table of Contents
3
Section 1: Introduction
7
How to Use the Manual
7
Safety Messages (Review Carefully)
8
Persona M30E Card Printer Overview
9
Reviewing the Persona M30E Block Diagram
9
Reviewing the Persona M30E Sequence of Operations
10
Reviewing the Persona M30E Boot up Sequence
13
Section 2: Specifications
14
Regulatory Compliances
14
Agency Listings
15
Technical Specifications
15
Functional Specifications
18
Printer Components: Front Cover to USB Port
19
Printer Components: Print Ribbons
20
Printer Components: Resin-Only Print Ribbons
21
Printer Components: Dye-Sublimation Print Ribbons
22
Printer Components: Dye-Sublimation Ribbons
23
Printer Components: Blank Cards
24
Printer Module: Flipper Table Module Assembly (D900200)
25
Section 3: Setup and Installation Procedures
26
Printer Setup and Installation
26
Choosing a Good Location
26
About Moisture Condensation
26
Unpacking and Inspection
27
Reviewing the Printer (Front View)
27
Reviewing the Printer (Front View; Cartridge Being Installed)
28
Connecting the Printer Power
29
Installing the Print Ribbon Cartridge
30
Installing Blank Cards into the Card Hopper
33
Lowering the Card Output Hopper
36
Printer Driver Installation
37
Installing the Printer Driver
37
Printing a Test Print Image
46
Printer Transport
48
Moving the Printer to Another Location
48
Section 4: General Troubleshooting
49
Safety Messages (Review Carefully)
49
Communications Errors
50
Resolving the Communication Errors
50
Print Process Errors
52
Resolving a Card Not Fed Error (Cards will Not Feed off the Hopper)
52
Resolving a Card Not Fed Error (Two (2) or more Card Feed at the same Time)
55
Resolving a Ribbon RFID Error (Ribbon RFID Antenna Is Corrupted)
57
Resolving a Ribbon RFID Error (Ribbon RFID Sensor Is Corrupted)
59
Resolving the Mag Verify Error
60
Resolving the no Magnetic Encoder Installed Error
63
Resolving a Ribbon Break Jam Error
65
Resolving a Ribbon out Error
67
Resolving a no Ribbon Installed Error
68
Resolving a Invalid Ribbon Error
70
Resolving a Wrong Ribbon Error
72
Resolving a Card Jam Error
74
Resolving a Headlift Motor or Sensor Error
76
Resolving the Cover Open Error Message
78
Resolving the Blank Output Issues
79
Flipper Table Module Assembly Problems
82
Resolving the no Flipper Table Module Problem
82
Resolving the Flipper Jam Error
83
Diagnosing Image Problems
85
Resolving the Pixel Failure Problems
85
Resolving the Card Surface Debris Problems
86
Resolving the Excessive Resin Printing Problems
87
Resolving the Incomplete Resin Printing Problems
89
Resolving the Image Placement Problems
90
Resolving the Poor Image Quality Problems
94
Running the Self Test
95
Running the Standard Self Test Print
95
Running the Magnetic Self Test (Hico Only)
96
Section 5: Printer Adjustments
97
Safety Messages (Review Carefully)
97
M30E Print Driver Options
98
Reviewing M30E Printer Drivers
98
Using the Card Tab (Persona M30E)
99
Adjusting the Card Size Option
99
Adjusting the Orientation Option
100
Selecting the Number of Copies
101
Using the Diagnostics Button under the Card Tab
102
Using the Clean Printer Option
103
Using the Test Print Button
105
Using the about Button
106
Using the Device Options Tab (M30E)
107
Reviewing the Device Options Tab
107
Adjusting the Ribbon Type Option
108
Selecting the Auto Ribbon Select Option
109
Adjusting for the Resin Dither
110
Using the Print both Sides Option
111
Using the Print Back Side First Option
112
Using the Print Back Side Only Option
113
Using the Rotate Front 180 Degrees or Rotate Back 180 Degrees Options
114
Using the Disable Printing Option
115
Using the Image Color Tab (M30E)
116
Using the Resin Heat (K) Option (Front and Back)
117
Using the Overlay Heat (O) Option
118
Using the Color Matching Option and Default Button
119
Using the Calibrate Tab (Persona M30E)
120
Using the Image Position Controls
121
Using the Settings Button
123
Using the Magnetic Encoding Tab
124
Using the Encoding Mode Dropdown List
125
Selecting the Coercivity/Magnetic Track
131
Reviewing the Shift Data Left Function
133
Reviewing the Magnetic Track Options
134
Using the Magnetic Track Options
136
Using the Character Size Buttons
138
Using the ASCII Offset Dropdown List
139
Using the Bit Density Dropdown List
140
Using the LRC Generation Dropdown List
141
Using the Encoding Mode Dropdown List
142
Reviewing the ISO Track Locations
143
Sending the Track Information
144
Reviewing the Sample String
145
Reviewing the ASCII Code and Character Table
146
Using the Default Button
147
Using the Overlay / Print Area Tab (Persona M30E)
148
Enabling the Back Options
149
Using the Front Option (Overlay / Print Area)
150
Using the Back Option (Overlay / Print Area)
151
Using the Overlay / Print Area Dropdown Menu
152
Using the Overlay / Print Area
154
Using the Defined Area Option
156
Using Security Options (Visual Security Solutions) (Front Option Only)
161
Selecting Orientation - Landscape under Card Tab
162
Selecting the Visual Security Solutions Dropdown Menu (a to D)
163
Selecting Orientation - Portrait under Card Tab
164
Selecting the Visual Security Solutions Dropdown Menu (E to H)
165
Selecting the Verimark Radio Button (Frontside Option Only)
166
Selecting Holomark (Front Option Only)
167
Reviewing the Custom Verimark Card (Custom Graphic in a 2D Foil)
168
Reviewing the Custom Holomark Card (Custom Graphic in a 2D Foil)
169
Using the Printer Info Tab (Persona M30E)
170
Reviewing the Ribbon Information
171
Reviewing the Ribbon Level Indicator
172
Using the Printer Calibration Utility (Persona M30E)
173
Using the Image Darkness Option
174
Using the Print Top of Form Option
175
Card Input
176
Card Output
176
Using the Print End of Form Option
176
Using the Print Left of Form Option
177
Using the Magnetic Encoder Voltage Offset Option
178
Adjusting the Hi-Co Voltage Offset
179
Adjusting the Lo-Co Voltage Offset
180
Using the Mag Top of Form Option
181
Using the Ribbon Tension Option
183
Using the Flipper Center Offset Option
184
Using the Flipper Home Offset Option
184
Using the Flipper Smart Angle Offset Option
185
Section 6: Cleaning
186
Safety Messages (Review Carefully)
186
Persona M30E Card Printer/Encoders Cleaning Kit (Part Number 085976)
187
Part Number
187
Supplies (Included with the Cleaning Kit)
187
Cleaning the Printhead
188
Cleaning the Platen and the Card Feed Rollers
189
Cleaning the Printer's Exterior
192
Cleaning the Printer's Interior
192
Section 7: Packing the Card Printer
193
Section 8: Firmware Upgrades
194
Requirements
194
Safety Messages (Review Carefully)
194
Upgrade the Printer Firmware
195
Section 9: Fargo Technical Support
198
Contacting Fargo Technical Support
198
Reading the Serial Numbers on a Fargo Printer
199
Finding out When a Fargo Card Printer was Manufactured
199
Reviewing Example No. 1: Serial Number 80453289
199
Reviewing Example No. 2: Serial Number A1280224
199
Section 10: Glossary of Terms
200
Section 11: Index
220
Advertisement
Related Products
FARGO electronics PERSONA M10 Service
FARGO electronics C16
FARGO Electronics Card Printer
FARGO electronics CardJet 410
FARGO electronics CardJet X001200
FARGO electronics Color ID Card Printer II
FARGO electronics DTC300
FARGO electronics DTC300M
FARGO electronics DTC400e
FARGO electronics DTC500 Series
FARGO electronics Categories
Printer
More FARGO electronics Manuals
Login
Sign In
OR
Sign in with Facebook
Sign in with Google
Upload manual
Upload from disk
Upload from URL