Sign In
Upload
Manuals
Brands
Canon Manuals
Printer
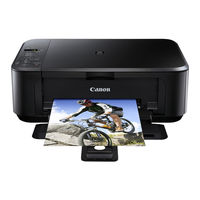
PIXMA MG4160
Canon PIXMA MG4160 Manuals
Manuals and User Guides for Canon PIXMA MG4160. We have
2
Canon PIXMA MG4160 manuals available for free PDF download: Simplified Service Manual, Getting Started
Canon PIXMA MG4160 Simplified Service Manual (34 pages)
Brand:
Canon
| Category:
Printer
| Size: 3 MB
Table of Contents
Table of Contents
3
1 List of Error Display / Troubleshooting
4
Operator Call Error (Alarm LED Lit in Orange)
4
Service Call Error (by Cyclic Blinking of Alarm and Power Leds)
6
2 Adjustment / Settings
9
Service Mode
9
Service Mode Operation Procedures
9
Service Tool V3.400 Operation
10
Service Mode Functions
15
Adjustment
17
User Mode
17
Special Notes on Assembling
18
Carriage Rail and Main Chassis Adjustment
18
Document Pressure Sheet Adjustment
18
Cap-Blade Unit: Ink Tube Arrangement
19
Logic Board: Cable Wiring
19
Carriage Unit: FFC Arrangement
19
Grease Application
20
3 Special Notes on Servicing
21
Ink Absorber Configuration
21
Main Ink Absorber Replacement
22
Preventive Replacement of Ink Absorber
26
Print Head Alignment
27
Detection of Remaining Ink Amount
28
New Service Test Pattern
29
Encoder Film Cleaning
30
4 External View / Parts List
32
External View
32
Parts List
34
Advertisement
Canon PIXMA MG4160 Getting Started (4 pages)
Brand:
Canon
| Category:
Printer
| Size: 3 MB
Table of Contents
Preparation
1
Included Items
1
Remove the Orange Tape
1
Connect the Power Cord
1
Adjust the Angle of the LCD, then Press the on Button
1
Replacing the FINE Cartridges
2
Unpack the FINE Cartridge, then Remove the Protective Tape
2
Select Your Language, then Press the OK Button
2
Insert the FINE Cartridge until It Stops
2
Lift the Ink Cartridge Lock Lever
2
Repeat Step 2 to 5 to Install the Other FINE Cartridge
2
Open the Paper Output Tray and the Paper Output Cover
2
Close the Paper Output Cover
2
The LCD Turns off if the Machine Is Not Operated for about 5 Minutes
2
Setting Plain Paper
3
Loading Photo Paper
3
Check that the Paper Output Tray Is Closed, then Pull out the Paper Support
3
Slide the Right Paper Guide to the End
3
Insert Paper until It Stops
3
Adjust the Paper Guide to Fit the Paper Size Used, then Open the Output Tray Extension
3
Copy and Other Functions that Do Not Require a Computer Are Now Available
3
Printing Without Opening the Paper Output Tray Causes an Error
3
For Information about Paper, Refer to the On-Screen Manual Which will be Installed Later
3
Read the On-Screen Manual on the Computer
4
Insert the CD-ROM into the Computer
4
If the USB Cable Is Already Connected, Unplug It. if a Message Appears on the Computer, Click Cancel
4
Follow the On-Screen Instructions to Proceed
4
If the CD-ROM Does Not Autorun: Double-Click (My) Computer > CD-ROM Icon > MSETUP4.EXE
4
To Complete the Installation, Follow the On-Screen Instructions on the Computer
4
To Switch from USB to Network Connection, Reinstall the Software from the CD-ROM
4
After the Installation, “Solution Menu EX” Starts
4
Solution Menu EX and the On-Screen Manual Need to be Selected for Installation
4
Advertisement
Related Products
Canon PIXMA MG4120
Canon PIXMA MG4150
Canon PIXMA MG4100 Series
Canon PIXMA MG4140
Canon MG4110
Canon MG4130
Canon MG4170
Canon MG4180
Canon MG4210
Canon MG4280
Canon Categories
Printer
Digital Camera
All in One Printer
Camcorder
Scanner
More Canon Manuals
Login
Sign In
OR
Sign in with Facebook
Sign in with Google
Upload manual
Upload from disk
Upload from URL