Sign In
Upload
Manuals
Brands
Avocent Manuals
Extender
Emerge MPX1500
Avocent Emerge MPX1500 Extender Manuals
Manuals and User Guides for Avocent Emerge MPX1500 Extender. We have
11
Avocent Emerge MPX1500 Extender manuals available for free PDF download: Installer/User Manual, Brochure, Technical Specifications, Quick Installation Manual, Specifications
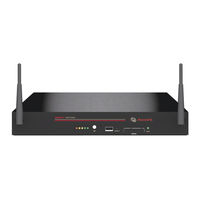
Avocent Emerge MPX1500 Installer/User Manual (130 pages)
Avocent AutoView Switch User's Manual Model 1400, 1500 and 2000
Brand:
Avocent
| Category:
Switch
| Size: 3 MB
Table of Contents
English
5
Canadian Notification
4
Japanese Approvals
4
USA Notification
4
Table of Contents
5
List of Figures
7
Chapter 1: Product Overview
11
Features and Benefits
11
Figure 1.1: Example of an Autoview Switch Configuration
13
Safety Precautions
14
Chapter 2: Installation
15
Getting Started
15
Supplied with the Autoview Switch
15
Rack Mounting Your Autoview Switch
15
Installing the Autoview Switch
16
Figure 2.1: Autoview Switch Horizontal Installation
16
Figure 2.2: Basic Autoview Switch Configuration
17
Connecting Users
18
Cascading Autoview Switches
18
Adding Legacy Switches
20
Figure 2.3: Autoview 2000 Switch Configuration with a Cascaded Switch
20
Table 2.1: Legacy Switch Support
20
Figure 2.4: Autoview 2000 Switch Configuration with Legacy KVM Switches
21
Figure 2.5: Autoview Switch Configuration with Autoview 1400/1500/2000 Switches
22
Setting up Your Autoview Switching System
23
Chapter 3: Basic Operations
25
Controlling Your System at the Analog Ports
25
Viewing and Selecting Ports and Servers
25
Figure 3.1: Example of Configured Main Dialog Box
25
Table 3.1: OSCAR Interface Status Symbols
26
Viewing the Status of Your Switch
26
Selecting Servers
26
Table 3.2: OSCAR Interface Navigation Basics
27
Soft Switching
27
Navigating the OSCAR Interface
27
Table 3.3: Setup Features to Manage Routine Tasks for Your Servers
29
Configuring OSCAR Interface Menus
29
To Access the Setup Menu
29
Assigning Server Names
30
Figure 3.2: Setup Dialog Box
30
Figure 3.3: Names Dialog Box
30
Assigning Device Types
31
Figure 3.4: Name Modify Dialog Box
31
Figure 3.5: Devices Dialog Box
32
Figure 3.6: Device Modify Dialog Box
32
To Assign a Device Type
32
Changing the Display Behavior
33
Figure 3.7: Menu Dialog Box
33
Setting the Keyboard Country Code
34
Figure 3.8: Keyboard Box
34
Controlling the Status Flag
35
Figure 3.9: Keyboard Warning Dialog Box
35
Table 3.4: OSCAR Interface Status Flags
35
Figure 3.10: Flag Dialog Box
36
Figure 3.11: Set Position Flag
36
To Determine How the Status Flag Is Displayed
36
Setting Console Security
36
Figure 3.12: Security Dialog Box
37
Figure 3.13: Version Dialog Box
40
To Immediately Turn on the Screen Saver
40
Displaying Version Information
40
To Display Version Information
40
Scanning Your System
41
Figure 3.14: Target Selection Dialog Box
41
Figure 3.15: Target Version Dialog Box
41
Figure 3.16: Scan Dialog Box
42
Figure 3.17: Commands Dialog Box
43
To Cancel Scan Mode
43
Running System Diagnostics
43
Figure 3.18: Diagnostics Dialog Box
44
Table 3.5: Diagnostic Test Details
44
Broadcasting to Servers
45
Figure 3.19: Diagnostics Warning Dialog Box
45
Figure 3.20: Broadcast Dialog Box
46
Figure 3.21: Broadcast Enable Confirm/Deny Dialog Box
47
To Turn Broadcasting off
47
Changing Your Switch Mode
47
Figure 3.22: Switch Dialog Box
48
Chapter 4: Advanced Operations
49
Using Administrator Privileges
49
Figure 4.1: Security Menu
49
Figure 4.3: User Setup Menu (Administrator Only)
50
Figure 4.2: Setup Menu (Administrator Only)
50
Figure 4.4: User Edit Menu (Administrator Only)
51
User Access Menu (Administrator Only)
51
Figure 4.5: User Access Menu (Administrator Only)
52
Appendices
53
Appendix A: Flash Upgrades
53
Figure A.1: AVRIQ Status Dialog Box
54
Figure A.2: AVRIQ Upgrade Dialog Box
55
Figure A.3: Version Dialog Box
55
Figure A.4: Target Selection Dialog Box
56
Figure A.5: Target Version Dialog Box
56
Figure A.6: AVRIQ Load Dialog Box
57
Appendix B: Technical Specifications
58
Table B.1: Product Specifications
58
Appendix C: Sun Advanced Key Emulation
60
Table C.1: Sun Key Emulation
60
Table C.2: PS/2-To-USB Keyboard Mappings
61
Appendix D: Technical Support
62
Index
63
Guide D'installation et D'utilisation
67
Français
69
Liste des Tableaux
73
Présentation du Produit
75
Caractéristiques et Avantages
75
Mesures de Sécurité
78
Installation
79
Démarrage
79
Éléments Livrés Avec le Commutateur Autoview
79
Montage en Rack du Commutateur Autoview
79
Installation du Commutateur Autoview
80
Connexion D'utilisateurs
82
Montage en Cascade des Commutateurs Autoview
82
Ajout de Commutateurs Classiques
84
Tableau 2.1 : Compatibilité Avec les Commutateurs Classiques
84
Configuration du Système de Commutation Autoview
87
Opérations de Base
89
Contrôle du Système Par les Voies Analogiques
89
Visualisation et Sélection des Voies et des Serveurs
89
Tableau 3.1 : Symboles D'état Utilisés Dans L'interface OSCAR
90
Sélection des Serveurs
90
Commutation Logicielle
91
Navigation Dans L'interface OSCAR
92
Tableau 3.2 : Concepts de Base de la Navigation Dans OSCAR
92
Fonctions de Configuration de L'interface OSCAR
93
Tableau 3.3 : Fonctions de Configuration pour Gérer les Tâches de Routine des Serveurs
93
Attribution de Noms aux Serveurs
94
Attribution des Types D'équipements
96
Modification de L'affichage
97
Configuration du Paramètre Régional du Clavier
99
Contrôle de L'indicateur D'état
100
Tableau 3.4 : Indicateurs D'état de L'interface OSCAR
100
Paramétrage de Sécurité de la Console
101
Activation IMMédiate de L'économiseur D'écran
104
Affichage des Informations Relatives à la Version
104
Balayage du Système
105
Interruption du Mode de Balayage
107
Diagnostic du Système
107
Tableau 3.5 : Détails des Tests de Diagnostic
108
Diffusion Vers les Serveurs
109
Désactivation de la Diffusion
111
Modification du Mode de Commutation
111
Opérations Avancées
113
Utilisation des Privilèges D'administrateur
113
Annexe
117
Annexe A : Mises à Jour Flash
117
Annexe B : Spécifications Techniques
122
Tableau B.1 : Spécifications du Produit
122
Annexe C : Émulation des Touches Avancées du Clavier Sun
124
Tableau C.1 : Émulation des Touches du Clavier Sun
124
Tableau C.2 : Mappages de Touches PS/2-USB
125
Annexe D : Assistance Technique
126
Résolution des Problèmes
126
Advertisement
Avocent Emerge MPX1500 Installer/User Manual (120 pages)
HD Multipoint Extender
Brand:
Avocent
| Category:
Extender
| Size: 3 MB
Table of Contents
List of Figu Res
5
Table of Contents
5
Table of Contents
11
Chapter 1: Product Overview
15
Introduction
15
Features
15
Video
15
Audio
16
Control
16
Benefits
16
Figure 1.1: Example MPX Multipoint Extender Configuration
17
Table 1.1: System Definitions for an MPX Extender Solution
17
System Overview
17
System Definitions
17
Understanding User Interfaces
20
Browser-Based Configuration
20
Front Panel Display
20
Table 1.2: List of Accessories
21
Accessories
21
Compatibility with Attached Devices
23
EDID Compatibility
23
HDCP Compatibility
24
Rack Mount Safety Considerations
25
Figure 2.1: Emerge MPX1000 Transmitter (Front)
27
Table 2.1: Front Panel (MPX1000 Transmitter)
27
Chapter 2: Hardware Overview
27
Transmitter
27
MPX1000 Transmitter Overview
27
Figure 2.2: Emerge MPX1000 Transmitter (Rear)
28
Table 2.2: Rear Panel (Transmitter)
28
MPX1500 Transmitter Overview
29
Figure 2.3: Emerge MPX1500 Transmitter (Rear)
30
Table 2.3: Rear Panel (MPX1500 Transmitter)
30
Figure 2.4: Emerge MPX1000 Receiver (Front)
31
Table 2.4: Front Panel ( Receiver)
31
Receiver
31
MPX1000 Receiver Overview
31
Figure 2.5: Emerge MPX1000 Receiver (Rear)
32
Table 2.5: Rear Panel (Receiver)
32
Figure 2.6: Emerge MPX1500 HD Multipoint Extender Receiver (Front)
33
Table 2.6: Front Panel ( Receiver)
33
MPX1500 Receiver Overview
33
Figure 2.7: Emerge MPX1500 HD Multipoint Extender Receiver (Rear)
34
Table 2.7: Rear Panel (Receiver)
34
MPX1000 Media Modules
35
HDMI Media Module
35
Figure 2.8: HDMI Media Module
36
HD15 Media Module
36
Figure 2.9: HD15 Media Module
37
Cross Conversion
37
Chapter 3: Installation
39
Getting Ready
39
Installing MPX1000 Media Modules
39
Transmitter Configuration
40
LAN Settings
40
Figure 3.1: Control LAN Settings
41
Figure 3.2: Transmitter Source Device Settings
41
Figure 3.3: System Settings
43
Validating Media LAN Connectivity
43
Setting Explicit Receiver Bindings (Suggested)
44
Figure 3.4: Bindings Page
46
Firmware Version Checking
46
Receiver Configuration
46
Accessing Your Receiver's Web Interface
46
Figure 3.5: MPX1500 Receiver Display Device Settings
47
MPX1500 Receiver Display Device Settings
47
MPX1000 Receiver Display Device Settings
48
Figure 3.6: MPX1000 Receiver Display Device Settings
49
MPX Receiver Control LAN (L1) Settings (Optional)
50
Configure Receiver System Settings (Optional)
50
Multiple Transmitter Considerations
51
Configure Receiver Password (Optional)
51
Initiating a Media Session
52
Troubleshooting
52
Transmitter and Receiver Placement
53
Figure 3.7: Bound Receiver Status
55
Final Adjustments
55
Extension of IR and Serial Data
55
Change Password
55
Figure 3.8: Change Login Password Page
56
Chapter 4: Additional Functions
57
System Tuning
57
Transmitter Tuning Parameters
57
Table 4.1: Transmitter Tuning Parameters - Basic Settings
58
Figure 4.1: Transmitter Tuning Parameters - Basic Settings
59
Receiver Tuning Parameters
59
Figure 4.2: Receiver Tuning Parameters
60
Table 4.2: Receiver Tuning Parameters
60
Table 4.3: Methods for Fine Tuning
61
Fine Tuning Suggestions
61
Figure 4.3: Transmitter Media LAN Settings
63
Serial Control
63
Figure 4.4: Serial Passthrough Mode
65
Figure 4.5: Serial Settings Page: Serial Parameters
66
I/R Control
66
Figure 4.6: IR Flow: Transmitter to Receiver
67
Figure 4.7: IR Flow: Primary Receiver to Transmitter
68
Figure 4.8: IR Loopback
69
Configuring IR Control
69
Figure 4.9: Serial Settings Page: IR Parameters
70
Table 4.4: Status Page Information
70
Status Monitoring
70
Connection Status
70
Media LAN Performance
72
Figure 4.10: System Reboot Page
73
System Reboot
73
Reset to Factory Defaults
73
Figure 4.11: Reset to Factory Defaults Page
74
Table 4.5: Buttons for Manual Menu Navigation
74
MPX1000 Front Panel Display
74
Display Modes
74
Table 4.6: Buttons for Automatic Menu Display Mode
75
Table 4.7: Buttons for Parameter Modification Mode
76
Main Menu
76
Screen Saver
78
Appendix A: Technical Support
79
Appendices
79
Appendix B: Radio Considerations
80
Figure C.1: MPX LED Status Indicators
83
Appendix C: MPX Status Leds
83
Table C.1: LED Status - Wireless Connection
84
Table C.2: LED Status - Wired Connection
84
Table C.3: LED Status - Reset Button Press
85
Table C.4: LED Status - Flash Update
85
Figure C.2: MPX Receiver Rear LED Status Indicators
86
Appendix D: Audio
87
Figure E.1: Transmitter Status Table
88
Appendix E: Video Troubleshooting
88
Figure E.2: Transmitter Media LAN Performance
89
Figure F.1: Transmitter Rack Mount Brackets
93
Appendix F: Mounting Options
93
Figure F.2: Parts for under Desk Mounting Option
94
Figure F.3: Installing the Horizontal Mounting Bracket (under Desk Option)
94
Figure F.4: MPX1500 Mounting Bracket
95
Figure F.5: MPX1500 Power Supply Bracket
96
Table G.1: MPX1000T HD Multipoint Extender Product Specifications
97
Appendix G: Technical Specifications
97
Table G.2: MPX1000R HD Multipoint Extender Product Specifications
98
Table G.3: MPX1000T HDMI Input Module Product Specifications
99
Table G.4: MPX1000R HDMI Output Module Product Specifications
100
Table G.5: MPX1000T HD15 (VGA) Input Module Product Specifications
101
Table G.6: MPX1000R HD15 (VGA) Output Module Product Specifications
102
Table G.7: MPX1500(T/R) HD Multipoint Extender Product Specifications
102
Table H.1: Firmware and Hardware Versions Page Information
106
Appendix H: Displaying Firmware and Hardware Versions
106
Appendix I: Upgrading MPX Firmware
107
Table J.1: MPX Extender Supported ISO Country Codes
111
Appendix J: Supported ISO Country Codes
111
Table K.1: MPX1000 Transmitter Kit Contents
114
Table K.2: MPX1000 Receiver Kit Contents
114
Table K.3: MPX1000 Receiver HDMI Media Module Kit Contents
114
Table K.4: MPX1000 Transmitter HDMI Media Module Kit Contents
114
Appendix K: Kit Contents
114
Table K.5: MPX1000 Receiver VGA Media Module Kit Contents
115
Table K.6: MPX1000 Transmitter VGA Media Module Kit Contents
115
Table K.7: MPX1500 Transmitter / Receiver Kit Contents
115
Avocent Emerge MPX1500 Installer/User Manual (99 pages)
HD Multipoint Extender
Brand:
Avocent
| Category:
Extender
| Size: 2 MB
Table of Contents
Table of Contents
5
Audio
15
Chapter 1: Product Overview
15
Control
15
Features
15
Introduction
15
Video
15
Benefits
16
Figure 1.1: Example MPX Multipoint Extender Configuration
17
System Definitions
17
System Overview
17
Table 1.1: System Definitions for an MPX Extender Solution
17
Accessories
21
Table 1.2: List of Accessories
21
Compatibility with Attached Devices
22
EDID Compatibility
22
HDCP Compatibility
23
Rack Mount Safety Considerations
24
Browser-Based User Interface
20
Chapter 2: Hardware Overview
25
MPX1500 Transmitter Overview
25
Transmitter
25
Figure 2.1: Emerge MPX1500 Transmitter (Rear)
26
Table 2.1: Rear Panel (MPX1500 Transmitter)
26
Figure 2.2: Emerge MPX1500 HD Multipoint Extender Receiver (Front)
27
Figure 2.3: Emerge MPX1500 HD Multipoint Extender Receiver (Rear)
28
Table 2.3: Rear Panel (Receiver)
28
Video Cross Conversion
29
MPX1500 Receiver Overview
27
Receiver
27
Table 2.2: Front Panel ( Receiver)
27
Chapter 3: Installation
31
Getting Ready
31
LAN Settings
31
Transmitter Configuration
31
Figure 3.1: Control LAN Settings
32
Figure 3.2: Transmitter Source Device Settings
33
Figure 3.3: Transmitter Custom Resolution Settings
34
Figure 3.4: System Settings
35
Figure 3.5: Bindings Page
38
Firmware Version Checking
38
Accessing Your Receiver's Web Interface
39
Figure 3.6: MPX1500 Receiver Display Device Settings
39
Receiver Configuration
39
Receiver Display Device Settings
39
Figure 3.7: Rx Manual Resolution Settings
40
Configure Receiver System Settings (Optional)
41
MPX Receiver Control LAN (L1) Settings (Optional)
41
Configure Receiver Password (Optional)
42
Multiple Transmitter Considerations
42
Initiating a Media Session
43
Troubleshooting
43
Transmitter and Receiver Placement
44
Figure 3.8: Vertically Misaligned Antennas
45
Figure 3.9: Vertically Aligned Antennas
46
Change Password
47
Extension of IR and Serial Data
47
Figure 3.10: Bound Receiver Status
47
Final Adjustments
47
Validating Media LAN Connectivity
35
Setting Explicit Receiver Bindings (Suggested)
37
Figure 3.11: Change Login Password Page
48
Chapter 4: Additional Functions
49
System Tuning
49
Transmitter Tuning Parameters
49
Table 4.1: Transmitter Tuning Parameters - Basic Settings
50
Figure 4.5: Serial Passthrough Mode
59
Figure 4.6: Serial Settings Page: Serial Parameters
60
I/R Control
60
Advanced Source Device Settings
51
Figure 4.1: Transmitter Tuning Parameters - Basic Settings
51
Figure 4.2: Transmitter Advanced Source Device Settings
52
Receiver Tuning Parameters
52
Figure 4.3: Receiver Tuning Parameters
53
Table 4.2: Receiver Tuning Parameters
53
Fine Tuning Suggestions
54
Table 4.3: Methods for Fine Tuning
54
Figure 4.4: Transmitter Media LAN Settings
57
Serial Control
57
Figure 4.7: IR Flow: Transmitter to Receiver
61
Figure 4.8: IR Flow: Primary Receiver to Transmitter
62
Configuring IR Control
63
Figure 4.9: IR Loopback
63
Connection Status
64
Figure 4.10: Serial Settings Page: IR Parameters
64
Status Monitoring
64
Table 4.4: Status Page Information
65
Media LAN Performance
66
Figure 4.11: System Reboot Page
67
Reset to Factory Defaults
67
System Reboot
67
Figure 4.12: Reset to Factory Defaults Page
68
Appendix A: Technical Support
69
Appendices
69
Appendix B: Radio Considerations
70
Figure C.1: MPX LED Status Indicators
73
Appendix C: MPX Status Leds
73
Table C.1: LED Status - Wireless Connection
74
Table C.2: LED Status - Wired Connection
74
Table C.3: LED Status - Reset Button Press
75
Table C.4: LED Status - Flash Update
75
Figure C.2: MPX Receiver Rear LED Status Indicators
76
Appendix D: Audio
77
Figure E.1: Transmitter Status Table
78
Appendix E: Video Troubleshooting
78
Figure E.2: Transmitter Media LAN Performance
79
Figure F.1: MPX1500 Mounting Bracket
83
Appendix F: Mounting Options
83
Figure F.2: MPX1500 Power Supply Bracket
84
Table G.1: MPX1500(T/R) HD Multipoint Extender Product Specifications
85
Appendix G: Technical Specifications
85
Table H.1: Firmware and Hardware Versions Page Information
88
Appendix H: Displaying Firmware and Hardware Versions
88
Appendix I: Upgrading MPX Firmware
89
Table J.1: MPX Extender Supported ISO Country Codes
93
Appendix J: Supported ISO Country Codes
93
Table K.1: MPX1500 Transmitter / Receiver Kit Contents
96
Advertisement
Avocent Emerge MPX1500 Installer/User Manual (56 pages)
Brand:
Avocent
| Category:
Switch
| Size: 2 MB
Table of Contents
Table of Contents
5
List of Figures
7
List of Tables
9
Chapter 1: Product Overview
11
Features and Benefits
11
Safety Precautions
13
Figure 1.1: Example of an Autoview Switch Configuration
13
Chapter 2: Installation
15
Getting Started
15
Supplied with the Autoview Switch
15
Rack Mounting Your Autoview Switch
15
Installing the Autoview Switch
16
Figure 2.1: Autoview Switch Horizontal Installation
16
Figure 2.2: Basic Autoview Switch Configuration
17
Connecting Users
18
Cascading Autoview Switches
18
Adding Legacy Switches
20
Figure 2.3: Autoview 2000 Switch Configuration with a Cascaded Switch
20
Table 2.1: Legacy Switch Support
20
Figure 2.4: Autoview 2000 Switch Configuration with Legacy KVM Switches
21
Setting up Your Autoview Switching System
22
Chapter 3: Basic Operations
23
Controlling Your System at the Analog Ports
23
Viewing and Selecting Ports and Servers
23
Figure 3.1: Example of Configured Main Dialog Box
23
Table 3.1: OSCAR Interface Status Symbols
24
Viewing the Status of Your Switch
24
Navigating the OSCAR Interface
25
Table 3.2: OSCAR Interface Navigation Basics
25
Configuring OSCAR Interface Menus
27
Figure 3.2: Setup Dialog Box
27
Table 3.3: Setup Features to Manage Routine Tasks for Your Servers
27
Assigning Server Names
28
Figure 3.3: Names Dialog Box
28
Assigning Device Types
29
Figure 3.4: Name Modify Dialog Box
29
Figure 3.5: Devices Dialog Box
30
Figure 3.6: Device Modify Dialog Box
30
Changing the Display Behavior
31
Figure 3.7: Menu Dialog Box
31
Controlling the Status Flag
32
Figure 3.8: Flag Dialog Box
32
Table 3.4: OSCAR Interface Status Flags
32
Figure 3.9: Set Position Flag
33
Setting Console Security
33
Figure 3.10: Security Dialog Box
34
Displaying Version Information
36
Figure 3.11: Version Dialog Box
36
Scanning Your System
37
Figure 3.12: Target Selection Dialog Box
37
Figure 3.13: Target Version Dialog Box
37
Figure 3.14: Scan Dialog Box
38
Running System Diagnostics
39
Figure 3.15: Commands Dialog Box
39
Figure 3.16: Diagnostics Dialog Box
40
Table 3.5: Diagnostic Test Details
40
Broadcasting to Servers
41
Figure 3.17: Diagnostics Warning Dialog Box
41
Figure 3.18: Broadcast Dialog Box
42
Changing Your Switch Mode
43
Figure 3.19: Broadcast Enable Confirm/Deny Dialog Box
43
Figure 3.20: Switch Dialog Box
44
Appendix A: Flash Upgrades
45
Figure A.1: AVRIQ Status Dialog Box
46
Figure A.2: AVRIQ Upgrade Dialog Box
47
Figure A.3: Version Dialog Box
47
Figure A.4: Target Selection Dialog Box
48
Figure A.5: Target Version Dialog Box
48
Figure A.6: AVRIQ Load Dialog Box
49
Appendices
45
Appendix B: Technical Specifications
50
Table B.1: Product Specifications
50
Appendix C: Technical Support
52
Index
53
Avocent Emerge MPX1500 Quick Installation Manual (2 pages)
Wireless Switch
Brand:
Avocent
| Category:
Switch
| Size: 0 MB
Table of Contents
Installing the Autoview Wireless Transmitter
1
Connecting the Computer’s Peripherals
1
Connecting the Audio
1
Connecting a Local User to the Transmitter
1
Powering up the Transmitter and Computer
1
To Connect an Autoview Wireless Receiver
2
Connecting the Peripherals
2
Connecting the Audio
2
Powering up the Receiver
2
Notifications and Approvals
2
USA Notification
2
Agency Approvals
2
For Additional Information
2
Avocent Emerge MPX1500 Quick Installation Manual (2 pages)
Multipoint High-Definition (HD) Wired/Wireless Extender System
Brand:
Avocent
| Category:
Extender
| Size: 0 MB
Table of Contents
Important Safety Instructions
1
Overview
1
1 Preparing to Use the Extender System
1
2 Configuring the Transmitter
1
3 Using Explicit Bindings (Optional)
1
4 Configuring the Receiver
1
5 Sending Video
2
6 Placing and Mounting the Extender System
2
USA Notification
2
Canadian Notification
2
Safety and EMC Approvals and Markings
2
Compliance Note
2
Free And/Or Open Source Components
2
Avocent Emerge MPX1500 Brochure (8 pages)
Simpler KVM access and virtual media support for midsize data centers
Brand:
Avocent
| Category:
Switch
| Size: 0 MB
Avocent Emerge MPX1500 Specifications (2 pages)
Brand:
Avocent
| Category:
Switch
| Size: 0 MB
Table of Contents
Mechanical Specifications
2
Environmental / Power Specifications
2
Ordering Details
2
Server Interface Modules
2
Standards
2
Warranty
2
Avocent Emerge MPX1500 Quick Installation Manual (1 page)
Avocent AutoView AutoView 1400: Install Guide
Brand:
Avocent
| Category:
Switch
| Size: 0 MB
Table of Contents
Switch Hardware
1
Turning on the Servers and Switches
1
Connecting Power to the Autoview Switch
1
Connecting the Analog Ports
1
Connecting a Server to an AVRIQ or IAC Module
1
Avocent Emerge MPX1500 Technical Specifications (2 pages)
Wireless HD Multipoint Extender
Brand:
Avocent
| Category:
Extender
| Size: 0 MB
Avocent Emerge MPX1500 Brochure (2 pages)
Avocent AutoView AutoView 1400: Supplementary Guide
Brand:
Avocent
| Category:
Switch
| Size: 0 MB
Advertisement
Related Products
Avocent Emerge MPX1000
Avocent Emerge MPX1000T
Avocent Emerge MPX1000R
Avocent Emerge MPX15000R
Avocent Emerge ECMS2000U
Avocent Emerge MPX
Avocent Emerge 1000
Avocent Emerge EMS2000 series
Avocent MPU1016-001
Avocent MergePoint Unity
Avocent Categories
Switch
Extender
Network Hardware
Server
Software
More Avocent Manuals
Login
Sign In
OR
Sign in with Facebook
Sign in with Google
Upload manual
Upload from disk
Upload from URL