Sign In
Upload
Manuals
Brands
Armor Manuals
Handhelds
X7
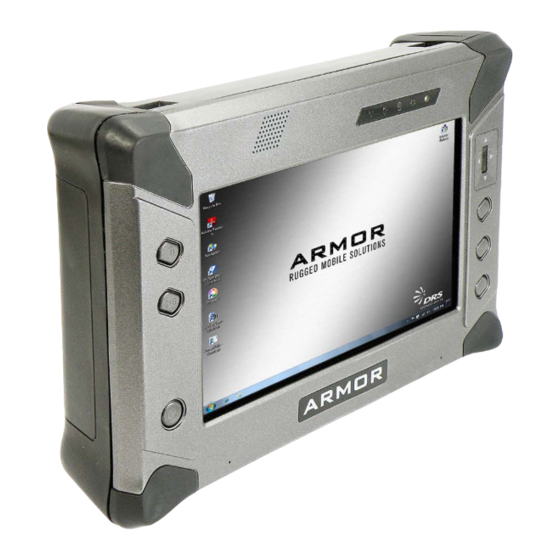
Armor X7 Rugged Tablet PC Manuals
Manuals and User Guides for Armor X7 Rugged Tablet PC. We have
1
Armor X7 Rugged Tablet PC manual available for free PDF download: User Manual
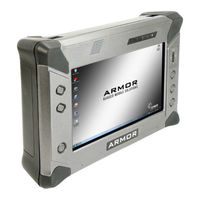
Armor X7 User Manual (190 pages)
Brand:
Armor
| Category:
Handhelds
| Size: 4 MB
Table of Contents
Content
2
Warning Summary
6
Table of Contents
10
1 Welcome and Introduction
20
Your ARMOR X7 Purchase
21
About this Guide
22
Viewing, Navigating, and Printing this Guide
22
Terminology Used in this Guide
22
Please Help Us Maintain Top Quality Documentation
22
2 Getting to Know Your Armor X7
24
Processor and Operating System
24
Data Storage
24
Dual Screen Display
24
Video Graphics
25
Wireless
25
Wireless LAN
25
Optional WWAN Support
25
Optional GPS Capability
25
Audio
25
Batteries
26
ARMOR Flexspace
26
ARMOR X7 Specifications
27
Figure 1. X7 Internal Block Diagram
31
Front Panel Features
33
Figure 2. ARMOR X7 Key Features - Front View
33
Figure 3. X7 Control Panels
34
Left and Right Control Panels
34
Indicator Panel
35
Ambient Light Sensor (ALS)
36
Figure 4. Indicator Panel
36
Noise Cancelling Stereo Microphones
36
Speaker
36
Rear Panel Features
37
Cooling Register
37
Figure 5. Key Features - Rear Panel
37
Batteries
38
Figure 6. X7 Battery Bays
38
Webcam
39
Figure 7. Battery Fuel Gauge
39
Figure 8. X7 Webcam
39
Bottom Panel Features
40
Figure 9. Key Features - Bottom Panel
40
Included Components, Accessories and Support
41
Active Pen with Tether
41
AC Adapter
41
Figure 10. the ARMOR X7 Pen
41
Figure 11. ARMOR X7 AC Adapter
41
ARMOR Cloth
42
Subscriber Identity Module (SIM) Card Support
42
Secure Digital (SD) Card Reader Support
42
Trusted Platform Module (TPM) Support
42
Figure 12. ARMOR Microfiber Cleaning Cloth
42
Optional Accessories for Your X7
43
Compact Keyboard
43
Figure 13. Compact Keyboard
43
Desk Dock
44
Figure 14. X7 Desk Dock
44
Vehicle Dock
45
Figure 15. X7 Vehicle Dock
45
Figure 16. Examples of X7 Vehicle Dock Mounting Configurations
45
ARMOR Flexspace
46
Figure 17. ARMOR X7 Flexspace™ Adapter Concept
46
3 Getting S Tarted
48
Installing and Charging the Batteries
49
Figure 18. X7 Batteries Positioned for Installation
49
Table 2. Install the X7 Batteries
50
Turning on Your X7 for the First Time
51
Turning the Computer on Normally
51
Putting the Computer in Sleep Mode
51
Turning the Computer off Normally
51
Emergency Shutdown
52
Indicator State Summary
52
Activating Your Wireless Radios
53
Installing a Micro SD or SDHC Card
54
Figure 19. Micro SD Card Socket
54
Accessing and Using the GPS Receiver
56
Figure 20. U-Center GPS Application Window
56
Operating the X7 Display
57
Adjusting the Screen Brightness
57
Figure 21. Armor Utilities Screen - Backlight Tab
57
Automatic Adjustment
58
Automatic Mode Profiles
58
Working with the Pen Screen
59
Your X7 Active Pen
59
Using the X7 Pen with the Pen Screen
59
Pen Screen Adjustments
60
Pen Screen Calibration
60
Working with the Touch Screen
61
Touch Screen Adjustments
61
Touch Screen Calibration
62
Entering Data Using the Input Panel
63
Accessing Input Panel
63
Figure 22. Location of the Input Panel
63
Figure 23. Input Panel Keyboard Opened on Desktop
63
Opening Input Panel with a Gesture
64
Editing Documents
64
Using the FPS as a Simple Mouse Device
65
Figure 24. FPS Sensor Properties Window
65
Table 8. FPS Mouse Actions
66
Configuring Your Speakers
67
Figure 25. Realtek HD Audio Manager - Speakers Main Tab
67
Configuring Your Microphones
68
Figure 26. Microphone Main Tab
68
Operating with the ARMOR X7 Vehicle Dock
69
X7 RF and Non-RF Vehicle Docks
69
Figure 27. External Antenna Selection Options in Armorutils
70
Using the Webcam
72
Capturing Images and Video
72
Table 12. Capturing a Still Image or Video
72
Scanning a Barcode
73
Figure 28. Picasa Application Window
73
Figure 29. Sample Linear Barcode
73
Figure 30. Webcam Barcode Scanner® Barcode Scanner Application Window
74
Table 13. Scan UPC-10, EAN-13 and ISBN Barcodes in Windows 7
74
Figure 31. Sample 2D Barcode
75
Figure 32. Quickmark® Barcode Scanner Application Window
76
Figure 33. a Captured 2D Barcode
76
Table 14. Scan Datamatrix and QR Format Barcodes in Windows 7
76
Using the Screen Magnifier
77
Figure 34. Virtual Magnifying Glass at Work
77
Tips for Proper Use and Care of Your X7
78
4 Networking
80
Managing the WI-FI Radio
80
Table 15. View and Manage Network Connections
81
Figure 35. Windows Network and Sharing Center
82
Figure 36. Currently Connected and Available Wi-Fi Networks
82
Controlling Your Wireless Radios
83
Figure 39. Armorutils Wireless Devices Page
83
Managing the WWAN Radio
84
Installing the SIM Card
84
Table 17. Installing a SIM Card
84
Figure 40. X7 Rear Compartment
85
Connecting to a WWAN
86
Table 18. Connecting to a WWAN
86
Figure 41. Sierra Oneclick Connection Manager Window
87
Figure 42. Settings Window
87
Wireless Signal Quality
88
5 Your Armor X7 S Oftware
89
Getting Started with Windows 7
89
Help for Windows
89
Figure 43. Windows 7 Welcome Page
89
Armorutils Program
90
Armorutils Main Dialog Window
90
Figure 44. Armorutils Main Window
90
Backlight Setup Dialog Window
91
Manual Adjustment
91
Automatic Adjustment
91
Figure 45. Armorutils Backlight Setup Page
91
Automatic Mode Profiles
92
Switching between Brightness Modes
92
Wireless Devices Dialog Window
93
Radio ON/OFF Buttons
93
Docking RF Switch Button
93
Figure 46. Armorutils Wireless Devices Page
93
Dock RF MUX Options
94
Save Settings Button
94
Radios ON/OFF Toggle Button
94
Programmable Button Settings Dialog
95
Figure 47. Armorutils Programmable Button Settings Page
95
Additional Capabilities
96
Figure 48. Armorutils Programmable Button Settings Page Menu Options
96
Configuration Dialog Window
97
Installed Options
97
Figure 49. Armorutils Configuration Page
97
Battery Monitor Dialog Window
98
Figure 50. Armorutils Battery Monitor Dialog
98
Battery 1 and 2 Information Buttons
99
Figure 51. Armorutils Battery Information Window
99
Charger Settings Button
100
Figure 52. Armorutils Charger Control Settings Window
100
Screen Mode Setup Dialog Window
101
Diagnostics Dialog Window
102
Figure 53. Armorutils Diagnostics Dialog
102
Armorutils about Window
103
Figure 54. Armorutils about Window
103
Pen and Touch Utility
104
Pen Options Tab
104
Figure 55. Pen and Touch Utility - Pen Options Tab
104
Flicks Tab
106
Handwriting Tab
106
Figure 56. Pen and Touch Utility - Flicks Tab
106
Figure 57. Pen and Touch Utility - Handwriting Tab
107
Touch Tab
108
Figure 58. Pen and Touch Utility - Touch Tab
108
Figure 59. Touch Tab Virtual Mouse Pointer
109
Tablet PC Settings Utility
110
Display Tab
110
Figure 60. Tablet PC Settings - Display Tab
110
Other Tab
111
Figure 61. Tablet PC Settings Utility - Other Tab
111
Pen Tablet Properties Utility
112
Pen Tab
112
Figure 62. WACOM Pen Tablet Properties Window - Pen Tab
112
Figure 63. Settings and Options Supported by the ARMOR X7 Active Pen
113
Figure 64. Side Button Menu Options
114
Figure 65. Pen Tablet Properties - Advanced Settings Window
115
Pop-Up Menu Tab
116
Figure 66. Pen Tablet Properties - Pop-Up Menu Tab
116
Calibrate Tab
118
Picasa 3
119
Virtual Magnifying Glass
120
6 Troubles Hooting
121
Determine the Problem
121
Table 19. ARMOR X7 Trouble Symptoms
121
Trouble Hooting
121
Troubleshooting Flowcharts
124
TS -0 1 Ta B Le T W Ill N O T P O W E R U P
124
TS -0 2 Ta B Le T W Ill N O T S Ta R T B O O T P R O C E S S . P O W E R Is O K
125
TS -0 3 Ta B Le T W Ill N O T B O O T in T O Win D O W S
126
TS -0 4 Ta B Le T W Ill N O T R E C O G N Iz E a B a T te R y
127
TS -0 5 Ta B Le T Is lo C K E D U P
128
Cannot Connect to Wireless Network
129
7 Backup and Res Tore P Rocedures
131
Backup with Quickback
131
Disk Partitions
131
How to Access Quickback™ for Initial Set-Up and Help Features
132
Archive Backup
132
User Backups
133
System Recovery CD
133
Table 20. Boot the X7 from the Recovery CD
134
8 Maintaining Your Armor X7
135
Removing and Replacing the Solid State Drive
135
Removing and Replacing the Batteries
136
Table 21. Remove and Replace the Solid State Drive
136
Table 22. Remove and Replace a Battery
137
Installing a SIM Card
138
Table 23. Installing a SIM Card
138
Installing a Micro SD or SDHC Card
141
Table 24. Installing the SC Card
141
Changing the BIOS Settings
143
Table 25. Access the BIOS Setup Utility
143
Table 26. Record Bios Changes here
144
Changing the Power Button Default a
145
Table 27. Changing the Power Button Default Actions
145
Caring for the Display Screen
146
Monitoring the Health of Your ARMOR X7
147
Generating a Log of Temperature Variations
148
Table 28. Generate a Temperature Variation Log
148
9 Dis P Lay Management
151
Brightness Adjustment
151
Manual Brightness Adjustment
151
Automatic Adjustment
152
Automatic Mode Profiles
152
Calibrating the Display in Windows 7
153
Using Armorutils
153
Using the Tablet PC Settings Utility in Control Panel
153
Table 29. Calibrate the Display Using the Tablet PC Settings Utility
153
Calibrating the Display in Windows XP
156
Using Armorutils
156
Using the Pen Tablet Properties Utility (Pen Screen Only)
156
Table 30. Calibrate the Pen Screen Using the Pen Tablet Properties Utility
156
Using the Touch Settings Utility (Windows XP)
158
Table 31. Calibrate the Touch Screen Using the Touch Settings Utility
158
Rotating the Screen (Touch or Pen)
159
Using the Intel Graphics Options
159
Using the Intel Graphics and Media Control Panel
160
Using a Keyboard "Hot Key" Combination
161
10 Battery Management
163
Safety and Handling Considerations for Your Batteries
164
When to Charge a Battery
164
Newly Received Batteries
164
Disconnected Batteries
164
Installed Batteries
164
Fully Depleted Batteries
165
How to Charge Your Batteries
165
Table 32. Select How to Charge the Batteries
166
How to Tell When Batteries Have Finished Charging
167
Temperature Can Affect Recharging Times
167
Battery Operating Time
167
Operating under Low Battery Conditions
168
What to Do if You Get a Low Battery Alert
169
Avoiding Overly-Discharging Your Batteries
169
What to Do for Overly-Discharged Batteries
169
Table 33. Recover an Overly-Discharged Battery
169
Battery Capacity
170
Discharge/Recharge Cycles
170
Battery Conditioning
170
Table 34. Conditioning a Battery
171
How to Optimize Battery Operating Time
173
How to Monitor Battery Usage
173
Open the Task Bar Battery Window
173
Open the Armorutils Battery Monitor Page
174
When to Replace a Battery
174
Battery Warranty
175
Where to Purchase Replacement Batteries
175
How to Store Batteries When Not in Use
176
Short-Term Storage
176
Long-Term Storage
176
Battery Tips for Best Performance
176
Disposing of Your Batteries
177
11 Drs Technical S up P Ort
179
Before You Contact Us
179
How to Obtain Warranty Service
179
If You Need Further Information
181
Warranty Information
182
General Information
182
Length of Warranty
182
Terms and Conditions
182
Additional Information
183
Acronyms
184
Glossary
185
Explanation of Pen Side Button Options
186
Appendix A
186
Using the X7 External Battery Charger
187
Table 35. Charging a Battery
187
Appendix B
187
Charger LED Status Indications
188
Table 36. Status Indicator Conditions
188
Advertisement
Advertisement
Related Products
Armor X10gx
Armor Categories
Water Heater
Industrial Equipment
Headsets
Digital Camera
Telephone
More Armor Manuals
Login
Sign In
OR
Sign in with Facebook
Sign in with Google
Upload manual
Upload from disk
Upload from URL