
Summary of Contents for Armor X7
- Page 1 USER’S GUIDE | REVISION - MODEL X7 HAND-HELD COMPUTER Copyright 2008-2009, DRS Tactical Systems, Inc., Melbourne, Florida. All Rights Reserved.
-
Page 2: Content
FRONT MATTER CONTENT PAGE 2 To learn more about optional ARMOR accessories, please call 1-888-872-1100 9711-26400-0001 EXPORT CONTROLLED – SEE PAGE 3 Rev -... - Page 3 These transmitters must not be co-located or operated in conjunction with any other antenna or transmitter. • This X7 tablet computer has been tested for compliance with ATEX directive 94/9/EC. 9711-26400-0001 EXPORT CONTROLLED – SEE PAGE 3 Rev -...
- Page 4 FRONT MATTER PAGE 4 NOTICE 9711-26400-0001 EXPORT CONTROLLED – SEE PAGE 3 Rev -...
- Page 5 FRONT MATTER PAGE 5 DRS Tactical Systems, Inc. reserves the right to revise this publication or to change its contents without notice. Information contained herein is for reference only and does not constitute a commitment on the part of the manufacturer or any subsequent vendor. They are in no way responsible for any loss or damage resulting from the use (or misuse) of this publication.
-
Page 6: Warning Summary
PAGE 6 WARNING SUMMARY This device is a Class I, Division 2, Groups A-D, T5 product. The ARMOR X7 complies with all applicable industrial health and safety requirements. However there are certain safety considerations such as battery safety that you need to be aware of. Please read and comply with all warnings and cautions in this guide and in all other X7 documentation. - Page 7 FRONT MATTER PAGE 7 WARNING! The lithium-ion batteries used in this equipment contain material that is hazardous to your health. If battery contents come in contact with the eyes, IMMEDIATELY flush the affected area with clean water for 15 minutes and have someone else summon medical attention for you.
- Page 8 AC adapter connected to the computer and vehicle power connected to the docking station. Permanent damage to the X7 batteries or to the computer itself may result. CAUTION! When using the provided AC adapter, the maximum safe ambient operating temperature is 40°C.
- Page 9 FRONT MATTER PAGE 9 CAUTION! DO NOT use this unit in classified areas unsuitable for its safety ratings. NE PAS UTILISER CETTE UNITÉ EN ZONES AINSI CLASSÉES IMPROPRES À SA COTE DE SÉCURITÉ CAUTION! When using IEEE 802.11a wireless LAN [in Canada], this product is restricted to indoor use due to its operation in the 5.15- to 5.25- GHz frequency range.
-
Page 10: Table Of Contents
Viewing, Navigating, and Printing this Guide ................22 Terminology Used in this Guide .....................22 Please Help Us Maintain Top Quality Documentation ............22 2. Ge ttin g to Kn o w yo u r ARMOR X7 ............24 Processor and Operating System ..................24 Data Storage .........................24 Dual Screen Display ......................24... - Page 11 ARMOR Flexspace™ ......................46 3. Ge ttin g S ta rte d ..................48 Installing and Charging the Batteries ..................49 Turning On Your X7 for the First Time ...................51 Turning the Computer On Normally ..................51 Putting the Computer in Sleep Mode ..................51 Turning the Computer Off Normally ..................51...
- Page 12 Managing the WWAN Radio ....................84 Installing the SIM Card ......................84 Connecting to a WWAN .....................86 Wireless Signal Quality ......................88 5. Yo u r ARMOR X7 S o ftwa re ..............89 Getting Started with Windows 7 .....................89 Help for Windows ......................89 ARMORutils Program ......................90 ARMORutils Main Dialog Window ..................90...
- Page 13 FRONT MATTER PAGE 13 Docking RF Switch Button ....................93 Dock RF MUX Options ......................94 Save Settings Button ......................94 Radios ON/OFF Toggle Button ..................94 Programmable Button Settings Dialog ...................95 Additional Capabilities .......................96 Configuration Dialog Window ....................97 Installed Options ........................97 Battery Monitor Dialog Window ....................98 Battery 1 and 2 Information Buttons ..................99 Charger Settings Button ....................
- Page 14 Archive Backup ....................... 132 User Backups ........................133 System Recovery CD......................133 8. Ma in ta inin g Yo u r ARMOR X7 ............135 Removing and Replacing the Solid State Drive ..............135 Removing and Replacing the Batteries ................136 Installing a SIM Card ......................
- Page 15 FRONT MATTER PAGE 15 Using the Intel Graphics and Media Control Panel ............160 Using a Keyboard “Hot Key” Combination ............... 161 10. Ba tte ry Ma n a ge m e n t ............... 163 Safety and Handling Considerations for Your Batteries ............164 When to Charge a Battery ....................
- Page 16 Charger LED Status Indications ................... 188 List of Figures Figure 1. X7 Internal Block Diagram ..................31 Figure 2. ARMOR X7 Key Features – Front View ..............33 Figure 3. X7 Control Panels .....................34 Figure 4. Indicator Panel ......................36 Figure 5. Key Features - Rear Panel ..................37 Figure 6.
- Page 17 Figure 61. Tablet PC Settings Utility – Other Tab ..............111 Figure 62. WACOM Pen Tablet Properties Window – Pen Tab ..........112 Figure 63. Settings and Options Supported by the ARMOR X7 Active Pen ......113 Figure 64. Side Button Menu Options ..................114 Figure 65.
- Page 18 Figure 70. Virtual Magnifying Glass Application ..............120 Figure 71. QuickBack™ Graphical User Interface ..............132 Figure 72. X7 Solid State Drive Location ................135 Figure 73. X7 Battery Pack Locations ..................137 Figure 74. X7 Rear Compartment ..................139 Figure 75.
- Page 19 Table 18. Connecting to a WWAN.....................86 Table 19. ARMOR X7 Trouble Symptoms ................121 Table 20. Boot the X7 from the Recovery CD ................ 134 Table 21. Remove and Replace the Solid State Drive ............136 Table 22. Remove and Replace a Battery ................137 Table 23.
-
Page 20: 1. Welcome And Introduction
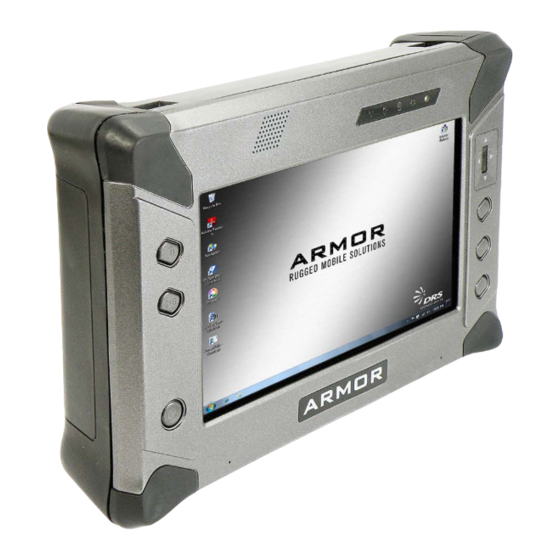
1. WELCOME AND INTRODUCTION Thank you for purchasing the ARMOR X7 ruggedized tablet computer with Intel® Mobile technology. Your X7 is the first of a new line of durable, reliable, and easy-to-use small form factor tablet computers. The X7 is housed in a light-weight magnesium alloy frame surrounded by a durable plastic case, and has sealed external connectors that are rated IP 67 level protection from dust, dirt, water and other damaging elements. -
Page 21: Your Armor X7 Purchase
Your ARMOR X7 Purchase Your purchase includes the items and accessories shown below. Please confirm that all of these items are present and in good condition. NOTE: If your X7 includes a solid state drive, it is shipped already installed in the computer. -
Page 22: About This Guide
Viewing, Navigating, and Printing this Guide This User’s Guide is installed on your ARMOR X7 computer in PDF format. To access it, double-click on the icon on the desktop. You can click on any Figure or Table reference and on... - Page 23 SECTION 1 WELCOME AND INTRODUCTION PAGE 23 This Page Intentionally Left Blank 9711-26400-0001 EXPORT CONTROLLED – SEE PAGE 3 Rev -...
-
Page 24: 2. Getting To Know Your Armor X7
Gobi WWAN radio. If the WWAN radio is not installed, the X7 is equipped with a 1.8” solid state drive of 32GB or 80GB capacity in addition to the mSATA memory... -
Page 25: Video Graphics
2.4 and 5 GHz bands. O p t io n a l WWAN S u p p o r t An optional PCI-e WWAN card can be installed in place of the solid-state drive. The X7 WWAN supports the following networks: •... -
Page 26: Batteries
PAGE 26 Batteries Two batteries are installed, one on either side of the X7, as shown in Figure 5. The X7 batteries are high efficiency lithium-ion batteries that are “hot swappable.” That is, if you have two batteries, you can replace one battery while the tablet operates on the other battery. With this capability, you do not have to shut down the computer or interrupt your current operating session in order to replace a battery. -
Page 27: Armor X7 Specifications
SECTION 2 GETTING TO KNOW YOUR ARMOR X7 PAGE 27 ARMOR X7 Specifications Operating System Microsoft Windows7 Professional® or Windows 7 Ultimate® 32 bit Processor Intel® Embedded Luna Pier system architecture with Pineview-M 1.6GHz Single Core Processor 512 KB L2 Cache... - Page 28 SECTION 2 GETTING TO KNOW YOUR ARMOR X7 PAGE 28 Cursor Control Touch screen controlled by fingertip or inert stylus Pen screen controlled by inductive (active) pen Optional external mouse using mini-USB adapter (not included) Interface Connections Fixed I/O: •...
- Page 29 SECTION 2 GETTING TO KNOW YOUR ARMOR X7 PAGE 29 Flexspace Expansion Replacement of 2 /right side battery pack +5V, 1A & +3.3V, 1A power for active modules User accessible open-source interface support for 3rd party or application specific functions:...
- Page 30 SECTION 2 GETTING TO KNOW YOUR ARMOR X7 PAGE 30 -20 to +60°C operating/-40 to +70°C storage Operational Features 20°C/min temperature shock (operating) +5°C to 60°C, 95% RH 20,000 feet altitude Composite wheeled vehicle vibration 30g, 11ms, half-sine operational shock...
-
Page 31: Figure 1. X7 Internal Block Diagram
SECTION 2 GETTING TO KNOW YOUR ARMOR X7 PAGE 31 DDR2 1GB/2GB LVDS Backlight LCD Display Driver Touch Panel Pineview-M Flexspace Exp Optically Bonded Controller LCD Assy X4 DMI USB 0 PCIe X1 USB Connector Half-Size Mini-PCIe WLAN USB 1... - Page 32 SECTION 2 GETTING TO KNOW YOUR ARMOR X7 PAGE 32 This Page Intentionally Left Blank 9711-26400-0001 EXPORT CONTROLLED – SEE PAGE 3 Rev -...
-
Page 33: Front Panel Features
DUAL SCREEN SPEAKER WLAN / WWAN / GPS INDICATOR FINGERPRINT DISPLAY ANTENNAS PANEL SCANNER RIGHT LEFT CONTROL CONTROL PANEL PANEL NOISE CANCELLING MICROPHONES Figure 2. ARMOR X7 Key Features – Front View 9711-26400-0001 EXPORT CONTROLLED – SEE PAGE 3 Rev -... -
Page 34: Left And Right Control Panels
It can also be used to steer the on-screen cursor and perform some simple mouse functions. Normally, this requires third-party software that does not come with the X7. However, we have provided some introductory software that will allow you to explore this feature. Refer to... -
Page 35: Indicator Panel
In d ic a to r P a n e l There are 4 LED status indicators located on the indicator panel at the upper right of the X7 display, as shown in Figure 4 (NOTE: The fifth object to the far right on the panel is the ambient light sensor (ALS), not an LED). -
Page 36: Ambient Light Sensor (Als)
P o w e r On In d ic a to r A blue LED that is on steady whenever power is applied to the ARMOR X7 and is off when power is shut down. -
Page 37: Rear Panel Features
PAGE 37 Rear Panel Features The rear panel of the X7 houses a built-in webcam, a cooling register, bays for two batteries and a compartment that provides access to installed radio modules, a SIM card socket, and a micro SD socket. A slot for the active pen is also built into the back panel with posts to secure the lanyard. -
Page 38: Batteries
With this capability, you do not have to shut down the computer or interrupt your current operating session in order to replace a battery. The X7 can operate for 8 hours or longer on two fully charged batteries and up to 4 hours on a single battery. -
Page 39: Webcam
We b c a m Your X7 has a built-in 2 megapixel camera located on the back side of the unit (see Figure 8). The camera is equipped with an autofocus lens and can be used to capture still images or movies, or to scan barcodes. -
Page 40: Bottom Panel Features
PAGE 40 Bottom Panel Features The bottom panel houses an AC adapter jack, a mini-USB connector and a 20-pin docking connector. The docking connector contains two RF ports to connect the X7 to external GPS and wireless antennas. AC ADAPTER... -
Page 41: Included Components, Accessories And Support
AC Ad a p t e r Included with your ARMOR X7 is a +19 VDC ± 5%, 2 amp AC power adapter, or “AC Adapter”. This external power supply can be plugged in to any 100-240 VAC outlet and is used to recharge your computer’s battery packs or to provide power to the computer without draining... -
Page 42: Armor Cloth
S u b s c r ib e r Id e n t it y Mo d u le (S IM) C a r d S u p p o r t The X7 is equipped with a SIM card socket. A SIM card is a small electronic card that contains your subscriber ID, billing information, and network permissions. -
Page 43: Optional Accessories For Your X7
A reduced-size USB keyboard (Figure 13) is available for use with the ARMOR X7 computer. The keyboard is approximately half the size of a standard keyboard and can be connected directly to the X7 or to a desk docking station to conserve space on a table or desktop. Figure 13. Compact Keyboard 9711-26400-0001 EXPORT CONTROLLED –... -
Page 44: Desk Dock
De s k Do c k The X7 desk dock is designed to fit on your desktop without taking up a lot of space. It is made of light-weight but rugged plastic and houses connectors for 3 USB ports, 2 GPIO ports, an Ethernet port, an RS-232 serial port and 5 VDC external power. -
Page 45: Vehicle Dock
The tablet slips easily into the cradle and can be inserted and latched with one hand. The X7 vehicle dock is rugged and light weight and can be adapted to just about any mounting situation from console and dashboard installation to bulkhead and cab roof installation (see Figure 16), or it can be floor mounted using a special mounting assembly. -
Page 46: Armor Flexspace
AR MO R Fle x s p a c e ™ The X7 computer provides additional space and a flexible I/O connectivity to accommodate a custom card or module such as a radio frequency ID (RFID) tag reader, contactless card reader or satellite communications module. - Page 47 SECTION 2 GETTING TO KNOW YOUR ARMOR X7 PAGE 47 This Page Intentionally Left Blank 9711-26400-0001 EXPORT CONTROLLED – SEE PAGE 3 Rev -...
-
Page 48: 3. Getting S Tarted
GETTING STARTED PAGE 48 3. GETTING S TARTED The information in this section will help you get your X7 set up and operating. Please read all warnings, cautions and notes prior to each procedure or step. CAUTION! Use this product only in vehicles with a regulated voltage supply of +10 to +30 VDC. -
Page 49: Installing And Charging The Batteries
Installing and Charging the Batteries The first step to getting your X7 operating is to install and charge the batteries. The batteries are inserted into slots on side of the computer, as shown in Figure 18. Follow the procedure in Table 2 to install the batteries. -
Page 50: Table 2. Install The X7 Batteries
Release the battery latch to lock the battery in place. Perform steps 1-3 to install the second battery. Connect the AC adapter to the jack on the bottom of the X7 and plug the adapter power cord into an AC outlet. -
Page 51: Turning On Your X7 For The First Time
Turning the Computer On Normally Turn the computer on by pressing and releasing the Power button. The ARMOR X7 will perform self-checking routines during the start-up process. All units are configured at the factory to automatically boot to the Microsoft Windows desktop unless a custom configuration has been requested. -
Page 52: Emergency Shutdown
This procedure should only be used in emergencies because improperly shutting down Windows may result in the loss of data and possible corruption of the operating system. Indicator State Summary Table 3 lists all states for the various X7 indicators. Refer to Indicator Panel for a description of each LED. -
Page 53: Activating Your Wireless Radios
SECTION 3 GETTING STARTED PAGE 53 IF THE AND THE THIS MEANS: INDICATION POWER EXTERNAL BATTERY MODE IS: POWER IS: On steady red Power Connected Installed Power system fault on/off (overvoltage, undervoltage or overcurrent condition or battery failure) Power (blue) Installed Computer power is on Computer power is off... -
Page 54: Installing A Micro Sd Or Sdhc Card
SECTION 3 GETTING STARTED PAGE 54 Installing a Micro SD or SDHC Card The micro SD card socket is located inside the rear compartment, as shown in Figure 19. Follow the procedure in Table 4 to install the card. CAUTION! Do not remove the rear compartment cover while the unit is powered up as internal voltages are exposed to possible short circuit. - Page 55 SECTION 3 GETTING STARTED PAGE 55 STEP ACTION CONDITION OR INDICATION Place the computer face down on a clean surface and remove the 14 Philips screws securing the cooling register. Carefully pry up the cooling register at the slot provided (Figure 19) and remove.
-
Page 56: Accessing And Using The Gps Receiver
SECTION 3 GETTING STARTED PAGE 56 Accessing and Using the GPS Receiver Click on the U-Center™ desktop icon or select Start à All Programs à u-center. The U- Center application opens as shown in Figure 20. U-Center GPS Application Window The diagram in the center shows the approximate positions of satellites that are within range of the receiver. -
Page 57: Operating The X7 Display
Us in g P 1 a n d P 2 When you first receive your X7, the P1 button is programmed to increase the screen brightness in 10% steps and the P2 button is programmed to decrease brightness in 10% steps. Press and release a button to change the brightness level. -
Page 58: Automatic Adjustment
SECTION 3 GETTING STARTED PAGE 58 Press the UP or DOWN buttons repeatedly with the pen or a fingertip to move the slider and adjust the backlight level. The % brightness is displayed in a field on the right. You can also use the up and down arrows next to this field to adjust the slider. -
Page 59: Working With The Pen Screen
Us in g th e X7 P e n w ith t h e P e n S c r e e n Table 5 lists mouse-type objectives you can perform using the X7 pen with the pen screen. -
Page 60: Pen Screen Adjustments
• Tablet PC Settings utility Refer to Your ARMOR X7 Software for information about these utilities. P e n S c r e e n C a lib r a tio n After a period of normal usage, the screen may need to be calibrated with the pen to ensure the pen tip is aligned with the cursor over the entire screen area. -
Page 61: Working With The Touch Screen
Select Start à Control Panel à Hardware and Sound à and click on the Touch Settings utility, Pen and Touch utility and the Tablet PC Settings utility. Refer to Your ARMOR X7 Software section in the X7 User’s Guide for an explanation of these attributes. -
Page 62: Touch Screen Calibration
You will need to calibrate the touch screen using a fingertip or a passive stylus (not included with the X7) to ensure the actual touch point matches the position of the cursor. For calibration instructions, refer to Error! Reference source not found.. -
Page 63: Entering Data Using The Input Panel
SECTION 3 GETTING STARTED PAGE 63 Entering Data Using the Input Panel The input panel is a virtual keyboard and handwriting entry tool that is located on your desktop. It is accessed differently depending on the operating system. Ac c e s s in g In p u t P a n e l The Input panel keyboard is normally hidden just off the left side of the display, as shown in Figure 22. -
Page 64: Opening Input Panel With A Gesture
SECTION 3 GETTING STARTED PAGE 64 The input panel has two modes: handwriting and keyboard entry. These are selectable by the two mode icons at the upper left corner. NOTE: The panel will always open in the last mode used. Click on the Tools menu for handwriting options and for information on how to set up and use Input Panel. -
Page 65: Using The Fps As A Simple Mouse Device
SECTION 3 GETTING STARTED PAGE 65 Using the FPS as a Simple Mouse Device The FPS mouse function is activated as soon as you start up the computer. It places an icon in the task tray that you can used to access options and make adjustments. Follow the procedure in Table 7 to configure the FPS mouse function. -
Page 66: Table 8. Fps Mouse Actions
SECTION 3 GETTING STARTED PAGE 66 STEP ACTION CONDITION OR INDICATION Move the Motion Sensitivity slider to the right to about 80% of the scale. Click on the Advanced Options tab at This aligns the mouse movement axes the top of the window and change the with finger movement over the FPS Orientation to 270°. -
Page 67: Configuring Your Speakers
SECTION 3 GETTING STARTED PAGE 67 Configuring Your Speakers Table 9. Configuring Your Speakers STEP ACTION CONDITION OR INDICATION Double-click on the orange speaker The Realtek® HD Audio Manager window opens with the Speakers main tab (top of icon in the task bar tray. page) open Speaker... -
Page 68: Configuring Your Microphones
SECTION 3 GETTING STARTED PAGE 68 Co n fig u r in g Yo u r Mic r o p h o n e s Table 10. Configuring Your Microphones STEP ACTION CONDITION OR INDICATION Click on the Microphone main tab at The Microphone main tab opens with the the top of the page. -
Page 69: Operating With The Armor X7 Vehicle Dock
Both the RF and Non-RF docks have a “dock sense” pin that tells the X7 when it is docked. This allows the X7 to turn off power to the docking connector pins when the tablet is undocked, and turn power back on when it is docked. -
Page 70: Figure 27. External Antenna Selection Options In Armorutils
Dock RF Mux panel. NOTE If you have an X7 RF dock installed but are not using external antennas, you must set the Dock RF Sw to “Disable” in order to use the tablet’s internal antennas. - Page 71 The Non-RF dock (DRS P/N 9800F26200-1000) has all the features of the RF dock but without the external antenna connections. NOTE If you have an X7 Non-RF dock installed, you must set the Dock RF Sw to “Disable” in order to use the tablet’s internal antennas. 9711-26400-0001 EXPORT CONTROLLED –...
-
Page 72: Using The Webcam
Ca p t u r in g Im a g e s a n d Vid e o Image and video capture is performed using the built-in webcam and image capture software. Your X7 is provided with a version of Picasa 3™ image editor to demonstrate the image capture process. -
Page 73: Scanning A Barcode
The built-in webcam and application software of your choice allows you to scan various types of barcodes and incorporate them in to your documents. We have included two simple applications to demonstrate the barcode scanning capabilities of the X7. NOTE Ensure that adequate light can reach the barcode to be scanned. -
Page 74: Figure 30. Webcam Barcode Scanner® Barcode Scanner Application Window
SECTION 3 GETTING STARTED PAGE 74 Table 13. Scan UPC-10, EAN-13 and ISBN Barcodes in Windows 7 STEP ACTION Double-click on the Webcam Barcode Scanner icon on the desktop to open the application window, as shown in Figure 30. Hold the barcode to be scanned 2-3” from the camera and hold it steady. A tone will announce successful barcode capture, and the barcode number will appear at the bottom of the window. -
Page 75: Figure 31. Sample 2D Barcode
SECTION 3 GETTING STARTED PAGE 75 Figure 31. Sample 2D Barcode 9711-26400-0001 EXPORT CONTROLLED – SEE PAGE 3 Rev -... -
Page 76: Figure 32. Quickmark® Barcode Scanner Application Window
SECTION 3 GETTING STARTED PAGE 76 Table 14. Scan Datamatrix and QR Format Barcodes in Windows 7 STEP ACTION Double-click on the QuickMark icon on the desktop to open the QuickMark® application window, as shown in Figure 32. Hold the barcode to be scanned 2-3” from the camera; an audible signal will sound upon capture and the barcode information will be displayed in the application window, as shown in Figure 33. -
Page 77: Using The Screen Magnifier
Some text and images on a tablet computer can be so small they are difficult to see clearly. Your X7 has a handy application that will magnify a portion of the screen and help you see more effectively. The program is called Virtual Magnifying Glass™. -
Page 78: Tips For Proper Use And Care Of Your X7
GETTING STARTED PAGE 78 Tips for Proper Use and Care Of Your X7 There are certain precautions you should take to ensure that your ARMOR X7 computer continues to provide you with reliable service: • Do not subject the computer to heat by placing it on the dashboard of a vehicle with the display facing the sun. - Page 79 SECTION 3 GETTING STARTED PAGE 79 This Page Intentionally Left Blank 9711-26400-0001 EXPORT CONTROLLED – SEE PAGE 3 Rev -...
-
Page 80: 4. Networking
NETWORKING PAGE 80 4. NETWORKING Your ARMOR X7 comes with Wi-Fi™ (wireless fidelity) network capabilities. The Wi-Fi network is primarily used for higher bandwidth connections such as Internet or a company LAN. Managing the WI-FI Radio Your WI-FI (WLAN) radio is already configured and operating. Refer to Table 15 for instructions on how to establish and manage your WLAN connections. -
Page 81: Table 15. View And Manage Network Connections
SECTION 4 NETWORKING PAGE 81 Table 15. View and Manage Network Connections STEP ACTION CONDITION OR INDICATION Select Start à Control Panel à The window shown in Figure 35 opens. Network and Internet à Network and Sharing Center. Click on the “Connect to a network” The label “Connected”... -
Page 82: Figure 35. Windows Network And Sharing Center
SECTION 4 NETWORKING PAGE 82 Figure 35. Windows Network and Sharing Center Figure 36. Currently Connected and Available Wi-Fi Networks 9711-26400-0001 EXPORT CONTROLLED – SEE PAGE 3 Rev -... -
Page 83: Controlling Your Wireless Radios
SECTION 4 NETWORKING PAGE 83 Controlling Your Wireless Radios You may want to turn off one or more of your radios to save power, to avoid interfering with other radio systems, or just to ensure your privacy. Or you may want to turn off all of your wireless radios at one time but keep working on your computer, as when travelling on an aircraft. -
Page 84: Managing The Wwan Radio
SECTION 4 NETWORKING PAGE 84 Managing the WWAN Radio In s ta llin g t h e S IM C a r d Before you can activate and use your WWAN radio, a valid SIM card from your network service provider needs to be installed. -
Page 85: Figure 40. X7 Rear Compartment
PAGE 85 SIM CARD COVER SOCKET REMOVAL SLOT Figure 38. X7 Rear Compartment STEP ACTION CONDITION OR INDICATION Place a fingertip in the notch on the left side of the SIM socket cover and slide the cover to the right until you feel an indent, then lift up. -
Page 86: Connecting To A Wwan
SECTION 4 NETWORKING PAGE 86 Gently press the cover down and slide to the left to lock in place. Reinstall the cooling register and secure with the 14 Philips screws. Be careful not to over- tighten the screws. Co n n e c tin g t o a WWAN Once your card is installed, you are ready to activate your network connection. -
Page 87: Figure 41. Sierra Oneclick Connection Manager Window
SECTION 4 NETWORKING PAGE 87 Refer to Managing Your Network Connections in the ARMOR X7 User’s Guide for instructions on how to monitor and control your other wireless and Ethernet connections. Figure 39. Sierra OneClick Connection Manager Window Figure 40. Settings Window 9711-26400-0001 EXPORT CONTROLLED –... -
Page 88: Wireless Signal Quality
SECTION 4 NETWORKING PAGE 88 Wireless Signal Quality Wireless signal quality is affected by several conditions: • Distance from the access point (wireless transmit and receive antennas). • Access rights (set up through an administrator). • Your security settings. • Orientation of the wireless antennas. -
Page 89: 5. Your Armor X7 S Oftware
He lp fo r Win d o w s For information on using Microsoft Windows features and options, refer to the Microsoft help files and documentation on the X7 computer by clicking on the Start button and selecting the Help and Support option. -
Page 90: Armorutils Program
SECTION 5 YOUR ARMOR X7 SOFTWARE PAGE 90 ARMORutils Program The ARMORutils program is provided to help you configure and manage your X7 computer. It contains settings and information about screen setup, wireless configuration, charging/fault and much more. NOTE The screen images in this section are used for reference only and may not reflect the actual configuration of your X7. -
Page 91: Backlight Setup Dialog Window
Click on the Automatic button to activate the automatic brightness control mode. Automatic brightness adjustment is controlled by the ambient light sensor (ALS) located on the front of the X7 tablet. This sensor monitors the surrounding light level and automatically adjusts the screen brightness according the adjustment profile selected. -
Page 92: Automatic Mode Profiles
SECTION 5 YOUR ARMOR X7 SOFTWARE PAGE 92 Au t o m a t ic Mo d e P r o file s Everyone’s eyes react differently to changes in light levels and there may be times when the full range of automatic brightness adjustment is uncomfortable for you. -
Page 93: Wireless Devices Dialog Window
Ra d io O N/O FF B u t t o n s There is an ON and Off button for each radio that can be installed in the X7. When you first start your ARMOR X7, all installed radios are enabled (default condition). Each radio can then be disabled by pressing its OFF button and re-enabled by pressing its ON button. -
Page 94: Dock Rf Mux Options
Do c k R F MUX O p t io n s These options allow you to select which external antennas will be used by the X7. You can select GPS only, WWAN only, or both antennas. If only one external antenna is selected, the other radio will operate on its internal antenna. -
Page 95: Programmable Button Settings Dialog
SECTION 5 YOUR ARMOR X7 SOFTWARE PAGE 95 Programmable Button Settings Dialog This page is shown in Figure 47. It allows you to preset up to 6 different functions using the three programmable buttons P1–P3 on the tablet control panel. -
Page 96: Additional Capabilities
SECTION 5 YOUR ARMOR X7 SOFTWARE PAGE 96 Figure 46. ARMORutils Programmable Button Settings Page Menu Options Ad d itio n a l C a p a b ilit ie s P1, P2 and P3 generate scan codes for F13, F14 and F15. Pressing the Fn button and then P1, P2 or P3 generates scan codes for Shift+F13, Shift+F14 and Shift+F15. -
Page 97: Configuration Dialog Window
The Configuration Page provides visual confirmation of those wireless radio and display options that are installed in your X7. For those options that are installed and available, the associated icons and text will appear in dark contrast. If an option is not installed or available, the icon and text will be grayed out. -
Page 98: Battery Monitor Dialog Window
SECTION 5 YOUR ARMOR X7 SOFTWARE PAGE 98 Battery Monitor Dialog Window The Battery Monitor window is shown in Figure 50. This window provides information about: • Each battery’s current charge level • Whether or not the battery is charging or discharging •... -
Page 99: Battery 1 And 2 Information Buttons
SECTION 5 YOUR ARMOR X7 SOFTWARE PAGE 99 Ba tt e r y 1 a n d 2 In fo r m a tio n Bu t to n s Click on the Battery 1 Details or Battery 2 Details button (Figure 50) to open a Battery Information window (example shown in Figure 51). -
Page 100: Charger Settings Button
SECTION 5 YOUR ARMOR X7 SOFTWARE PAGE 100 Ch a r g e r S e tt in g s B u t t o n Click on the Charger Settings button (Figure 50Error! Reference source not found.) to open the Charger Control Settings window, as shown in Figure 52. -
Page 101: Screen Mode Setup Dialog Window
SECTION 5 YOUR ARMOR X7 SOFTWARE PAGE 101 Screen Mode Setup Dialog Window This window is currently not available. 9711-26400-0001 EXPORT CONTROLLED – SEE PAGE 3 Rev -... -
Page 102: Diagnostics Dialog Window
SECTION 5 YOUR ARMOR X7 SOFTWARE PAGE 102 Diagnostics Dialog Window The Diagnostics dialog window provides internal temperature information that can be used by DRS to diagnose possible system problems. It displays three internal temperatures of the processor and one for each battery, as shown in Figure 53. These temperatures vary widely depending on the operation of the tablet and may not necessarily correlate with outside (ambient) temperatures. -
Page 103: Armorutils About Window
The About window (Figure 54) displays the current version and release date of the ARMORutils software. It also provides a contact telephone number for the DRS Tactical Systems Technical Support call center and the internet address to the ARMOR website where you can log on to access support information. -
Page 104: Pen And Touch Utility
SECTION 5 YOUR ARMOR X7 SOFTWARE PAGE 104 Pen and Touch Utility The Pen and Touch utility is a Windows utility that provides settings that effect how the pen works for both the active pen screen and the touch screen. - Page 105 Pen tab of the Pen Tablet Properties utility, regardless of whether it is checked or not. Use the top of the pen to erase ink option – The erase function is not supported in the X7 from any utility option.
-
Page 106: Flicks Tab
SECTION 5 YOUR ARMOR X7 SOFTWARE PAGE 106 Flic k s Ta b The Flicks tab provides settings that are applicable to both the pen and touch screens. Flicks are short quick gestures either up, down, left or right that produce common actions such as scrolling through a document, dragging an object, or opening a folder. -
Page 107: Figure 57. Pen And Touch Utility - Handwriting Tab
SECTION 5 YOUR ARMOR X7 SOFTWARE PAGE 107 Figure 55. Pen and Touch Utility – Handwriting Tab 9711-26400-0001 EXPORT CONTROLLED – SEE PAGE 3 Rev -... -
Page 108: Touch Tab
SECTION 5 YOUR ARMOR X7 SOFTWARE PAGE 108 To u c h Ta b The Touch tab provides settings that are applicable to the touch screen only. The options on this tab affect how the pen, or your finger, interacts with the touch screen. -
Page 109: Figure 59. Touch Tab Virtual Mouse Pointer
SECTION 5 YOUR ARMOR X7 SOFTWARE PAGE 109 Touch Actions Highlight a touch action and click on the Settings button to open an adjustment window. Touch Pointer Select this option to place a cursor at the touch point. A virtual mouse image will also appear next to the cursor, as shown in Figure 59 . -
Page 110: Tablet Pc Settings Utility
Use the Calibrate button to calibrate either a pen or touch screen. Click on Reset to remove the last calibration. Go to Orie n ta tio n This option is not supported by the X7. Figure 58. Tablet PC Settings – Display Tab 9711-26400-0001 EXPORT CONTROLLED –... -
Page 111: Other Tab
SECTION 5 YOUR ARMOR X7 SOFTWARE PAGE 111 O th e r Ta b This tab allows you to change where an on-screen menu appear when you activate the pen or touch displays so that your hand does not block your view of the menu. For example, if you are left-handed, check the Left-handed option to have the menus appear to the right of the cursor. -
Page 112: Pen Tablet Properties Utility
The Pen tab is displayed by default when the Pen Tablet Properties window opens (Figure 62 ). The pen pictured in the tab is a WACOM™ pen that is normally used in advanced drawing tablets. Its functionality far exceeds what is practical for your X7 tablet. Consequently, we have provided a simpler active pen. -
Page 113: Figure 63. Settings And Options Supported By The Armor X7 Active Pen
Figure 63 and Figure 64 highlight those functions and options that are supported by your ARMOR X7 active pen. NOTE Options not supported by the X7 pen are grayed out in Figure 63 and Figure 64 for illustration purposes only. They are not grayed out on the actual application screen image. -
Page 114: Figure 64. Side Button Menu Options
The side button can be set to perform different functions that are selected from the pull down menu shown in Figure 64. The default function is “Right Click”. Only the lower button menu is used with the X7 pen. Refer to Explanation of Side Button Options in the Appendix for a description of each menu option. -
Page 115: Figure 65. Pen Tablet Properties - Advanced Settings Window
SECTION 5 YOUR ARMOR X7 SOFTWARE PAGE 115 Ad va n c e d Bu t to n Click on the Advanced button to open the Advanced Settings window, as shown in Figure 65. The two options in this window allow you to set the way the side switch will be used to perform a right click action. -
Page 116: Pop-Up Menu Tab
SECTION 5 YOUR ARMOR X7 SOFTWARE PAGE 116 P o p -u p Me n u Ta b The Pop-up Menu tab is shown in Figure 66. This tab allows you to add additional functionality to the side button. These functions will be displayed in a pop-up menu when the side button is pressed while in an application or working on the desktop. - Page 117 SECTION 5 YOUR ARMOR X7 SOFTWARE PAGE 117 Click on the down arrow in the Add field to open a list of available functions then select and configure the desired function. Those functions that are selected will appear in the Pop-up Items panel to the right of the Add field.
-
Page 118: Calibrate Tab
SECTION 5 YOUR ARMOR X7 SOFTWARE PAGE 118 Ca lib r a t e Ta b The Calibrate tab is shown in Figure 68. Click on the Calibrate button to access the screen calibration routine. Follow the on-screen instructions. Figure 66. Pen Tablet Properties Window – Calibrate Tab 9711-26400-0001 EXPORT CONTROLLED –... -
Page 119: Picasa 3
SECTION 5 YOUR ARMOR X7 SOFTWARE PAGE 119 Picasa 3® Picasa 3 is an image capture program that allows you to use the webcam for taking still pictures and movies and for capturing barcodes. Refer to Capturing Images and Video for instructions on how to use this application. -
Page 120: Virtual Magnifying Glass
SECTION 5 YOUR ARMOR X7 SOFTWARE PAGE 120 Virtual Magnifying Glass™ This handy utility allows you to magnify portions of the screen that are too small to see clearly. It projects a virtual magnifying glass over a portion of the screen, as shown in Figure 70. Refer to Using the Screen Magnifier for instructions on how activate and use this application. -
Page 121: 6. Troubles Hooting
Any other failure will require the tablet be returned to DRS Tactical Systems. For each problem that occurs with your ARMOR X7 computer, there are specific steps that will isolate the problem to a failed component or to a configuration option that may be set incorrectly. - Page 122 SECTION 6 TROUBLESHOOTING PAGE 122 SYMPTOM PROBLEM AREA ACTION FLOWCHART 1. Select Start à Control Pen does not right- Display Panel à Hardware and click when held Sound à Pen and against the screen. Touch. 2. Highlight the Press and hold option in the Pen Actions panel and click on Settings.
- Page 123 SECTION 6 TROUBLESHOOTING PAGE 123 SYMPTOM PROBLEM AREA ACTION FLOWCHART Screen rolls, flashes, 1. Remove both batteries and connect AC adapter. then tablet freezes up. 2. Reboot the tablet. 3. If tablet works normally, reinstall one battery at a time and reboot until problem reoccurs.
-
Page 124: Troubleshooting Flowcharts
SECTION 6 TROUBLESHOOTING PAGE 124 Troubleshooting Flowcharts TS -0 1 Ta b le t w ill n o t p o w e r u p 1. Remove both batteries and connect tablet to docking Does tablet Replace Start station or connect AC power up? batteries. -
Page 125: Ts -0 2 Ta B Le T W Ill N O T S Ta R T B O O T P R O C E S S . P O W E R Is O K
SECTION 6 TROUBLESHOOTING PAGE 125 TS -0 2 Ta b le t w ill n o t s ta r t b o o t p r o c e s s . P o w e r is o k Undock tablet Is tablet Did tablet... -
Page 126: Ts -0 3 Ta B Le T W Ill N O T B O O T In T O Win D O W S
SECTION 6 TROUBLESHOOTING PAGE 126 TS -0 3 Ta b le t w ill n o t b o o t in t o Win d o w s Does boot Verify correct process halt at Does tablet Start boot device in Exit white flashing boot up? -
Page 127: Ts -0 4 Ta B Le T W Ill N O T R E C O G N Iz E A B A T Te R Y
SECTION 6 TROUBLESHOOTING PAGE 127 TS -0 4 Ta b le t w ill n o t r e c o g n iz e a b a t te r y Recharge/ Does tablet replace the Start recognize battery. battery? Flash the bios Does tablet... -
Page 128: Ts -0 5 Ta B Le T Is Lo C K E D U P
SECTION 6 TROUBLESHOOTING PAGE 128 TS -0 5 Ta b le t is lo c k e d u p 1. Shut down tablet. 2. Disconnect external power. 3. Remove both batteries and Does tablet allow tablet to sit un- Start Lock up? powered for 5 minutes. -
Page 129: Cannot Connect To Wireless Network
SECTION 6 TROUBLESHOOTING PAGE 129 TS -0 6 C a n n o t c o n n e c t t o w ir e le s s n e tw o r k Shut down and Does tablet Start reboot the Connect to... - Page 130 SECTION 6 TROUBLESHOOTING PAGE 130 This Page Intentionally Left Blank 9711-26400-0001 EXPORT CONTROLLED – SEE PAGE 3 Rev -...
-
Page 131: 7. Backup And Res Tore P Rocedures
If the entire hard drive becomes corrupted or the hard drive is damaged, this restore feature may not work. ARMOR X7 ruggedized computers implement the QuickBack™ functionality using the Acronis True Image OEM software package. The True Image application provides a number of useful... -
Page 132: How To Access Quickback™ For Initial Set-Up And Help Features
SECTION 7 BACKUP AND RESTORE PROCEDURES PAGE 132 Ho w to Ac c e s s Qu ic k B a c k ™ fo r In itia l S e t -Up a n d He lp Fe a t u r e s Once installed, the QuickBack™... -
Page 133: User Backups
SECTION 7 BACKUP AND RESTORE PROCEDURES PAGE 133 interruption. The Archive Backup contains the original C and D partitions and is stored in a compressed form in a hidden partition on the system hard disk. This hidden partition is not visible or accessible to you with the standard system file access toolset. -
Page 134: Table 20. Boot The X7 From The Recovery Cd
Place the recovery CD in the CD drive. Select Boot Manager. Boot the system and press the <ESC> key when the ARMOR splash screen appears. Select the CD drive (the exact text depends on the type of drive being used). -
Page 135: 8. Maintaining Your Armor X7
Figure 72. Follow the procedure in Table 21 to remove and replace the drive. NOTE The solid state drive should only be removed or installed by a qualified technician in a controlled environment. Figure 70. X7 Solid State Drive Location 9711-26400-0001 EXPORT CONTROLLED – SEE PAGE 3 Rev -... -
Page 136: Removing And Replacing The Batteries
Connect external power first before removing both batteries. NOTE If your X7 has only one battery pack, install it in the left side (primary) battery slot. 9711-26400-0001 EXPORT CONTROLLED – SEE PAGE 3... -
Page 137: Table 22. Remove And Replace A Battery
Release the battery latch to lock the battery in place. SECONDARY PRIMARY BATTERY BATTERY PACK PACK BATTERY LATCH Figure 71. X7 Battery Pack Locations 9711-26400-0001 EXPORT CONTROLLED – SEE PAGE 3 Rev -... -
Page 138: Installing A Sim Card
SECTION 8 MAINTAINING YOUR ARMOR X7 PAGE 138 Installing a SIM Card Before you can activate and use your WWAN radio, a valid SIM card from your network service provider needs to be installed. The SIM card is installed in a socket located inside the rear compartment, as shown in Figure 74. - Page 139 PAGE 139 SIM CARD COVER SOCKET REMOVAL SLOT Figure 72. X7 Rear Compartment STEP ACTION CONDITION OR INDICATION Place a fingertip in the notch on the left side of the SIM socket cover and slide the cover to the right until you feel an indent, then lift up.
- Page 140 SECTION 8 MAINTAINING YOUR ARMOR X7 PAGE 140 Gently press the cover down and slide to the left to lock in place. Reinstall the cooling register and secure with the 14 Philips screws. Be careful not to over-tighten the screws.
-
Page 141: Installing A Micro Sd Or Sdhc Card
SECTION 8 MAINTAINING YOUR ARMOR X7 PAGE 141 Installing a Micro SD or SDHC Card The micro SD card socket is located inside the rear compartment, as shown in Figure 75. Follow the procedure in Table 24 to install the card. - Page 142 SECTION 8 MAINTAINING YOUR ARMOR X7 PAGE 142 STEP ACTION CONDITION OR INDICATION Press the card down until it locks in place. Replace the cooling register and secure with 14 Philips screws. Reinstall the batteries and re-connect external power if desired.
-
Page 143: Changing The Bios Settings
BIOS settings for your ARMOR X7. CAUTION! Incorrectly setting the BIOS options could cause the X7 to become unstable or render it completely inoperable. Move carefully through the menus and use caution when making changes. Read the description of each change in the right-hand column before making any adjustments. -
Page 144: Table 26. Record Bios Changes Here
SECTION 8 MAINTAINING YOUR ARMOR X7 PAGE 144 Use the LEFT and RIGHT ARROW keys to highlight the desired menu page (listed at the top of the screen) and press ENTER to select the menu. Use the UP and DOWN ARROW keys to scroll through the page settings and to highlight a particular setting or sub-option. -
Page 145: Changing The Power Button Default A
SECTION 8 MAINTAINING YOUR ARMOR X7 PAGE 145 Changing the Power Button Default A Follow the procedure in Table 27 to change the default actions of the Power button. Table 26. Changing the Power Button Default Actions ACTION CONDITION OR INDICATION STEP Select Start à... -
Page 146: Caring For The Display Screen
Figure 74. Power Button Settings Options Caring For the Display Screen With minimal maintenance, your X7 display will last for many years. When operating on the desktop, you should not use an abrasive or metallic pointer as this may damage the screen. We recommend using the pen that came with your computer or your fingertip. -
Page 147: Monitoring The Health Of Your Armor X7
If you are experiencing problems and suspect that they are temperature related, you can monitor the internal temperature of the X7. Click on Start à All Programs à ARMORutils or double-click on the ARMORutils icon on the desktop to open the ARMORutils main window (see Figure 77). -
Page 148: Generating A Log Of Temperature Variations
SECTION 8 MAINTAINING YOUR ARMOR X7 PAGE 148 Ge n e r a tin g a Lo g o f Te m p e r a tu r e Va r ia t io n s If a problem is occurring over time, you can record system temperature variations over time by creating a temperature variation log file. - Page 149 SECTION 8 MAINTAINING YOUR ARMOR X7 PAGE 149 Figure 76. ARMORutils Event Recording Window [Update image to Win 7] 9711-26400-0001 EXPORT CONTROLLED – SEE PAGE 3 Rev -...
- Page 150 SECTION 8 MAINTAINING YOUR ARMOR X7 PAGE 150 Figure 77. Sample Temperature Log File [“Core X” column headers do not correspond to Diagnostics dialog window titles (T0, T1, T2….) “System Temp” column header is “Core T2” in the Diagnostics dialog window titles] 9711-26400-0001 EXPORT CONTROLLED –...
-
Page 151: 9. Dis P Lay Management
Ma n u a l Br ig h t n e s s Ad ju s tm e n t Your ARMOR X7 computer is pre-set for manual adjustment of screen brightness. The backlight level can be adjusted manually in two ways: by pressing a button sequence on the control panel or by adjusting the slider in the Backlight Setup dialog window of ARMORutils. -
Page 152: Automatic Adjustment
SECTION 9 DISPLAY MANAGEMENT PAGE 152 Press the UP or DOWN buttons repeatedly with the pen or a fingertip to move the slider and adjust the backlight level. The % brightness is displayed in a field on the right. You can also use the stylus with the up and down arrows next to this field to adjust the slider. -
Page 153: Calibrating The Display In Windows 7
SECTION 9 DISPLAY MANAGEMENT PAGE 153 Calibrating the Display in Windows 7 You can access both touch screen and pen screen calibration routines using ARMORutils or using the Tablet PC Settings utility in Control Panel. Us in g AR MO R u t ils This capability is not currently available. - Page 154 SECTION 9 DISPLAY MANAGEMENT PAGE 154 If you have a second pen or touch screen display connected, be sure the display you want to calibrate is selected in the Display field. If you are not having problems with The Calibrate Pen or Touch Input screen calibration and want to do a Screens window opens, as shown below: quick 4-point calibration, click on the...
- Page 155 SECTION 9 DISPLAY MANAGEMENT PAGE 155 Click on Calibrate and select the NOTE: A shield symbol next to the screen you want to calibrate. screen type (shown below) indicates the calibration data has been reset and is not calibrated; a green arrow indicates that the screen is calibrated.
-
Page 156: Calibrating The Display In Windows Xp
SECTION 9 DISPLAY MANAGEMENT PAGE 156 Calibrating the Display in Windows XP You can access both screen calibration routines through ARMORutils or access the pen screen calibration through the Pen Tablet Properties utility and the touch screen calibration through the Touch Settings utility in Control Panel. Us in g AR MO R u t ils This capability is not currently available. - Page 157 SECTION 9 DISPLAY MANAGEMENT PAGE 157 Figure 80. Pen Tablet Properties Utility Window Click on the Calibrate tab. The Calibrate tab opens as shown below: If you have a second pen or touch screen display connected, be sure the display you want to calibrate is selected in the Monitor field.
-
Page 158: Using The Touch Settings Utility (Windows Xp)
SECTION 9 DISPLAY MANAGEMENT PAGE 158 Us in g th e To u c h S e tt in g s Ut ilit y (Win d o w s XP ) Calibrate the touch screen using the procedure in Table 31. Table 30. -
Page 159: Rotating The Screen (Touch Or Pen)
PAGE 159 Rotating the Screen (Touch or Pen) Your ARMOR X7 supports the Windows function of rotating the screen between Landscape and Portrait layout mode. In landscape mode (default orientation), the long axis of the screen is along the top and bottom of the display. In portrait mode, you turn the computer 90° and the long axis of the screen is along the left and right sides of the display. -
Page 160: Using The Intel Graphics And Media Control Panel
SECTION 9 DISPLAY MANAGEMENT PAGE 160 You can rotate the screen clockwise in four 90 degree steps, alternating between portrait and landscape orientation, or you can rotate it 180° or 270°. Us in g th e In te l Gr a p h ic s a n d Me d ia C o n tr o l P a n e l Right-click anywhere on the desktop or click on the Intel Graphics icon in the icon tray and select Graphics Properties to open the Intel Graphics and Media Control Panel, as shown in... -
Page 161: Using A Keyboard "Hot Key" Combination
SECTION 9 DISPLAY MANAGEMENT PAGE 161 Us in g a Ke yb o a r d “ Ho t Ke y” C o m b in a tio n Open the Intel Graphics and Media Control Panel and select Options and Support à Hot Key Manager. - Page 162 SECTION 9 DISPLAY MANAGEMENT PAGE 162 This Page Intentionally Left Blank 9711-26400-0001 EXPORT CONTROLLED – SEE PAGE 3 Rev -...
-
Page 163: 10. Battery Management
PAGE 163 10. BATTERY MANAGEMENT The Lithium Ion batteries used in your ARMOR X7 computer offer the best technology available today. These ‘Smart Batteries’ provide ARMOR X7 users with the greatest power density and the most accurate “fuel gauge” possible. To achieve the best possible performance from your batteries, we recommend using and maintaining the batteries in accordance with the instructions provided in this section. -
Page 164: Safety And Handling Considerations For Your Batteries
SECTION 10 BATTERY MANAGEMENT PAGE 164 Safety and Handling Considerations for Your Batteries Please use the following safety rules when handling and using lithium-Ion batteries. • Do not expose the batteries to very high temperatures such as an open flame. •... -
Page 165: Fully Depleted Batteries
Us in g th e Op tio n a l X7 Ex te rn a l Ba tte r y Ch a rg e r The X7 external battery charger () will charge a single battery in about 2.5 hours, or two batteries in about 4.5 hours. -
Page 166: Table 32. Select How To Charge The Batteries
SECTION 10 BATTERY MANAGEMENT PAGE 166 NOTE The charging cycle is not linear and the last 20% of charge takes proportionally longer to complete than the first 80% of charge time. S e le c tin g Ho w to Ch a rg e Yo u r Ba t te rie s If you have two batteries installed, you can select if both will charge at the same time (simultaneous mode) or if the battery with the lowest charge will charge first (sequential mode). -
Page 167: How To Tell When Batteries Have Finished Charging
(113°F). Battery Operating Time The total operating time for the ARMOR X7 with two fully charged 2400 mAh batteries at a nominal room temperature is approximately 4 hours. For a single battery, the operating time is approximately 2.5 hours. Legacy batteries with lower capacity will have correspondingly shorter operating times. -
Page 168: Operating Under Low Battery Conditions
Lo w Ba tte r y Le ve l Your ARMOR X7 is designed to operate even when the battery is depleted (<10% charge). When the total charge drops below 10% (low battery level), a low battery alert message will be displayed, as shown in Figure 88. -
Page 169: What To Do If You Get A Low Battery Alert
Wh a t t o Do fo r O ve r ly-Dis c h a r g e d B a tt e r ie s The Armor Tablet X7 has an internal Level 2 smart battery charger. One of the features of this charger is that it will attempt to recover a battery that has been too deeply discharged (3% or less). -
Page 170: Battery Capacity
Do not leave batteries installed in your X7 with external power connected in high temperature surroundings for days or weeks at a time. Discharge/Recharge Cycles Lithium ion batteries do not need to be deeply discharged periodically to maintain capacity like other NiCad or other rechargeable batteries. -
Page 171: Table 34. Conditioning A Battery
SECTION 10 BATTERY MANAGEMENT PAGE 171 NOTE The conditioning process can take 3-5 hours to complete. Ensure external power remains connected for the duration of the conditioning period. NOTE If the internal battery temperature exceeds 45°C during conditioning, the charging circuit will suspend the conditioning cycle until the temperature drops back into the normal operating range. - Page 172 SECTION 10 BATTERY MANAGEMENT PAGE 172 Figure 87. ARMORutils Battery Conditioning Window 9711-26400-0001 EXPORT CONTROLLED – SEE PAGE 3 Rev -...
-
Page 173: How To Optimize Battery Operating Time
Click on the Battery/Plug icon in the Task Tray to open the Windows 7 battery window, as shown in Figure 90. The example on the left shows the battery symbol when the X7 is operating on battery power alone. The example on the right shows the battery symbol when external power is connected and the battery is charging (NOTE: The charge times and levels are not related in these examples). -
Page 174: Open The Armorutils Battery Monitor Page
SECTION 10 BATTERY MANAGEMENT PAGE 174 O p e n t h e AR MO R u tils B a tt e r y Mo n it o r P a g e Double-click on the ARMORutils icon on the desktop and select the Battery Monitor button to open the Battery and Charger Monitor page, as shown in Figure 91. -
Page 175: Battery Warranty
Figure 90. ARMOR X7 Battery Label Example Battery Warranty Your X7 battery is warranted against all defects in material and workmanship for a period of 1 year from shipment from DRS. Because of the many variables associated with usage and aging, DRS is not responsible for battery capacity performance except as affected by factory defects or workmanship in the battery. -
Page 176: How To Store Batteries When Not In Use
Lo n g -Te r m S t o r a g e • If your X7 will not be in use for 30 days or longer, the batteries should be placed in long- term storage. •... -
Page 177: Disposing Of Your Batteries
SECTION 10 BATTERY MANAGEMENT PAGE 177 • If possible, allow a battery to warm or cool to the temperature of your surroundings before installing it in the tablet. Disposing Of Your Batteries Lithium-ion batteries are fully recyclable and should not be simply thrown away. Please help protect our environment by turning in your defective batteries to an authorized recycler, or send them back to DRS. - Page 178 SECTION 10 BATTERY MANAGEMENT PAGE 178 This Page Intentionally Left Blank 9711-26400-0001 EXPORT CONTROLLED – SEE PAGE 3 Rev -...
-
Page 179: 11. Drs Technical S Up P Ort
SECTION 11 TECHNICAL SUPPORT PAGE 179 11. DRS TECHNICAL S UP P ORT Before You Contact Us Please have your local technical personnel check for network or custom software problems before contacting DRS Technical Support with a problem How to Obtain Warranty Service Before proceeding, please read the Error! Reference source not found.. - Page 180 SECTION 11 TECHNICAL SUPPORT PAGE 180 • Serial number of the product. • Date of purchase. • Your ship-to address and any special shipping requirements. • A detailed description of the problem. 5. Prepare your Products for Shipment. • Use the original shipping container if possible to return your product. •...
-
Page 181: If You Need Further Information
SECTION 11 TECHNICAL SUPPORT PAGE 181 In Europe, ship to: DRS Tactical Systems, LTD. The Trading Estate Farnham Surrey, GU9 9NN UK ATTN: Brian Perkins International – Markus Breuch Rathausstr. 10 53797 Lohmar, Germany ATTN: Silke Zaigler Once your product(s) are repaired or replaced under the terms specified in the warranty, DRS will return your product(s), with shipping pre-paid, to the address included with your RMA. -
Page 182: Warranty Information
Ge n e r a l In fo r m a tio n DRS Tactical Systems, Inc. (“DRS”) warrants for the duration of this warranty that the DRS ARMOR product(s) (“Product(s)”) produced by DRS will be free from defects in material and workmanship under normal use and service, subject to the terms and conditions set forth herein. -
Page 183: Additional Information
SECTION 11 TECHNICAL SUPPORT PAGE 183 maintenance; problems caused by using accessories, parts, or components not supplied by DRS; improper installation (to include the absence of surge protection in vehicle installations), testing, operation, use or handling of the Product; or unauthorized alteration of Products ... -
Page 184: Acronyms
REAR MATTER PAGE 184 Acronyms ACRONYM DEFINITION alternating current BIOS basic input/output system CD-ROM compact disk – read only memory CDMA code division multiple access central processing unit direct current digital video disk EDGE enhanced data rates for GSM evolution EVDO evolution data only/evolution data optimized gigabytes... -
Page 185: Glossary
REAR MATTER PAGE 185 Glossary TERM DEFINITION ambient temperature The temperature of the air surrounding an object fully depleted battery A lithium-ion battery that has discharged to a level of 3 % or below. fully charged battery A lithium-ion battery that has reached 100% of charge as indicated by a steady 100% LED on the Battery Gauge on the Control Panel. -
Page 186: Explanation Of Pen Side Button Options
REAR MATTER PAGE 186 Appendix A E x p la n a tio n o f P e n S id e B u tt o n Op tio n s Click (Back) Duplicates a 4 mouse button click – usually the Back command in browser application. -
Page 187: Using The X7 External Battery Charger
Appendix B Us in g th e X7 E x te r n a l Ba t te r y C h a r g e r The X7 battery charger can recharge a single battery in 2.5 hours and two batteries in less than 6 hours. -
Page 188: Charger Led Status Indications
REAR MATTER PAGE 188 Figure 91. Inserting a Battery Charger LED Status Indications There are two status indicators for each battery bay. Table 36 lists the possible indicator conditions and their meanings. Table 35. Status Indicator Conditions Status Indicator Condition Fully Charged Battery LED (green) On steady with external power applied and battery fully charged (>95%). - Page 189 REAR MATTER PAGE 189 RECORD OF CHANGES ECO # Description Of Change Initial Release. 9711-26400-0001 EXPORT CONTROLLED – SEE PAGE 3 Rev -...
- Page 190 REAR MATTER PAGE 190 This Page Intentionally Left Blank 9711-26400-0001 EXPORT CONTROLLED – SEE PAGE 3 Rev -...
Need help?
Do you have a question about the X7 and is the answer not in the manual?
Questions and answers
I have an armored X7. I’m trying to figure out how to manually reset it is there a way to do that with the button configuration?