Sign In
Upload
Manuals
Brands
Armor Manuals
Tablet
X10gx
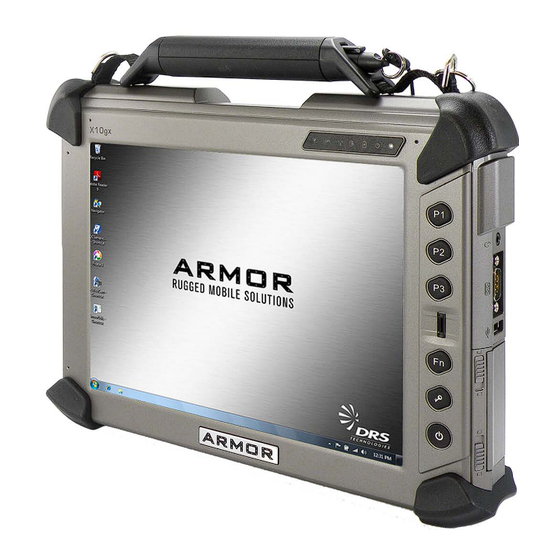
Armor X10gx Rugged Tablet Computer Manuals
Manuals and User Guides for Armor X10gx Rugged Tablet Computer. We have
1
Armor X10gx Rugged Tablet Computer manual available for free PDF download: User Manual
Armor X10gx User Manual (100 pages)
TABLET COMPUTER
Brand:
Armor
| Category:
Tablet
| Size: 5 MB
Table of Contents
Table of Contents
11
Front Matter Content
2
This Page Intentionally Left Blank
7
Warning Summary
8
Table of Contents
11
Figures
17
1 Welcome and Introduction
20
Your ARMOR X10Gx Purchase
21
Figure 1. ARMOR X10Gx Components and Accessories
21
ARMOR X10Gx Documentation
22
About this Guide
22
Viewing, Navigating, and Printing this Guide
22
Terminology Used in this Guide
22
Please Help Us Maintain Top Quality Documentation
23
2 Getting to Know Your ARMOR X10Gx
24
Processing
24
Data Storage
24
Dual-Mode Display
24
Video Graphics
24
Wireless
25
WLAN Capability
25
Bluetooth® Capability
25
Optional WWAN Capability
25
Optional GPS Capability
25
Audio
25
Batteries
25
Flexspace
26
Key Features
27
Front and Top Panel Features
28
Figure 2. Front Panel Features
28
Controls
29
Fingerprint Scanner
29
Figure 3. X10Gx Control Panel
29
Indicators
30
Figure 4. Indicator Panel
30
Ambient Light Sensor (ALS)
31
Speakers and Microphones
31
Rear Panel Features
32
Figure 5. Rear Panel Features
32
Battery Compartments
33
Fuel Gauge Leds
33
Figure 6. Fuel Gauge Indicators
33
Flexspace™ Compartment
34
Figure 7. Flexspace™ Compartment
34
Subscriber Identity Module (SIM) Card Socket
35
Figure 8. SIM Card Socket
35
Memory Module Compartment
36
Figure 9. RAM Memory Module Compartment
36
Built-In Webcam
37
Docking Connectors
37
Figure 10. Built-In Camera
37
Figure 11. X10Gx Docking Connectors
37
Left Side Panel Features
38
Figure 12. Left Side Panel Features
38
Right Side Panel Features
39
Removable Card Support
39
Figure 13. Right Side Panel Features
39
Bottom Panel Features
40
Figure 14. Bottom Panel Features
40
Included Components, Accessories and Support
41
Batteries
41
Figure 15. ARMOR X10Gx Battery
41
Figure 16. Solid-State Hard Drive
41
RAM Memory Modules
42
Active Pen with Tether
42
Figure 17. RAM Memory Module
42
Figure 18. the ARMOR X10Gx Pen
42
AC Adapter
43
ARMOR Cloth
43
Figure 19. AC Adapter
43
Figure 20. ARMOR Microfiber Cleaning Cloth
43
Flexspace Device Support
44
Figure 21. X10Gx Flexspace™ Concepts
44
Optional Accessories for Your X10Gx
45
Compact Keyboard
45
Two-Bay External Battery Charger
45
Vehicle Power Supply
45
Docking Stations
46
Figure 22. ARMOR X10Gx Desk Dock
46
Figure 23. Port Replicator
47
Figure 24. X10Gx RF Dock and Breakout Box
48
Figure 25. X10Gx Vehicle Dock on a Ball Mount Assembly
48
Figure 26. X10Gx Docking Station Attached to Ball Mount Assembly
49
Figure 27. ARMOR Legacy Vehicle Docks
50
Figure 28. X10Gx Mounted in a Universal Dock with Keyboard Tray and Keyboard
51
3 Getting Started
52
Installing the Batteries
53
Figure 29. ARMOR X10Gx Battery Compartments
53
Figure 30. Battery Positioned for Insertion
54
Turning on Your X10Gx for the First Time
56
Turning the X10Gx on Normally
56
Putting the Computer in Sleep Mode
56
Turning the Computer off Normally
56
Emergency Shutdown
56
Indicator State Summary
57
Accessing and Using the GPS Receiver
59
Figure 31. U-Center GPS Application Window
59
Audio Adjustments
60
Speakers
60
Figure 32. Realtek HD Audio Manager - Speakers Main Tab
60
Microphones
61
Figure 33. Microphone Main Tab
61
Using the X10Gx in a Vehicle Dock
62
X10Gx RF and Non-RF Vehicle Docks
62
Figure 34. External Antenna Selection Options in Armorutils
62
Table 3. Configuring the External Antennas
63
ARMOR Legacy Docks
64
Operating the X10Gx Display
65
Dual Screen Mode
65
Single Screen Mode
65
Working with the Pen Screen
65
Table 4. Pen Screen Actions
66
Working with the Touch Screen
67
Entering Data Using the Input Panel
69
Accessing Input Panel in Windows 7
69
Figure 35. Location of the Input Panel
69
Figure 36. Input Panel
70
Accessing Input Panel in Windows XP
71
Figure 37. Input Panel with no Mode Showing (for Illustration Purposes Only)
71
Figure 38. Writing Pad Mode
71
Figure 39. Character Pad Mode
71
Figure 40. On-Screen Keyboard Mode
72
Using the Webcam
73
Capturing Images and Video
73
Figure 41. Picasa Application Window
74
Scanning a Barcode
75
Figure 42. Sample Linear Barcode
75
Figure 43. Webcam Barcode Scanner® Barcode Scanner Application Window
76
Figure 44. Sample 2D Barcode
76
Figure 45. Quickmark® Barcode Scanner Application Window
77
Figure 46. a Captured 2D Barcode
77
Screen Magnifier
78
Figure 47. Virtual Magnifying Glass at Work
78
Tips for Proper Use and Care of Your X10Gx
79
4 Networking
80
Managing Your Wireless Connections
80
WI-FI (WLAN) Connections
80
Figure 48. Windows Network and Sharing Center
81
Figure 49. Currently Connected and Available Wi-Fi Networks
82
Bluetooth Connections
83
Figure 50. Devices and Printers Window
84
Figure 51. Bluetooth Settings Window
85
Using the Optional Gobi WWAN Radio
86
Installing Your SIM Card
86
Figure 52. SSD and Cradle
87
Connecting to a WWAN
88
Figure 53. Sierra Oneclick Connection Manager Window
89
Figure 54. Oneclick Connection Manager Settings Window
89
Controlling Your Wireless Radios
90
Wireless Signal Quality
91
Accessing a LAN Using an Ethernet Cable
92
5 Your ARMOR X10GX Software
93
Getting Started with Windows
93
Windows 7
93
Windows XP
93
Help for Windows
94
Armorutils Program
95
Armorutils Main Dialog Window
95
Backlight Setup Dialog Window
96
Manual Adjustment
97
Automatic Adjustment
97
Automatic Mode Profiles
97
Switching between Brightness Modes
97
Wireless Devices Dialog Window
98
Radio ON/OFF Buttons
98
Docking RF Sw Button
98
Dock RF MUX Options
98
Save Settings Button
99
Radios ON/OFF Toggle Button
99
Programmable Button Settings Dialog Window
100
Advertisement
Advertisement
Related Products
Armor X7
Armor Categories
Water Heater
Headsets
Industrial Equipment
Tablet
Handhelds
More Armor Manuals
Login
Sign In
OR
Sign in with Facebook
Sign in with Google
Upload manual
Upload from disk
Upload from URL