Sign In
Upload
Manuals
Brands
AMX Manuals
Recording Equipment
TPI-PRO-DVI-2
AMX TPI-PRO-DVI-2 Manuals
Manuals and User Guides for AMX TPI-PRO-DVI-2. We have
2
AMX TPI-PRO-DVI-2 manuals available for free PDF download: Instruction Manual, Installation Manual
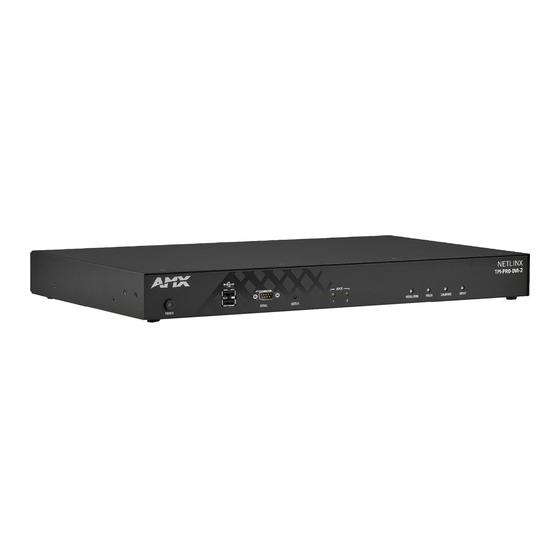
AMX TPI-PRO-DVI-2 Instruction Manual (166 pages)
TOTAL PRESENTATION INTERFACE WITH DVI
Brand:
AMX
| Category:
Recording Equipment
| Size: 7 MB
Table of Contents
Important Safety Instructions
2
Weee Notice
3
Table of Contents
4
TPI-PRO-DVI (Total Presentation Interface-DVI)
13
Overview
13
TPI-PRO-DVI Specifications
13
Supported Input and Output Modes
16
Supported Touch Monitors and USB Touch Drivers
16
A Note about Wall and Rack Installation
16
Installation Recommendations
16
Rack-Mounting the TPI-PRO-DVI
17
Safety Instructions
17
Cable Details and Pinout Information
18
Overview
18
DVI-D Male to DVI-D Male Single-Link Cable
19
DVI-To-DVI Cable Pinout Information
19
DVI-A Male to 5-BNC Male Cable
20
DVI-To-5-BNC Cable Pinout Information
20
DVI-A Male to Triple RCA Male Cable
21
DVI-To-Triple RCA Cable Pinout Information
21
DVI-A Male to S-Video Male Cable
22
DVI-To-S-Video Cable Pinout Information
22
DVI-A Male to HD15 (VGA) Male Cable
23
DVI-To-VGA Cable Pinout Information
23
Wiring and Device Connections
24
Overview
24
Front Panel Components
24
Rear Panel Components
24
Connections Overview
25
Front Panel Connectors
25
USB (Type A) Input Ports
25
SERIAL Port
26
Rear Panel Connectors
26
DVI Input Adapter Cables
26
VIDEO/VGA/DVI Inputs
27
DVI-I Input Ports - Pinouts and Signals
27
DVI-I OUTPUT Connectors
27
SOURCE KEYBOARD/MOUSE (USB-Type B) Device Ports 1-4
28
USB (Type A) Input Ports
28
ETHERNET 10/100 (RJ-45) Port
28
TOUCH INPUT (DB-9) Port
29
AUDIO out Connector
30
12VDC PWR (Power) Connector
30
Connecting USB Input Touch Devices
31
Type a & Type B USB Ports
31
Notes on USB Connections
31
System Installation
32
Overview
32
Touch Input Via Touch Monitor
32
Configuring the TPI for Touch Monitor Input
33
Mouse Pass-Thru Control
33
Configuring the TPI for Pass-Through Control
34
Using a Touch Monitor for Mouse/Touch Pass-Thru Control
34
Enabling Video Pass-Through Control on a Touch Monitor
35
Configuring the TPI
37
Overview
37
Before You Start
37
Startup Routine and Initial Panel Response
37
Setting the Output Resolution
38
Setting the Touch Drivers (Serial Touch Monitors Only)
38
Calibrating the TPI
39
Calibrating the TPI Using a USB Input
39
Calibrating the TPI Using a Serial Touch Monitor
40
Other Conf Iguration Pages
40
Configuring Communication Settings
41
Overview
41
Configuring TPI Communication Settings
41
Assigning a Device Number to the TPI
42
Setting the Serial Port Baud Rate
43
Configuring the Master Connection Settings
43
Configuring IP Settings
44
Configuring a DHCP Address
44
Configuring a Static IP Address
44
Choosing the Master Connection Mode
45
Master Connection Mode Options
45
Configuring the Ethernet Connection on the Netlinx Master
46
Netlinx Master IP Address - URL Mode
46
Netlinx Master IP Address - Listen Mode
47
Netlinx Master Ethernet IP Address - Auto Mode
48
Netlinx Master Ethernet IP Address - NDP (UDP) Mode
48
Netlinx Master Ethernet IP Address - URL (UDP) Mode
51
Rebooting the TPI
51
TPI Conf Iguration Pages
52
Overview
52
Resolution Setup Page
52
Panel Information Page
53
Calibrate Page
54
Setup Page
54
Setup - Protected Setup Page
55
Setup - Project Information Page
56
Setup - Time & Date Settings Page
57
Setup - Audio Settings Page
58
Supported Sampling Rates for WAV and MP3 Audio
58
Setup - Video Settings Page
59
Configuring Incoming Video Signals
60
Video Parameters
61
Configuring the Input Resolution (VGA & Component Only)
62
Protected Setup Page
64
Overview
64
Protected Setup - System Settings Page
66
Protected Setup - Calibrate Page
67
Protected Setup - G4 Web Control Page
68
Protected Setup - Other Settings
69
Protected Setup (Other Settings) - Cache Page
69
G4 Image Caching
69
Enabling Image Cache
70
Clearing the Image Cache
70
Checking Image Cache Status
70
Protected Setup (Other Settings) - Password Settings Page
71
Protected Setup - Tools
72
Protected Setup (Tools) - Panel Connection Logs Page
72
Protected Setup (Tools) - Panel Statistics Page
73
Protected Setup (Tools) - Connection Utility Page
74
Using the Connection Utility
74
Protected Setup - Takenote Control Page
75
Netlinx Programming
77
Overview
77
Button Assignments
77
Color, Border, and Font Names/ID #'S
77
RGB Triplets and Names for Basic 88 Colors
77
Fixed Fonts and ID Numbers
78
Slider/Cursor Names
78
Border Styles by Name
78
Border Styles by Numbers
80
Text Effects Names
80
Send_Commands
81
Page Commands
81
Apg
81
Cpg
81
Dpg
81
Pdr
81
Phe
82
Php
82
Pht
82
Ppa
82
Ppf
82
Ppg
82
Ppk
83
Ppm
83
Ppn
83
Ppt
83
Ppx
83
Pse
84
Psp
84
Pst
84
Ppof
84
Ppog
84
@Pht
82
@Php
82
Button Commands with Embedded Codes
85
Bmf
85
Ppon
85
Button Commands
87
Button Query Commands
87
Ani
87
Apf
88
Bat
88
Bau
88
Bcb
88
Bcb
89
Bcf
89
?Bcf
90
Bct
90
Bdo
90
Bfb
90
^Bdo
90
^Bct
90
^Bim
91
Bim
91
Bln
91
Bmc
91
Bmf
92
Bmi
92
Bml
92
Bmp
92
?Bmp
93
Bnc
93
Bnn
93
Bnt
93
Bop
93
?Bop
94
Bor
94
Bos
94
Bpp
94
Brd
94
Brd
95
Bsf
95
Bsm
95
Bso
95
Bvl
95
Bvn
96
Bvp
96
Bvt
96
Bww
96
^Cpf
97
?Bww
97
Cpf
97
Dpf
97
Ena
97
Fon
97
Fon
98
Gdi
98
Giv
98
Glh
98
Gll
99
Grd
99
Gru
99
Gsc
99
Gsn
99
?Ico
100
Ico
100
Jsb
100
Jsb
101
Jsi
101
?Jst
102
?Jsi
102
Jst
102
Mbt
102
MDC
102
Sho
103
Skt
103
Slt
103
Tec
104
?Tef
105
Tec
105
Tef
105
Top
105
?Txt
106
Txt
106
Uni
106
Run Time Operation Commands
107
Abeep
107
Adbeep
107
Akb
107
Akeyb
107
Akeyr
107
Akp
107
Akeyp
107
Akeyp
107
Akr
108
Beep
108
Brit
108
Brt
108
Dbeep
108
Ekp
108
Ores
109
Pkeyp
109
Pkp
109
Setup
110
Sleep
110
Sou
110
Tkp
110
Tpageoff
110
Tpageon
110
Vkb
110
Tpo
110
Input Commands
111
Cal
111
Kps
111
Tps
111
Wake
111
Mps
112
Pps
112
Slt
113
Embedded Codes
114
Vks
114
^Pwd
115
Panel Setup Commands
115
Mut
115
Pwd
115
Vol
115
Listbox Commands
116
Data List Commands
116
Ldn
116
Lda
116
Ldr
116
Ldc
116
List View Commands
117
Lvc
117
Ldd
117
Ldt
117
Ldl
117
Lvf
118
Lvl
118
Lvm
118
Lvo
118
Dynamic Image Commands
119
Bbr
119
Raf
119
Lvp
119
Lvs
119
Lvu
119
RAF, ^RMF - Embedded Codes
120
Rfr
120
Rmf
120
Rsr
120
Escape Sequences
121
Takenote Commands
121
Takenote-Enable
121
Takenote-Disable
121
Takenoteserver-Enable
121
Takenoteserver-Disable
121
Tna-Autoexpose
121
?Tna-Canvascolor
122
?Tna-Autohide
122
?Tna-Autoexpose
122
Tna-Autohide
122
Tna-Canvascolor
122
Tnb-Canvascolor
122
Tna-Clear
122
Tna-Flush
122
Tna-Hide
122
?Tna-Penopacity
123
?Tna-Pencolor
123
Tna-Pencolor
123
Tna-Penopacity
123
Tna-Penstyle
123
Tna-Penwidth
123
Tna-Redo
123
Tna-Save
123
Tna-Session
124
Tna-Text
124
Tna-Textsize
124
Tna-Tooltype
124
Tna-Undo
124
Tnb-Canvascolor
124
Tnb-Clear
124
Tnb-Flush
124
?Tnb-Penopacity
125
?Tnb-Pencolor
125
Tnb-Pencolor
125
Tnb-Penopacity
125
Tnb-Penstyle
125
Tna-Penstyle
125
?Tnb-Penwidth
126
Tnb-Penstyle
126
Tnb-Penwidth
126
Tna-Penwidth
126
Tnb-Print
126
Tnb-Redo
126
Tnb-Save
126
Tnb-Textsize
126
Tna-Textsize
126
?Tnb-Tooltype
127
Tnb-Textsize
127
Tnb-Tooltype
127
Tna-Tooltype
127
Tnb-Undo
127
Tna-Session
127
Tnc
127
Tnf
127
Tnh
127
Tns
127
Programming - Button Properties
128
Text Formatting Codes for Bargraphs/Joysticks
128
Text Area Input Masking
128
Input Mask Character Types
129
Input Mask Ranges
129
Input Mask Next Field Characters
129
Input Mask Operations
129
Input Mask Literals
130
Input Mask Output Examples
130
URL Resources
130
Special Escape Sequences
130
Terminal/Telnet Commands
132
Overview
132
Upgrading Firmware
133
Overview
133
Prepare the TPI for Ethernet Communication
133
Upgrade the TPI Firmware
134
Sending Firmware to the TPI (Via Netlinx Studio)
134
Using G4 Web Control
136
Overview
136
Using the Netlinx Master to Control the TPI
137
Using Takenote
139
Overview
139
Enabling Takenote on the TPI
139
Starting a Takenote Session
139
Takenote Menu Bar
140
Drawing Annotation Tools
141
Undo / Redo Last Action
141
Drawing a Freehand Curved Line
141
Drawing a Straight Line
141
Drawing a Rectangle
141
Drawing an Oval
141
Using the Select Object Tool
142
Moving a Takenote Annotation Object
142
Deleting a Takenote Annotation Object
142
Using the Pointer
143
Using the Save Tool
143
Capturing and Saving the Screen Image
143
Changing the Storage Location for Captured Takenote Screen Images
144
Shape Options Menu Bar
144
Drawing a Shape
145
Inserting a Push-Pin Icon
145
Inserting an Arrow Icon
146
Text Annotation Tools
146
Text Size Button
146
Takenote Text Keyboard
146
Creating Text Annotations
147
Moving Text
147
Pen Options Menu Bar
148
Clearing Annotations
148
Canvas Options Menu Bar
149
Working with Opacity Settings
149
Session Tools
149
Naming the Takenote Session
149
Hiding Takenote
150
Hiding the Takenote Menu Bar
150
Hiding Takenote Annotations
150
Using the Takenote Web Application
150
Launching the AMX Takenote Web Application
150
The AMX Takenote Web Application User Interface
151
Menu Bar
151
Thumbnail Images
152
Toolbar
152
Previewing Captured Takenote Image Files
152
Downloading Captured Takenote Image Files to a Local Directory
153
Printing Captured Takenote Image Files
153
Deleting Captured Takenote Image Files
154
Appendix A: Supported Input and Output Modes
155
Overview
155
Supported Input Modes
155
Supported Input Modes - DVI and RGB
155
Supported Input Modes - Component
156
Supported Output Modes
156
Appendix B: Using Netlinx Studio to Connect to a Netlinx Master
158
Overview
158
Connecting to a Master Controller Via Network (TCP/IP)
158
Manually Entering the Master's IP Address Information
160
Listening for Masters on the Network
161
Editing a TCP/IP Address
163
Deleting a TCP/IP Address
163
Appendix C: Troubleshooting
164
Overview
164
Advertisement
AMX TPI-PRO-DVI-2 Installation Manual (2 pages)
Total Presentation Interface with DVI
Brand:
AMX
| Category:
Recording Equipment
| Size: 0 MB
Table of Contents
Overview
1
Product Specifications
1
Before You Start
1
Installation/Safety Instructions
2
Connections Overview
2
Cable Details and Pinouts
2
Startup Routine and Initial Panel Response
2
Setting the Output Resolution
2
Setting the Touch Drivers (Serial Touch Monitors Only)
2
Calibrating the TPI-PRO-DVI
2
Calibrating the TPI-PRO-DVI Using a USB Input
2
Calibrating the TPI-PRO-DVI Using a Serial Touch Panel
2
Additional Documentation
2
Advertisement
Related Products
AMX TPI-PRO-DVI-4
AMX Tango
AMX TPI-PRO-2
AMX TPI-PRO-4
AMX TPDESIGN3 V3.16
AMX TPDESIGN4 V2.5
Amx TPDOC
AMX TPDesign4
AMX TPDesign3 Version 3.16
AMX TPDOC 4.23
AMX Categories
Touch Panel
Matrix Switcher
Controller
Switch
Keypad
More AMX Manuals
Login
Sign In
OR
Sign in with Facebook
Sign in with Google
Upload manual
Upload from disk
Upload from URL