Sign In
Upload
Manuals
Brands
AMX Manuals
Touch Panel
NXD/T-CV7 Modero
AMX NXD/T-CV7 Modero Manuals
Manuals and User Guides for AMX NXD/T-CV7 Modero. We have
1
AMX NXD/T-CV7 Modero manual available for free PDF download: Operation/Reference Manual
AMX NXD/T-CV7 Modero Operation/Reference Manual (220 pages)
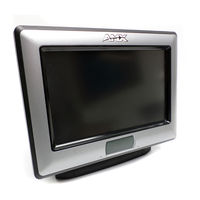
7" Modero Touch Panel
Brand:
AMX
| Category:
Touch Panel
| Size: 4 MB
Table of Contents
Touch Panel
1
FCC Information
4
FCC RF Radiation Exposure Statement
4
Federal Communications Commission (FCC) Statement
4
Table of Contents
5
Introduction
13
CV7 Specifications
15
CV7 Panels - Connector Layout
18
CV7 Touch Panel Accessories
19
Overview
19
NXA-AVB/ETHERNET Breakout Box (FG2254-10)
19
Product Specifications
19
Installing the NXA-AVB/ETHERNET
20
Wiring the NXA-AVB/ETHERNET Connectors and Cables
21
Wiring the NXA-AVB/ETHERNET for Unbalanced Audio
22
Wiring the NXA-AVB/ETHERNET for Balanced Audio
22
Modero Table Top Cable (CA2250-50)
23
Product Specifications
23
Wiring Information for the Modero Table Top Cable
23
NXA-WC80211B/CF 802.11B Wireless Card (FG2255-03)
25
NXA-WC80211GCF 802.11G Wireless Card (FG2255-07)
26
NXA-CFSP Compact Flash (FG2116-3X)
29
Before Upgrading the Wireless Card - Read this
30
Installation and Upgrade of the Internal NXT Components
30
Step 1: Remove the Existing NXT Outer Housing
30
Step 2: Install the Compact Flash Memory Card Upgrade
32
Step 3: Install the New 802.11G CF Card and Antenna
33
Step 4: Close and Resecure the NXT Panel Enclosure
33
Installation and Upgrade of the Internal NXD Components
34
Step 1: Remove the Existing NXD Outer Housing
34
Step 2: Install the New Compact Flash Memory Card (NXD)
35
Step 3: Install the New 802.11G Wireless Compact Flash Card (NXD)
35
Step 4: Close and Resecure the NXD Panel Enclosure
35
NXT-BP Power Pack (FG2255-10)
36
NXA-BASE/1 Battery Base Kit (FG2255-05K)
36
Checking the NXT-BP Charge
37
Installing an NXT-BP into the NXA-BASE/1
37
Installing the NXA-BASE/1 below an NXT-CV7 Panel
38
Charging the NXT-BP Using the NXA-BASE/1
39
NXT-CHG Battery Charger Kit (FG2255-50K)
40
Powering the NXT-CHG
40
Reading the NXT-CHG LED Indicator
41
Charging the NXT-BP Batteries Using the NXT-CHG
41
Recalibrating the Batteries
41
Installation
43
Overview
43
Unpacking the Panel
43
Installing the Internal Components
43
Installing the No-Button Trim Ring
43
Installing the Button Trim Ring
45
Pre-Wall Installation of the Rough-In Box
46
Installation of an NXD Touch Panel
47
Installing the NXD Panel Within a Rough-In Box
47
Installing the NXD into Drywall Using Expansion Clips
49
Installing the NXD into a Flat Surface Using #4 Screws
52
Installing an NXD-CV7 into an (Optional) Rack Mount Kit (NXA-RK7)
54
Wiring Guidelines for the CV7 Panels
55
Preparing Captive Wires
55
Wiring a Power Connection
55
Audio/Video Port: Connections and Wiring
56
Ethernet/Rj-45 Port: Connections and Wiring
56
USB Port: Connecting and Using Input Devices
57
Panel Calibration
59
Overview
59
Calibrating the Modero Panel
59
Testing Your Calibration
60
Configuring Communication
61
Overview
61
Modero Setup and System Connection
61
Configuring and Using USB with a Virtual Master
63
Step 1: Setup the Panel and PC for USB Communication
63
Step 2: Confirm the Installation of the USB Driver on the PC
63
Step 3: Confirm and View the Current AMX USB Device Connections
65
Step 4: Use the USB to Configure a Virtual Master (Using Netlinx Studio)
66
Step 5: Confirm and View the Current AMX USB Device Connections
68
Wireless Settings Page - Wireless Access Overview
69
IP Routing
69
Hot Swapping
69
Configuring a Wireless Connection
69
Step 1: Configure the Panel's Wireless IP Settings
70
Wireless Communication Using a DHCP Address
70
Wireless Communication Using a Static IP Address
71
Using the Site Survey Tool
71
Step 2: Configure the Card's Wireless Security Settings
73
Configuring the Modero's Wireless Card for Unsecured Access to a WAP200G
73
Configuring the Modero's Wireless Card for Secured Access to a WAP200G
75
Configuring Multiple Wireless Moderos to Communicate to a Target WAP200G
79
Configuring a Wired Ethernet Connection
80
Step1: Configure the Panel's Wired IP Settings
80
IP Settings Section - Configuring a DHCP Address over Ethernet
80
IP Settings Section - Configuring a Static IP Address over Ethernet
80
Step 2: Choose a Master Connection Mode Setting
81
Step 3: Configure an Ethernet Connection Type
82
Master Connection Section - Virtual Master Communication over Ethernet
83
Master Connection Section - Netlinx Master Ethernet IP Address - URL Mode
84
Master Connection Section - Netlinx Master Ethernet IP Address - Listen Mode
85
Master Connection Section - Netlinx Master Ethernet IP Address - Auto Mode
86
Using G4 Web Control® to Interact with a G4 Panel
86
Using Your Netlinx Master to Control the G4 Panel
88
Upgrading Modero Firmware
91
Overview
91
Upgrading the Modero Firmware Via the USB Port
91
Step 1: Configure the Panel for a USB Connection Type
91
Step 2: Prepare Netlinx Studio for Communication Via the USB Port
92
Step 3: Confirm and Upgrade the Firmware Via the USB Port
93
Upgrading the Modero Firmware Via Ethernet (IP Address)
95
Step 1: Prepare the Master for Communication Via an IP
95
Step 2: Prepare the Panel for Communication Via an IP
97
Step 3: Verify and Upgrade the Panel Firmware Via an IP
97
Firmware Pages and Descriptions
99
Setup Navigation Buttons
99
Setup Page
100
Project Information Page
102
Panel Information Page
103
Time & Date Setup Page
104
Volume Page
106
Supported Sampling Rates for WAV
107
Protected Setup Page
107
Video Adjustment Page
107
Battery Base Page
108
Protected Setup Navigation Buttons
110
Protected Setup Page
111
G4 Web Control Page
113
Sensor Setup Page Elements
115
Making the most of the Automated Brightness Control Feature (DIM Mode)
117
Password Setup Page
118
Calibration Page
119
Wireless Settings Page
119
Wireless Settings Page - Security Options - Overview
125
Wireless Settings Page - Security Options - Open (Clear Text)
125
Required Information
125
Wireless Settings Page - Security Options - Static WEP
126
Wireless Settings Page - Security Options - WPA-PSK
128
Wireless Settings Page - Security Options - EAP-LEAP
129
Wireless Settings Page - Security Options - EAP-FAST
131
EAP Security's Using Server Certificates - Overview
134
Wireless Settings Page - Security Options - EAP-PEAP
134
Wireless Settings Page - Security Options - EAP-TTLS
136
Wireless Settings Page - Security Options - EAP-TLS
139
Client Certificate Configuration
141
System Settings Page
142
Programming
145
Overview
145
Button Assignments
145
Page Commands
145
Apg
145
Cpg
146
Dpg
146
Pdr
146
Phe
146
Php
146
Pht
147
Ppa
147
Ppf
147
Ppg
147
Ppk
148
Ppm
148
Ppn
148
Ppt
148
Ppx
149
Pse
149
Psp
149
Pst
149
Ppof
150
Ppog
150
Ppon
150
Programming Numbers
151
RGB Triplets and Names for Basic 88 Colors
151
Font Styles and ID Numbers
153
Border Styles
153
Button Commands
156
Ani
156
Apf
156
Bat
156
Bau
157
Bcb
157
Bcf
157
Bct
158
Bdo
158
Bfb
158
Bim
159
Bln
159
Bmc
160
Bmf
161
Bmi
162
Bml
163
Bmp
163
Bnc
163
Bnn
163
Bnt
163
Bop
164
Bor
164
Bos
164
Bpp
165
Brd
165
Bsf
165
Bsm
165
Bso
166
Bsp
166
Bvl
166
Bvn
166
Bvp
166
Bvt
167
Bww
167
Cpf
167
Dpf
167
Ena
168
Fon
168
Gdi
168
Giv
168
Glh
169
Gll
169
Grd
169
Gru
169
Gsc
169
Gsn
170
Ico
170
Jsb
171
Jsi
171
Jst
172
Mbt
172
MDC
172
Sho
172
Skt
173
Tec
173
Tef
173
Txt
173
Text Effect Names
174
Uni
174
Button Query Commands
175
Bcb
176
Bcf
176
Bct
177
Bmp
177
Bop
178
Brd
178
Bww
179
Fon
179
Ico
180
Jsb
180
Jsi
181
Jst
181
Tec
182
Tef
182
Panel Runtime Operations
183
Abeep
183
Adbeep
183
Txt
183
Akb
184
Akeyb
184
Akeyp
184
Akeyr
184
Akp
184
Akr
185
Beep
185
Brit
185
Brt
185
Dbeep
185
Ekp
185
Pkeyp
186
Pkp
186
Setup
186
Shutdown
186
Sleep
186
Sou
186
Tkp
187
Tpageon
187
Tpageoff
187
Vkb
187
Wake
187
Input Commands
188
Cal
188
Kps
188
Vks
188
Embedded Codes
189
Panel Setup Commands
190
Mut
190
Pwd
190
Rpp
190
Vol
190
Dynamic Image Commands
191
Bbr
191
Raf
191
Rfr
191
RAF, ^RMF - Embedded Codes
192
Rmf
192
Rsr
192
Escape Sequences
193
Text Formatting Codes for Bargraphs/Joysticks
195
Appendix A
195
Text Area Input Masking
196
Input Mask Character Types
196
Input Mask Ranges
197
Input Mask Next Field Characters
197
Input Mask Operations
197
Input Mask Literals
197
Input Mask Output Examples
198
URL Resources
199
Special Escape Sequences
199
Appendix B - Wireless Technology
201
Overview of Wireless Technology
201
Terminology
202
EAP Authentication
205
EAP Characteristics
205
EAP Communication Overview
206
AMX Certificate Upload Utility
207
Configuring Your G4 Touch Panel for USB Communication
207
Step 1: Setup the Panel and PC for USB Communication
207
Step 2: Confirm the Installation of the USB Driver on the PC
208
How to Upload a Certificate File
209
Troubleshooting
213
Advertisement
Advertisement
Related Products
Amx Modero NXD-CA12
Amx NXD-CA15
Amx Modero NXD-CV12
Amx Modero NXD-500i
Amx modero NXD-CV10
AMX Modero NXD/NXT-1500VG
AMX Modero NXD/NXT-1700VG
AMX NXD-700i
AMX NXD-430
AMX Modero NXD-1200V
AMX Categories
Touch Panel
Matrix Switcher
Controller
Switch
Keypad
More AMX Manuals
Login
Sign In
OR
Sign in with Facebook
Sign in with Google
Upload manual
Upload from disk
Upload from URL