Sign In
Upload
Manuals
Brands
AMX Manuals
Intercom System
MET-ECOM
AMX MET-ECOM Manuals
Manuals and User Guides for AMX MET-ECOM. We have
5
AMX MET-ECOM manuals available for free PDF download: Operation/Reference Manual, Instruction Manual, Dimensional Drawing, Installation Manual
AMX MET-ECOM Instruction Manual (70 pages)
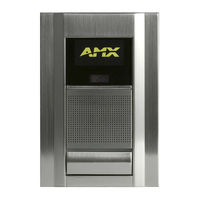
METREAU ENTRY COMMUNICATORS
Brand:
AMX
| Category:
Intercom System
| Size: 3.57 MB
Table of Contents
Copyright Notice
2
Important Safety Instructions
2
Table of Contents
3
Metreau Entry Communicators
7
Overview
7
Front Components
8
Rear Components
8
Product Specifications - Metreau Entry Communicators
9
Screensaver (MET-ECOM-D and MET-ECOM-DNS-B Only)
10
MET-ECOM/D Mounting and Installation
11
MET-ECOM / MET-ECOM-D Installation Overview
11
Dimensions
11
Mounting Specifications
12
Front View
12
Side Views
12
Top View
13
MET-ECOM and MET-ECOM-D Typical Installation (Without Expansion Clips)
13
Installing the Rough-In Box Without the Use of Tabs
14
Wall Surface Installation (Using Expansion Clips)
14
Installing Onto a Flat Surface Using Mounting Screws
16
Removing the Device from the Wall
17
Using the Optional Surface Mount Box
17
Included in the Kit
17
Surface Mount Box Specifications
18
Ferrite Installation (Required)
19
Installing the Metreau Entry Communicator (MET-ECOM and MET-ECOM-D)
19
Installing the MET-ECOM-DNS-B
20
Wiring and Connections
21
Overview
21
Rear Panel Connectors
21
Ethernet 10/100 Base-T RJ-45 Wiring Configuration
21
Poe (Power over Ethernet)
21
Input/Output (I/O) Port: Connections and Wiring
22
Connecting the Device Via I/O
22
Relay Port: Connections and Wiring
22
Ferrite Installation (Required)
22
System Diagram
23
System Diagram - Intercom
24
Using Zero Configuration
25
Overview
25
Bonjour (Zero-Configuration) Client
25
Connecting to a Network with a DHCP Server
25
Connecting to a Network Without a DHCP Server
25
Using the Configuration Manager
27
Overview
27
Command Buttons
27
Accessing the Configuration Manager
28
Summary of <Device> Settings Page
29
Checking the Firmware Version
30
Determining the IP Settings of the Metreau Entry Communicator
30
Rebooting the Device
30
Configuration Page
31
Configuration Page - Network IP Settings Tab
31
Setting the IP Address
32
Setting the DNS Address
32
Configuration Page - Netlinx Settings Tab
32
Setting the ICSP Connection to the Netlinx Master
33
Configuration Page - SIP Settings Tab
33
Configuring Voip
34
Configuration Page - User Settings Tab
34
Setting a New Username and Password
34
Device Utilities Page
35
Image File Requirements
36
Creating Display Images
36
Creating Dynamic Images
38
Tpdesign4 - Resource Manager
38
Creating a New Dynamic Image
38
Uploading a Display Image to the Device
40
Deleting a Display Image from the Device
40
Audio/Video Page
40
Audio/Video Page - Audio Settings Tab
40
Setting Device Audio
41
Audio/Video Page - Video Settings Tab
41
Setting Device Video
42
Audio/Video Page - Display Settings Tab
43
Setting the Display Settings on the Device
43
Programming
44
Overview
44
Send_Commands
44
Touch Panel Intercom Commands
44
Stream-Set
44
Stream-Get
44
RTP, RTCP Video and Audio Streaming Commands
45
Get Video
45
Set Video
45
Stream-Play
45
Stream-Stop
45
Mod
45
Ver
45
Face Plate LED Commands
46
Set Led-Level
46
Get Audio
46
Set Audio
46
Get Gain
46
Set Gain
46
Get Volume
46
Set Volume
46
Camera Commands
47
Set Cam-Wbal
47
Get Cam-Wbal
47
Set Cam-Rgb
47
Get Led-Level
47
Set Led-State
47
Get Led-State
47
Get Cam-Rgbgain
48
Set Cam-Cst
48
Get Cam-Cst
48
Set Cam-Sat
48
Get Cam-Sat
48
Set Cam-Flick
48
Get Cam-Flick
49
Set Cam-Lightlvl
49
Get Cam-Lightlvl
49
Set Cam-View
49
Get Cam-View
49
Set Cam-Gam
49
LCD Commands
50
Set Disp-Banner
50
Get Disp-Banner
50
Set Disp-Brt
50
Get Disp-Brt
50
Get Cam-Gam
50
Phone Commands
51
Phn-Call
51
Phn-Hangup
51
Set Disp-Cst
51
Get Disp-Cst
51
Set Disp-State
51
Get Disp-State
51
I/O Commands
52
Get Input
52
Set Input
52
System Commands
52
Mod
52
Ver
52
Set Door-Desc
52
Get Door-Desc
52
Upgrading Firmware
53
Before Beginning the Upgrade Process
53
Upgrading Firmware Via an IP Address
53
Preparing the Master for Communication Via an IP Address
53
Verifying and Upgrading the Device Firmware Via an IP Address
57
Panel Intercom Configuration
58
Intercom Setup
58
Setting the Intercom Session Timeout
58
Setting Intercom Auto Answer
59
Door Setup
59
Disabling All Doorbells
59
Door Chime Setup
59
Assigning a Chime to a Doorbell
59
Advanced Setup
60
Allowing a Panel to be Monitored
60
Allowing a Panel to Monitor
60
Naming a Panel
60
Answering an Incoming Intercom Call
61
Answering an Incoming Doorbell Call
61
Using the Netlinx Module
58
Overview
58
Incorporating an Intercom Panel into Your Netlinx System
58
Someone at the Door Page
62
Ending a Doorbell Call
62
Creating Intercom Pages
63
Advanced Setup Page
63
Door Chime Setup Page
63
Door Setup Page
63
Intercom Demo Page
64
Setup Page
65
Someone at the Door Page
65
Creating Popup Pages
66
Door Answer Call Popup Page
66
Doorbell Adjustments Popup Page
66
Intercom Answer Call Popup Page
67
More Time Popup Page
67
Positioning the Camera
68
Overview
68
Camera Viewing Angle Adjustment
68
Advertisement
AMX MET-ECOM Operation/Reference Manual (88 pages)
Entry Communicators
Brand:
AMX
| Category:
Intercom System
| Size: 4.08 MB
Table of Contents
Table of Contents
3
Overview
7
Front Components
8
Product Specifications - MET-ECOM
9
Rear Components
9
Product Specifications - MET-ECOM-D
11
Positioning the Camera
13
Overview
13
Camera Viewing Angle Adjustment
13
Wiring and Connections
15
Overview
15
Rear Panel Connectors
15
Ethernet 10/100 Base-T RJ-45 Wiring Configuration
16
Poe (Power over Ethernet)
16
Input/Output (I/O) Port: Connections and Wiring
17
Connecting the Device Via I/O
17
Relay Port: Connections and Wiring
17
Ferrite Installation (Required)
18
System Diagram
19
System Diagram - Intercom
19
Mounting and Installation
21
MET-ECOM / MET-ECOM-D Installation Overview
21
Dimensions
21
Mounting Specifications
22
Front View
22
Side Views
23
Top View
23
Typical Installation (Without Expansion Clips)
24
Installing the Wall Box Without the Use of Tabs
26
Wall Surface Installation (Using Expansion Clips)
27
Installing into a Flat Surface Using Mounting Screws
29
Removing the Device from the Wall
30
Using the Optional Surface Mount Box
31
Included in the Kit
31
Surface Mount Box Specifications
32
Ferrite Installation (Required)
33
Installing the Metreau Entry Communicator
33
Using Zero Configuration
35
Overview
35
Bonjour (Zero-Configuration) Client
35
Connecting in a Network with a DHCP Server
35
Connecting in a Network Without a DHCP Server
36
Using the Configuration Manager
39
Overview
39
Command Buttons
40
Accessing the Configuration Manager
40
Summary of <Device> Settings Page
41
Checking the Firmware Version
42
Determining the IP Settings of the Metreau Entry Communicator
42
Rebooting the Device
42
Configuration Page
43
Configuration Page - Network IP Settings Tab
43
Setting the IP Address
44
Setting the DNS Address
44
Configuration Page - Netlinx Settings Tab
45
Setting the ICSP Connection to the Netlinx Master
45
Configuration Page - User Settings Tab
46
Setting a New Username and Password
46
Device Utilities Page
47
Image File Requirements
48
Creating Display Images
48
Creating Dynamic Images
50
Tpdesign4 - Resource Manager
50
Creating a New Dynamic Image
51
Uploading a Display Image to the Device
52
Deleting a Display Image from the Device
52
Audio/Video Page
53
Audio/Video Page - Audio Settings Tab
53
Setting Device Audio
53
Audio/Video Page - Video Settings Tab
54
Setting Device Video
55
Audio/Video Page - Display Settings Tab
55
Setting the Display Settings on the Device
56
Programming
57
Overview
57
Send_Commands
57
Touch Panel Intercom Commands
57
RTP, RTCP Video and Audio Streaming Commands
59
Face Plate LED Commands
61
Camera Commands
62
LCD Commands
64
I/O Commands
66
System Commands
66
Upgrading Firmware
68
Before Beginning the Upgrade Process
68
Upgrading Firmware Via an IP Address
68
Preparing the Master for Communication Via an IP
68
Verifying and Upgrading the Device Firmware Via an IP
69
Using the Netlinx Module
71
Overview
71
Incorporating an Intercom Panel into Your Netlinx System
71
Panel Intercom Configuration
71
Intercom Setup
71
Setting the Intercom Session Timeout
72
Setting Intercom Auto Answer
72
Door Setup
73
Disabling All Doorbells
73
Door Chime Setup
74
Assigning a Chime to a Doorbell
74
Advanced Setup
75
Allowing a Panel to be Monitored
75
Allowing a Panel to Monitor
76
Naming a Panel
76
Answering an Incoming Intercom Call
76
Answering an Incoming Doorbell Call
77
Someone at the Door Page
77
Ending a Doorbell Call
78
Creating Intercom Pages
78
Advanced Setup Page
78
Door Chime Setup Page
79
Door Setup Page
79
Intercom Demo Page
80
Setup Page
82
Someone at the Door Page
83
Creating Popup Pages
84
Door Answer Call Popup Page
84
Doorbell Adjustments Popup Page
84
Intercom Answer Call Popup Page
85
More Time Popup Page
86
Amx MET-ECOM Installation Manual (2 pages)
Amx Metreau MET-ECOM Entry Communicators: Install Guide
Brand:
Amx
| Category:
Intercom System
| Size: 0.24 MB
Table of Contents
Product Specifications
1
Rear Panel Components
1
Wiring and Connections
1
Mounting Specifications
2
Advertisement
Amx MET-ECOM Dimensional Drawing (3 pages)
Amx Metreau MET-ECOM Entry Communicator
Brand:
Amx
| Category:
Intercom System
| Size: 0.35 MB
Amx MET-ECOM Dimensional Drawing (1 page)
Amx Metreau MET-ECOM Entry Communicator
Brand:
Amx
| Category:
Intercom System
| Size: 0.3 MB
Advertisement
Related Products
AMX Metreau Entry Communicator with Display MET-ECOM-D
AMX MET-ECOM-D
AMX MET-ECOM-DNS-B
AMX Metreau
AMX Metreau MET-ECOM
AMX Metreau MET-ECOM-D
Amx Metreau MET-13
Amx Metreau MET-7
AMX METREAU MET-7X
AMX METREAU MET-13X
AMX Categories
Touch Panel
Matrix Switcher
Controller
Switch
Keypad
More AMX Manuals
Login
Sign In
OR
Sign in with Facebook
Sign in with Google
Upload manual
Upload from disk
Upload from URL